T-shirt Projects

DIY Toothy T-shirts

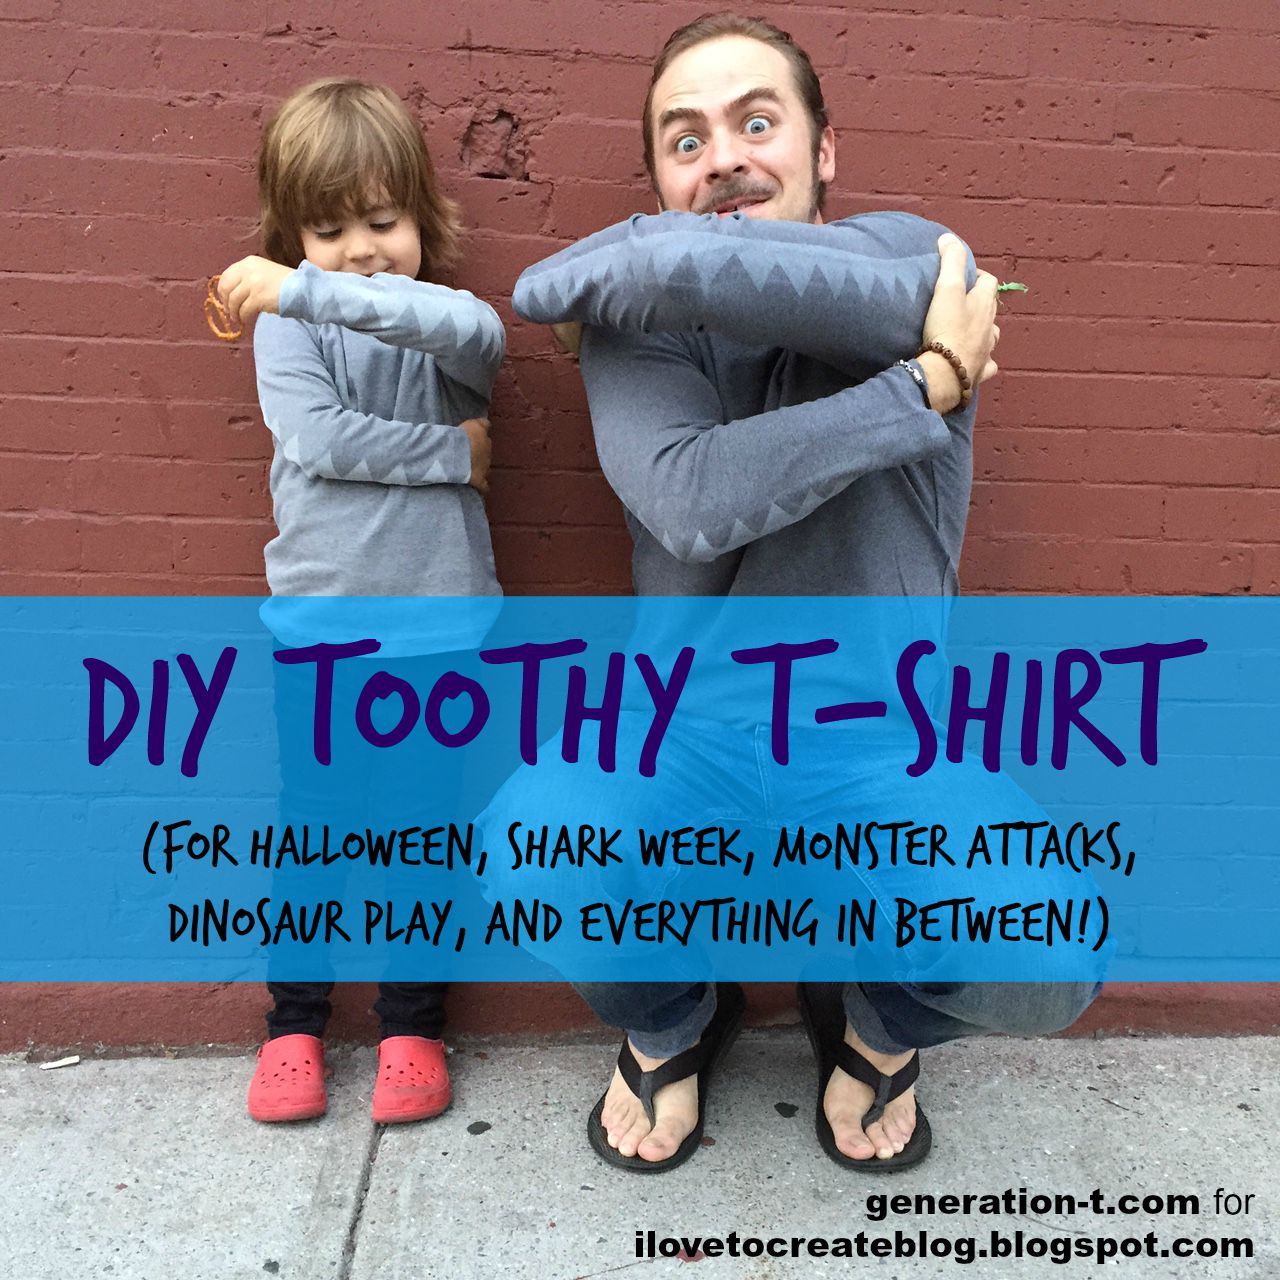
Whether you’re celebrating Shark Week, looking for a rainy day activity, or in search of a costume that even kids who aren’t into wearing masks can get behind, this toothy long-sleeved T-shirt is the ticket. Far from being holiday-exclusive–bust out your shirt any time you’re playing a spirited round of “Top o’ the Food Chain.” Toothy T-shirt generation-t.com

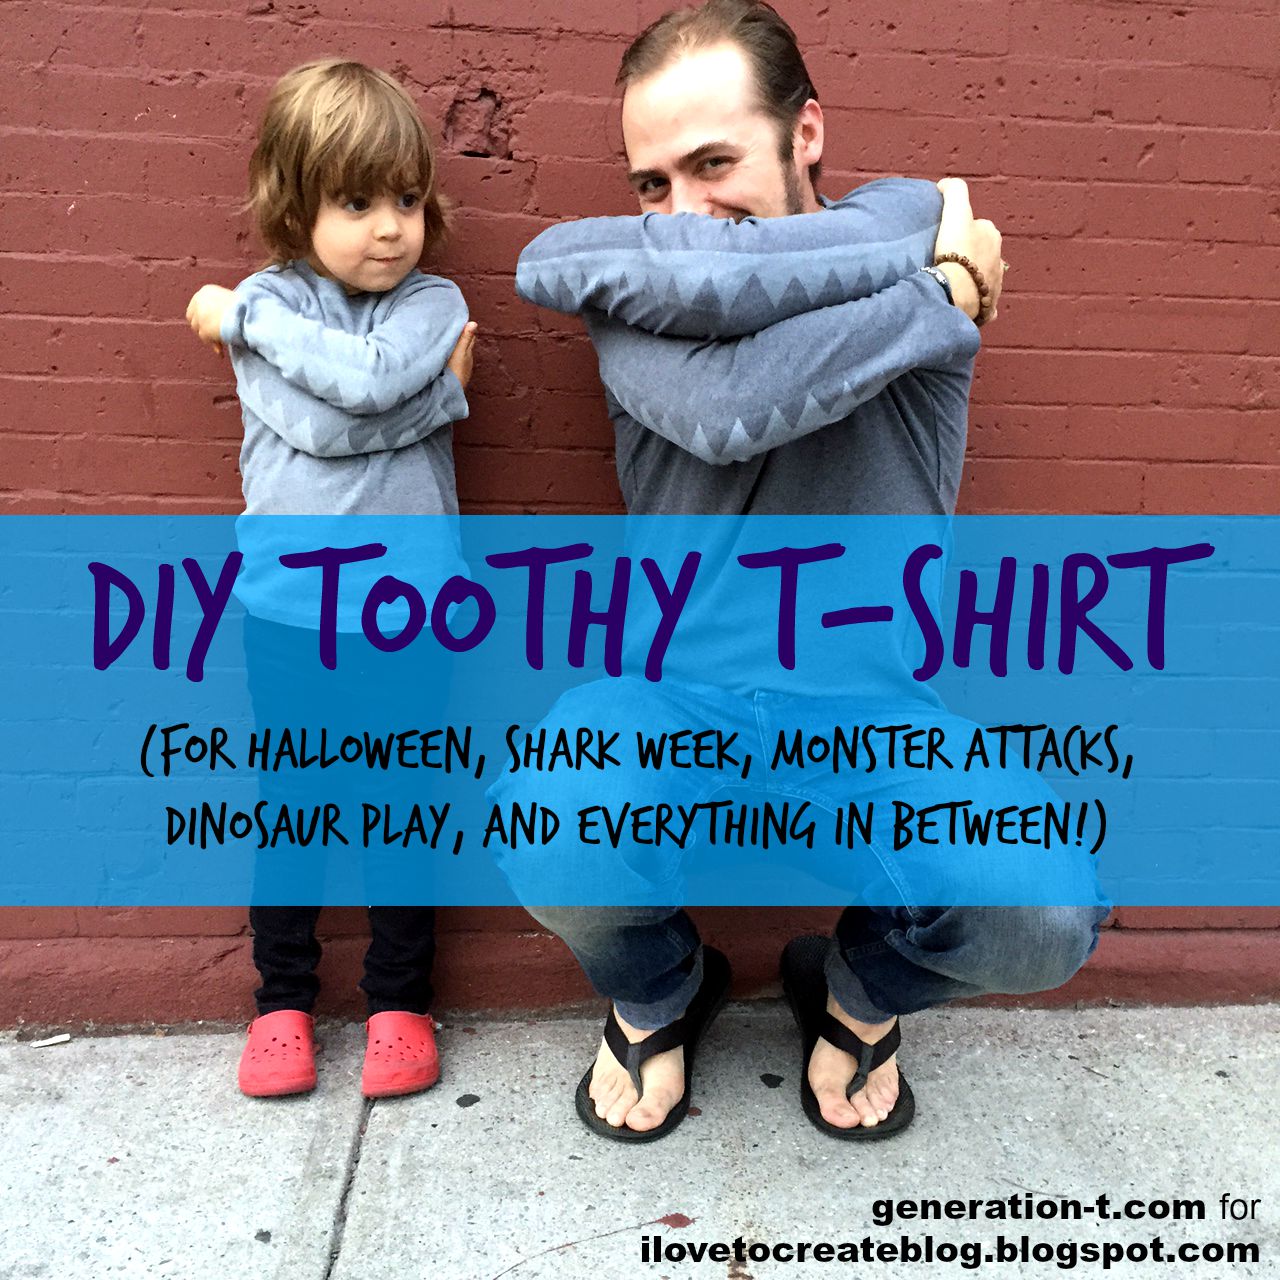
I stuck with gray, white, and silver to summon my boys’ inner sharks, but you could easily adapt your color palette to include dragons, dinosaurs, or even a Gruffalo (and, it should be noted, it can be made in multiple sizes)!
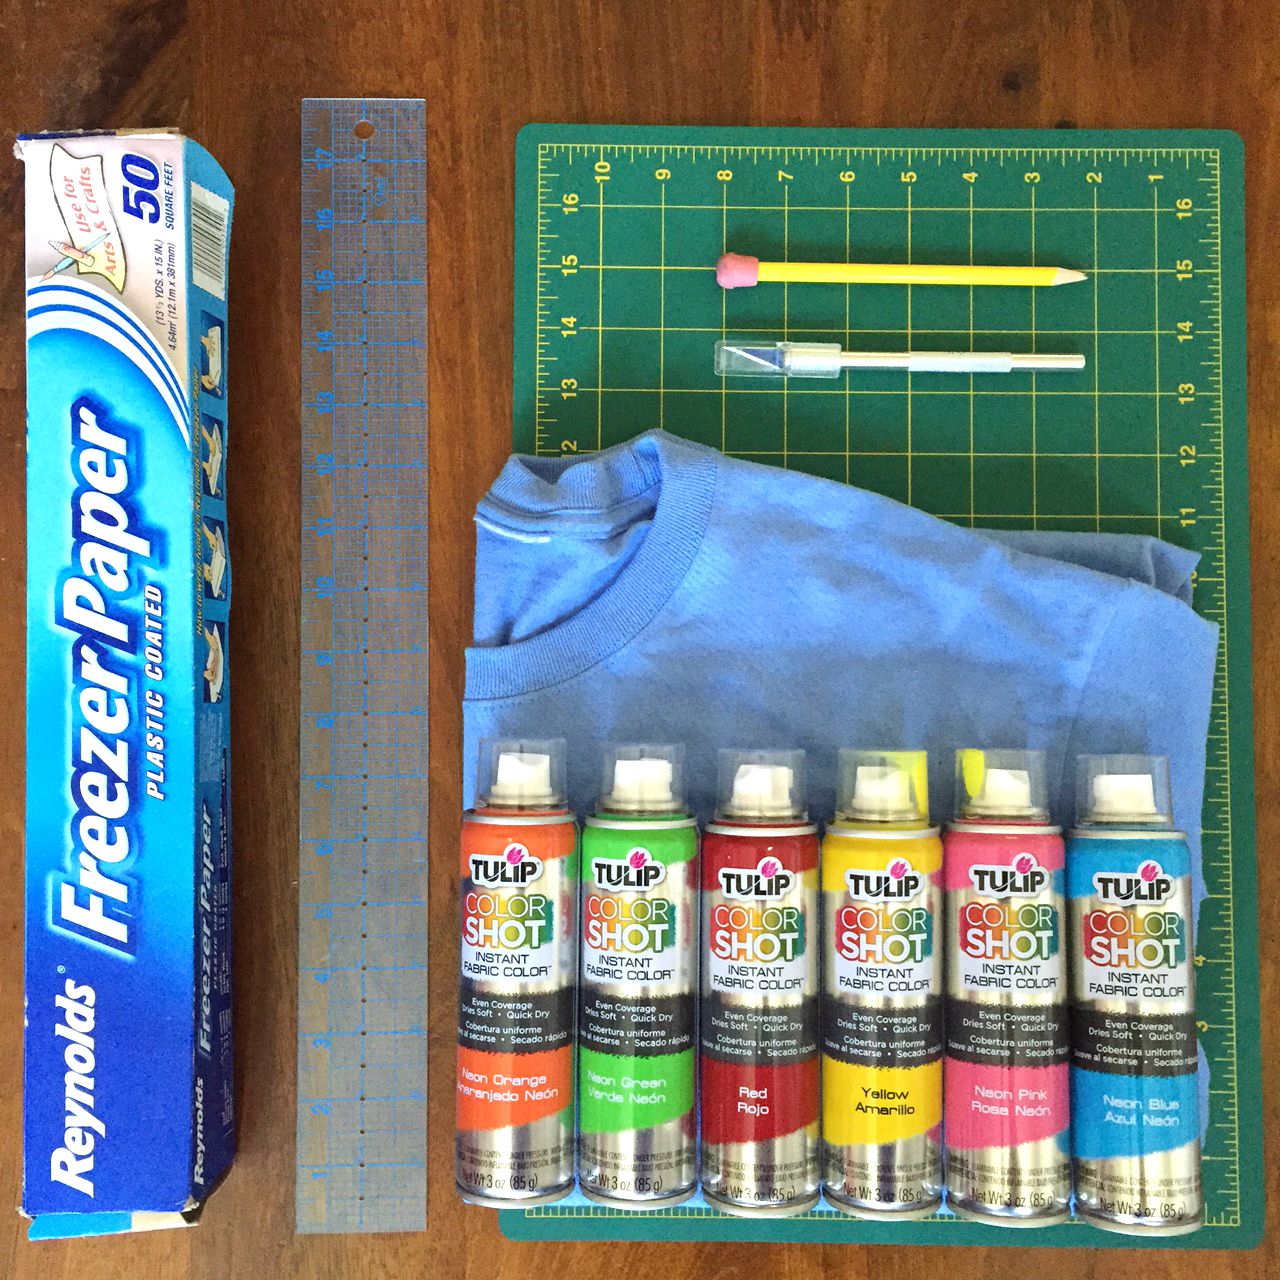
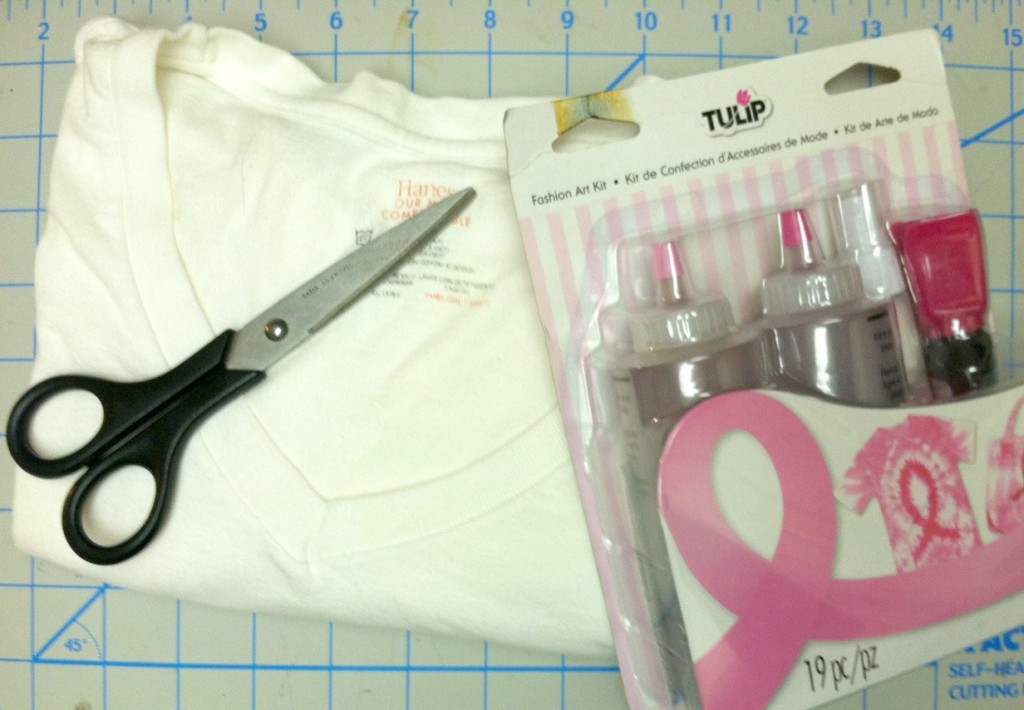
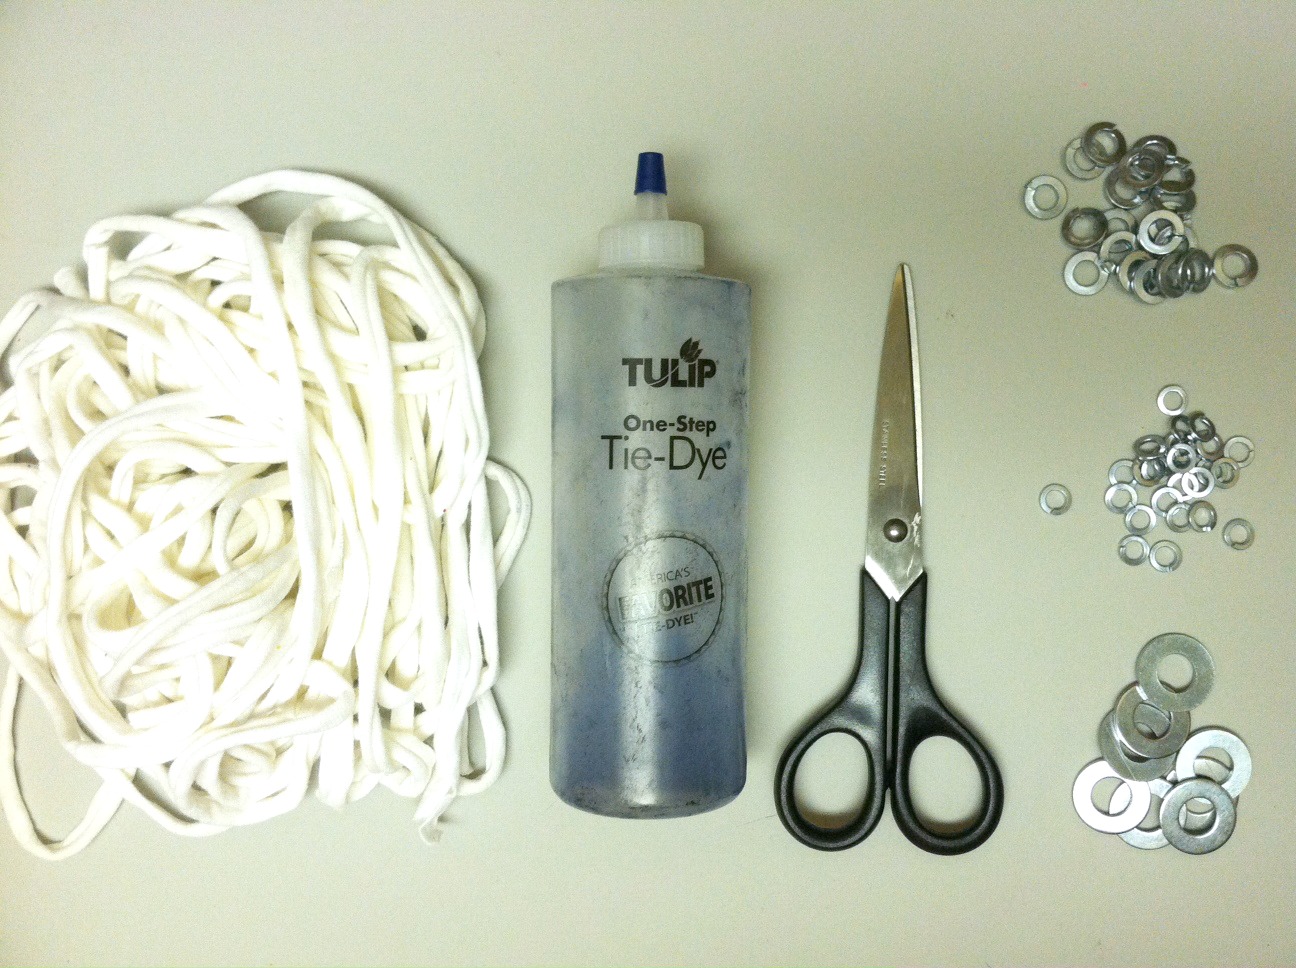
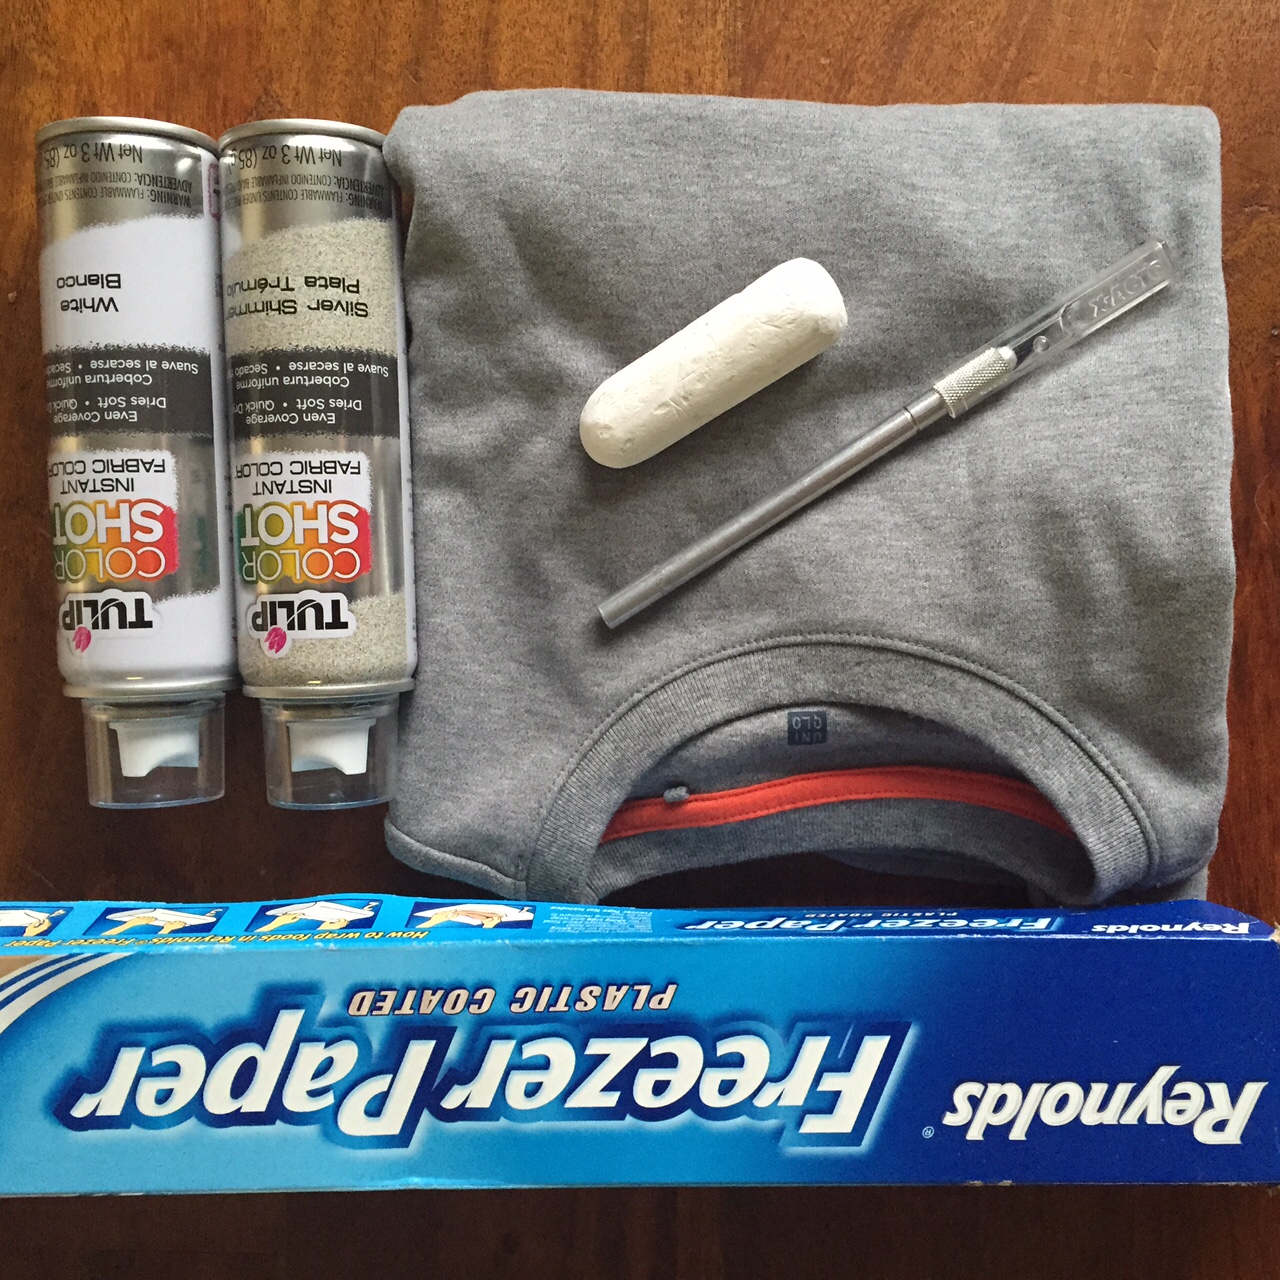
megan-nicolay-blog-footer

Materials:
-Long-sleeved T-shirt (in a plain color; I chose gray)
-Chalk or disappearing ink fabric pen
-Freezer paper
-Pen or pencil
-Craft knife and self-healing cutting mat
-Iron
Tulip Color Shot Instant Fabric Color (fabric spray paint; I chose white and silver)

Toothy T-shirt materials

Make it:
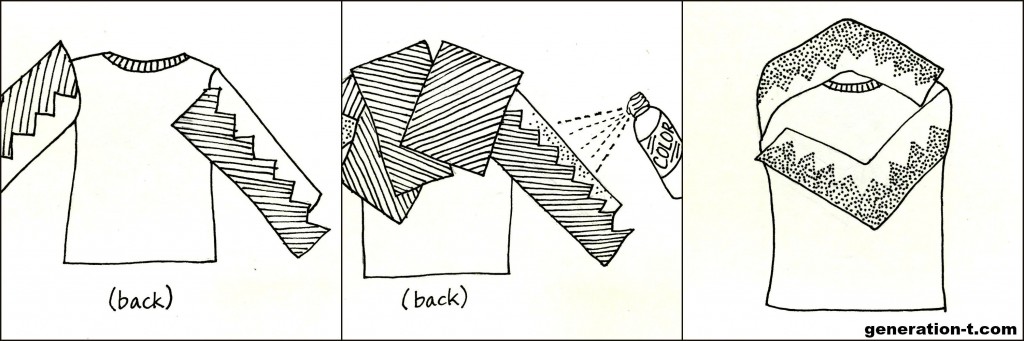
1.
Have the intended recipient try on the shirt. Placing opposite hand on opposite shoulder, have him/her line up his/her elbows. Use chalk or a disappearing ink pen to mark an upper and lower set of teeth along each arm. Remove the T-shirt and set it aside.

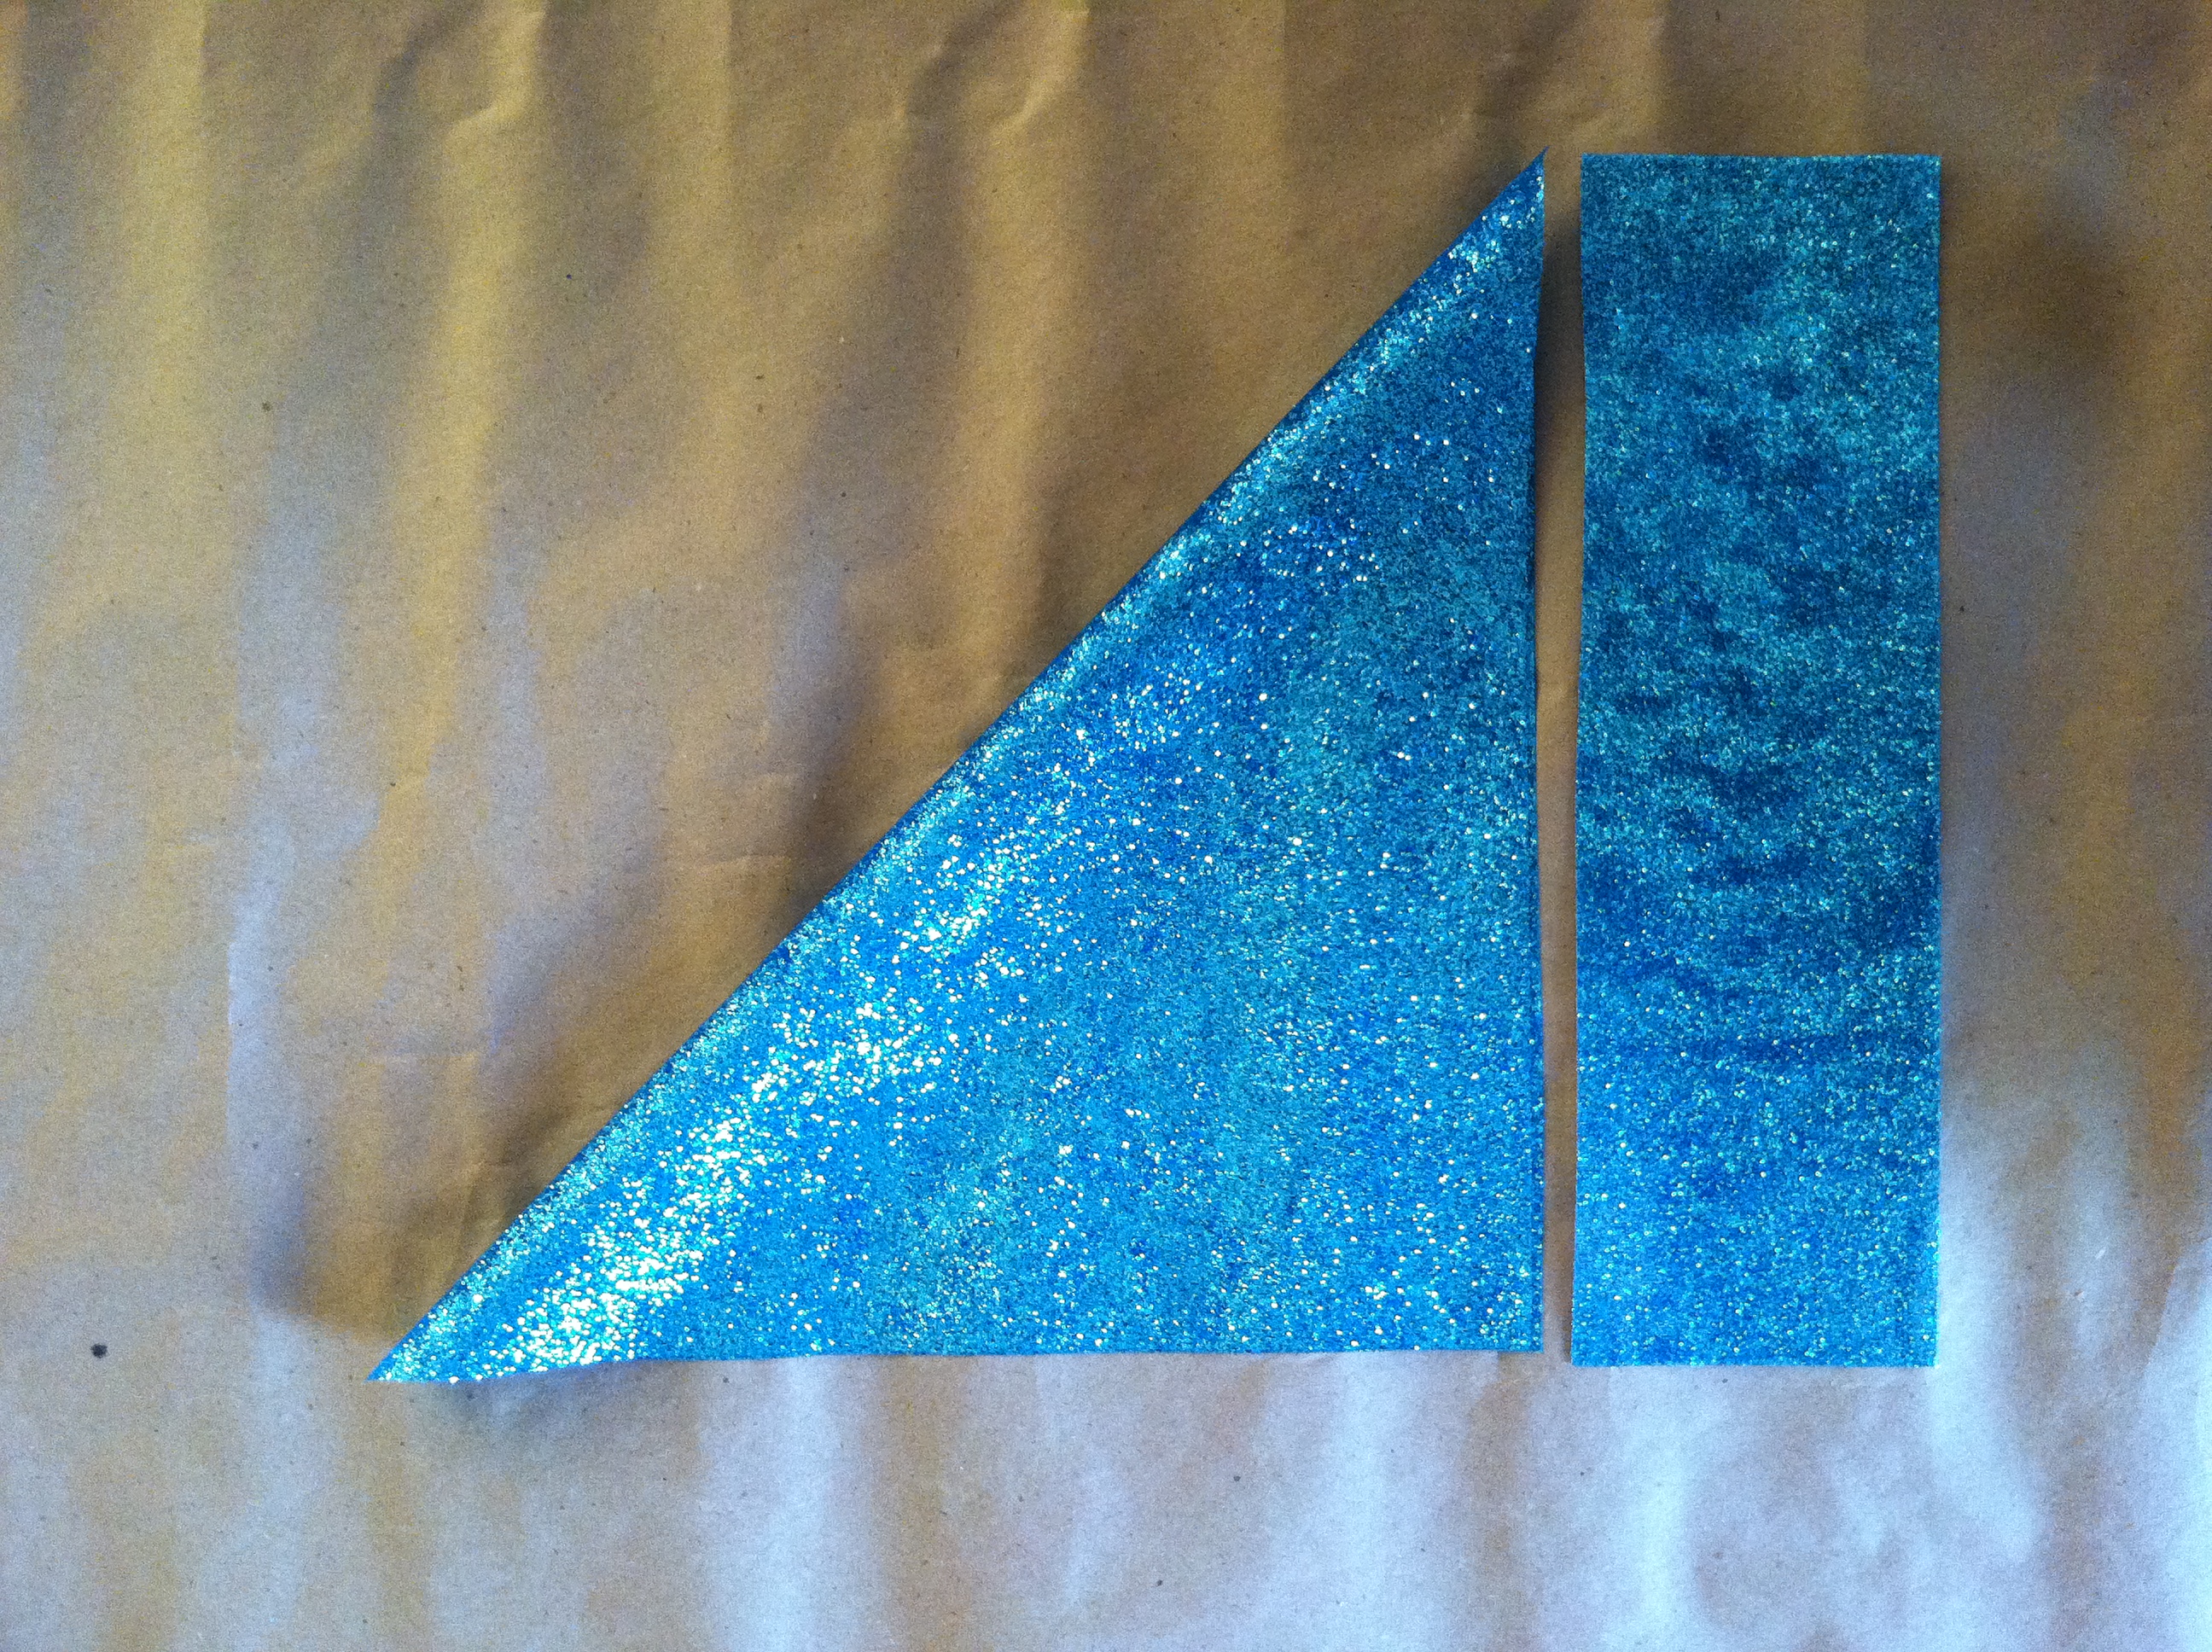
2. Measure the length of one shirt sleeve.

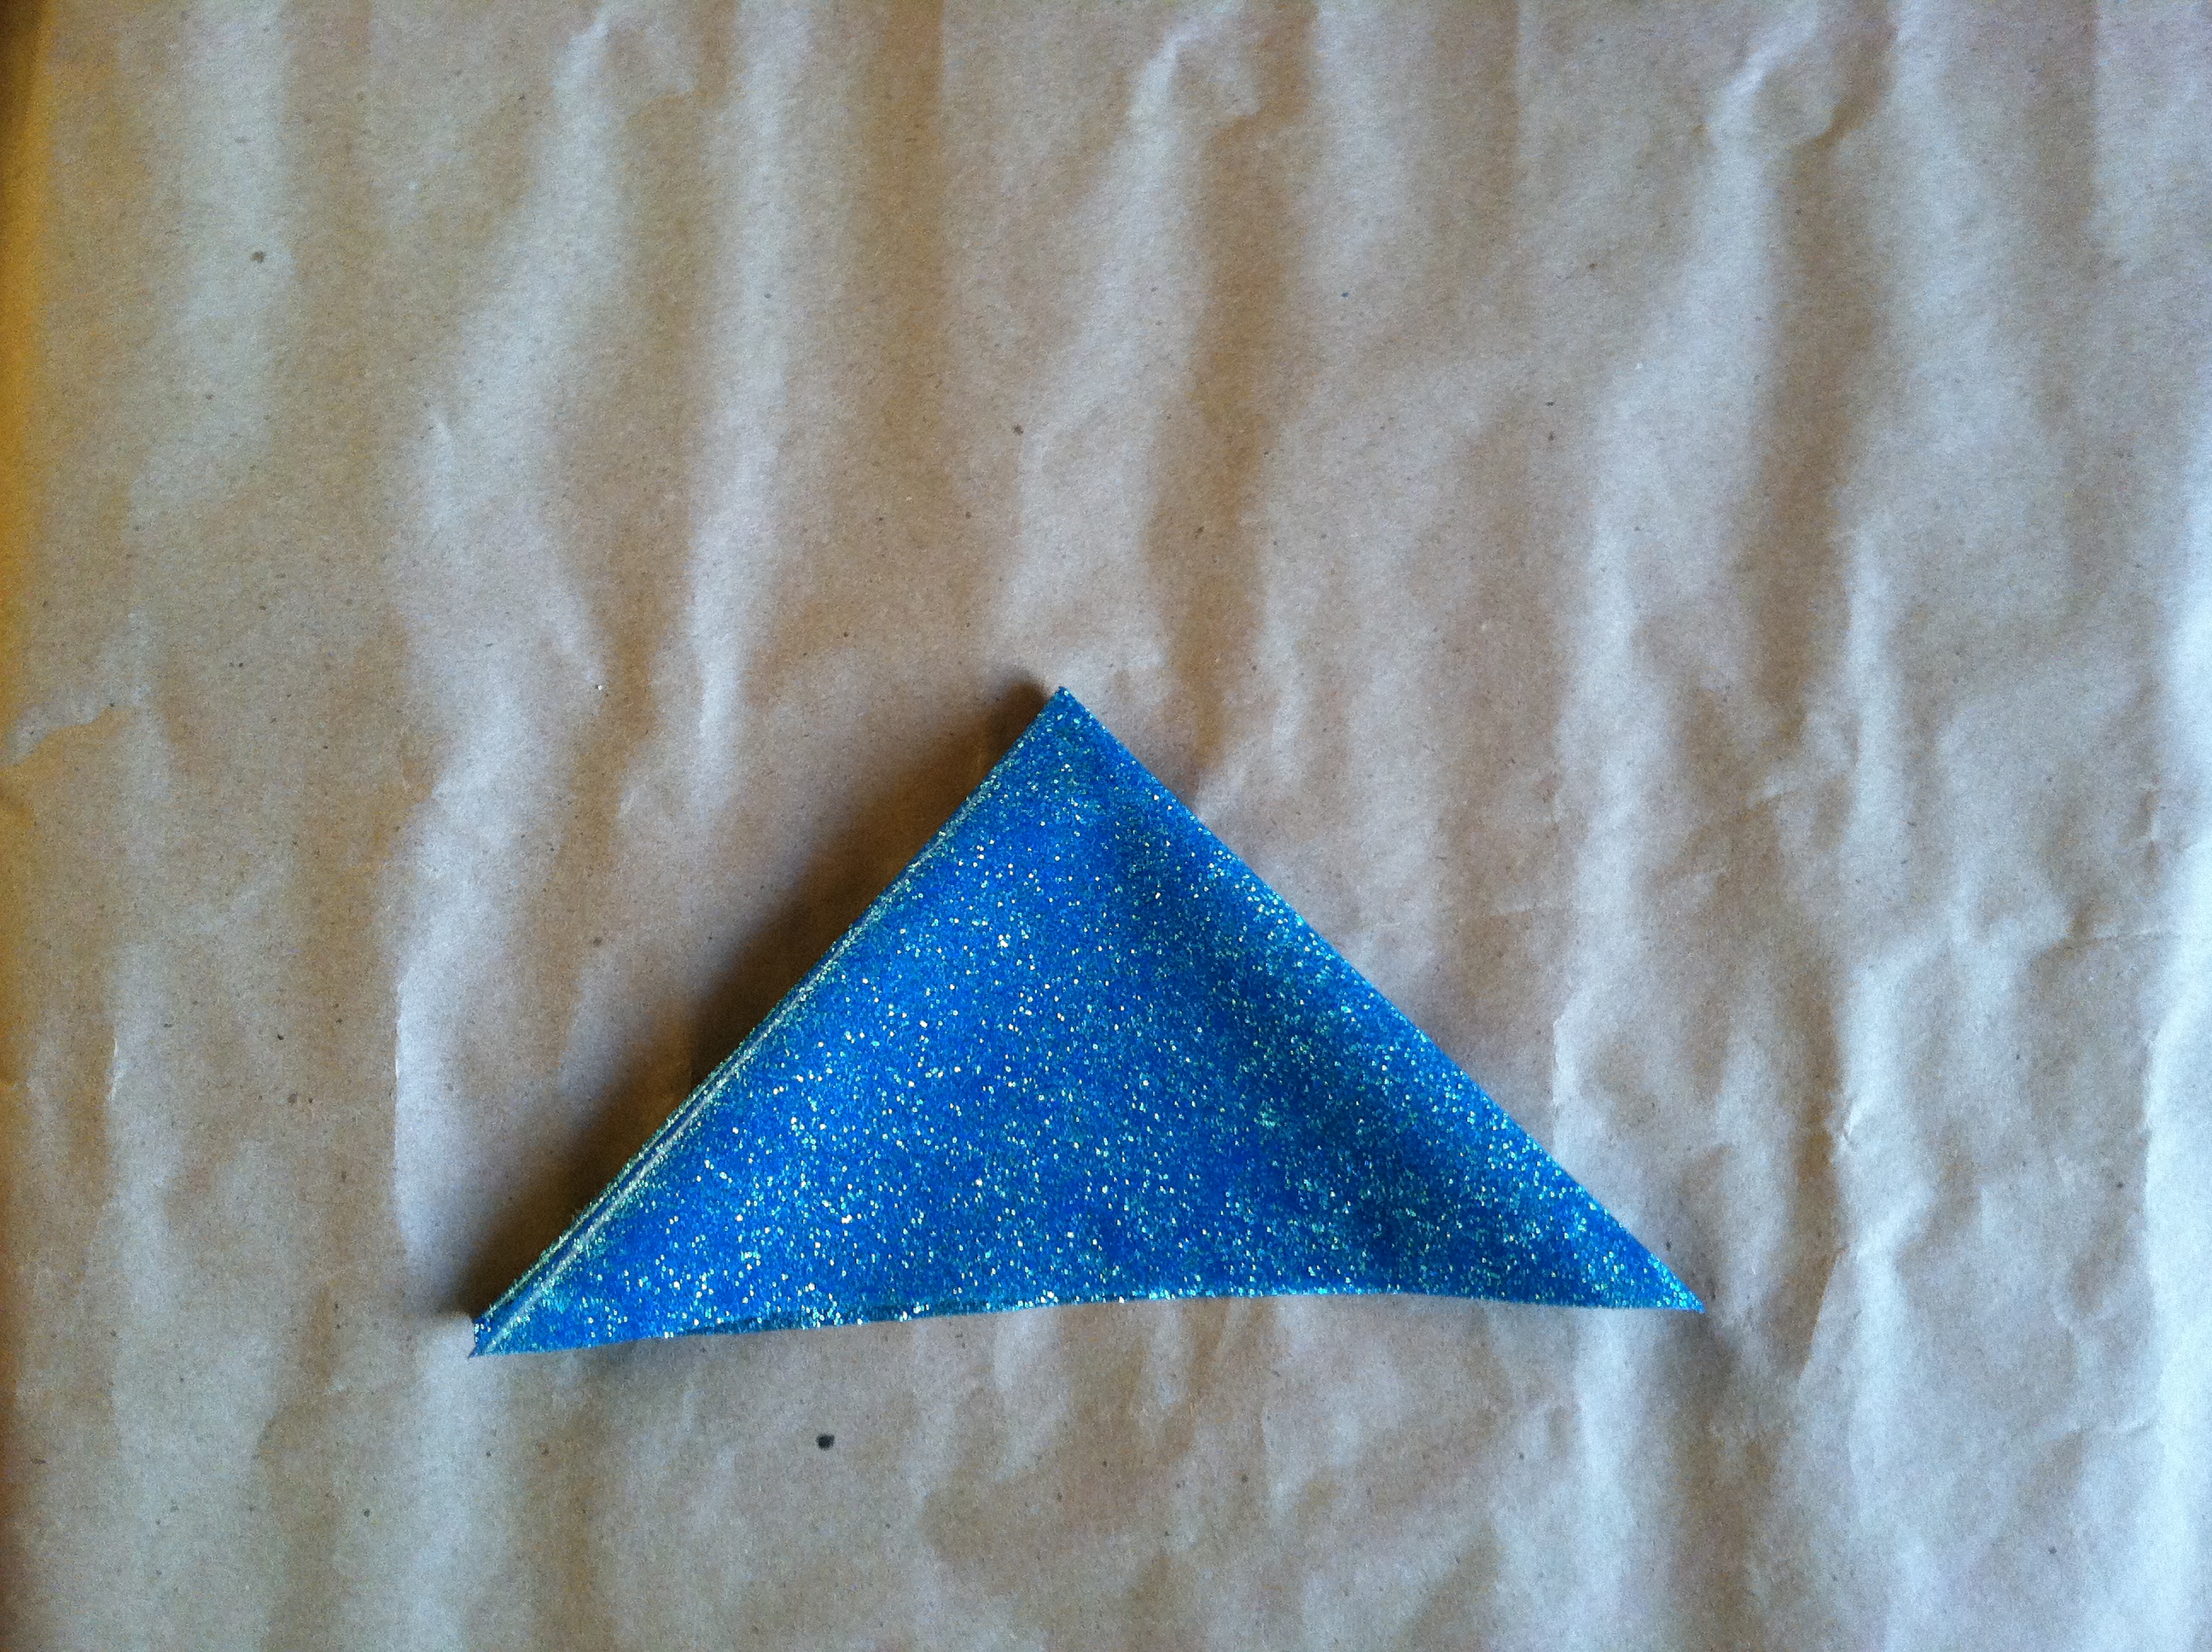
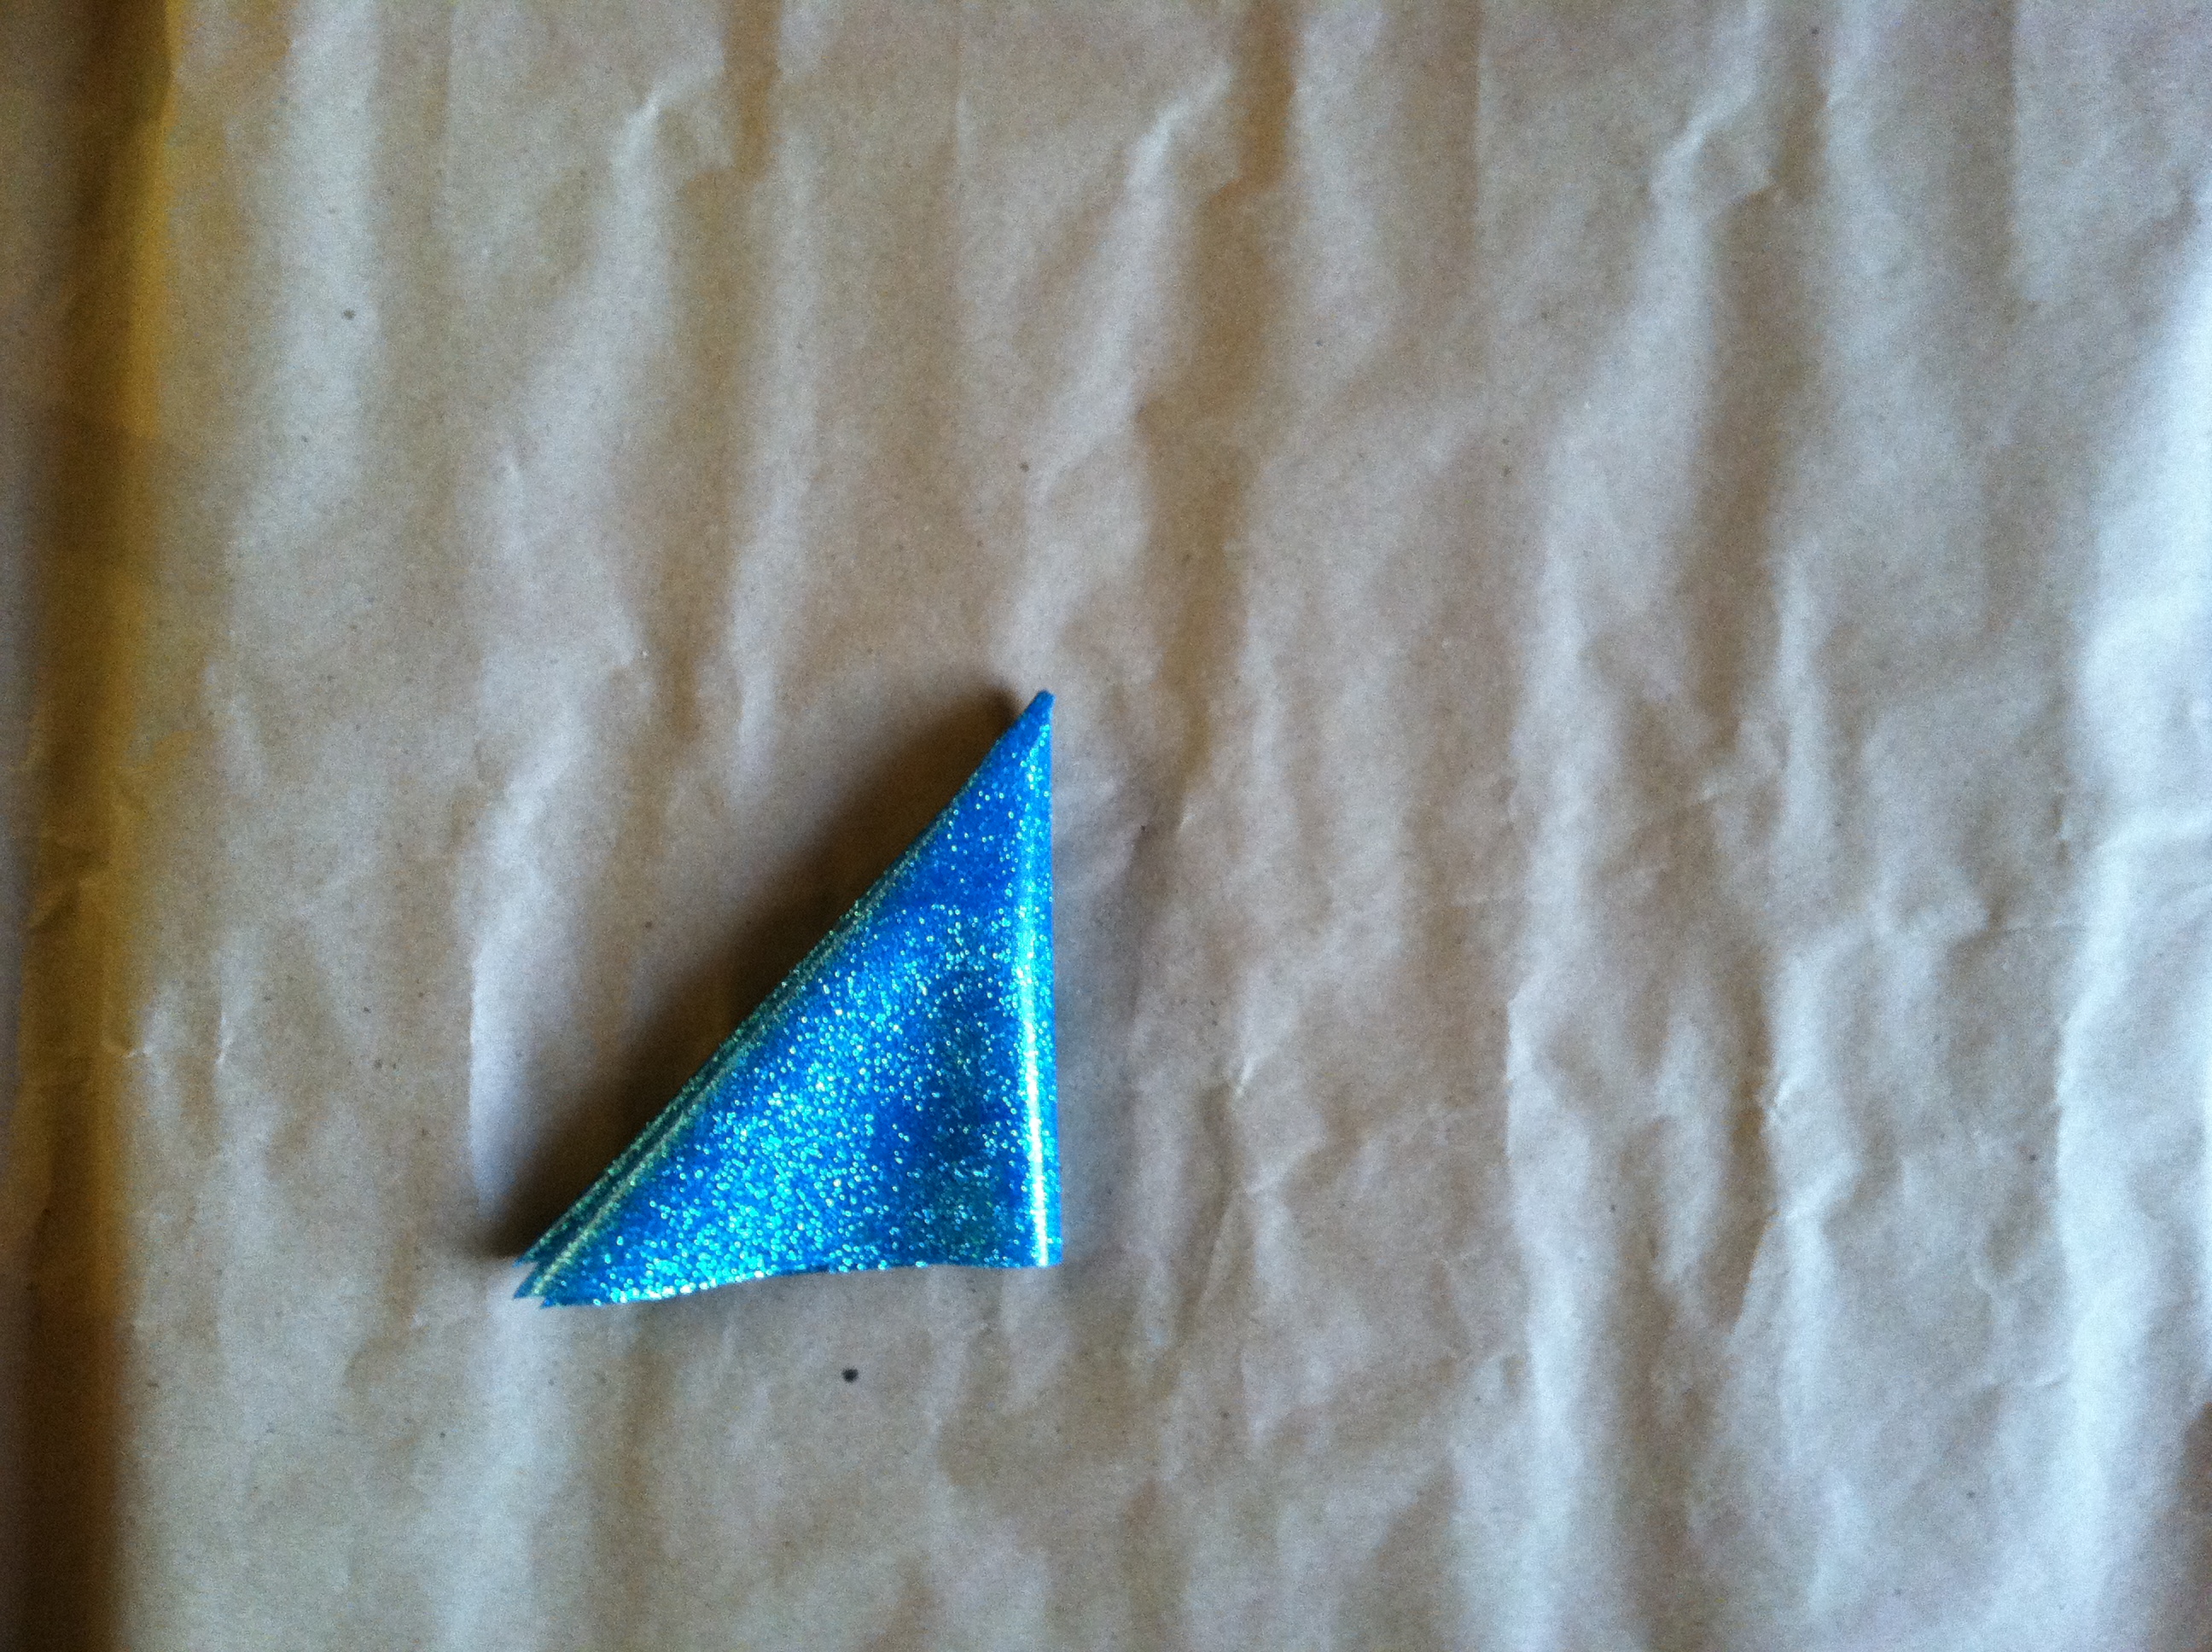
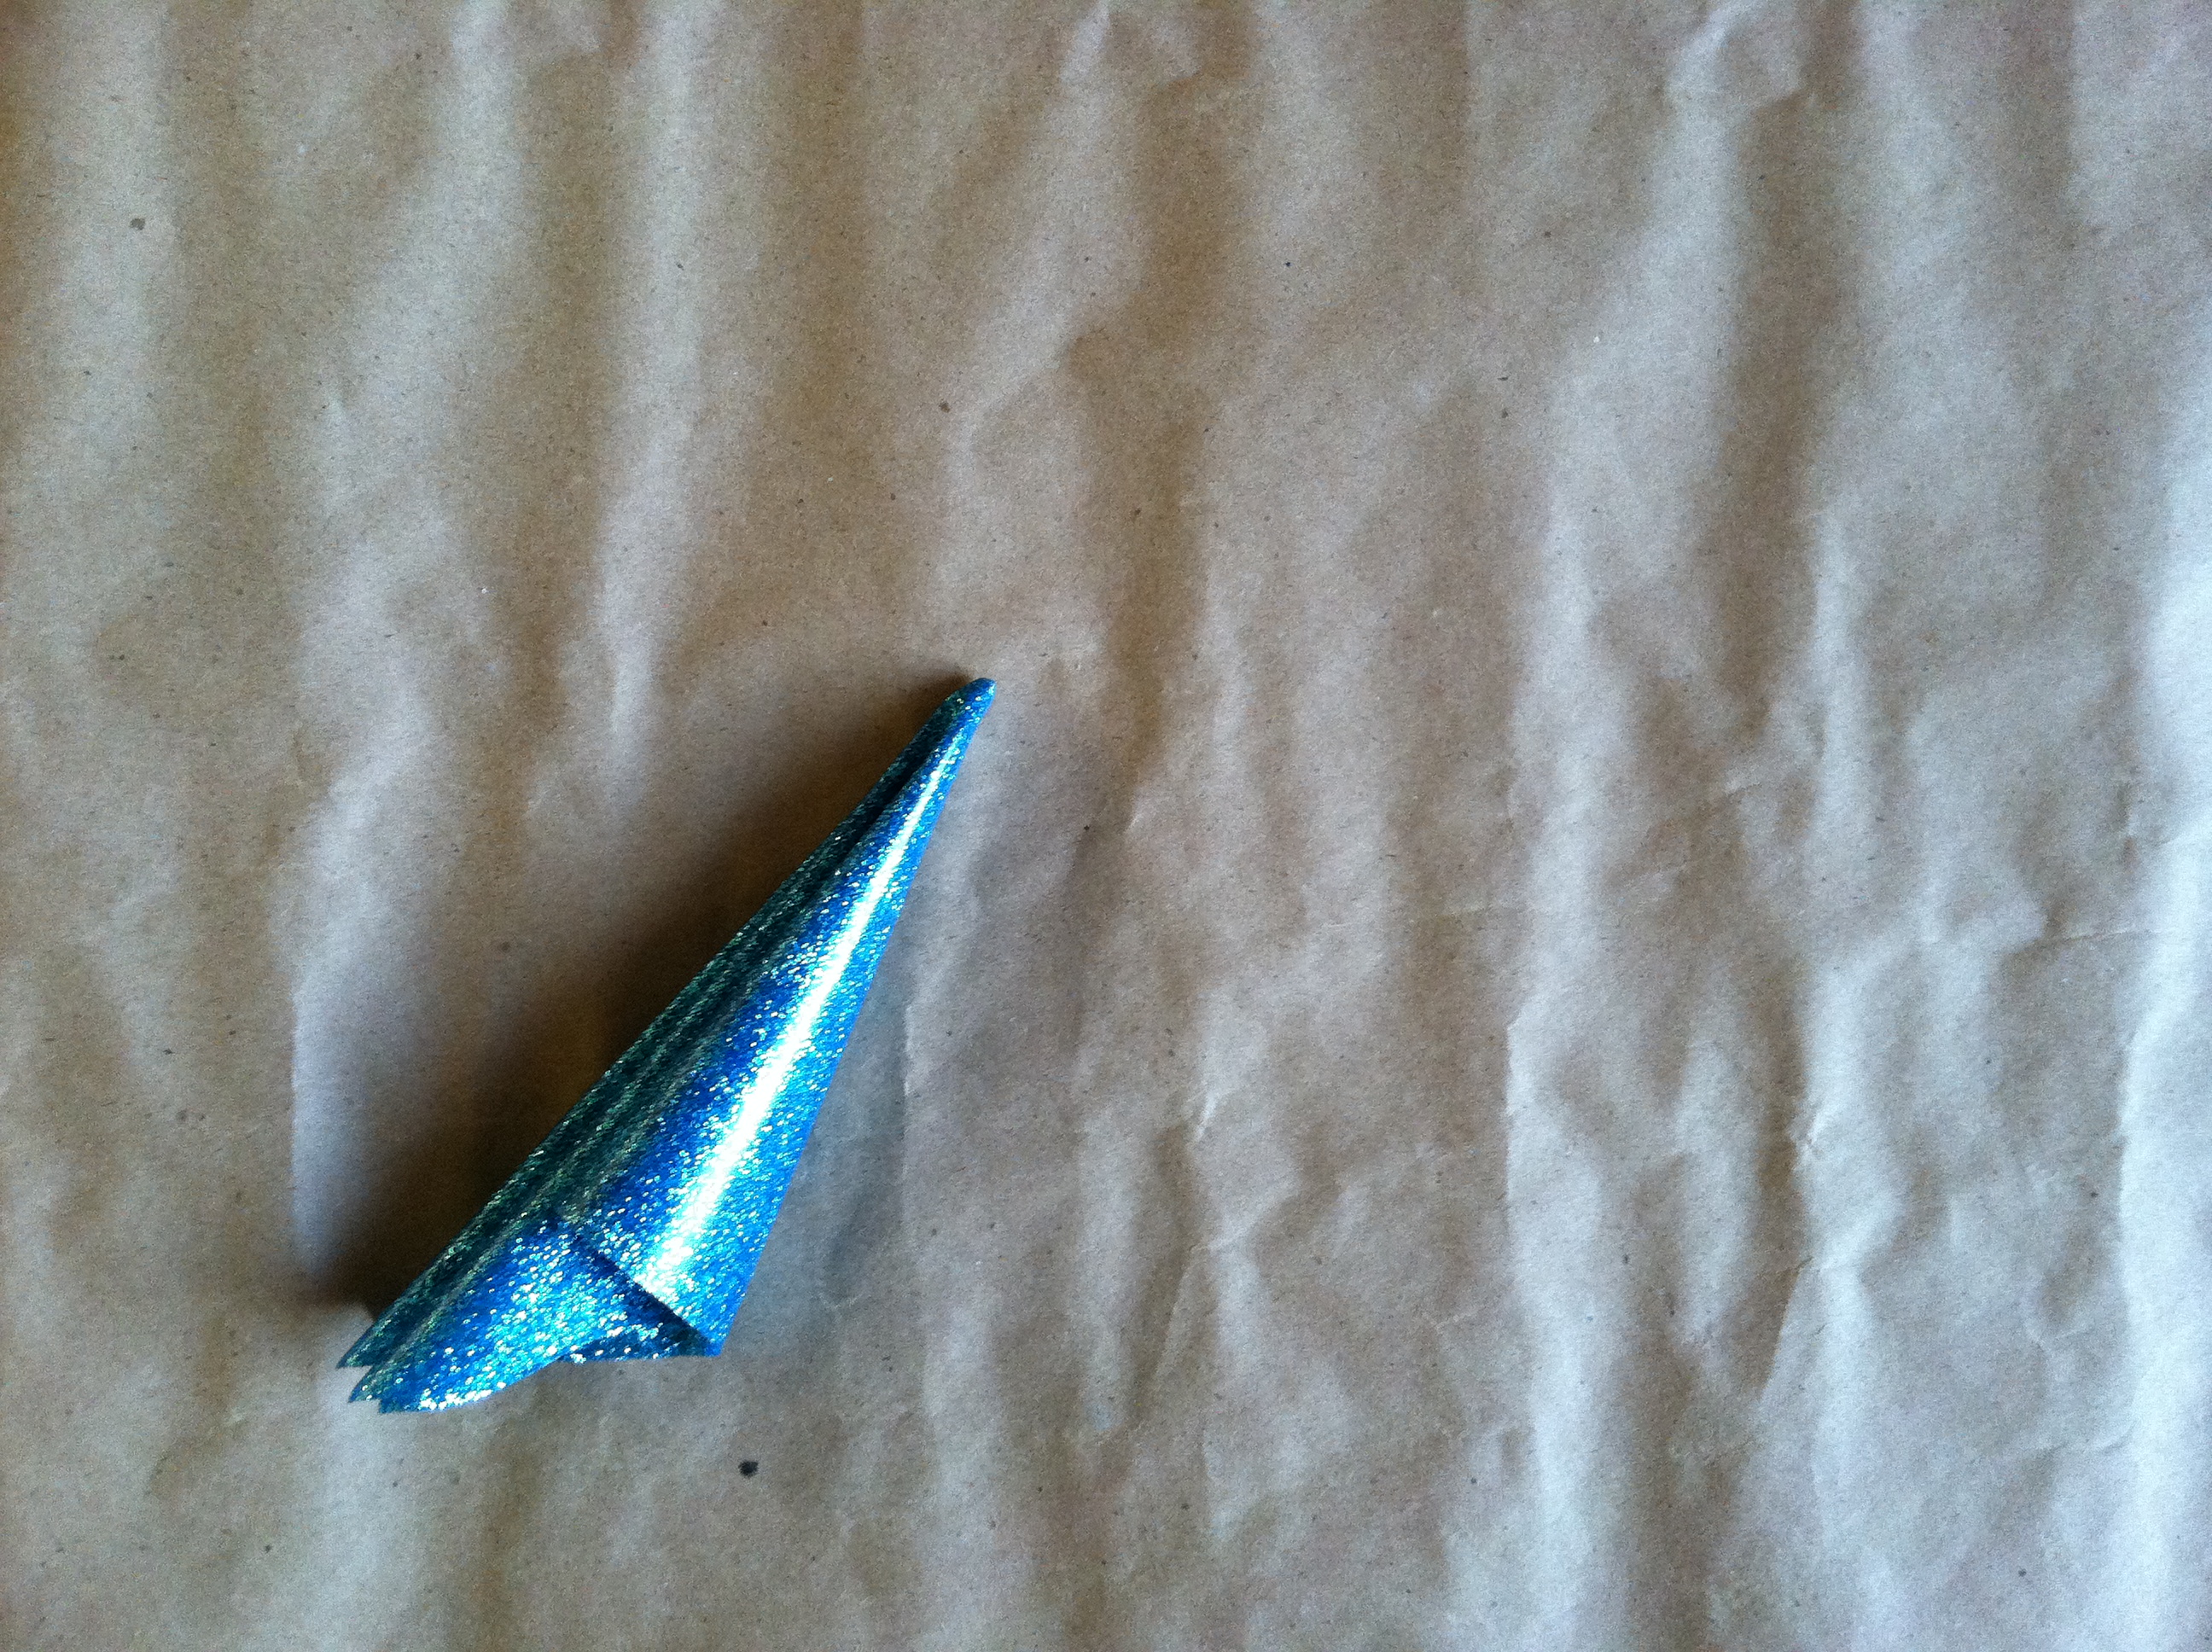
3. Draw and cut a zigzag line the length of the sleeves on freezer paper to create a teeth template. Draw and cut a second template for the opposite sleeve.

Toothy T-shirt 1-3 generation-t.com

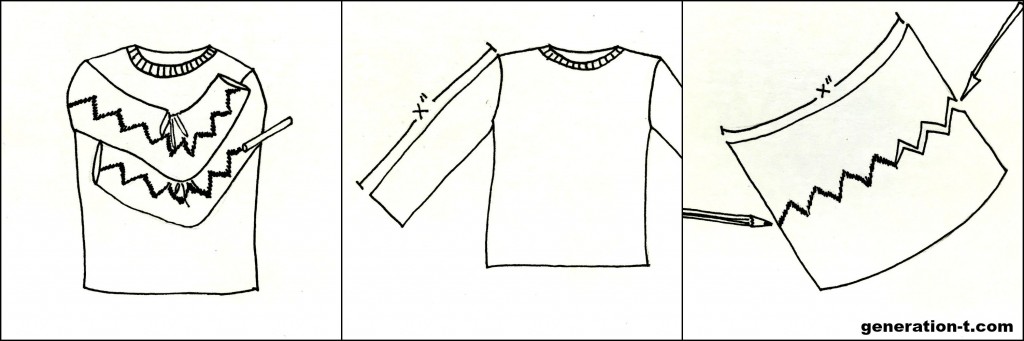
4. Lay the T-shirt flat, line up the freezer paper template with the chalk markings from step 1, and use a warm iron to press the template onto each sleeve. (Use additional freezer paper to mask other parts of the shirt that you don’t want painted.)

5. Outside, or in a well-ventilated area, spray Tulip Color Shot Instant Fabric Color. Let dry for 5 minutes, then spray again. Let dry completely.

6. Have the intended recipient(s) try on the shirt, fold up his/her arms, and CHOMP away.Toothy T-shirt 4-6 generation-t.com

Toothy T-shirt3 generation-t.com

[ Comments Off on DIY Toothy T-shirts | Posted on September 23rd, 2015 ]

No-Sew T-shirt Superhero Cape

Here’s a classic I recently adapted from my second book, Generation T: Beyond Fashion, because, hey,  it’s superhero season (okay, okay, when is it not??). A plain T-shirt is the key ingredient to this phonebooth-like transformation. Whether you’re a superhero at rest, or in action (leaping tall buildings in a single bound, racing faster than a locomotive, and generally exercising capabilities well beyond those of mortal men and women — you know, the usual), this cape has got you covered. Well, partially covered. It’s got your back, at least. (HA!)

superhero finish2 generation-t.com

The superhero in my household requested an orange lightning bolt on his cape, so once I created the basic shape, I made a couple of stencils I could layer to get the two-color effect. The length can be customized, so rest assured that adults and children of any size can be made super!

PS: Let me know how you like seeing my illustrations in the tutorial. A throwback to the books….

megan-nicolay-blog-footer

What you need:
-T-shirt
-Pencil or pen
-Ruler

-Fabric scissors
-Freezer paper (for stencils)
-Craft knife and cutting mat
-Warm iron
Tulip ColorShot Instant Fabric Color (fabric spray paint)

superhero materials generation-t.com

PART 1: The cape.
1. Lay the T-shirt flat, back side up. Use the pencil and ruler to mark a diagonal line from about 4″ up from the T-shirt hem along the left side of the shirt to a point 2″ left of the neckband. Mark a second diagonal line from about 4″ up from the T-shirt hem along the right side of the shirt to a point 2″ right of the neckband.

2. Continue the diagonal lines over each shoulder at the top until they intersect just below the front of the neckband.

3. Continue the diagonal lines around to the front of the shirt at the bottom until they reach the hem.

4. Cut along the pencil markings, through just one layer, and around the neckband in the front.

Superhero StepsA-D generation-t.com

Slip the neckband over your superhero’s head. The hem at the bottom adds a nice weight, but check that it isn’t too long so that it’s in danger of getting snagged or stepped on, and trim it if necessary.
Superhero StepE generation-t.com

PART 2: The design.
1. Head on over to the iLoveToCreate blog for the stenciling tutorial!

PART 3: The execution. 
1. Test out your cape’s powers!

superhero finish generation-t.com

[ Comments Off on No-Sew T-shirt Superhero Cape | Posted on August 26th, 2015 ]

How to: Grill Mitts from Old T-shirts!

Before you fire up the grill this summer (Happy 4th of July! Happy belated Canada Day!), fire up that sewing machine to make a grill mitt or two from some old T-shirts that aren’t fit to see another season in the sun in their current form. I dipped into book 2 (Generation T: Beyond Fashion) to bring you this one!

Grill-Mitts-cred

Materials:

2 T-shirts (100% cotton)
pencil
paper
ruler
straight pins
½ yard batting
scissors
needle
thread

Make it:

1. First, make a paper pattern by tracing around your hand (with your thumb at a 45-degree angle). Leave a 1″ allowance, as shown. At the base of the palm, widen the tracing to 2″ and extend it 7″ down. Cut around the tracing. fig 1

2. Lay one T-shirt flat and fold it in half, bringing the bottom hem up to the neckband in the back. Lay the pattern on an angle on the front of the T-shirt and pin it through all four layers. Cut around the pattern. Repeat on the second T-shirt, reversing the pattern so that the thumb points in a different direction.

fig 2


3. Fold a portion of the batting in half and pin the pattern onto it through both layers. Cut around the pattern and remove it.

fig 3


4. Sandwich a layer of batting between the layers of the T-shirt (there should be two layers of T-shirt, one layer of batting, two layers of T-shirt) to create one half of the mitt. Pin in place. Take that mitt half and sew a series of running stitches in crisscross diagonal lines, through all layers, to create a quilted look, as shown. Repeat on the other piece of the mitt.

fig 4


5. Lay the two pieces (sides) of the mitt right sides together (meaning the pieces with the logos are facing). Making sure to go through all layers, sew a tight whipstitch or a running stitch around the perimeter of the mitt, leaving the bottom edge open.

fig 5

6. Carefully turn the mitt right side out (the thumb will be a little tricky—use a pencil to persuade it if necessary).
7. Measure the circumference of the bottom opening and add 1″ to get x”. Cut a 2″ by x” strip of fabric from one of the T-shirt remnants. Line up one long edge around the opening and pin, right sides together. Sew a running stitch about ½” from the edge, being sure to “catch” all layers. Remove the pins.
fig 6

8. Fold the edge down ½” and then wrap it tightly around the raw edge to the inside. Pin and carefully sew a whipstitch securing the edging in place. Remove the pins. Optional: Repeat steps 2–8 to make a second mitt.
fig 7

9. Ready to get all up in that grill? The (veggie) burgers are ready to be flipped and nothing’s too hot to handle!

up-in-my-grill


[ 1 Comment | Posted on July 2nd, 2015 ]

No-Sew T-shirt Infinity Top

The best thing about T-shirt season? Umm…T-shirts. Here’s a no-sew T-shirt project to help you kick off your totally sweet summer. Punch it up with custom textile designs, and then wear it any way you like — the possibilities are infinite…or nearly!

Tshirt Infinity Top generation-t.commegan-nicolay-blog-footer-1

Materials:
Tulip Color Shot Instant Fabric Color
-Light-colored T-shirt (baggy)
-Stencil (I used a panel from a modular stacking unit that I scored at a stoop sale last spring!)
-Scrap paper or cardboard (to insert between the layers of the T-shirt)
-Fabric scissors

Make it:
Head over to the iLoveToCreate blog for step-by-step instructions for achieving the 4 different looks.

halter look generation-t.com


[ Comments Off on No-Sew T-shirt Infinity Top | Posted on May 27th, 2015 ]

Tie-Dye T-shirt Wrapped Necklace

This quick and easy accessory heralds in a Bohemian springtime. It’s the perfect project to use up any failed tie-dye attempts — or you can tie-dye a whole T-shirt or piece of fabric and host a party! (You can make at lease 10 necklaces from one large T-shirt.) TiedyeWrapNecklace generation-t.com

This particular version is adapted from the Fabric-Covered Bead Necklace from The Jewelry Recipe Book by Nancy Sorian0 — substituting in T-shirt fabric (of course) whenever possible!
megan-nicolay-blog-footer-1

Materials:
-Tie-dye T-shirt (or similar)
-10 wooden beads (5/8″) with large holes

-Fabric scissors
-T-shirt hem scraps (optional)
-Ruler
Aleene’s Fabric Fusion Glue (optional)

IMG_3565

Make it:
For step-by-step photographic instructions, click through to the iLoveToCreate blog.

TiedyeWrappedNecklace2 generation-t.com


[ 2 Comments | Posted on April 28th, 2015 ]

Pointilism Pocket T-shirt

Hi, folks! It’s been awhile, I’ve been in hibernation, but doggone it, it’s officially springtime, and that means T-shirts (soon, when the temperature hits…50 degrees??). As I’m thawing, I’ve been working on a couple of really exciting projects that I’ll share soon here on the blog, but in the meantime: Trompe l’oeil meets pointilism in this faux pocket T-shirt–a great low-stakes revamp that’ll do wonders at masking a well-placed food stain or simply sprucing up a plain shirt. PointilismPocketTee generation-t.com
Making the dots is so meditative, I’m ready to lose myself in a Lichtenstein-inspired image next!

megan-nicolay-blog-footer-1

Materials:
Tulip Fabric Markers (rainbow set)
-thin scrap cardboard cut into 4″-wide pocket template
-thin scrap cardboard to use as T-shirt insert to prevent bleed
-plain, light-colored T-shirt

IMG_2409

Make It:
For the fully photographed step-by-step tutorial, click through to the iLoveToCreate blog.

PointilismPocketTee2 generation-t.com


[ 1 Comment | Posted on March 24th, 2015 ]

Sparkle Snowflake T-shirt

I have a thing for snowflakes. I do. And winter solstice seems the perfect occasion to share this snowflake T-shirt with you (maybe it will encourage actual snowflakes to fall!). A little sparkle glams up a plain T-shirt, and you can dress it up with a skirt or down with jeans to suit the mood or the occasion.

Snowflake Tshirt FinalA generation-t.com

Materials:
-plain T-shirt
Fashion Glitter Iron on Shimmer Sheets
-scissors
-iron and press cloth 

MaterialsA

Make it:
1. Fold one corner of the shimmer sheet down on the diagonal.

Step2

2. Trim the excess to square it off.

Step3

3. Fold the folded triangle in half again.

Step4

4. And in half again.

Step5

5. And in half one more time.

Step6

6. Pinch the layers together and cut out shapes from the two folded edges, doing your best to go through ALL layers.

Step7

7. Unfold the snowflake, and tidy up any mismatched cutouts.

Step8

8. Place the snowflake on the T-shirt, plastic side down, and iron it on using a press cloth.

Step9

9. Peel back the press cloth to make sure all edges are stuck. Try it on!

Snowflake T-shirt FinalB generation-t.com

Sparkle Snowflake T-shirt stepsA generation-t.com

[ Comments Off on Sparkle Snowflake T-shirt | Posted on December 23rd, 2014 ]

DIY T-shirt Light Switch

A light switch plate is a pretty sweet blank canvas — small in dimension and fairly low-stakes (in case the creative process doesn’t go as planned). But when it does work, what fun! I started by picking through my T-shirt stash, but ended up far beyond there — click through at the end of the post to see a few other creative switch plate options!

Materials:
-T-shirt with small logo or text
Aleene’s Turbo Tacky Glue
-Blank light switch plate
-Craft knife and cutting mat

Switch tshirt final generation-t.com

megan-nicolay-blog-footer-1

Make it:
1. Select a T-shirt or T-shirt scrap and loosely cut out the logo portion. (My T-shirt “excerpt” is clearly from a Red Sox shirt — GO SOX!)

2. Apply glue lightly and evenly to the front of the switch plate, and press it down onto the back of the T-shirt fabric, leaving a 1″ margin on all sides. Trim off the corners and cut an X from corner to corner inside the light switch opening. Fold back the edges and fold back the cut triangle pieces in the center and glue.

3. Let dry completely, and attach your T-shirt light switch plate to the nearest light switch!

For 6 More Ways to Decorate a Light Switch Plate, click through to my tutorials over at the iLoveToCreate Blog.

7 ways light switch plate generation-t.comllage

[ Comments Off on DIY T-shirt Light Switch | Posted on October 28th, 2014 ]

DIY No-Sew Laced Up Tank Top

Mark your calendars: October is National Breast Cancer Awareness Month. Whether you walk, run, or responsibly conduct a breast self exam for the cause (do it once a month!) here’s a T-shirt transformation tutorial (plus a bonus throwback at the end!) to honor all of you making a difference and supporting those affected by breast cancer.

OuterLace Tank Top finish

Just set aside an old baggy T-shirt, a pair of scissors, and in 10 minutes you’ve got yourself a fitted tank top (inspired by the Outer Lace tank top in Generation T: 108 Ways to Transform a T-shirt). Get the team together and tie-dye and snip your way to its completion, then wear it for yourself, or wear it for a loved one–I know I will be!

megan-nicolay-blog-footer-1

Materials:
-plain white T-shirt
Tulip One-Step Tie-Dye Fashion Art Kit (includes 2 shades of dye plus gloves and rubber bands, black dimensional fabric paint, glitter spray)
-sharp scissors
-2 safety pins

shirt materials generation-t.com

Make it:
1.
Follow the kit instructions to tie-dye the T-shirt.
2. Click through to the step-by-step illustrated tutorial at the iLoveToCreate blog.

Outer Lace finish2 generation-t.com

Wear it with all your (ahem) breast friend! Shirt #2, below, is a variation of the Fringe Benefits shirt from Generation T and the Fringe Fabulous shirt from generation-t.com.

OuterLace finiah3 generation-t.com


[ Comments Off on DIY No-Sew Laced Up Tank Top | Posted on September 24th, 2014 ]

T-shirt Scrap Necklaces: 7 Ways

Whether you’re celebrating back to school or back to work (three weeks back from maternity leave for me!), here are a handful of quick-and-easy, no-sew techniques to accessorize on the cheap. Just grab all those scraps you’ve cut from your white T-shirts, rejuvenate them with a splash of tie-dye, and macramé your way to a statement necklace or two (or seven!). Wear them together or solo or mix and match for a different look each day of the week.

necklace finish2 generation-t.com
I’ve always loved shopping at hardware stores for my materials — washers and hex nuts and some of the more delicate chains lend a nice physical weight to a fabric-based piece while adding an industrial edge to the overall aesthetic.

megan-nicolay-blog-footer-1

Materials:
-White T-shirt strips
Tulip One-Step Tie-Dye (blue)
-Lock washers and flat washers in various sizes (#10, 1/4, and 3/8)
-Scissors

necklace materials generation-t.com

Make it:
Click over to iLoveToCreate blog for the illustrated diagram and step-by-step instructions for each necklace strand.

necklace step3 generation-t.com


necklace finish1 generation-t.com


[ Comments Off on T-shirt Scrap Necklaces: 7 Ways | Posted on August 26th, 2014 ]