Posts Tagged ‘Christmas crafting’

DIY: A Holiday Tree-Shirt!

Coming off Thanksgiving, a holiday that many people abbreviate to “T-Day,” of course makes me think of T-shirts….and how EVERY DAY is Tee Day! So, move over scratchy holiday sweater. Here’s a simple, no-sew holiday T-shirt (ahem, tree-shirt) that I designed as part of Homemade Holiday 101 (#homemade101). It combines techniques from the Brokenhearted tee in Generation T (project #2) and Back in Action tee in Generation T: Beyond Fashion (project #101).

Holiday Tree-Shirt finish generation-t.com

(OH, and…CLICK THROUGH TO HOMEMADE HOLIDAY 101 where the Generation T and Generation T: Beyond Fashion ebooks are on sale for $2.99 for a limited time!)

homemadeholiday101logo

Materials:
-Red fitted T-shirt (mine has a small percentage Lycra)
-Green fitted tank top (or similar, to layer underneath)
-Disappearing ink fabric marker or fabric chalk marker
-Ruler/ straightedge
-Fabric scissors
-Safety pin or 1″ round pin

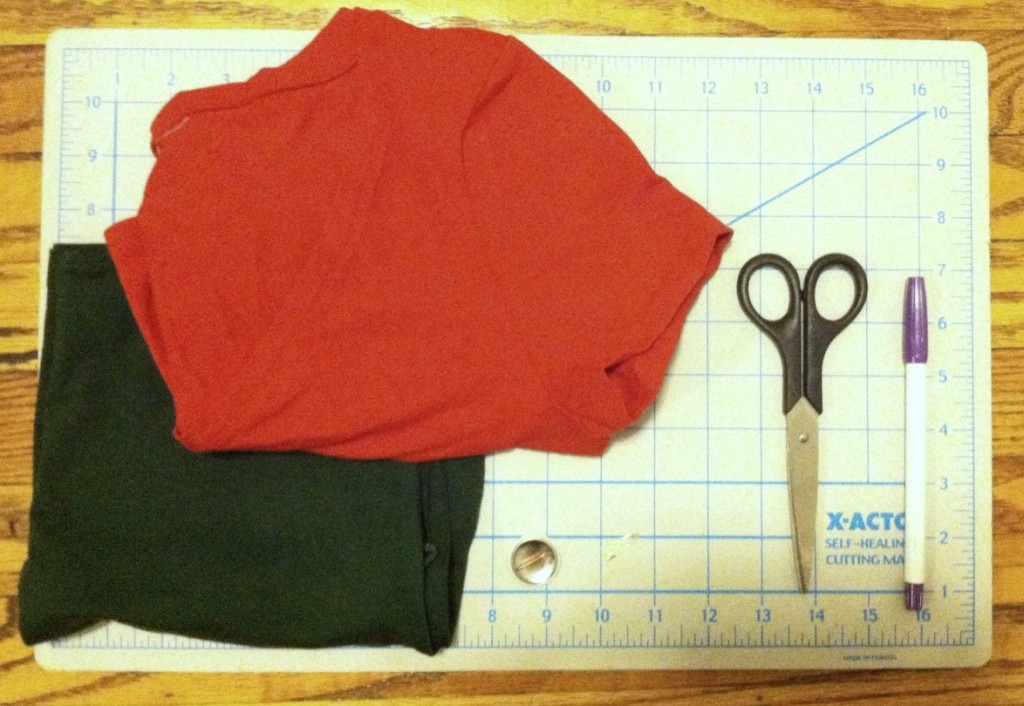
holiday shirt materials generation-t.com

Make it:

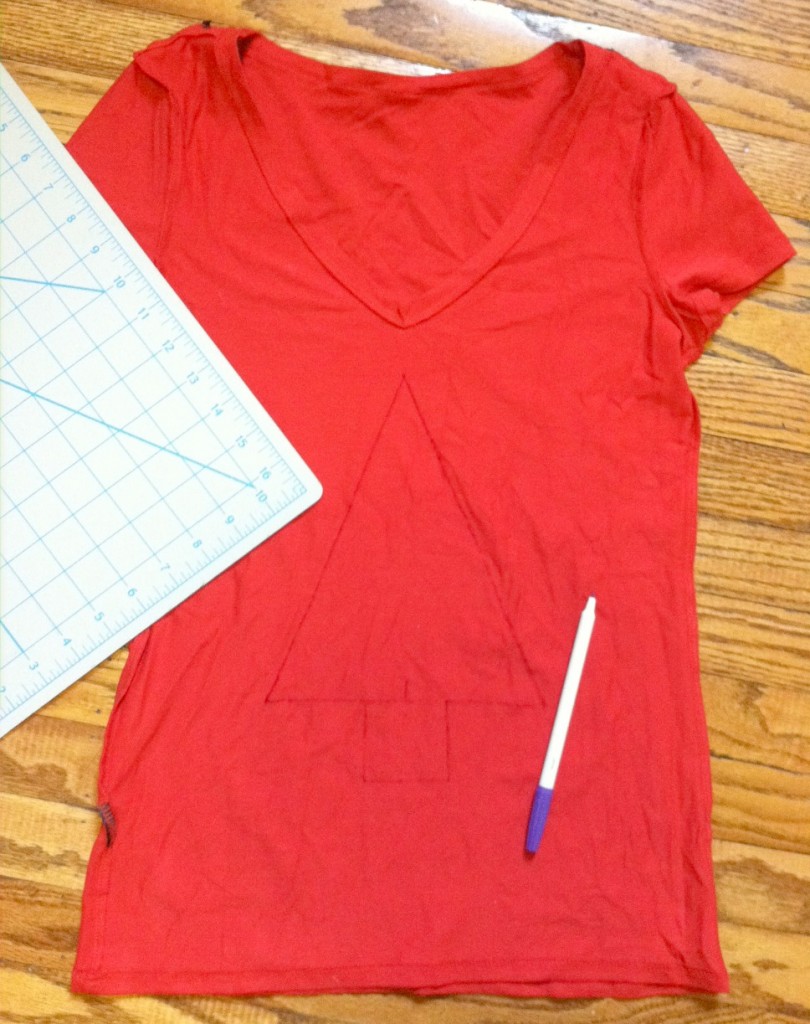
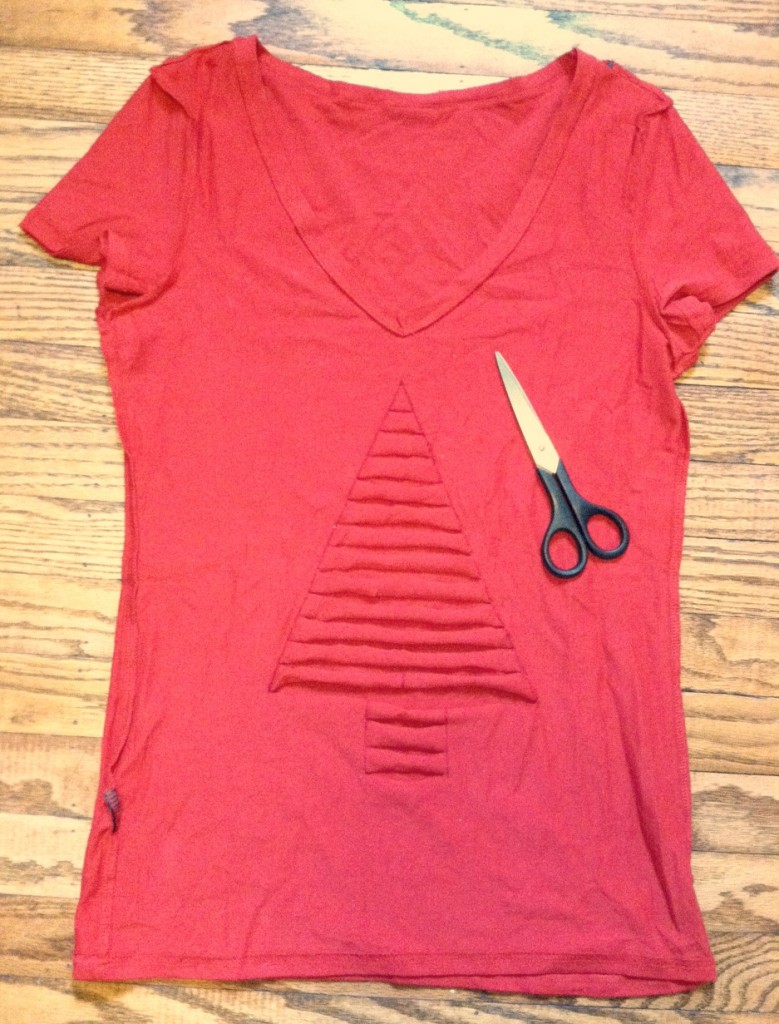
1. Turn the T-shirt inside out and, using the straightedge, draw an isosceles triangle with a small rectangle at the bottom (aka, a simplified evergreen tree shape). My tree is about 7″ across at its widest.

holiday shirt 1 generation-t

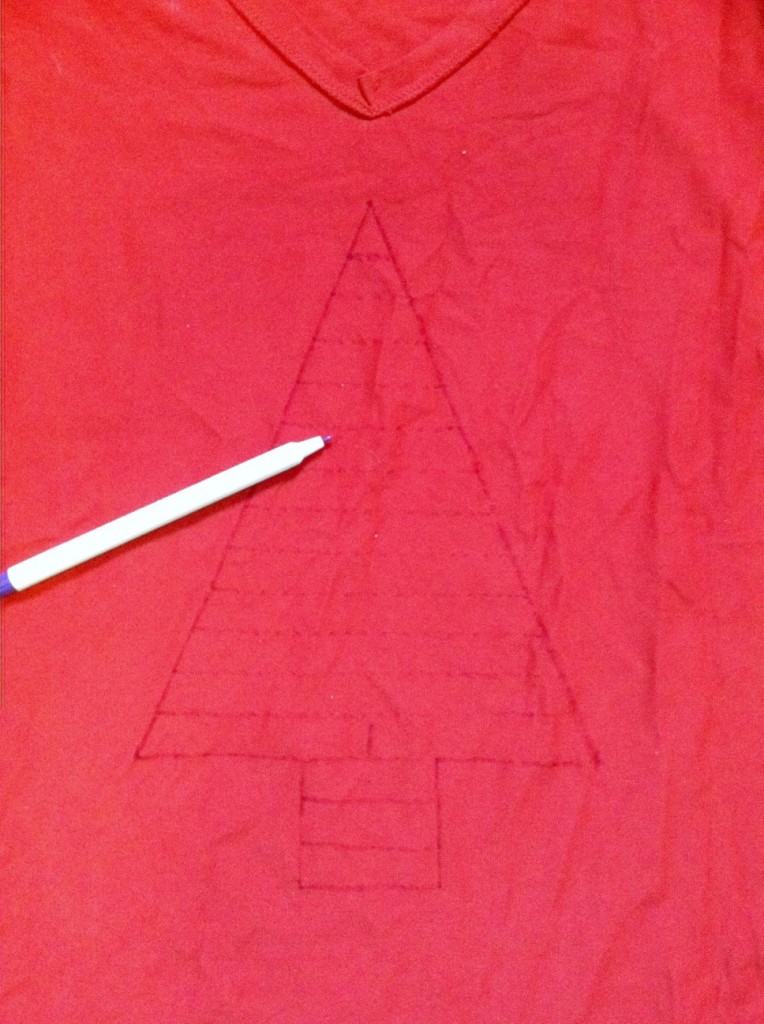
2. Use the straightedge again to mark horizontal lines from the base of the tree to the top, about 1/2″ to 3/4″ apart.

holiday shirt 3 generation-t.com

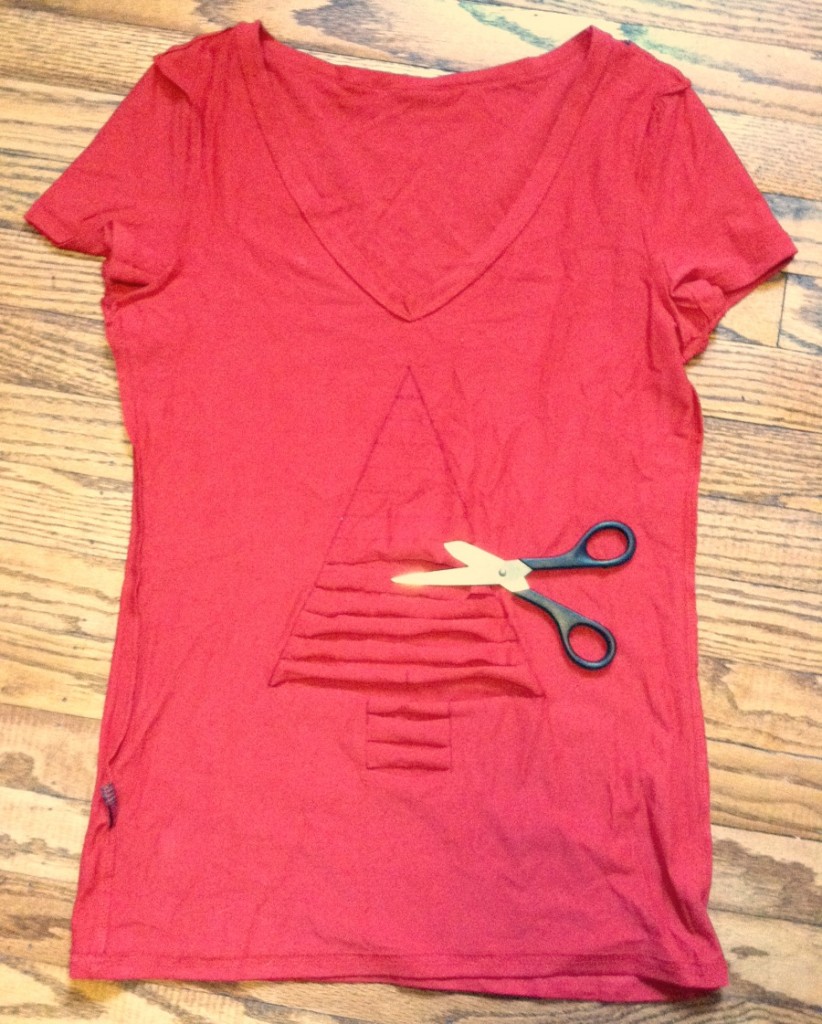
3. Cut along the horizontal lines only, making sure to cut through only the top layer of the shirt.

holiday shirt 5 generation-t.com

4. Cut all the way to the top, making a small snip (about 1/4″) at the peak of the tree. Tug gently at the sides of your T-shirt to stretch out the strips (so they curl a little).

holiday shirt 6 generation-t.com

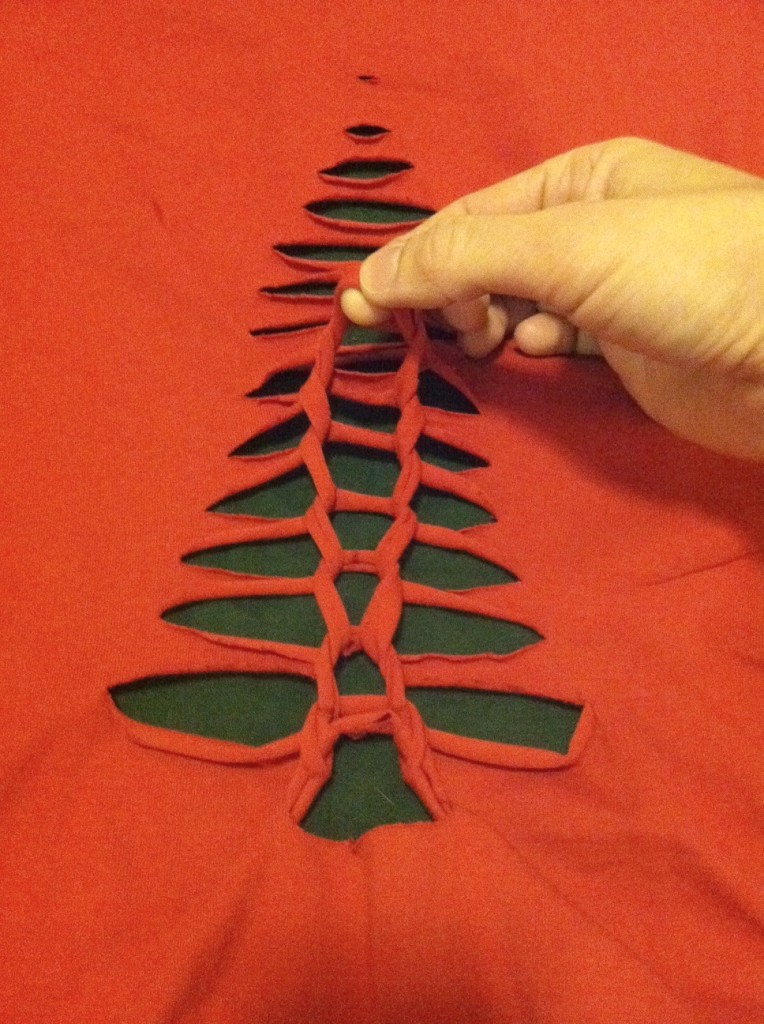
5. Turn the T-shirt right side out, and layer the green tank top underneath so you can see the shape of the tree clearly. You can stop right here and have a terrific-looking slashed tee, but forge on for another minute to get the woven effect: Take the first two strips at the trunk of your tree and loop strip #2 under strip #1. Drop strip #1. Then loop strip #3 under strip #2, dropping strip #2. And so on…

holiday shirt 8 generation-t.com

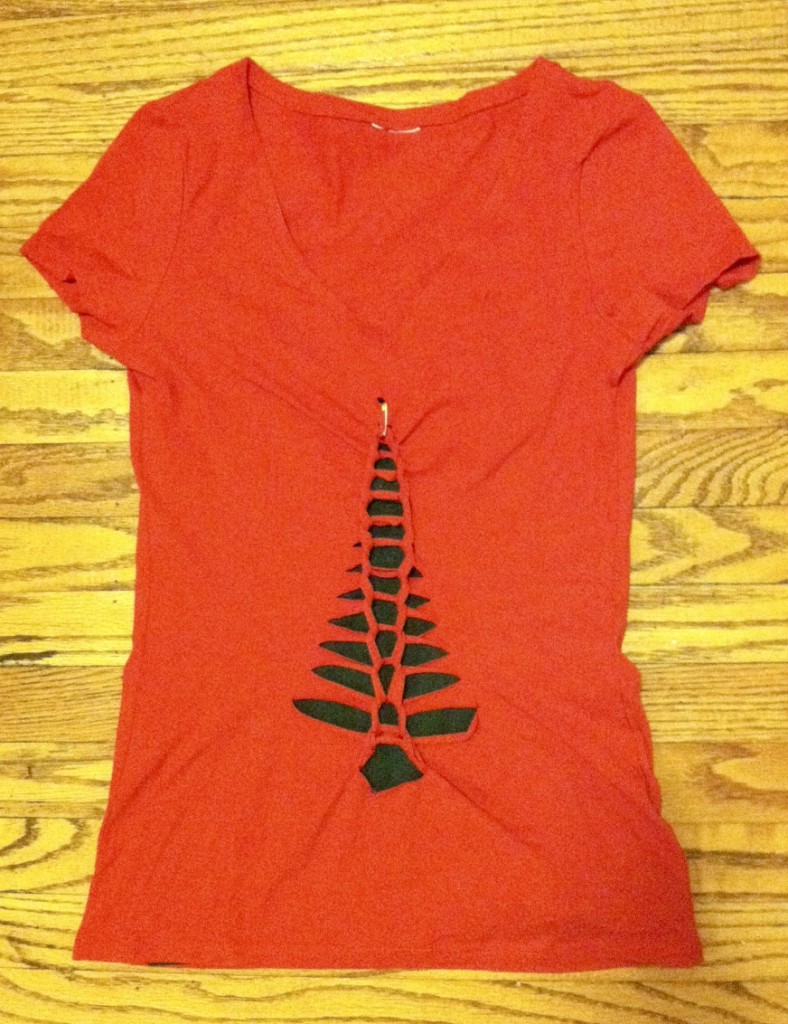
6. …to the top! Safety pin the second-to-last loop through the top snip. Tuck the safety pin inside so it shows less, or embrace the shiny bit of sparkle. Or, for a little more flair, trim your tree with a personalized 1″ round pin (replacing the safety pin).

holiday shirt finish generation-t.com

7. Try it on. Then….Go sing carols! Bake cookies! Replace the safety pin at the top with a sparkly brooch so you have a shining star up on the highest bow!

Holiday Tree-Shirt finish 3 generation-t.com

homemadeholiday101logo

[ 5 Comments | Posted on December 2nd, 2013 ]

How To: Advent Calendar T-shirt!

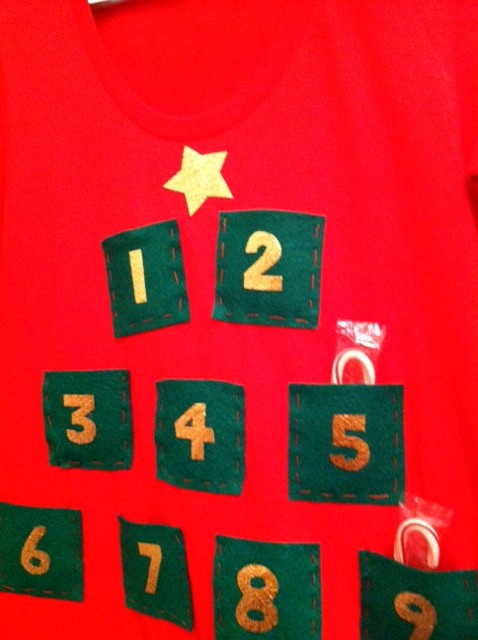
This project comes courtesy of my very talented and party-hopping younger sister, Ariana, who attended a very special holiday gathering this month in the Bay Area at which attendees don’t just wow with sparkly seasonal cocktail dresses — they costume it up. And not just sexy Santas and holiday carolers, but as, say, a dreidel, Nutcracker ballerinas, or the entire cast of Charlie Brown’s Christmas!

The event is called the Elf Party. It was originally started as a party among friends and has since grown into a huge fundraiser for children in need — not to mention a very popular event. Tickets sold out in just 30 minutes this year!

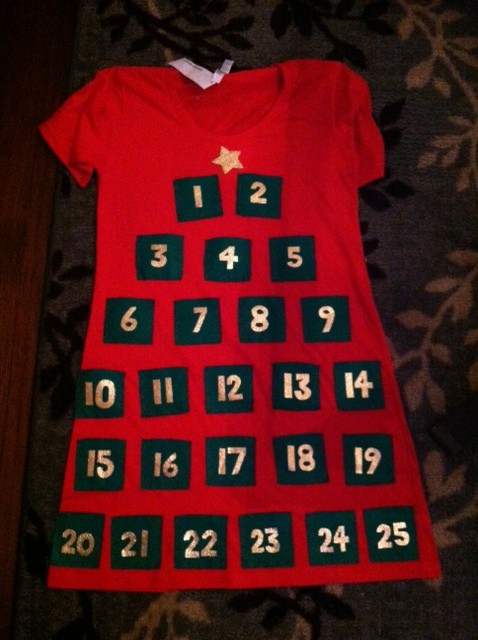
Needless to say, Ariana needed to dress to impress, and when we were having a crafty consult, I suggested that she be an advent calendar–a wearable variation on the “Final Countdown” pocketed calendar (project #35) from Generation T: Beyond Fashion — complete with pockets full of treats! And so she set to work…

Materials:

-Plain tunic dress or long T-shirt (in red or green for Christmas or blue or white for Hanukkah; sample is from American Apparel)
-2 to 3 sheets of craft felt (in red or dark green for Christmas or blue or white for Hanukkah)
-Fabric scissors
-Pen
Tulip Fashion Glitter Shimmer Transfer Sheets
-All-purpose scissors
-Pressing cloth
-Iron
-Straight pins
-Treats (individually wrapped mini candy canes and other hard candies work well–depending on how long you’ll be wearing the outfit, keep in mind that body heat can melt Hanukkah gelt or other chocolates!)

Make it:

1. Measure and cut about twenty-five 3″ by 3″ squares of felt (depending on the number of pockets you’d like).

2. Trace or draw the numbers 1 through 24 (or 25), on the glitter transfer sheets. Note: Trace numbers 1 through 12 for the twelve days of Christmas, or 1 through 8 for the eight nights of Hanukkah, and so on. (Optional: If you’re going Christmas-themed, trace and cut a star to place at the top of the arrangement.)

3. Cut out the numbers and/or shapes.

4. Following the instructions on the packaging, peel the clear layer off the top of the glitter numbers and arrange them glitter side up on each felt square. Then press the numbers on the squares with a pressing cloth and a warm iron.

5. Lay the tunic flat and arrange and pin the squares onto the front. Thread the needle with contrasting or matching thread and use a running stitch or backstitch to sew around the two sides and the bottom of each square to complete each pocket.

6. Remove the pins, try on the tunic, and fill up those pockets with treats!

[ 1 Comment | Posted on December 6th, 2011 ]