Posts Tagged ‘DIY Halloween costume’

DIY Toothy T-shirts

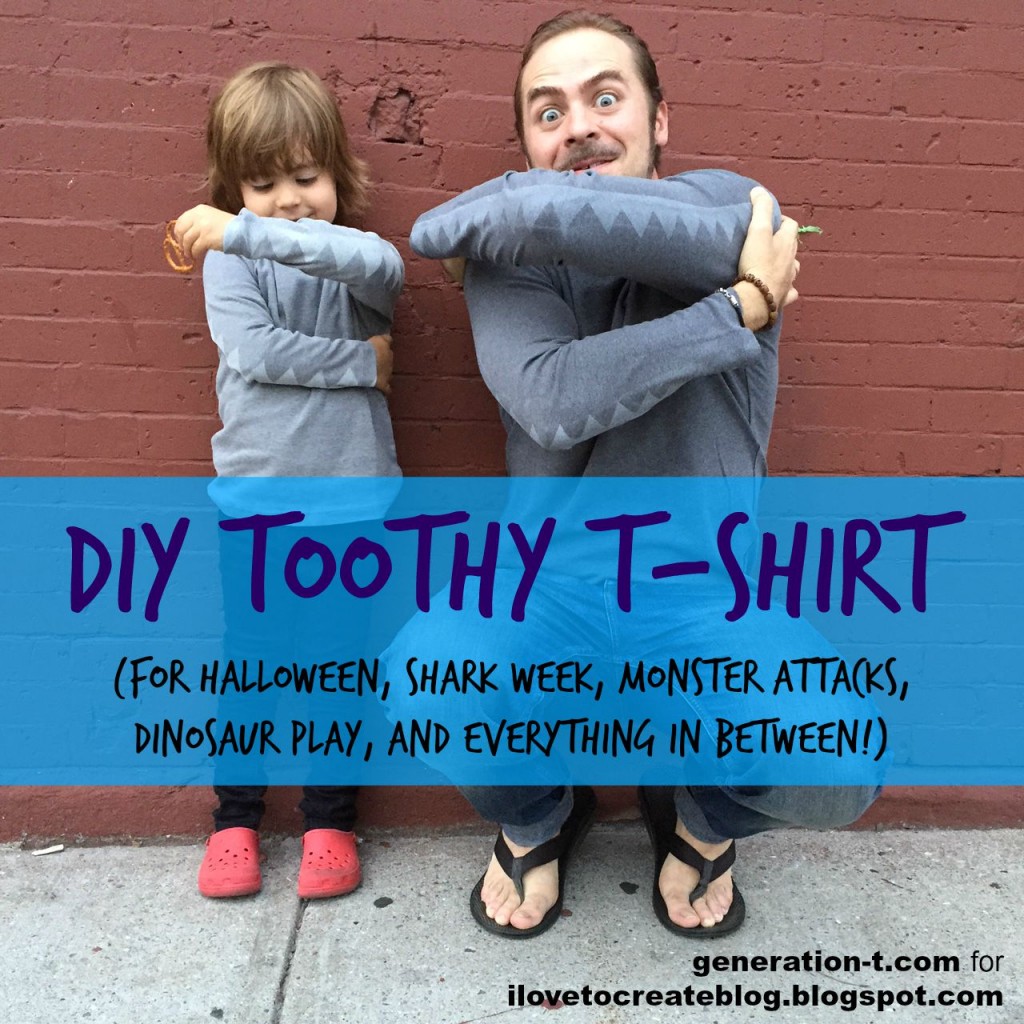
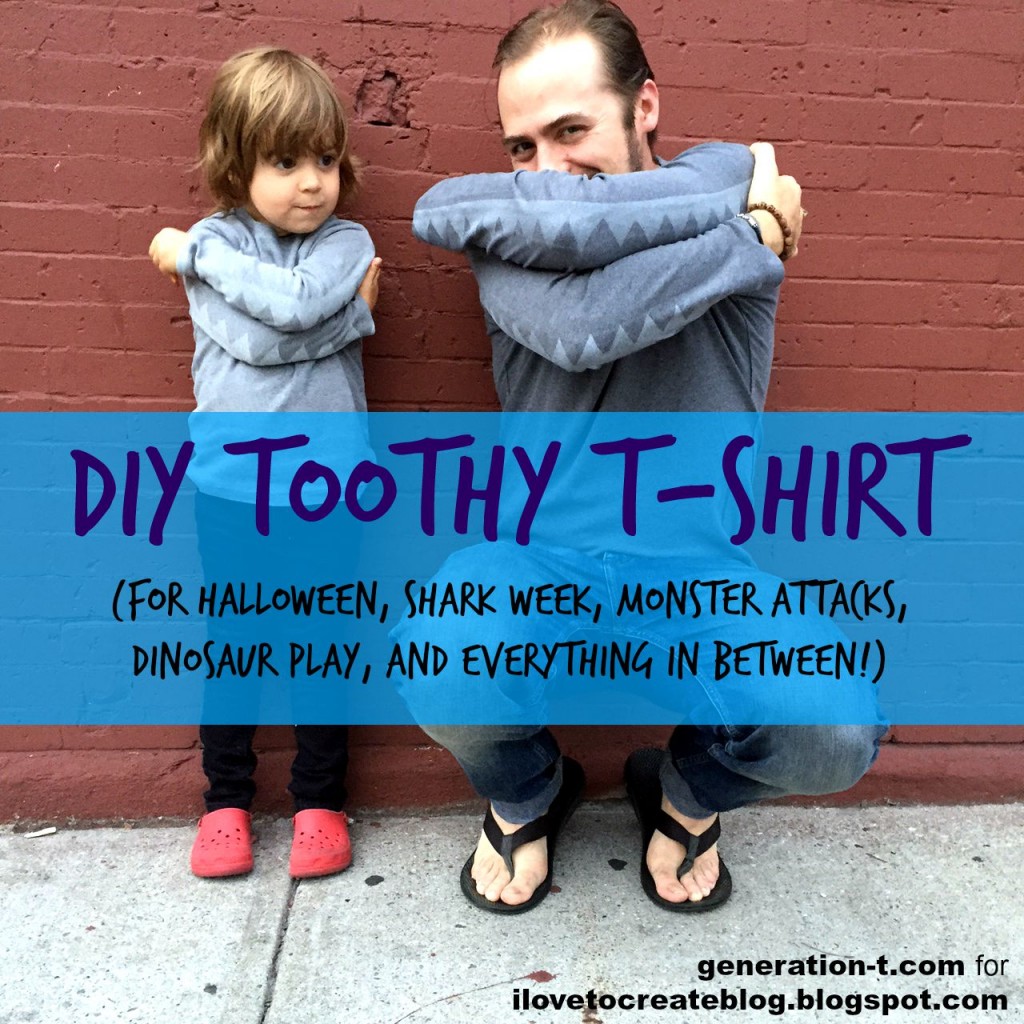
Whether you’re celebrating Shark Week, looking for a rainy day activity, or in search of a costume that even kids who aren’t into wearing masks can get behind, this toothy long-sleeved T-shirt is the ticket. Far from being holiday-exclusive–bust out your shirt any time you’re playing a spirited round of “Top o’ the Food Chain.” Toothy T-shirt generation-t.com

I stuck with gray, white, and silver to summon my boys’ inner sharks, but you could easily adapt your color palette to include dragons, dinosaurs, or even a Gruffalo (and, it should be noted, it can be made in multiple sizes)!
megan-nicolay-blog-footer

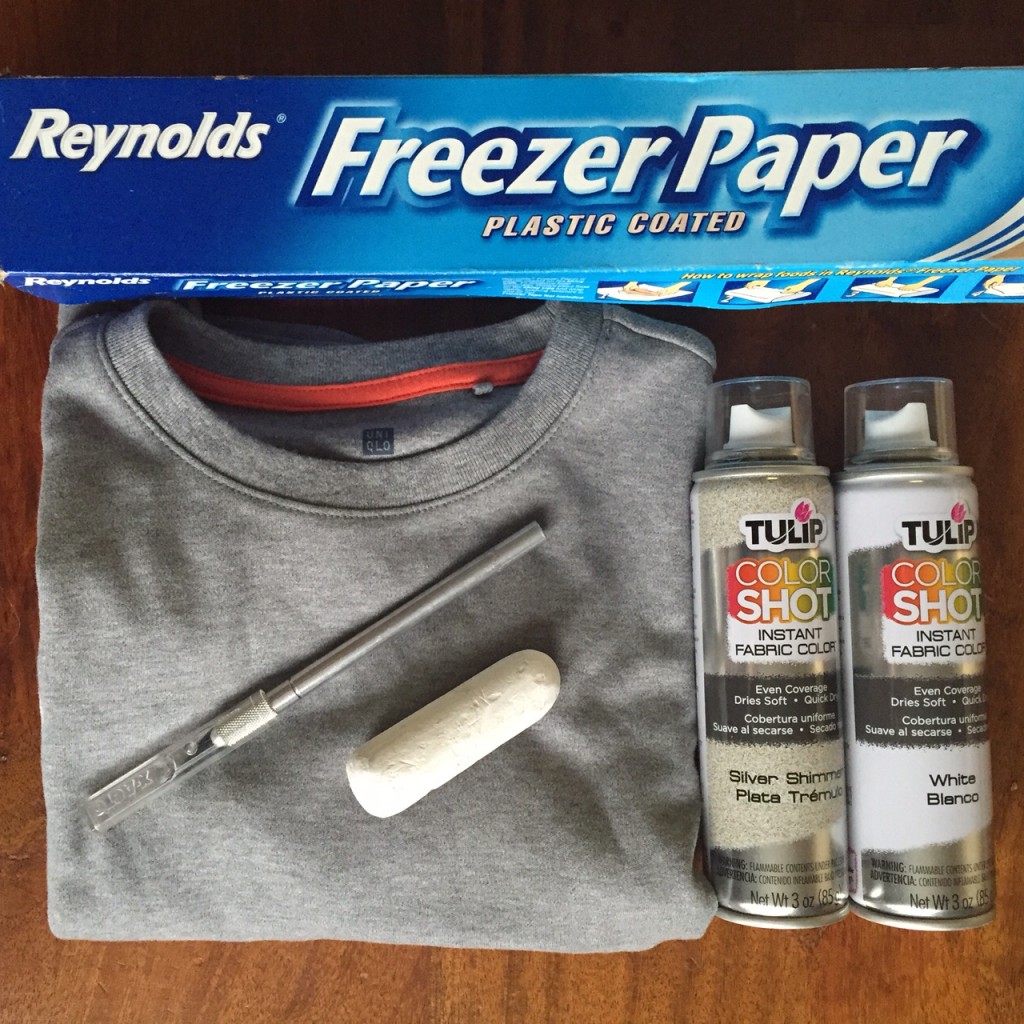
Materials:
-Long-sleeved T-shirt (in a plain color; I chose gray)
-Chalk or disappearing ink fabric pen
-Freezer paper
-Pen or pencil
-Craft knife and self-healing cutting mat
-Iron
Tulip Color Shot Instant Fabric Color (fabric spray paint; I chose white and silver)

Toothy T-shirt materials

Make it:
1.
Have the intended recipient try on the shirt. Placing opposite hand on opposite shoulder, have him/her line up his/her elbows. Use chalk or a disappearing ink pen to mark an upper and lower set of teeth along each arm. Remove the T-shirt and set it aside.

2. Measure the length of one shirt sleeve.

3. Draw and cut a zigzag line the length of the sleeves on freezer paper to create a teeth template. Draw and cut a second template for the opposite sleeve.

Toothy T-shirt 1-3 generation-t.com

4. Lay the T-shirt flat, line up the freezer paper template with the chalk markings from step 1, and use a warm iron to press the template onto each sleeve. (Use additional freezer paper to mask other parts of the shirt that you don’t want painted.)

5. Outside, or in a well-ventilated area, spray Tulip Color Shot Instant Fabric Color. Let dry for 5 minutes, then spray again. Let dry completely.

6. Have the intended recipient(s) try on the shirt, fold up his/her arms, and CHOMP away.Toothy T-shirt 4-6 generation-t.com

Toothy T-shirt3 generation-t.com

[ Comments Off on DIY Toothy T-shirts | Posted on September 23rd, 2015 ]

10 Quick & Easy T-shirt Halloween Costumes III

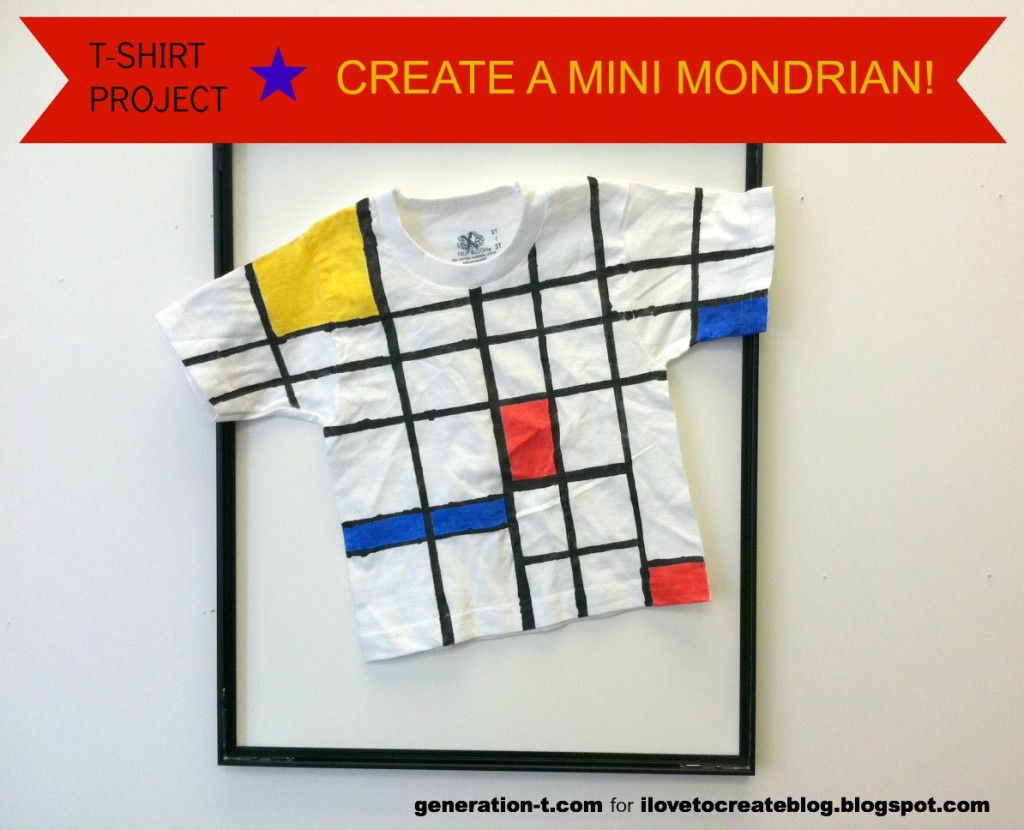
Well, I’ve started a tradition, serving all of you would-be Halloween revelers who are down to the wire when it comes to your costume. For the third year running (see year 1 and year 2 here), we have another 10 quick-and-easy T-shirt-based Halloween costumes. From the literary to the painterly, nerdy to the nostalgic, from pop culture to popcorn. In most cases, all you need is a blank T-shirt and some fabric paint or markers. First up, make a masterpiece in just a couple of hours — grab a frame and hit the trick-or-treating circuit!

MondrianFinish generation-t.com

megan-nicolay-blog-footer-1

MONDRIAN MASTERPIECE T-SHIRT

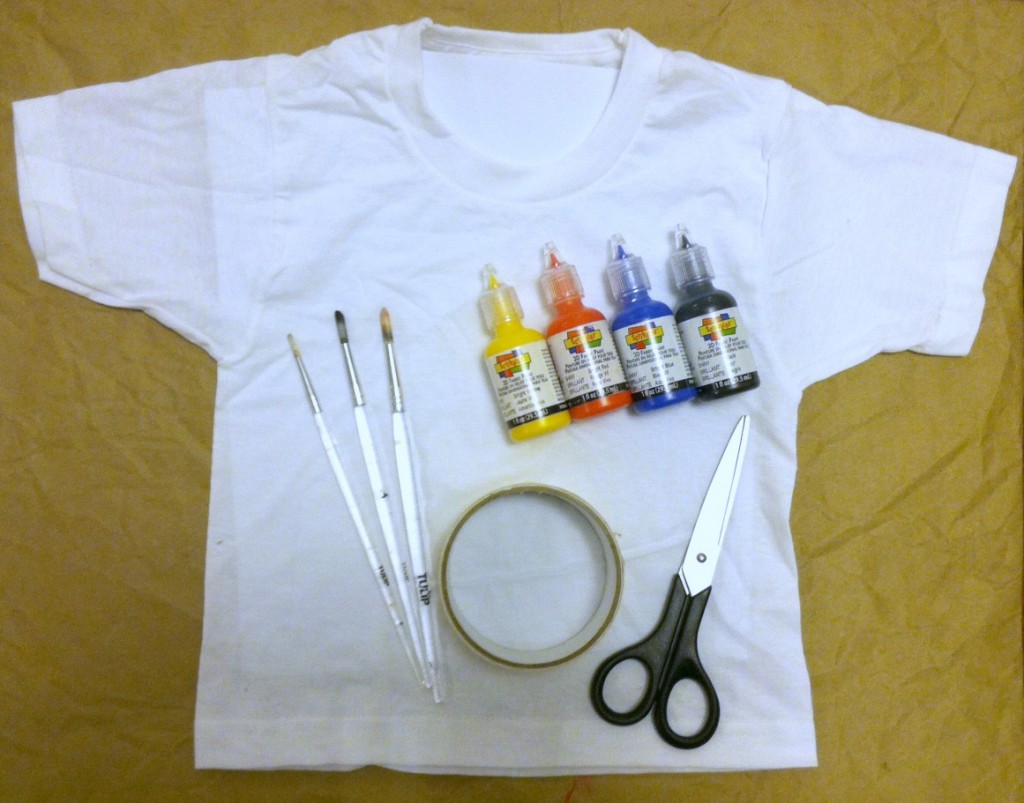
Materials:
-Plain white T-shirt (since I’m making a Mini Mondrian, it’s size 2T)
Scribbles 3D Fabric Paint (in black, red, blue, and yellow)
Tulip Fabric Paintbrushes
-Scissors
-Masking tape
-Scrap paper (to insert between the layers of the T-shirt in order to prevent the paint from seeping through)
-Newsprint paper or similar (to protect your work surface)

MondrianMaterials generation-t.com

Make it:

 1. Visit the iLoveToCreate blog for the the full Mondrian Masterpiece Tutorial. See below for 9 more ideas for quick costumes!


AND NOW, WITHOUT FURTHER ADO, HERE ARE 10 COSTUMES TO MAKE WITH T-SHIRTS (starting with the MONDRIAN MASTERPIECE)

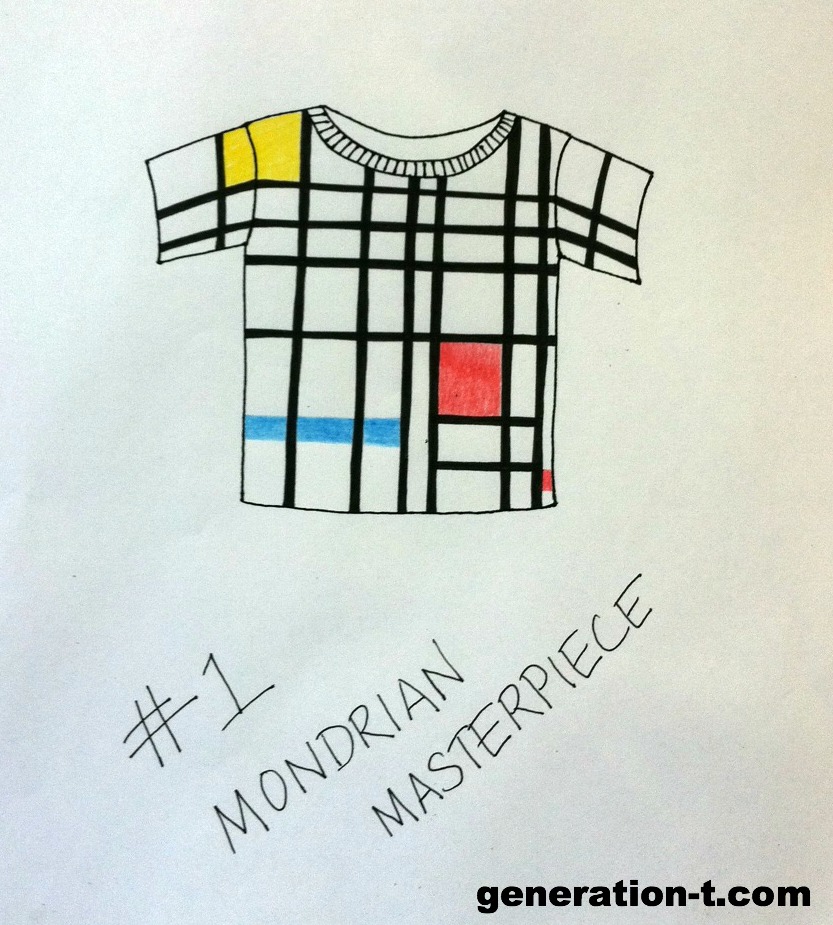
#1 Mondrian Masterpiece. Create a masterpiece! Or wear one inspired by the works of Piet Mondrian.
1Mondrian generation-t.com

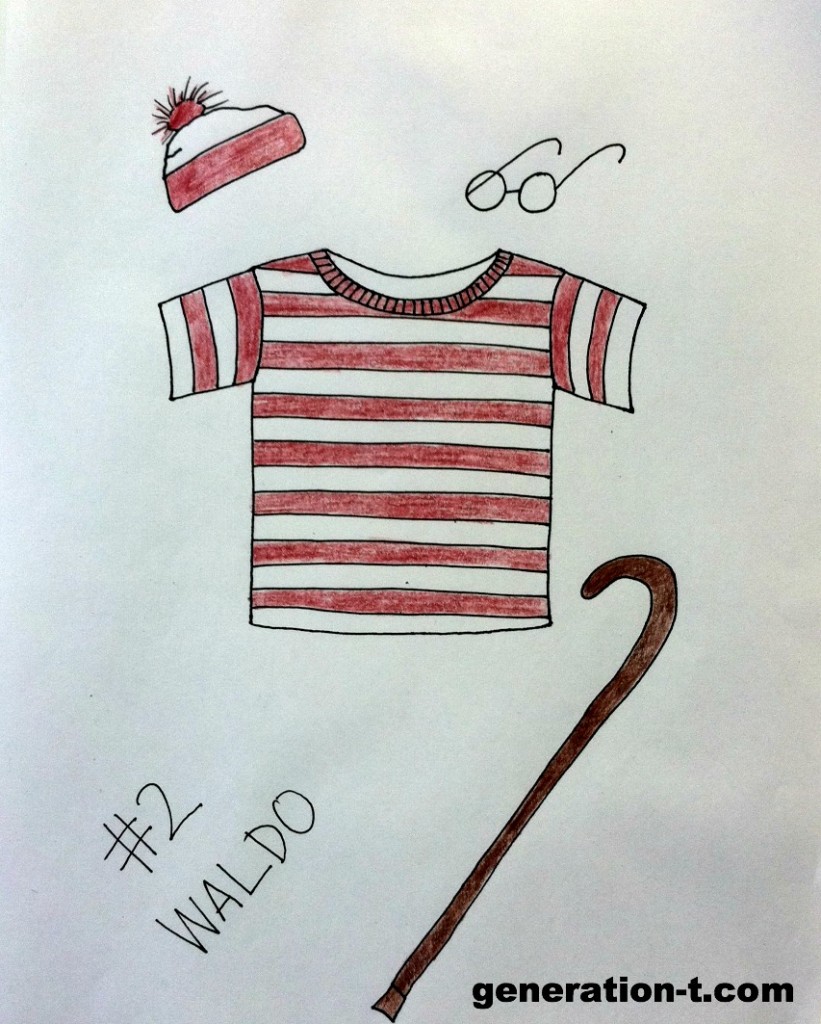
#2 Waldo. Dress in stripes to be the title character (or his pal Wanda) from the children’s classic Where’s Waldo?  (You know, before Harry Potter came along to claim those round specs). Just pair with denim.
2Waldo generation-t.com

#3 Popcorn. There are plenty of a baby costumes for freshly popped popcorn (parents as popcorn vendors), but this T-shirt rendition is limited only by the size of your T-shirt.
3Popcorn generation-t.com

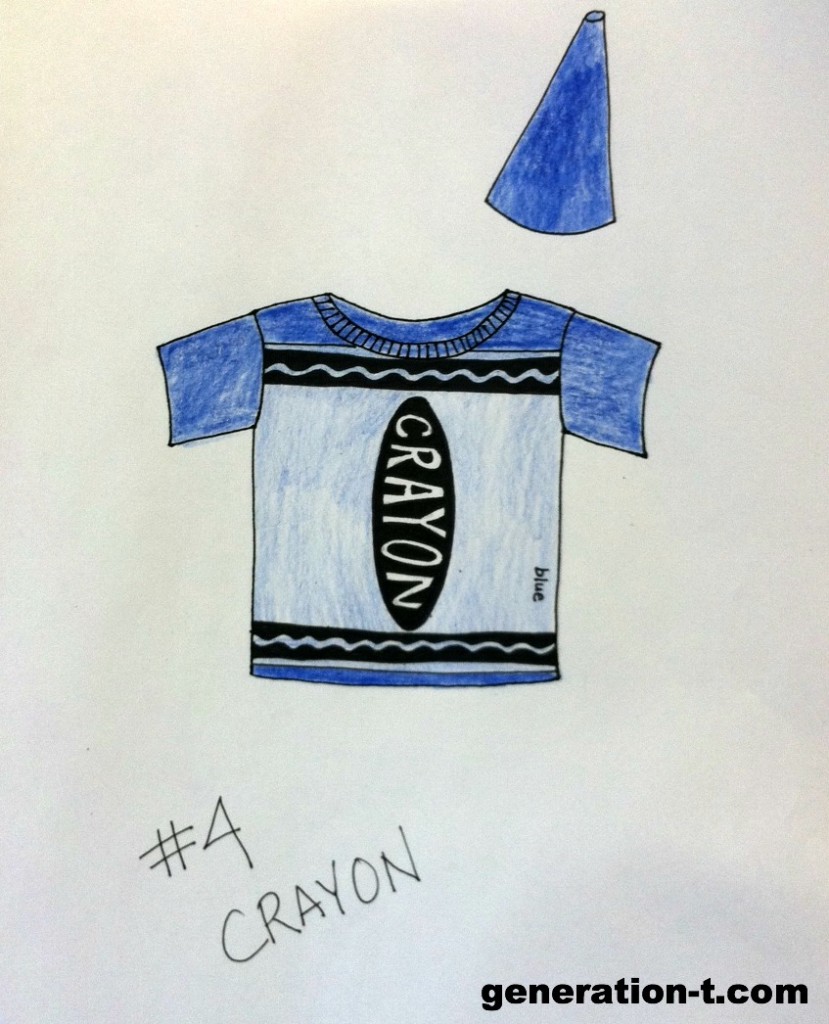
#4 Crayon. Go solo as a blue crayon (don’t forget the sharpened top of the crayon!) or grab your friends and make a whole box of crayons.
4Crayon generation-t.com

#5 Mickey Mouse. Recognizable a mile away, add a pair of ears to top off this costume (and some yellow sneakers wouldn’t hurt either!). Swap out the bottom of the T-shirt for red with white polka dots for Mickey’s main squeeze, Minnie. 5Mickey generation-t.com

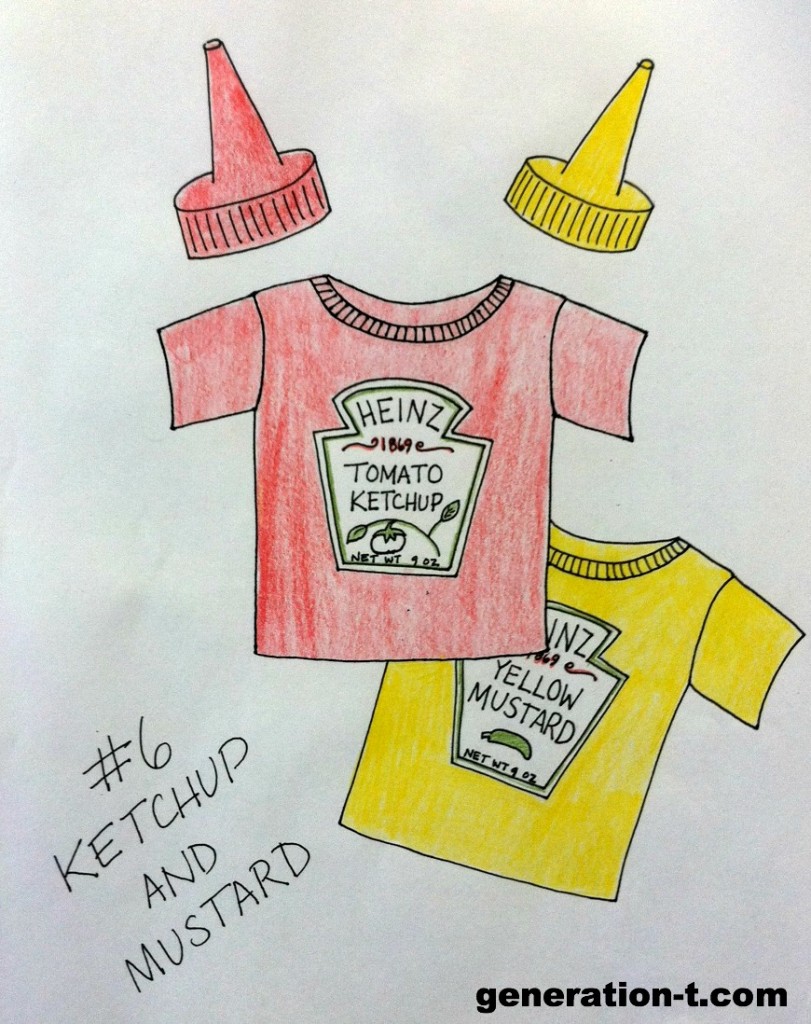
#6 Ketchup and Mustard. For couples, roommates, or other easily paired people, it’s everyone’s favorite condiments!
6KetchupMustard generation-t.com

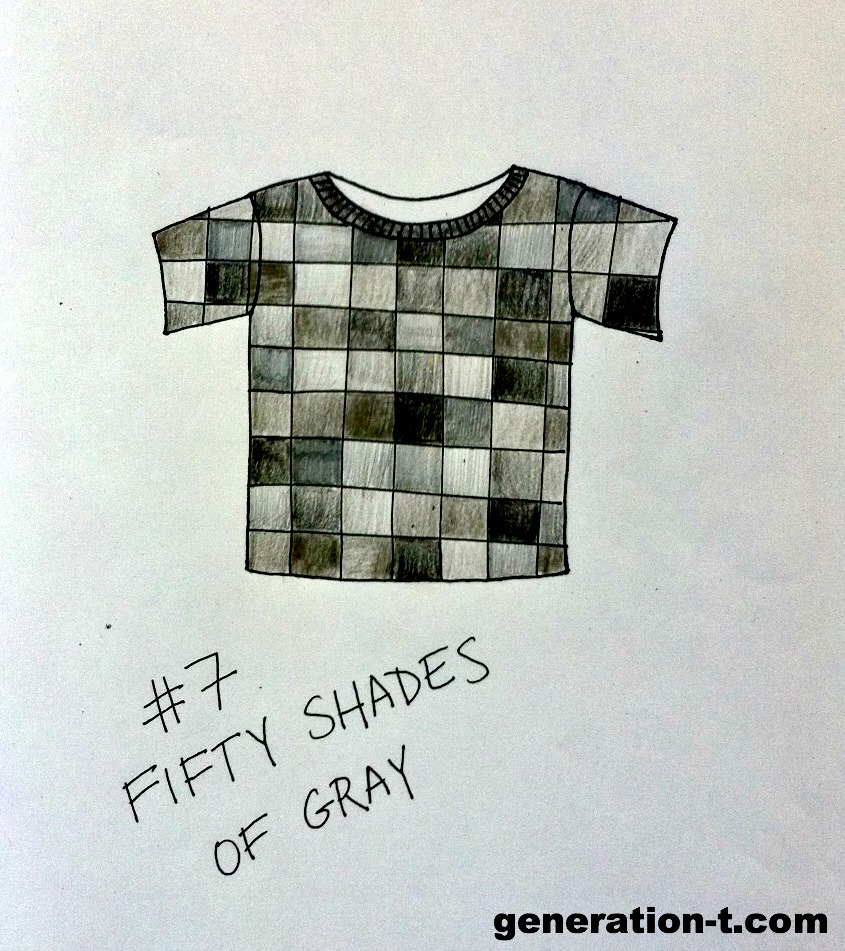
#7 Fifty Shades of Gray. A tame version of Fifty Shades of Gray that you could wear around the office. Alternatively, attach the actual Pantone color swatches all over the surface of the T-shirt.

7FiftyShadesGray generation-t.com

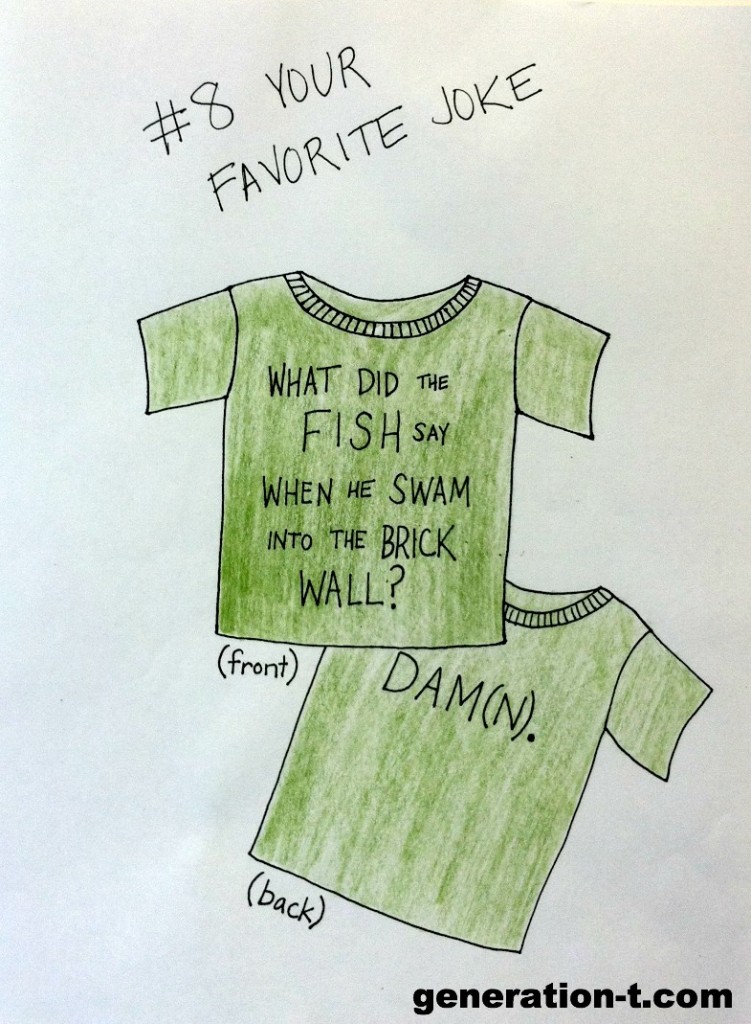
#8 Your Favorite Joke. I used my all-time favorite joke. But you should insert your own: Setup on the front, punchline in back!8Joke generation-t.com

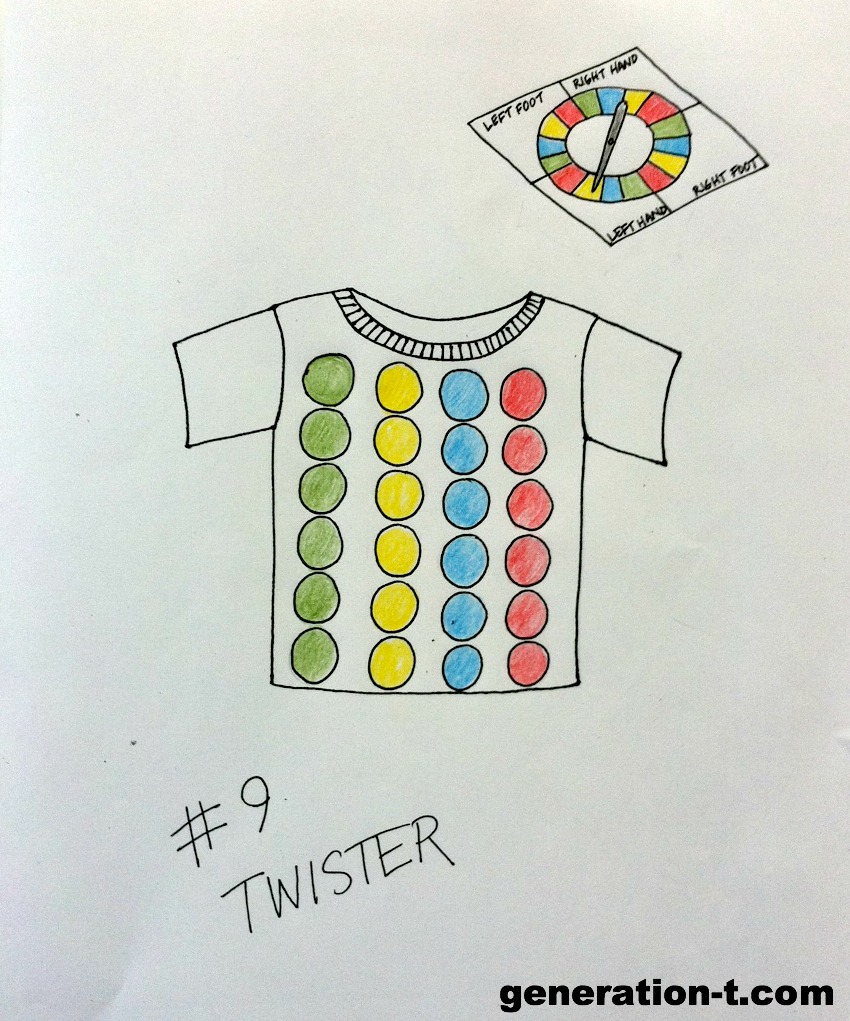
#9 Twister. Twister falls into that beloved classic family game category with the likes of Sorry!, Scrabble, and Pictionary. Fashion the spinner into a headpiece to complete the look!
9Twister generation-t.com

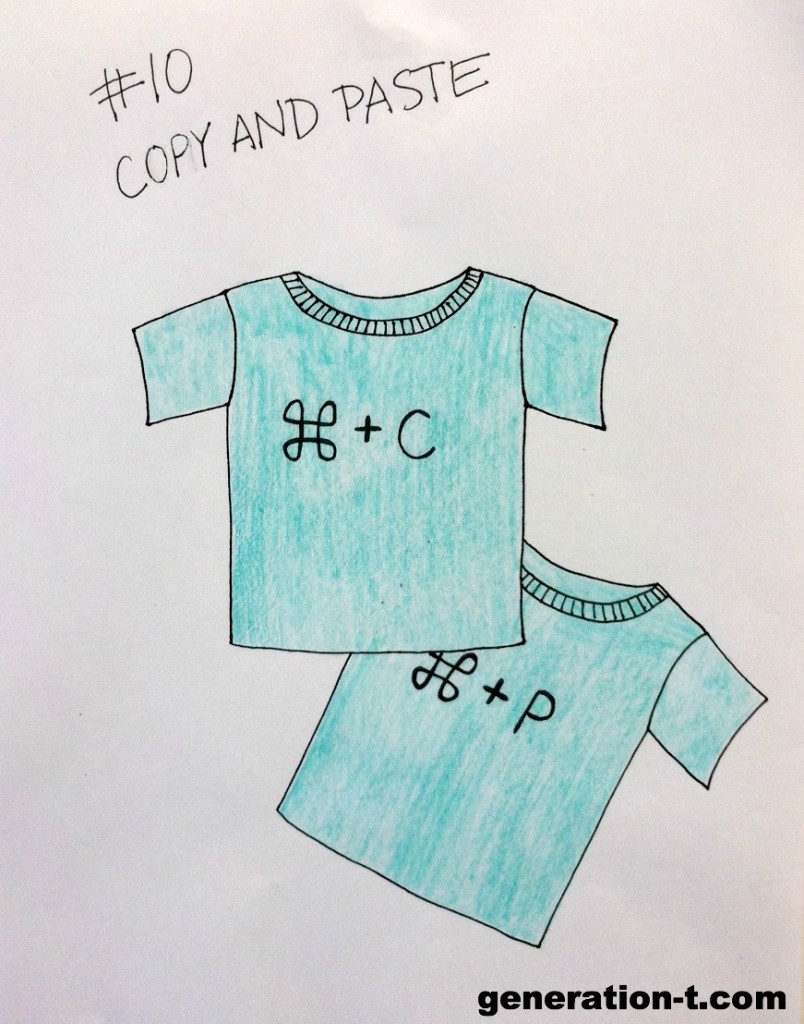
#10 Copy and Paste. Nerd alert! Perfect for twins (or bestie lookalikes), “Copy” and “Paste” (for Macs). Slight modifications (Ctrl + C and Ctrl + V) should be made for PCs.

10CopyPaste generation-t.com

Safe and happy haunting!


[ 1 Comment | Posted on October 29th, 2013 ]

Harold and the Purple Crayon Halloween!

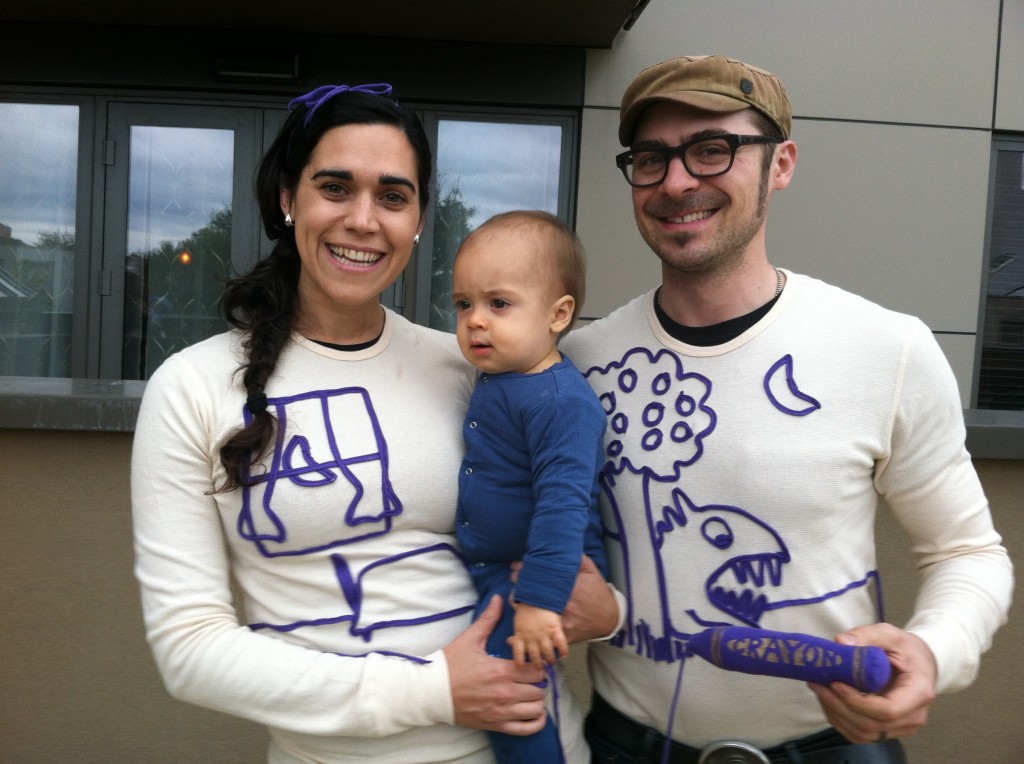
Baby’s first Halloween is a tough one — there’s a lot of pressure to make it memorable (even though he won’t remember it at all) and it’s also probably the only time that he won’t have an opinion about the costume. About two months in, Mr. T and I discovered our baby had not one, but two literary doppelgangers, and I promised that if he was still anywhere near as bald as he was at the time, we would honor one of his likenesses for his first Halloween. So between Crockett Johnson’s timeless “Harold” and the holiday-appropriate Alfred Hitchcock, Harold and his violet-hued crayon won out. Let’s start with the inspiration (above, at two months old). Wrinkled brow, giant cheeks, turned up nose. Pretty uncanny, right?
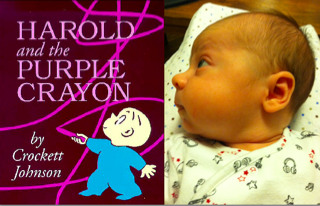
And please forgive the inconsistency in the photos…I made the costume over several late nights!

Materials:
-purple T-shirt (to use for parts)
-long-sleeved off-white T-shirt (or more, depending on how many “drawings” Harold will make)
-blue sleeper (this was worn as the top layer over 2 other sleepers, for warmth!)
-fabric scissors
-ballpoint pen
-ruler
-craft knife and cutting mat
gold fabric spray paint
freezer paper
-warm iron

-copy of Harold and the Purple Crayon by Crockett Johnson (for reference! and for reading!)
disappearing ink fabric marking pen
-sewing machine with matching thread
-needle and thread (for hand sewing)
-fiber fill
craft jingle bells (optional, to make the crayon rattle a bit)

Make it (Harold’s Purple Crayon):
1.
Use the ruler and ballpoint pen to mark out a stencil for the stuffed crayon.
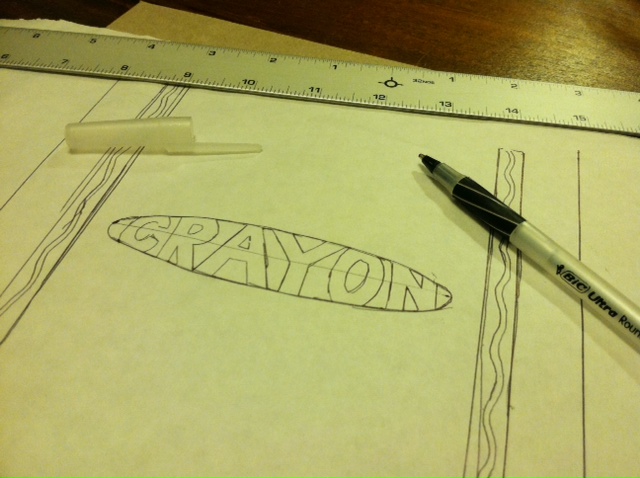
2. Use the craft knife and cutting mat to cut out the stencil.
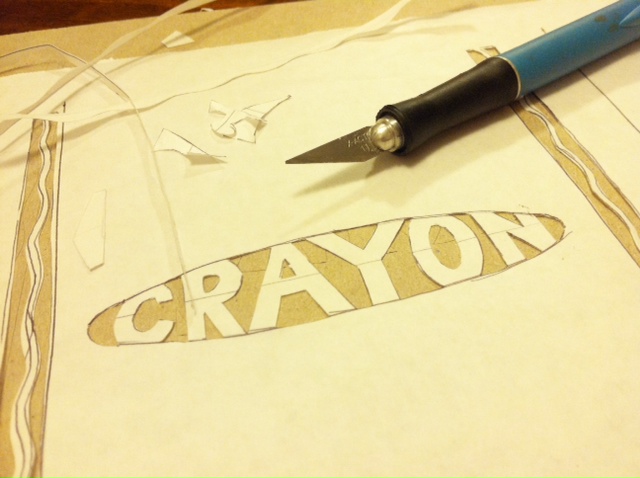
3. Iron the stencil onto a scrap from the purple T-shirt (I used a flattened out sleeve).
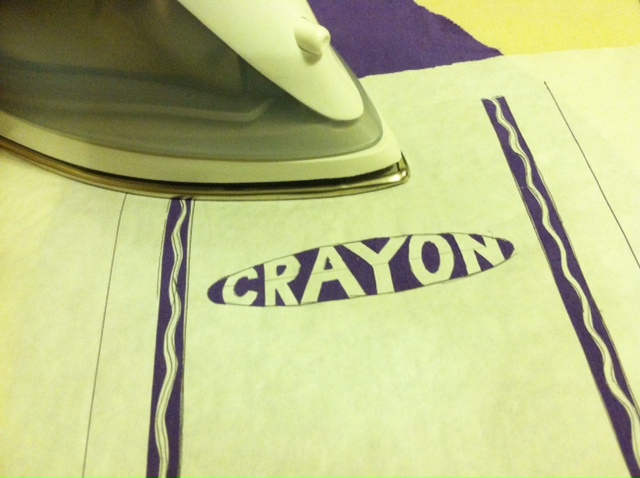
4. Use the fabric paint to spray over the stencil, making sure to mask the areas you don’t want painted. (I originally was going to use black paint for authenticity, but saw this Gold Glimmer in my paint stash, and thought the high contrast would make it show up better!)
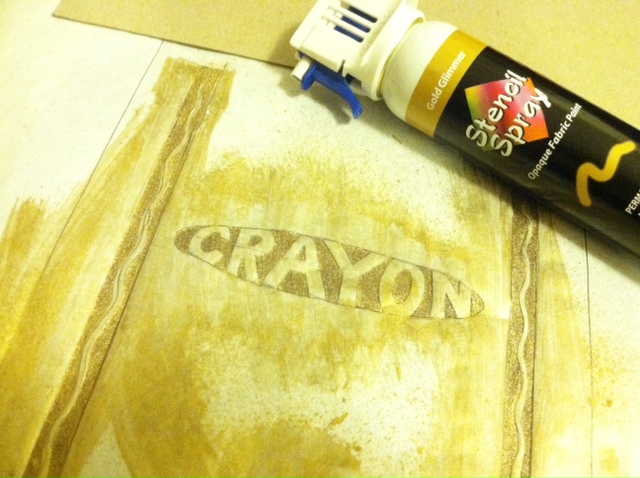
5. Let the paint dry for a minute, then peel off the stencil before letting it dry entirely. (I let the stencil sit too long on the one below, and as you can see the paint bled a bit  — so I made another one!)

6. Cut 4 to 5 additional rectangles of purple fabric to layer beneath the painted piece (to thicken the crayon wall and add structure). Cut a circle (also several layers) for the bottom of the crayon.
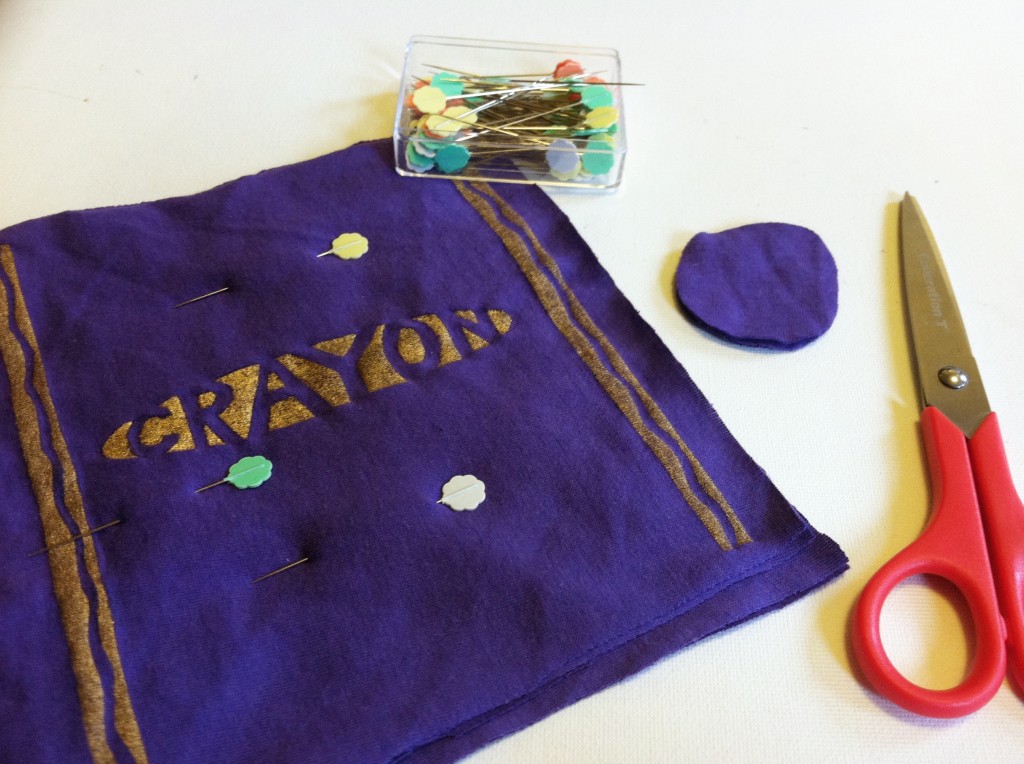
7. Fold the rectangle (all layers), right side in, and line up the paint lines. Then pin and use the sewing machine to stitch a straight line to create a tube. Make two angled cuts to help shape the point of the crayon.
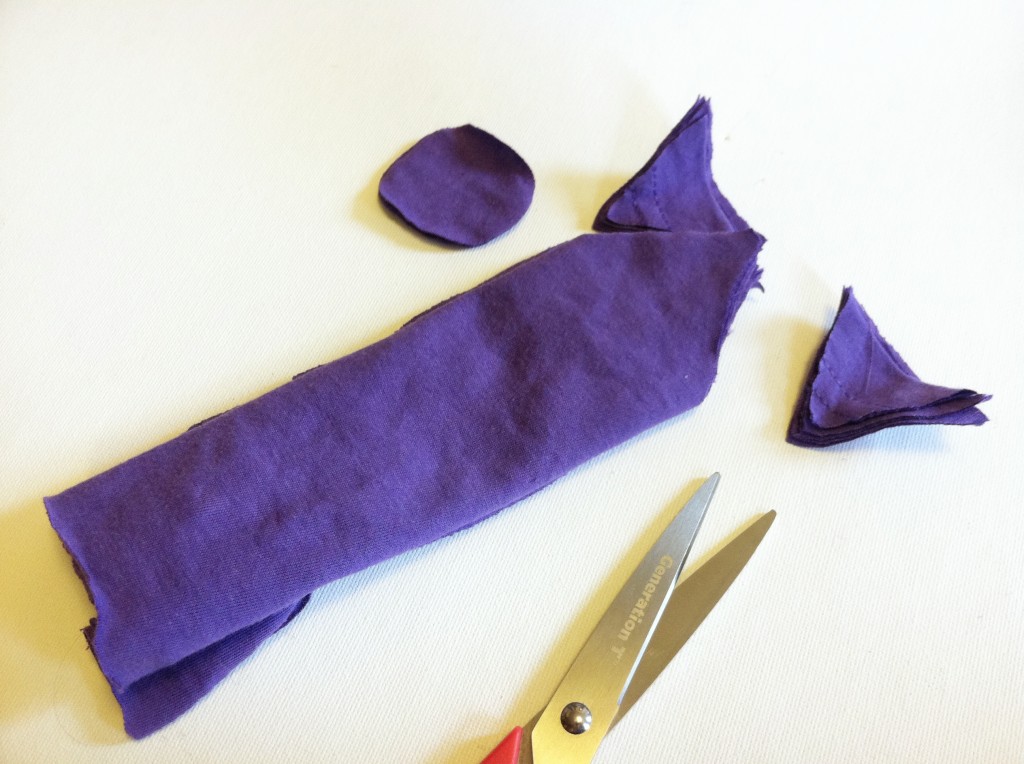
8. Cut a length of T-shirt cord and thread it inside the crayon tube, pinning it between the layers at the tip of the crayon. Stitch along the open edges at the tip (catching the end of the T-shirt cord) and turn it right side out. (The cord should appear to be a “drawing line,” extending from the tip of the crayon, as shown. Use fiber fill to stuff the crayon, and add a few bells in the center, if desired, to add a little jingle (it helped create more interest for my little guy, so he would play with it longer!).
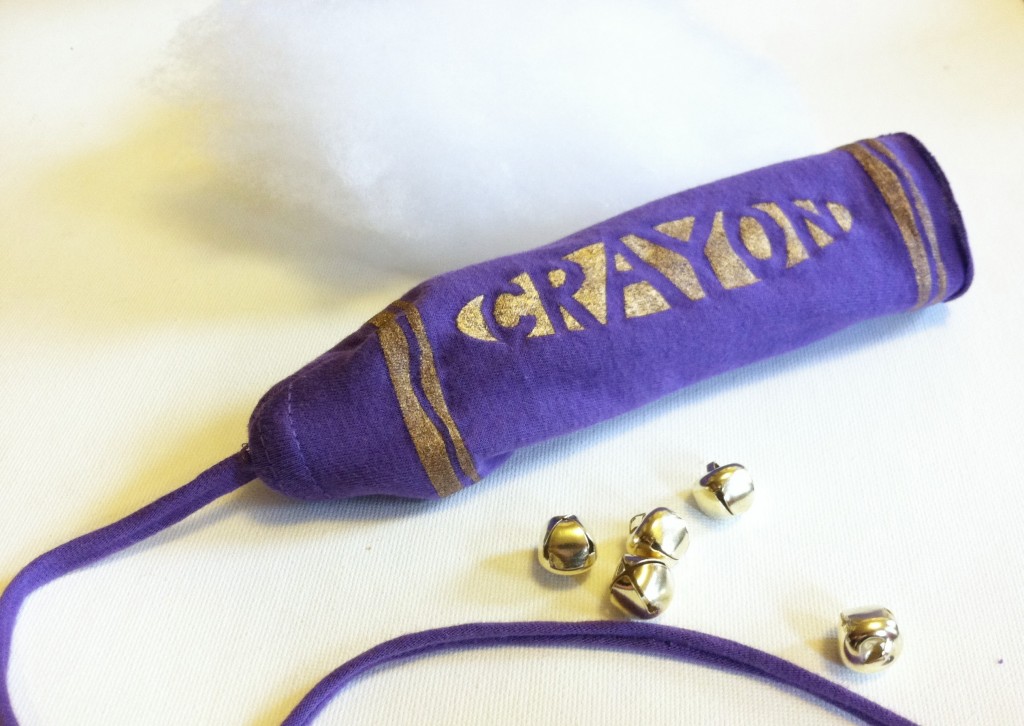
9. Tuck in the edges of the layered circle pieces, and hand-sew the end of the crayon in place.
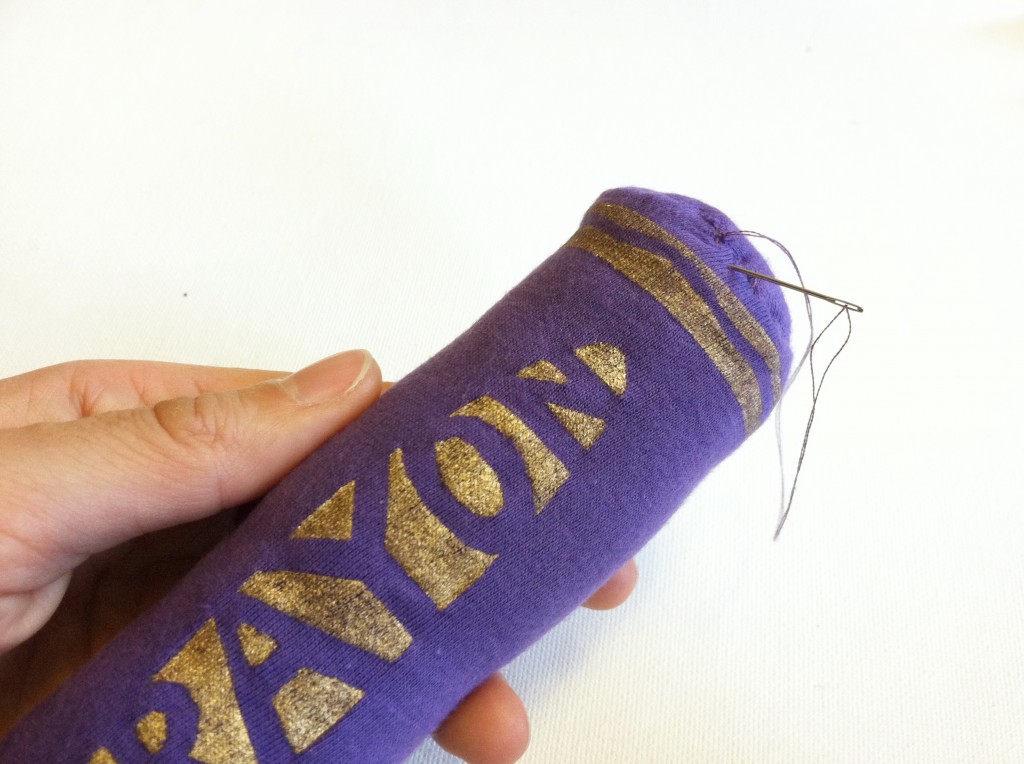
10. Trim the T-shirt cord (drawing line) as necessary.
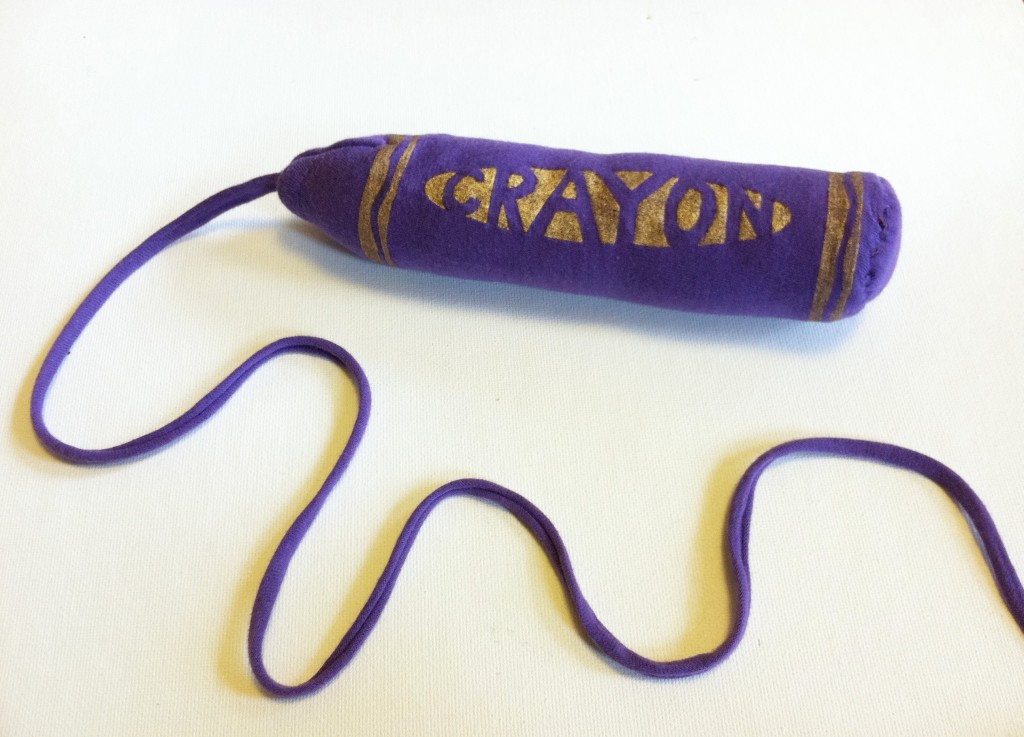
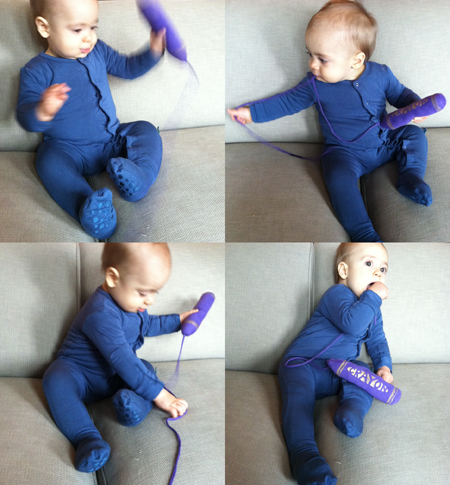
11. Harold’s costume is finished! But his drawings (aka his parents’ costumes) aren’t…
Make it (Harold’s Drawings):
1. Select a drawing from the book, and use the disappearing ink pen to sketch it onto shirt number 1. (It’s just a coincidence that the ink from the pen shows up purple before it fades!)
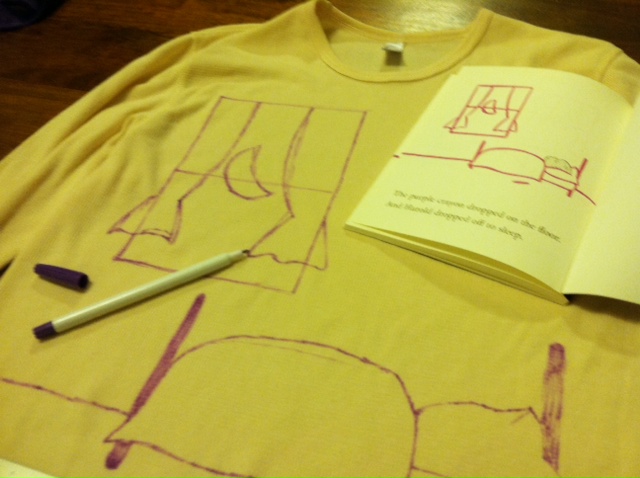
Optional: Select and sketch an image onto shirt number 2.
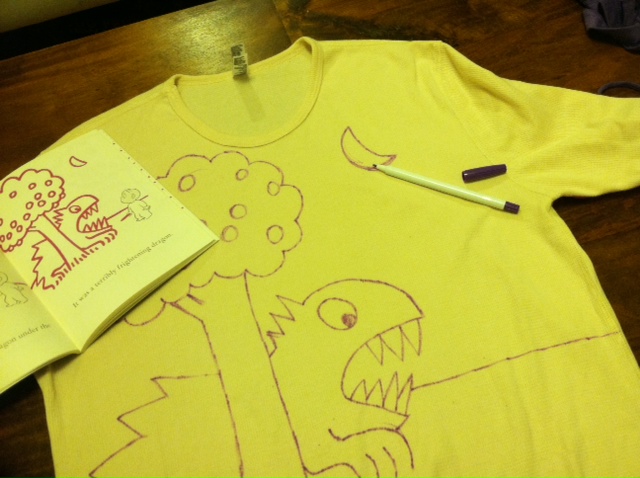
Perhaps, given the weather, I should have gone with one of these pages:
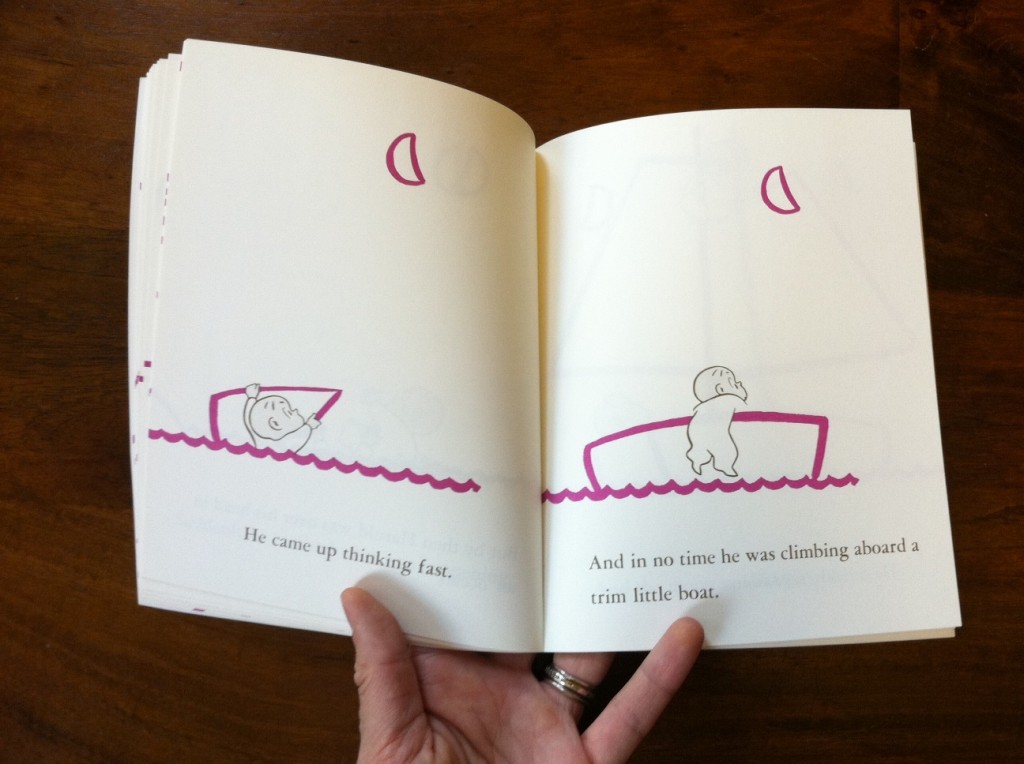
2. Begin to outline the drawings with more T-shirt cord.
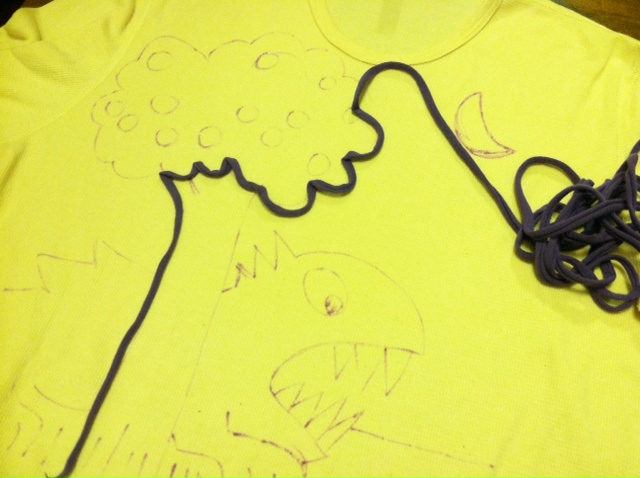
3. Use the sewing machine to carefully stitch the T-shirt cord over the sketches, piece by piece.

4. Done!
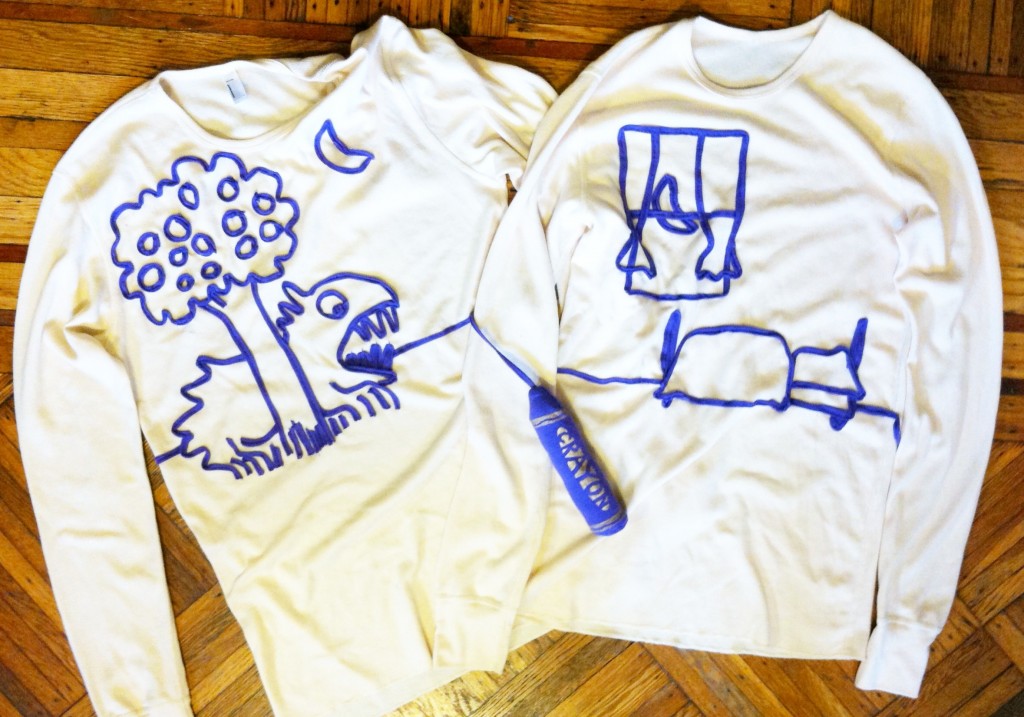
And what happens… When Grandma is unexpectedly in town for Halloween festivities? A quick online trip to Out of Print Clothing, of course, and we were able to round out the “story,” with Grandma as the cover of the book!

The best news? Less than 364 days until next Halloween. Start planning! What literary character would you dress as?
[ 14 Comments | Posted on November 2nd, 2012 ]

10 Quick & Easy T-shirt Halloween Costumes II

Following up last year’s popular list of 10 Quick & Easy T-shirt Halloween Costumes, here is another collection of ten DIY costumes on the fly. From the cinematic to the everyday, from the historical to the commercial, from the sweet to the oh-so-punny (scroll down to #10)…. But let’s start with a classic.

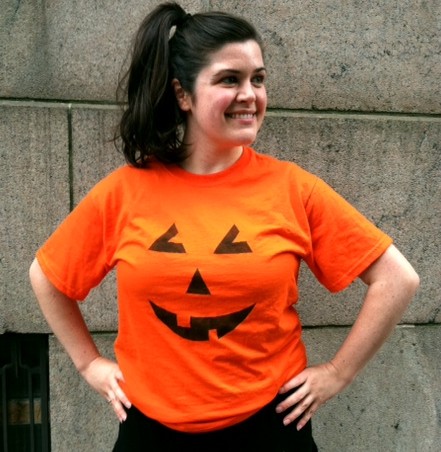
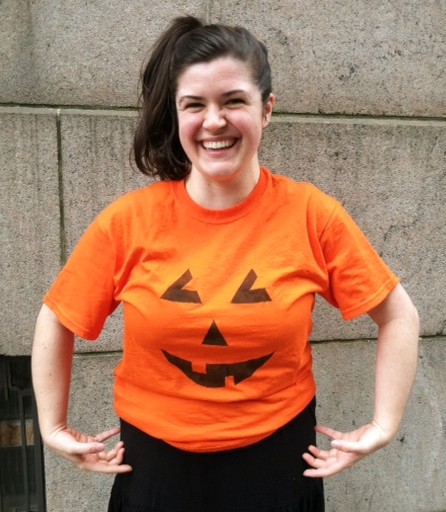
JACK-O-LANTERN T-SHIRT COSTUME

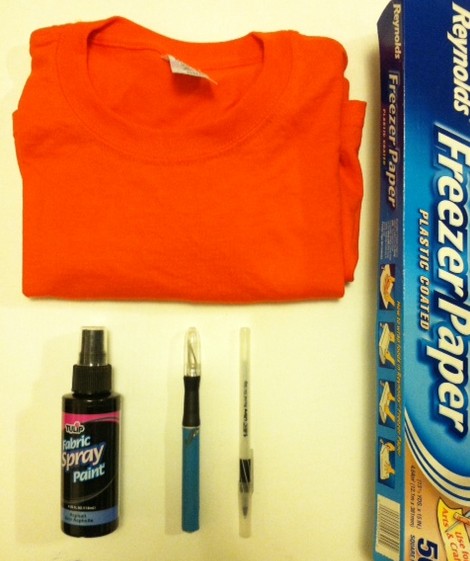
Materials:
-Orange T-shirt
Tulip Fabric Spray Paint (in black)
-Pen
-Freezer Paper
-Craft knife and cutting mat
-Warm iron
-Newsprint paper

Make it:
1.
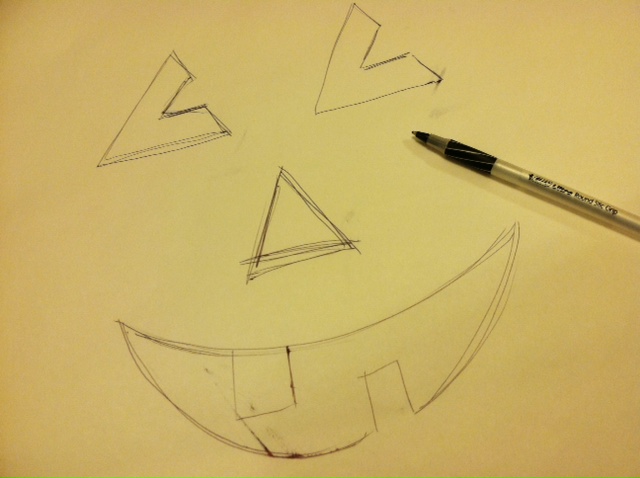
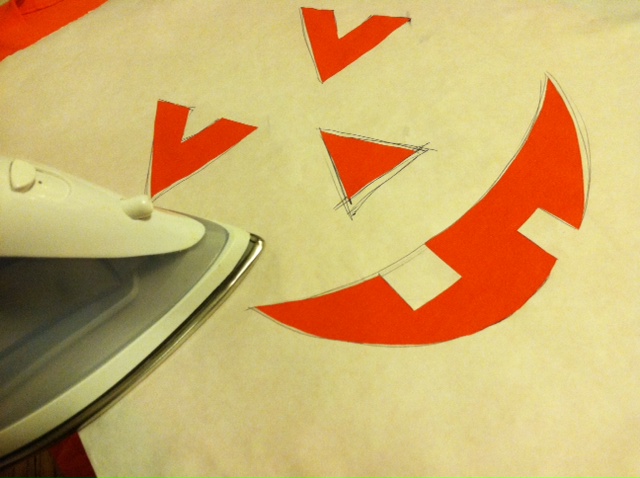
Use the pen to sketch out jack-o-lantern features on a sheet of freezer paper.

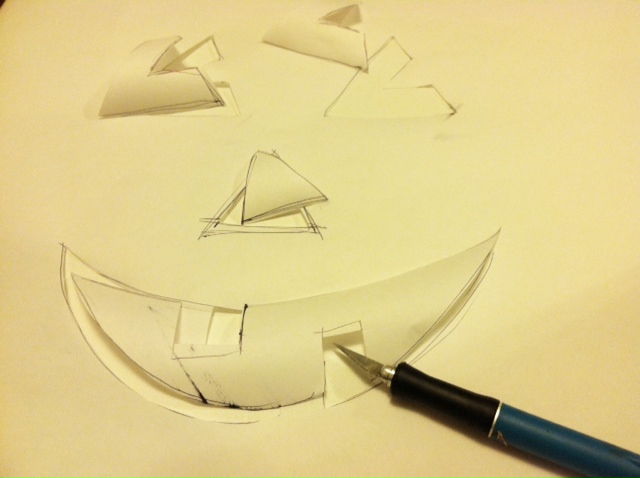
2. Use the craft knife and cutting mat to cut out the features.

3. Iron the freezer paper stencil onto the front of the T-shirt. Insert a sheet of newsprint between the layers of the shirt to prevent the paint from bleeding through.

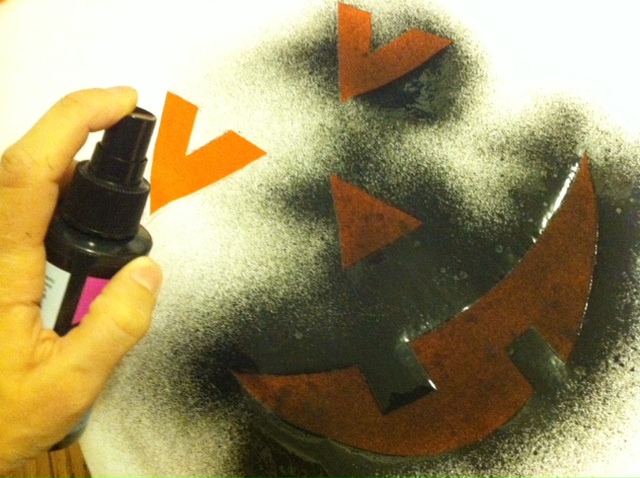
4. Mask the parts of the T-shirt that are still visible, and spray over the stencil with black paint.

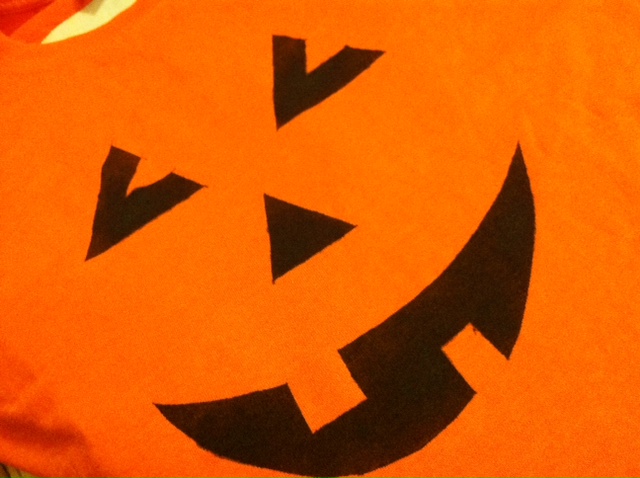
5. Let the paint dry briefly, then peel up the stencil.

6. Let the paint dry completely, then try on the T-shirt and go find a pumpkin patch to haunt!

WITHOUT FURTHER ADO, HERE ARE 10 COSTUMES TO MAKE WITH T-SHIRTS (starting with the JACK-O-LANTERN)

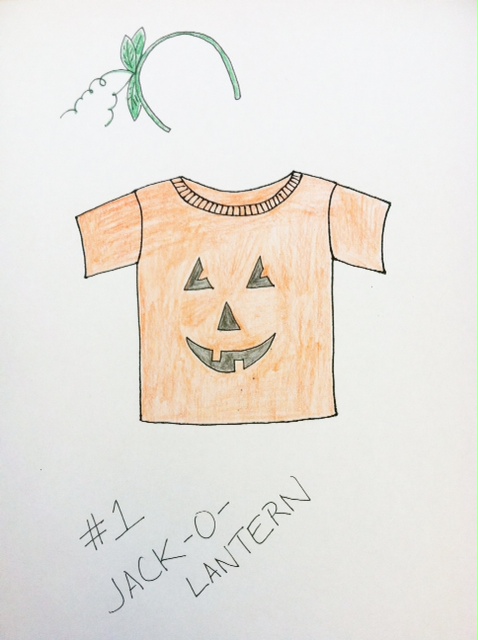
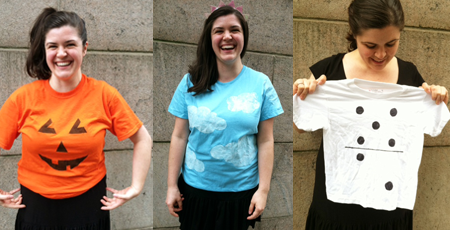
#1 Jack-o-lantern. As shown above, that pumpkin patch classic. Black paint on an orange T-shirt. Optional: Accessorize with a green vine and leaves headband.

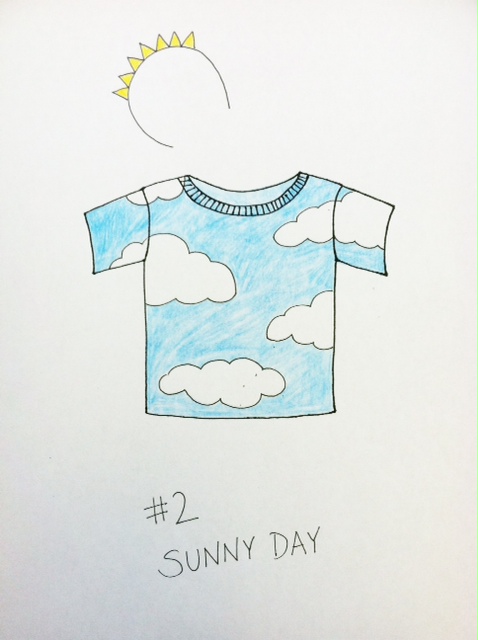
#2 Sunny day. Paint white clouds on a pastel blue T-shirt, or stick pillow stuffing on the T-shirt. Inspired by one of our readers, Emily A. (not to be confused with Emily P., our model for this post!), who used a variation of the Mohawk Mo’ Rock hat (from Generation T: Beyond Fashion) as the headpiece. We used this more recent accessory. And hey, you can always use the costume to moonlight in Ben & Jerry land.

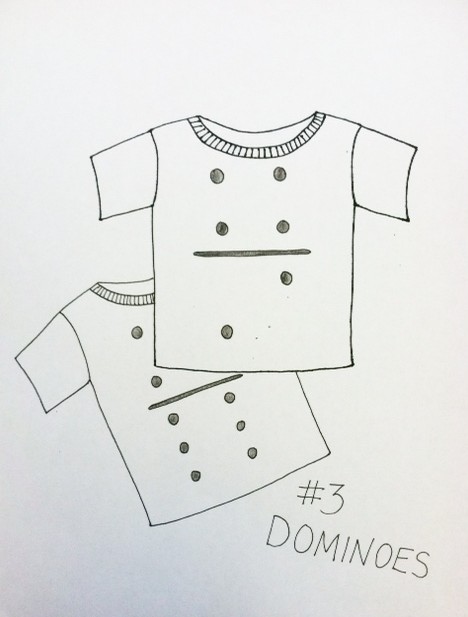
#3 Dominoes. A fun and very easy group costume (just leave the ears and tail at home so you don’t get mistaken for a dalmatian) — use black fabric paint or black permanent marker on a white T-shirt. And if you get tired at any point while wearing the costume, simply lie down adjacent or end-to-end with a matching number on  a friend’s shirt!

#4 Strawberry. Paint yellow seeds on a red shirt, and use green T-shirt scraps to fashion a stem with leaves to sit a top your head. Go solo or meet up with friends to make blueberries, watermelon — a whole fruit salad!

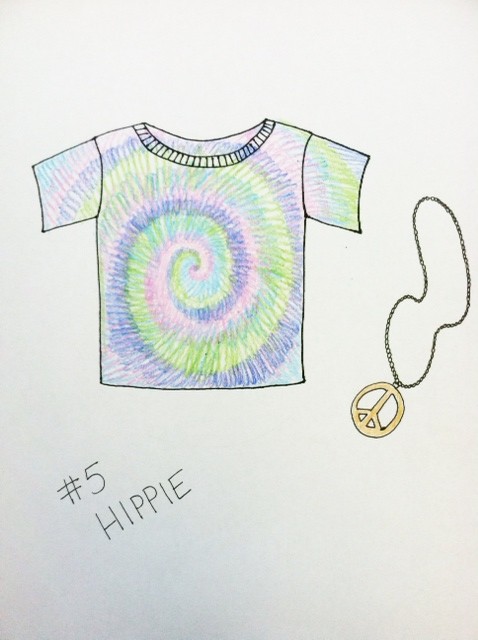
#5 Hippie. Tie-dye a T-shirt, then pair it with bell-bottom jeans, a headband, and any other . (Note: You have to schedule in additional drying time with this one.)

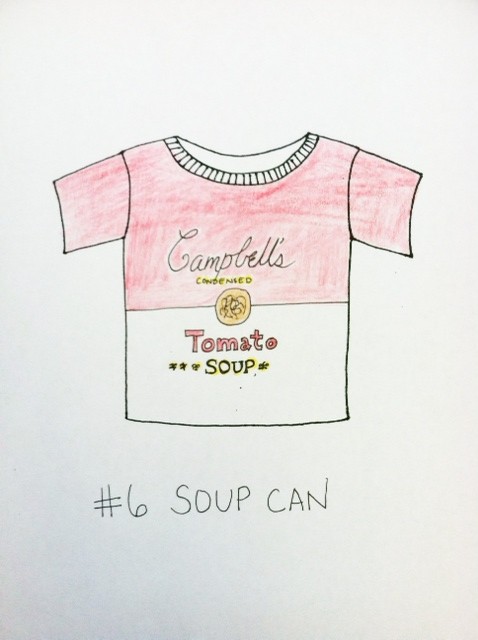
#6 Soup can. Start with a plain white T-shirt and use a black permanent marker, stencils, and red and yellow paint to embellish it. Then convince a pal to go as Andy Warhol!


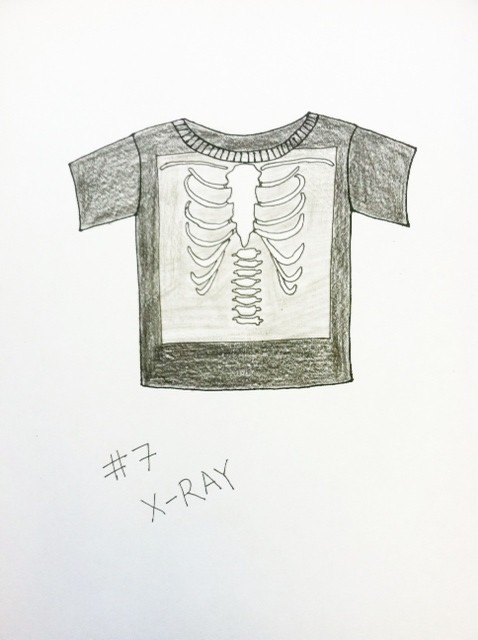
#7 X-ray. A great way to show some skeleton on Halloween, use white paint on a black T-shirt (and the painted parts will show up gray).


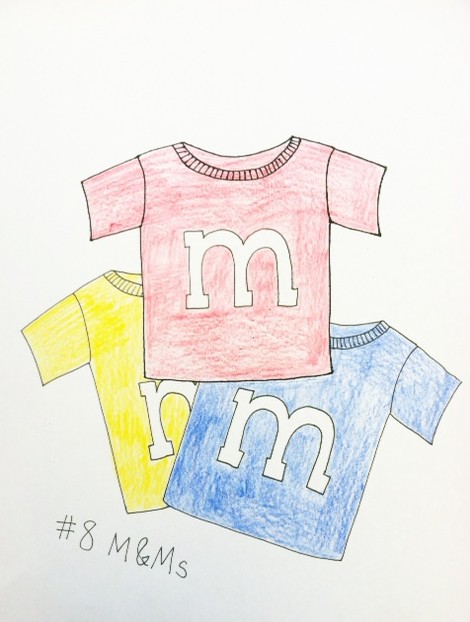
#8 M&M candies. Paint white lowercase ‘m’s onto red, yellow, blue, green, orange, and/or brown T-shirts. Then really go the extra mile and wear white gloves and white sneakers. Gather up a group of friends for a whole handful of candies. Note: This approach also works for Skittles!’


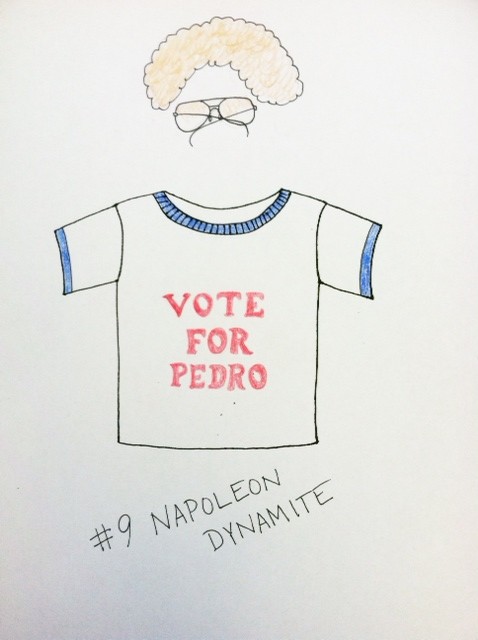
#9 Napoleon Dynamite. Based on the indie hit, paint blue edges on a white T-shirt to mimic a ringer tee; paint or iron on letters to spell “Vote for Pedro.” Top it off with some wiry glasses and a curly wig.

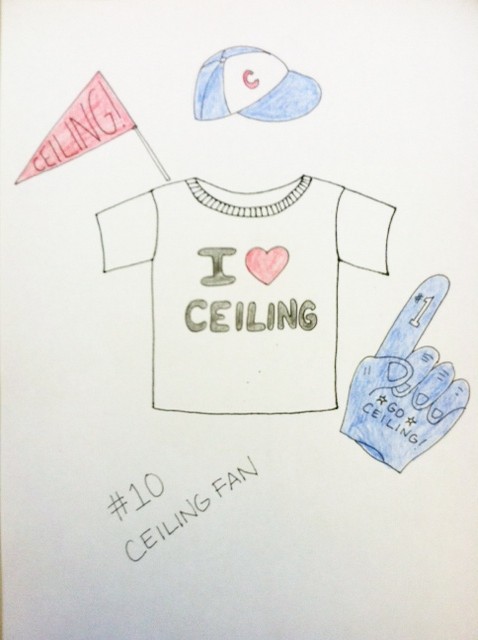
#10 Ceiling fan. Heh. Number 1 fan of the ceiling. Get it? Get it? Use fabric markers or paints on a white T-shirt — and plenty of cheerful props!

Happy trick-or-treating everyone! Here’s to last-minute costumes that are as easy as 1, 2, 3.


[ 3 Comments | Posted on October 23rd, 2012 ]

Caution: Speed Bump!

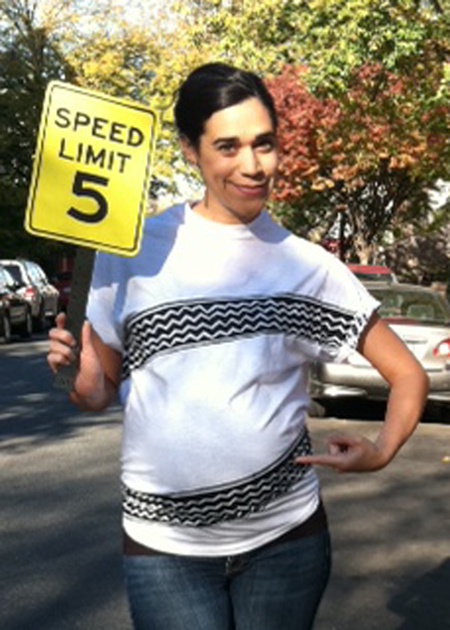
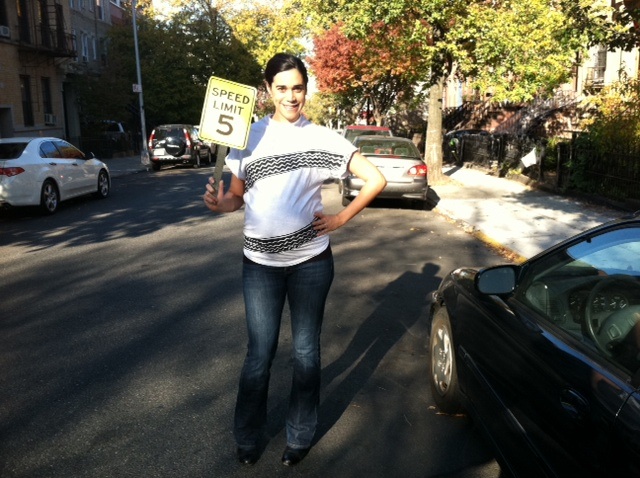
We here at Generation T hope everyone had a safe, boo-tiful, and bountiful Halloween last weekend! In addition to this bonus Halloween costume project below (okay, file it away for next year), you might notice that there’s some rather “big” news to share over here at Generation T headquarters: there’s a Baby T on the way! (And since we’ve taken to calling the inside-the-belly baby “Zombie,” it seemed only fitting that we get to make the announcement in costume.)

It can be tricky to come up with costume ideas when you’ve got a bun in the oven — besides the classic “Watermelon Smuggler” (make that a pumpkin smuggler), the obvious mummy (ha!), or a bathing beauty (get ready to dress in a bikini and paint the belly in the pattern of a beach ball). Go for the more literal, and get your partner in on the costume so you can have a chef and an oven (which I have to say held some appeal until I realized that I’m already feeling a tad large and awkward these days and dressing in a box would only serve to enhance my impressive girth).

So without further ado, here’s how I made my Speed Bump Halloween Costume (and yes, I do hear they’re called “speed humps” in Connecticut, but what can you do)…

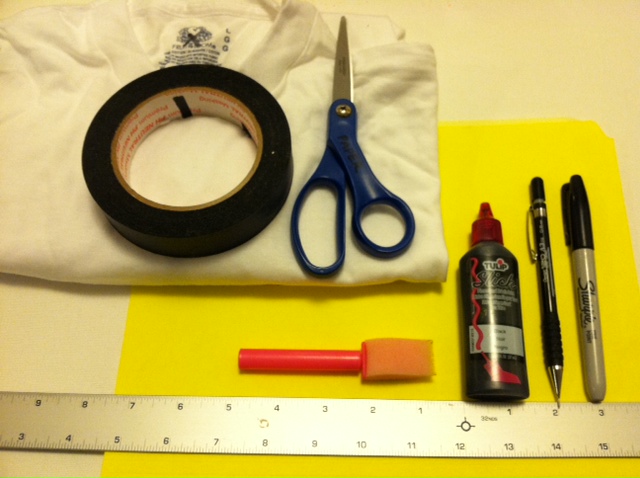
Materials:
-Plain T-shirt
-Masking tape (to make stencil)
-Scissors
-Black fabric paint

-Foam brush

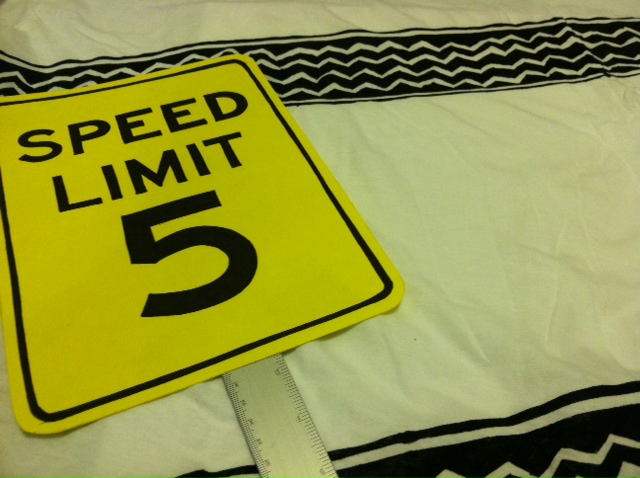
-Yellow card stock or paper
-Ruler, dowel, or chopsticks (to use as sign post)
-Pencil

-Black permanent marker

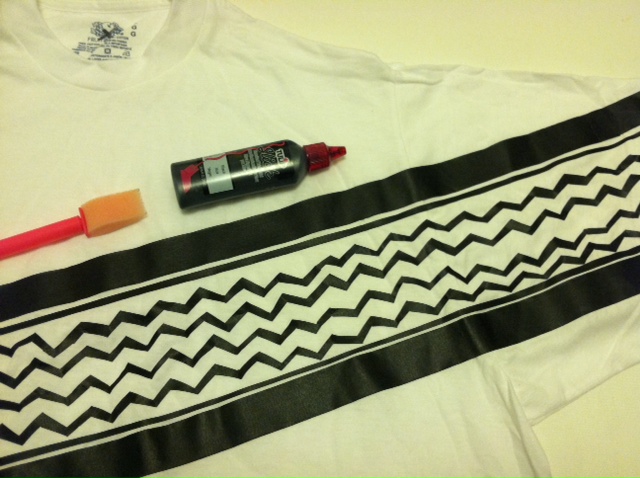
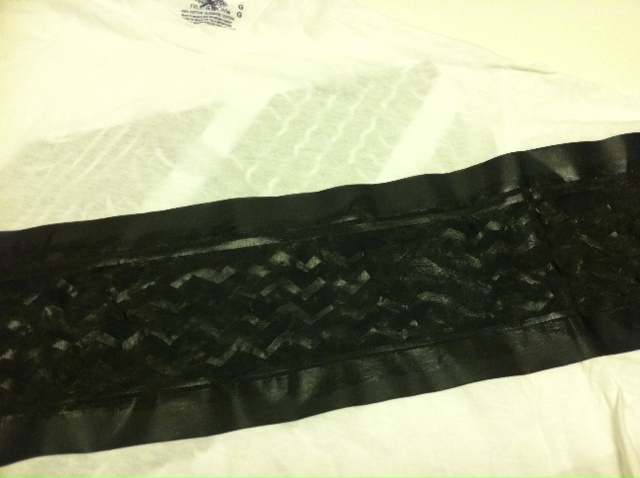
1. Cut and stick the masking tape across the front of the T-shirt in the pattern of two tire tread marks. Insert scrap paper in between the layers of the T-shirt to keep the paint from bleeding through. Then lightly paint over the masking tape.

2. Cover the taped area with paint and then let it dry completely.

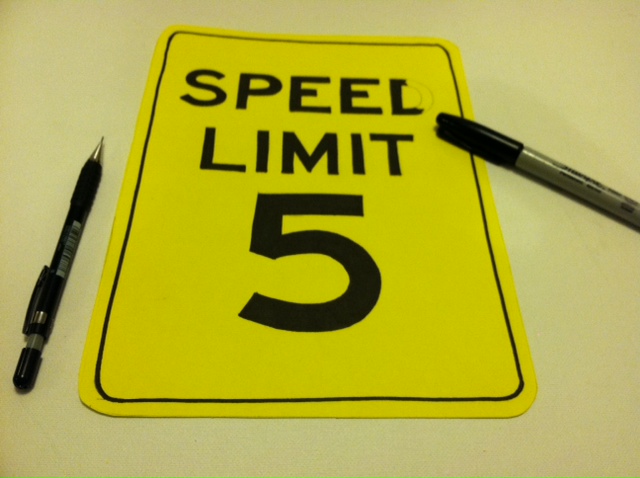
3. While the paint’s drying, measure and cut an approximately 7 1/2″ x 10″ rectangle from the yellow card stock (round the corners for an authentic street-sign shape). Then use the pencil and marker to draw and color in the appropriate speed limit. Set it aside.

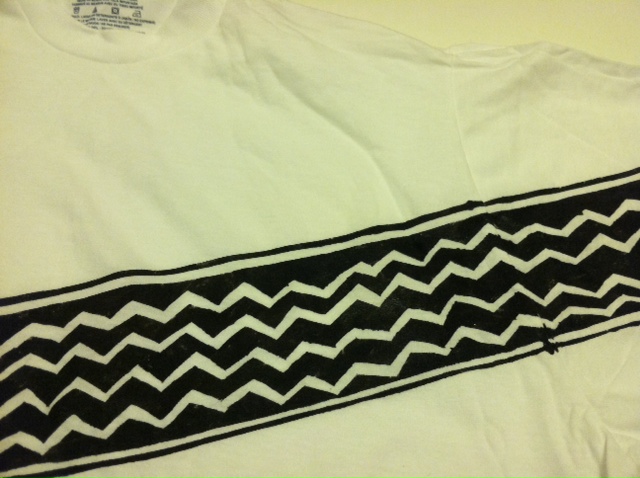
4. Peel off the tape from the T-shirt to reveal your painted tire treads!

5. Tape the ruler, centered, along the back of the street sign.

6. Now suit up!

P.S. Good luck to all of those folks running today in the ING New York City marathon — on this inspiring occasion, here’s to avoiding any speed bumps during the run!

[ 5 Comments | Posted on November 6th, 2011 ]

10 Quick & Easy T-shirt Halloween Costumes!

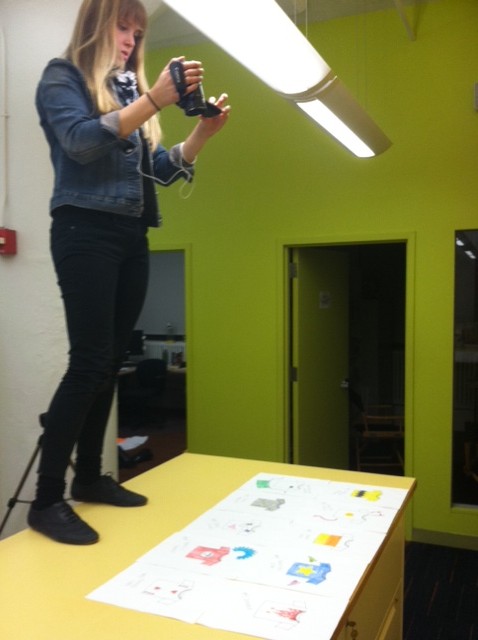
Just in time for you last-minute Halloween revelers! Make a beeline for your T-shirt stash and pull together one of these costumes in mere minutes…. Last week, my friend Elan asked me to help her out with a student project for her journalism class (see Elan in action, right, who was willing to climb on top of tables to get the right shot!). Here’s a little video tutorial we came up with to show you 10 super quick-and-easy ideas for a T-shirt-based Halloween costume. Forgive the low sound, since we were working without a mic, but we hope you enjoy!

Top-10 Last Second Halloween Costumes from Elan Bird on Vimeo.

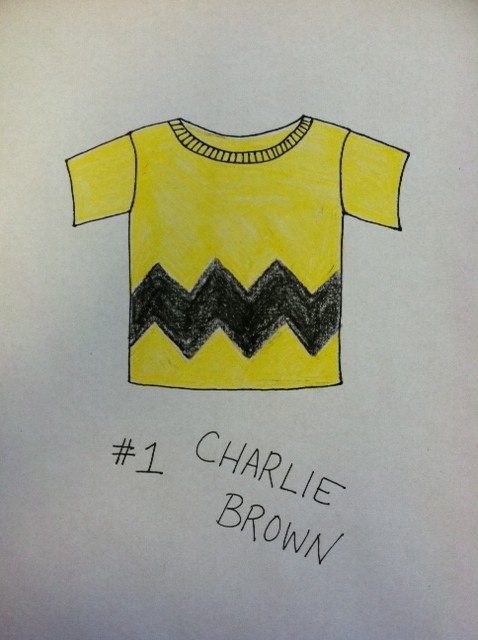
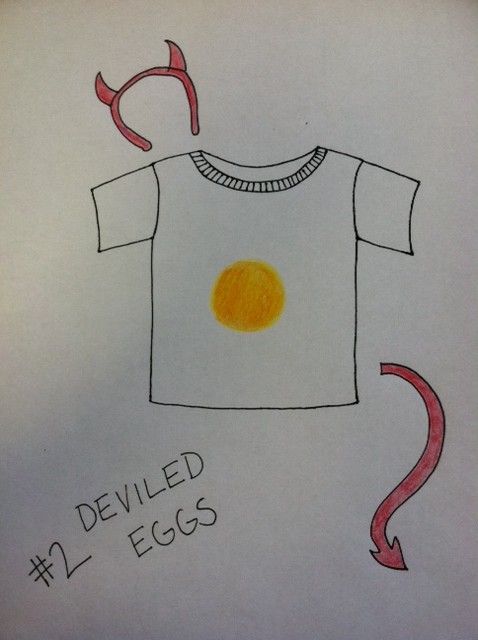
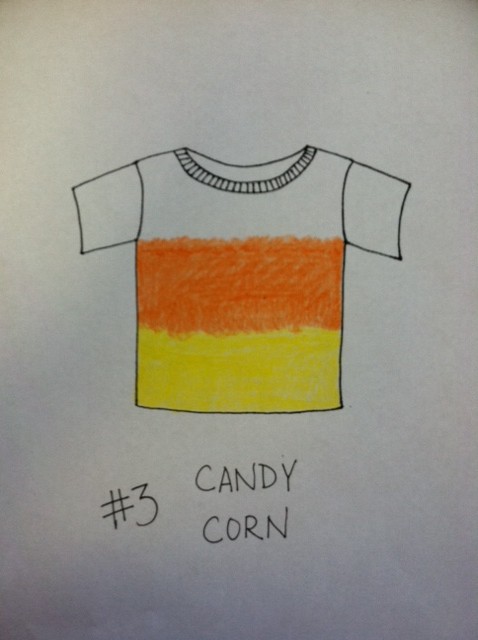
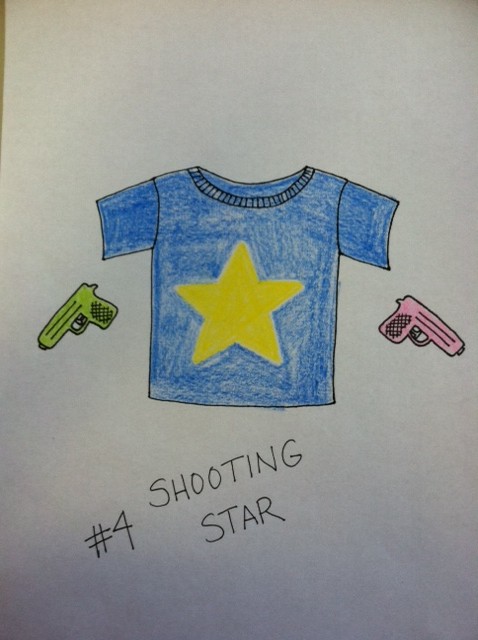
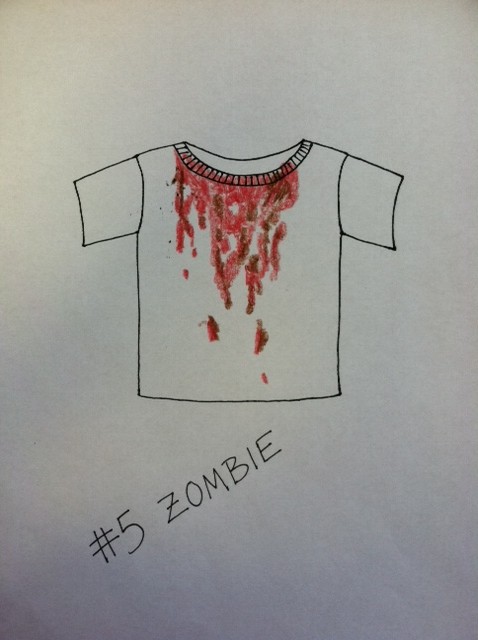
And in case you missed the visuals, below are the 10 quick-and-easy T-shirt-based Halloween Costumes (all illustrations courtesy of Megan/Generation T):

1. Charlie Brown (a good man, indeed, from our pal Charles M. Schulz–add a black pair of shorts and a baseball cap for good measure)

2. Deviled Egg (love me some wordplay! just grab those devil horns and tail I know you have packed away somewhere)

3. Candy Corn (inspired by my friend Alexa (aka The Swell Designer)’s adorable tie-dyed onesie!)

4. Shooting Star (more nerding out with words, adapted from an idea in The Halloween Handbook PS: those are squirt guns, folks!)

5. Zombie (classic: blood, brains…nuff said; and here’s the perfect soundtrack to listen to while you craft)

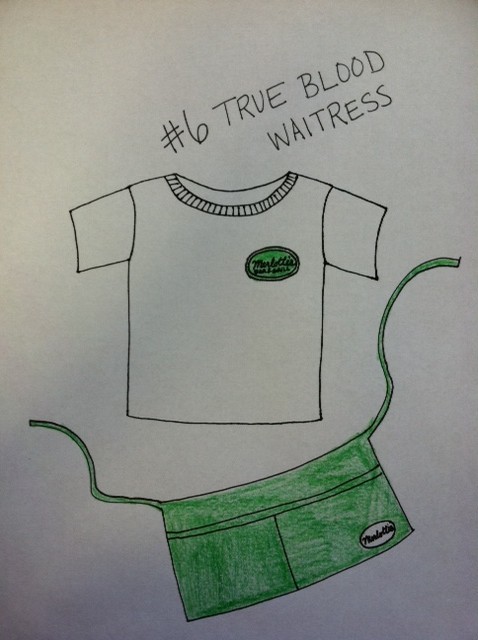
6. True Blood Waitress (don’t forget to add some fang marks on the neck!)

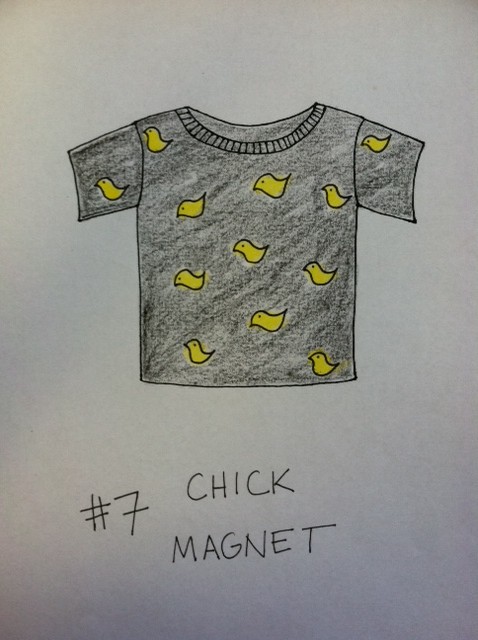
7. Chick Magnet (ha. get it?… also adapted adapted from an idea in The Halloween Handbook)

8. Static Cling (you don’t even need paint for this one!)

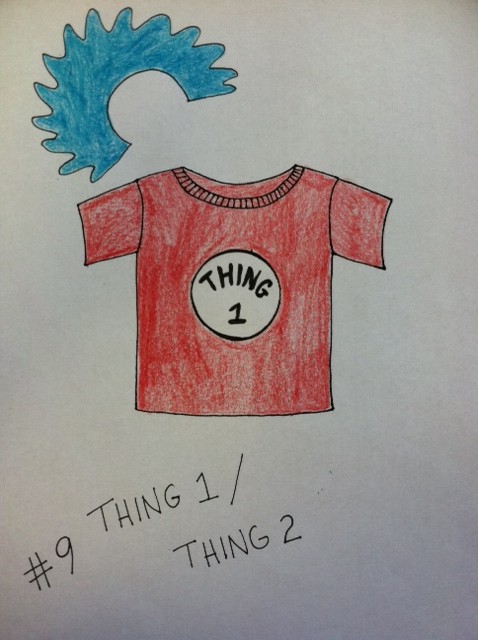
9. Thing 1 and Thing 2 (These Dr. Suess characters are perfect for pairs costumes!)

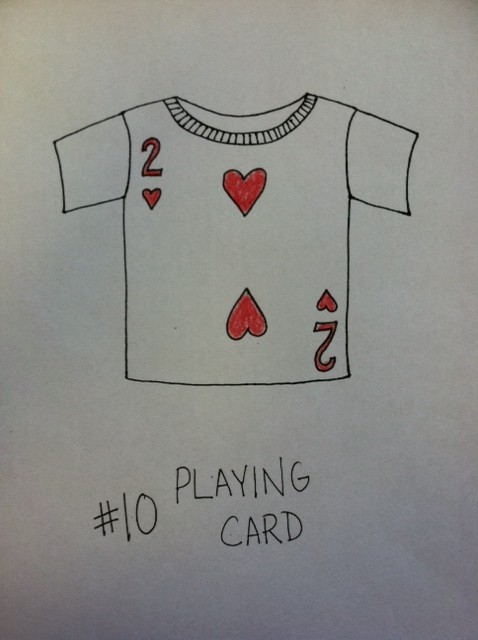
10. Playing Card (Ace of Spades or Queen of Hearts–or recruit enough for a full 52-card deck! Then shuffle.)

And if you have a T-shirt left over, don’t forget to make check out the tutorial for a trick-or-treat tote!

[ 6 Comments | Posted on October 28th, 2011 ]

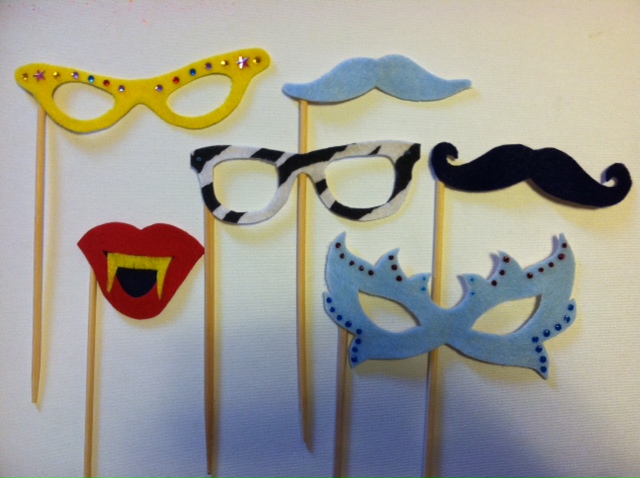
I Love to Create: Costume-on-a-Stick!

‘Twas the week before Halloween and all through the haunted house,
every creature was stirring–

the zombies, the mummies, the vampires, the flappers, the secret agents–

even the mouse.

But if you’re the one caught without a disguise,
make a costume-on-a-stick to cover your mouth or your eyes!

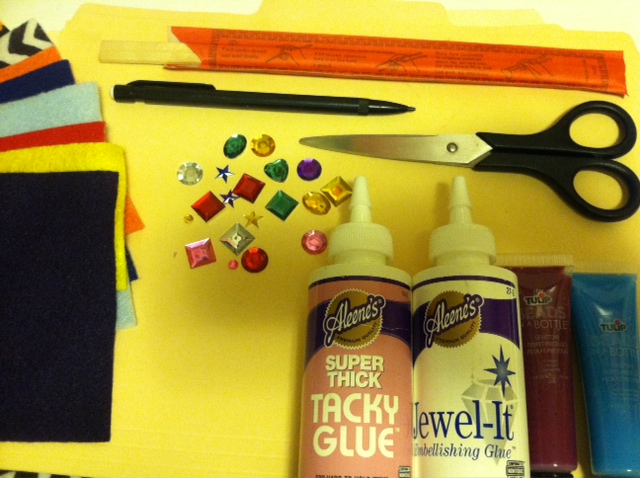
Materials:
-Pencil
-Paper (optional)
-Manila file folders
-Scissors
-Felt pieces in a variety of colors and patterns
Aleene’s Super Thick Tacky Glue
Aleene’s Jewel-It Embellishing Glue
-Fake jewels
Tulip Beads in a Bottle
-Wooden chopsticks

Make it:

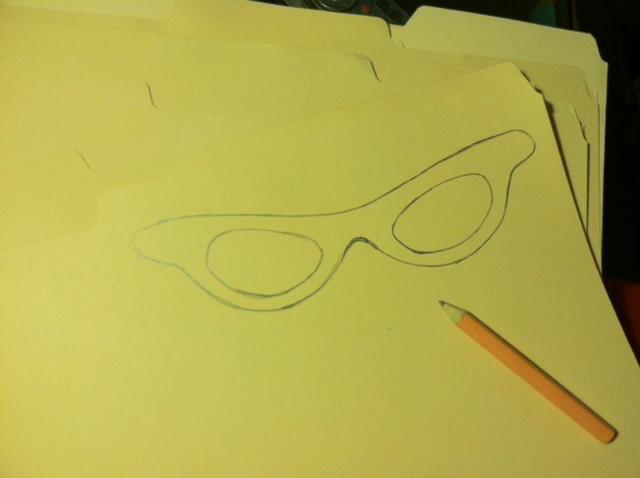
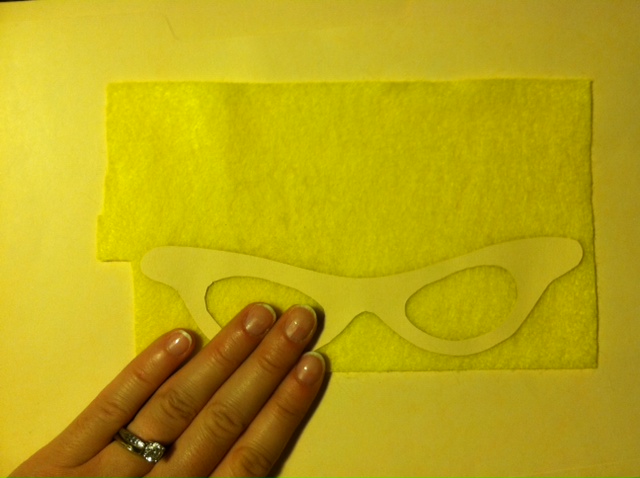
1. Draw the outline of a pair of glasses, a mustache, or other shape on a manila folder. Optional: Sketch it out on a piece of paper first to use as a template (this way, if it’s a symmetrical shape, you can fold it in half to make sure both sides match), then cut it out and trace it onto the folder.

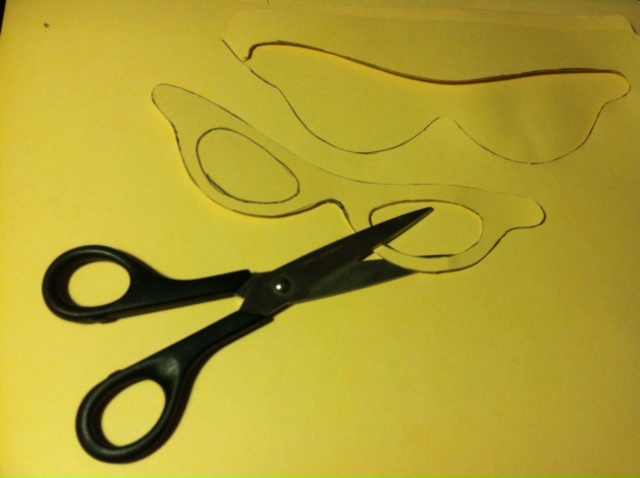
2. Use scissors to completely cut out the shape(s).

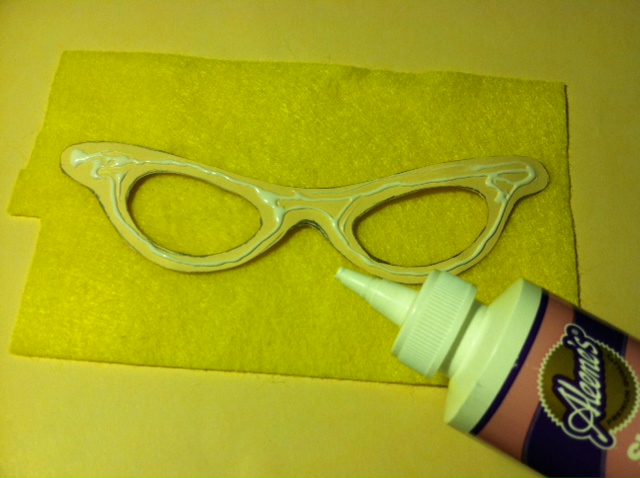
3. Spread glue generously over the back of the folder shape.


4. Press it firmly onto a piece of the desired felt color. Let the glue dry.

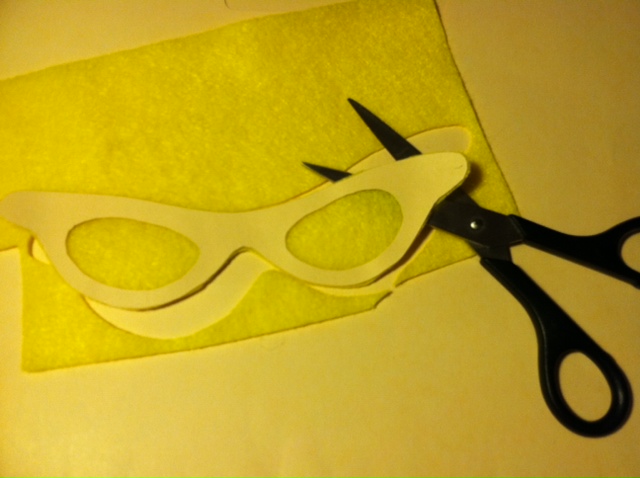
5. Cut out the felt piece, using the folder edges as your guide.

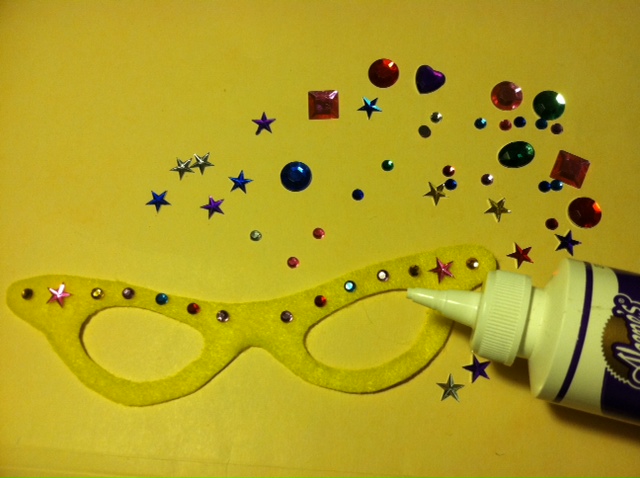
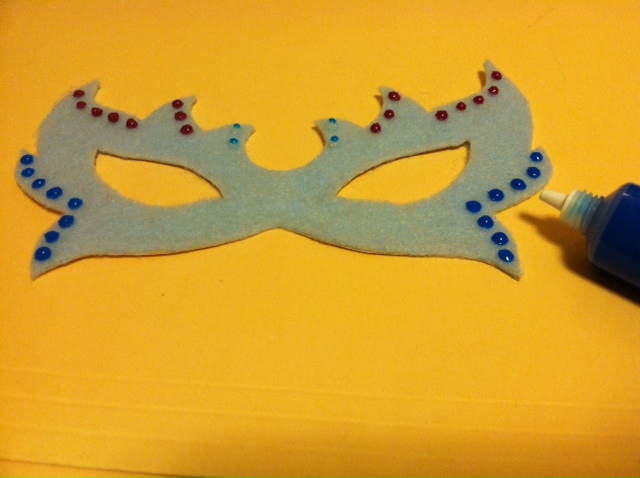
6. Use jewelry adhesive to decorate the front with fake jewels…

…or use Beads in a Bottle to create 3D embellishments! Let the embellishments dry.

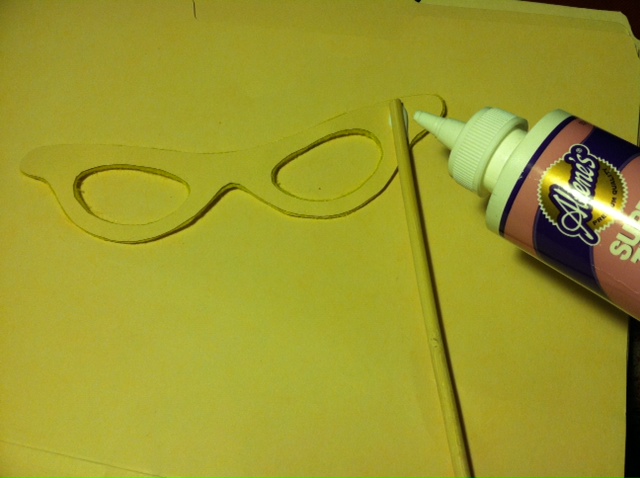
7. Flip the disguise over and squeeze a line of glue along one side. Press the top of one chopstick so it extends vertically from the bottom. Let it dry.

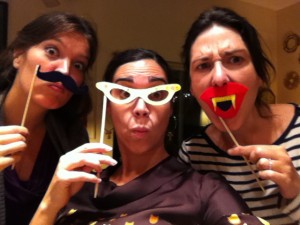
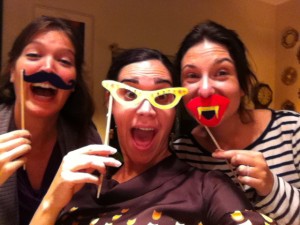
8. Repeat as many times as you like to make cat-eye glasses (shown), wayfarers, masquerade masks, vampire fangs, and mustaches galore. Now what are you waiting for? Go undercover!

Happy haunting from Generation T!


[ 3 Comments | Posted on October 25th, 2011 ]