Posts Tagged ‘holiday craft’

Sparkle Peter Pan Collar Necklace

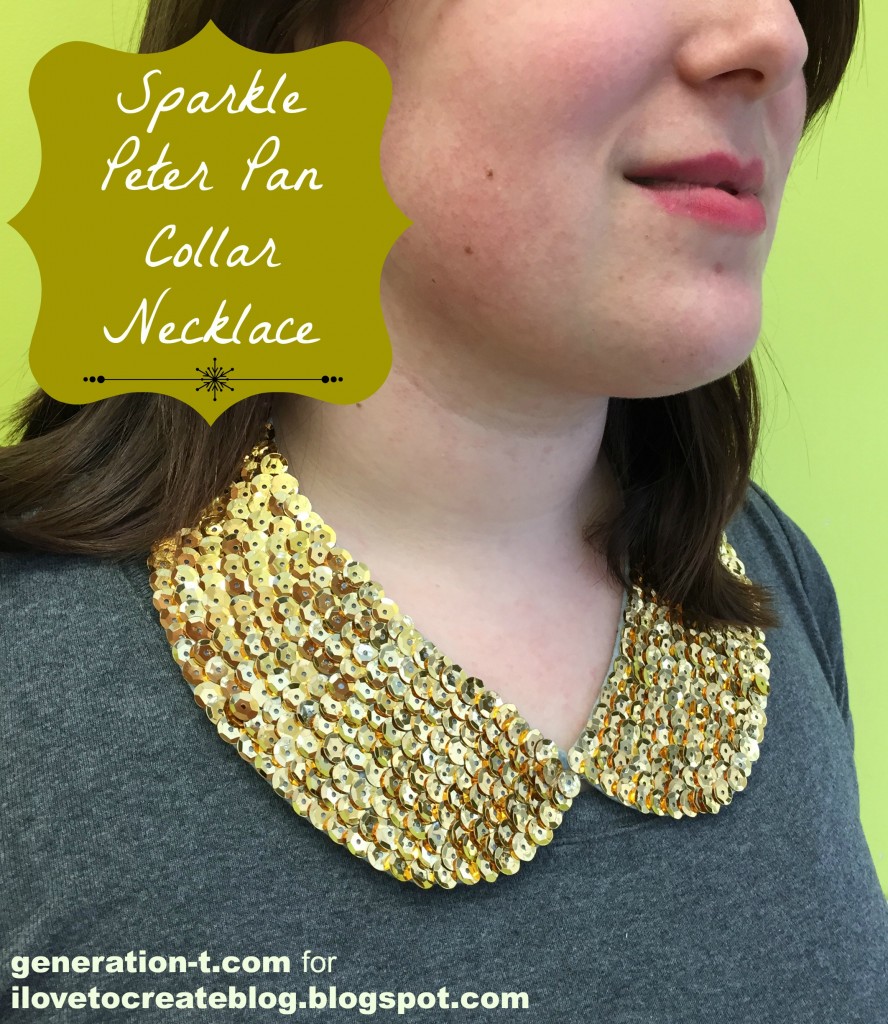
The perfect accessory for dressing up a basic crew neck T-shirt: a sequined necklace that mimics a Peter Pan-style collar. Even the sequins don’t take all that long to place–it’s the drying time that’s the most challenging to sit through! The ribbon tie makes it adjustable

PeterPan necklace final generation-t.com

megan-nicolay-blog-footer-1

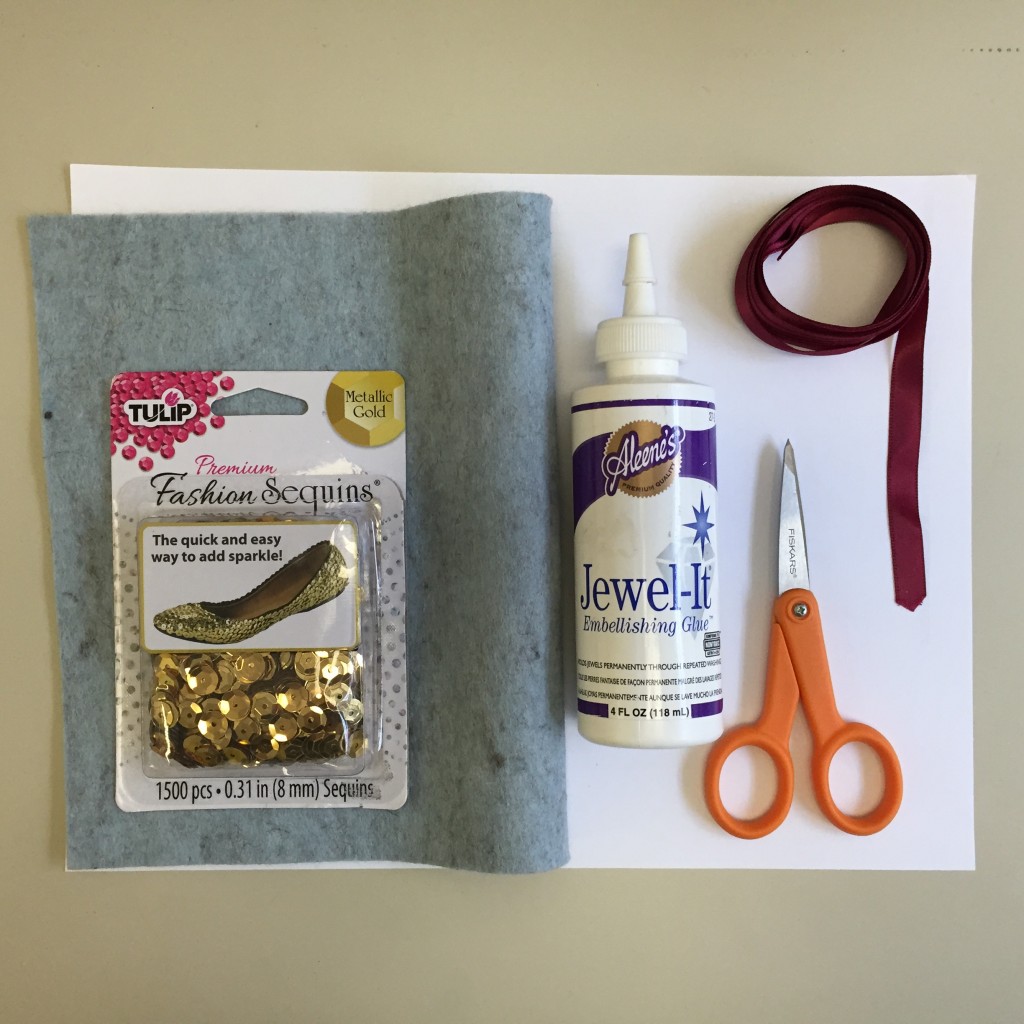
Materials:
-Felt
-Ribbon (two lengths, each about 12″)
Aleene’s Jewel-It Embellishing Glue
-Scissors
-Plain or scrap paper
Tulip Premium Fashion Sequins

PeterPan necklace materials

Make it:
Click through for the full step-by-step photographed tutorial at the iLoveToCreate blog.

PeterPan necklace step5 generation-t.com
Sparkle on!


[ Comments Off on Sparkle Peter Pan Collar Necklace | Posted on December 24th, 2014 ]

DIY: Distressed American Flag Muscle Tee

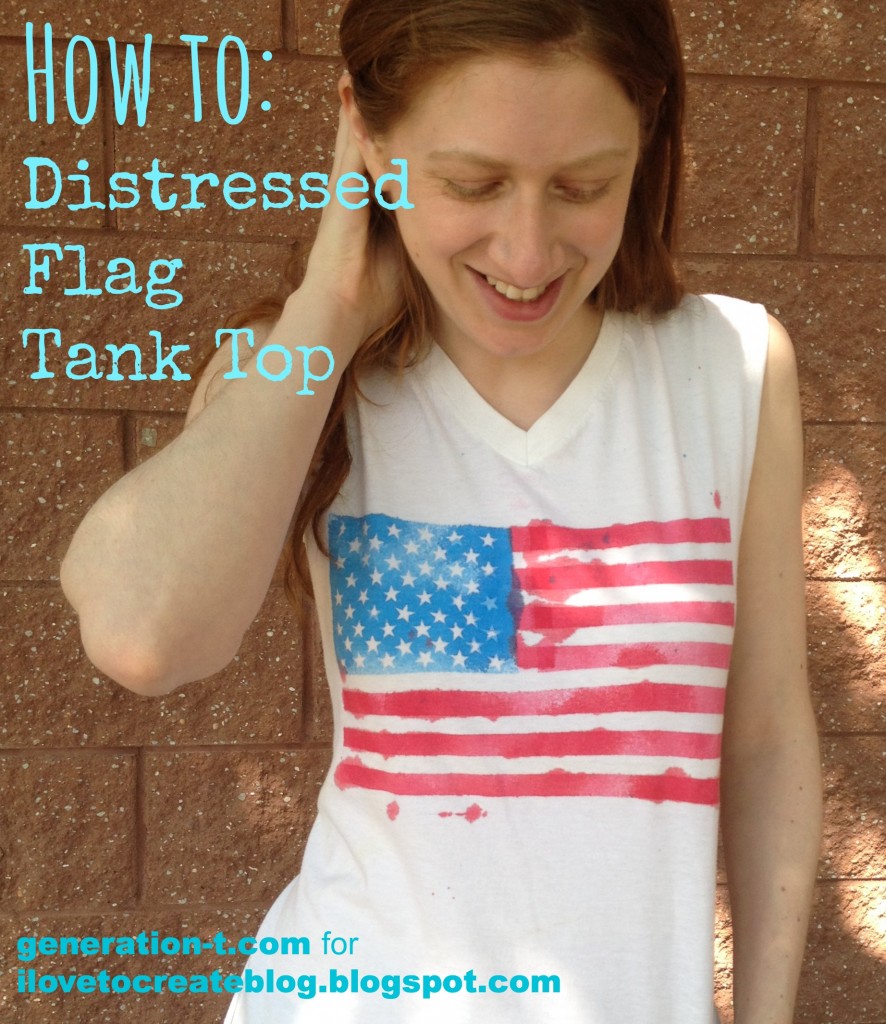
Between cheering on Team USA in the World Cup and all the 4th of July barbecues just around the corner, this project is at least a fashion twofer (at least — you can save it for next Memorial Day picnic, Flag Day…or whenever you’re feeling stylishly patriotic!).

USA tank top1 generation-t.com.jpg

With just a plain white T-shirt, some classic gold star stickers (50 of them, to be precise), clear tape, and fabric spray paint, you can, for just a few bucks, make a T-shirt that might otherwise retail for (gulp)…$84(!!!). Here’s how.megan-nicolay-blog-footer-1

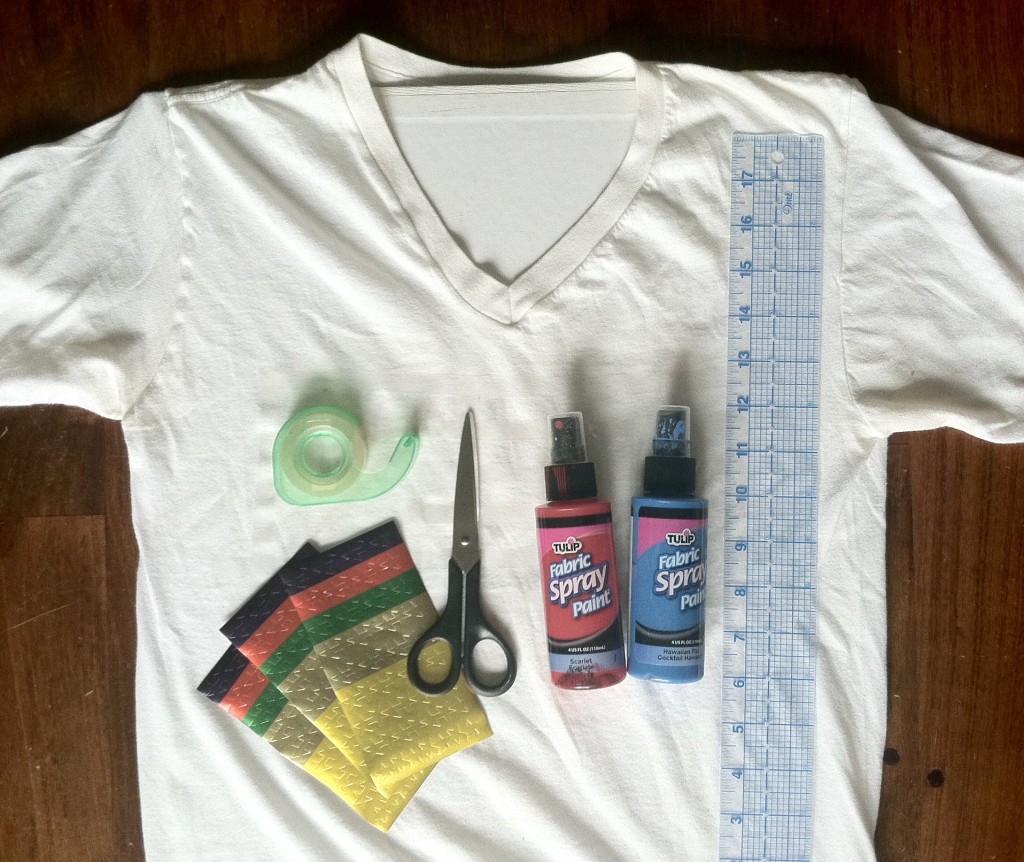
Materials:
-Plain white T-shirt (I chose an old V-neck, but crew-neck works just as well)
Tulip Fabric Spray paint in red and blue
-Gold or multi-colored star stickers (find them stocked with the teachers’ supplies)
-Clear tape (for best results, look for 1/2″-wide tape)
-Scissors
-Ruler
-Scrap cardboard and/or paper to mask and insert between the layers of the shirt

Flag Step1 generation-t.com

Make it:
1.
Head over to the iLoveToCreate blog for my complete step-by-step tutorial!

USA tank top2 generation-t.com


[ 3 Comments | Posted on June 24th, 2014 ]

Spell-It-Out Birthday Shirts (for Every Age!)

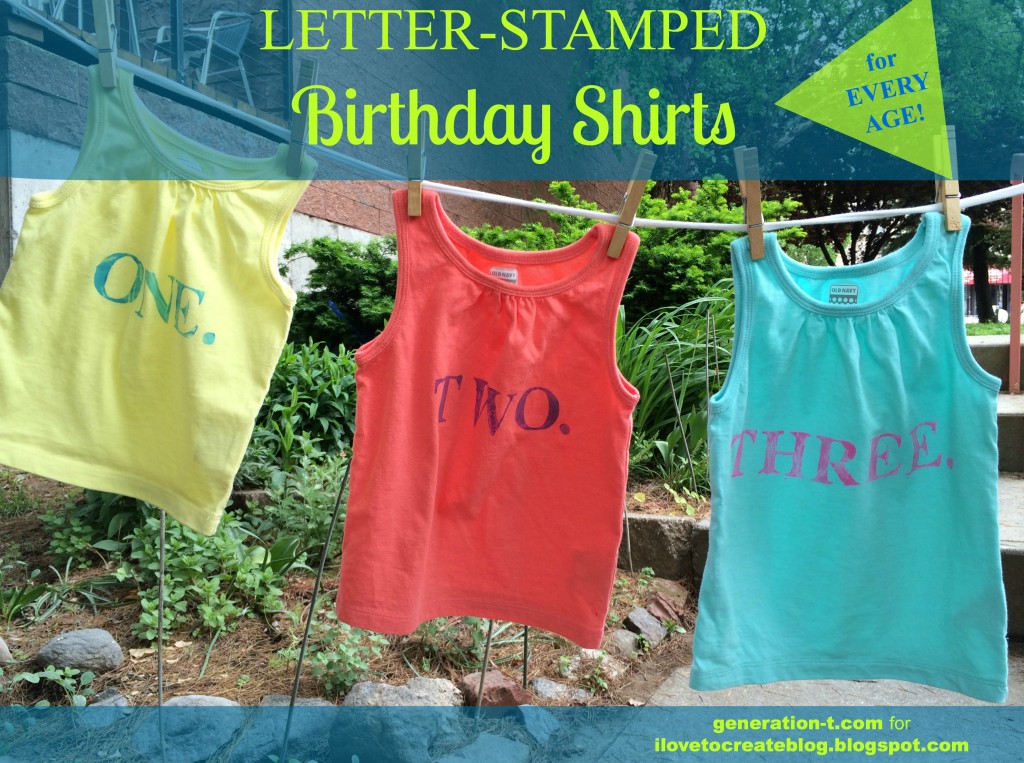
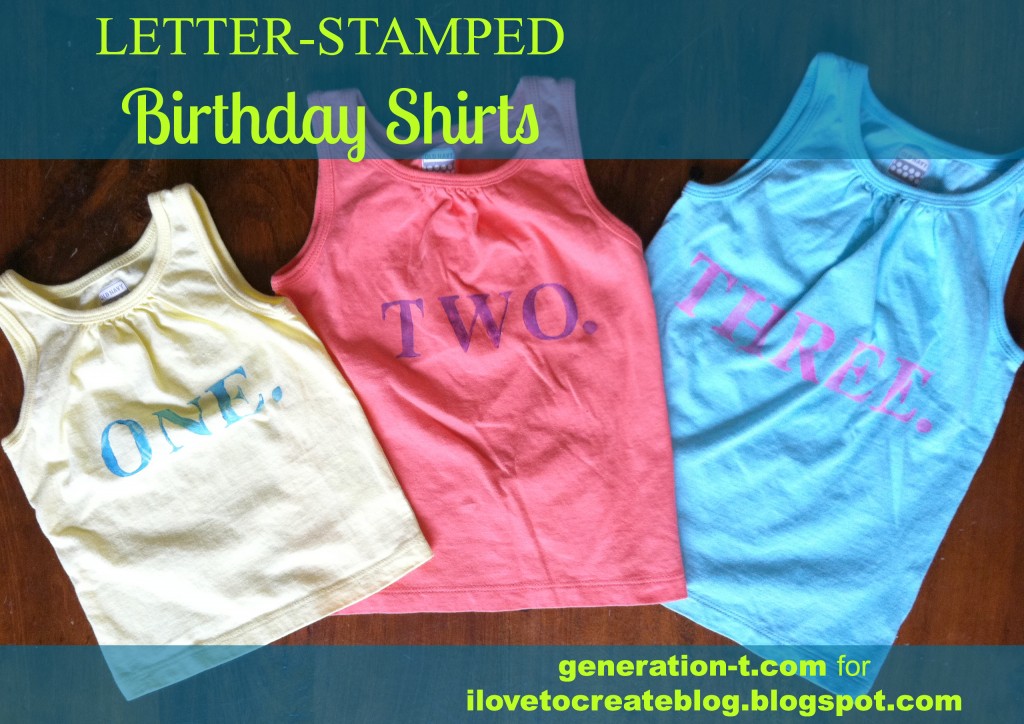
I love using words and type in my crafts (see exhibits ABCDE, and F…), so was super excited when some Scribbles Alphabet Stamps arrived in a recent crafty care package! With a friend’s daughter’s birthday around the corner, and armed with my new letter stamps and fabric paints, I knew just what I wanted to make: a series of birthday tops, each to announce the birthday girl’s age (and yes, there are number stamps, too, but I like to spell things out!).123Finish generation-t.com

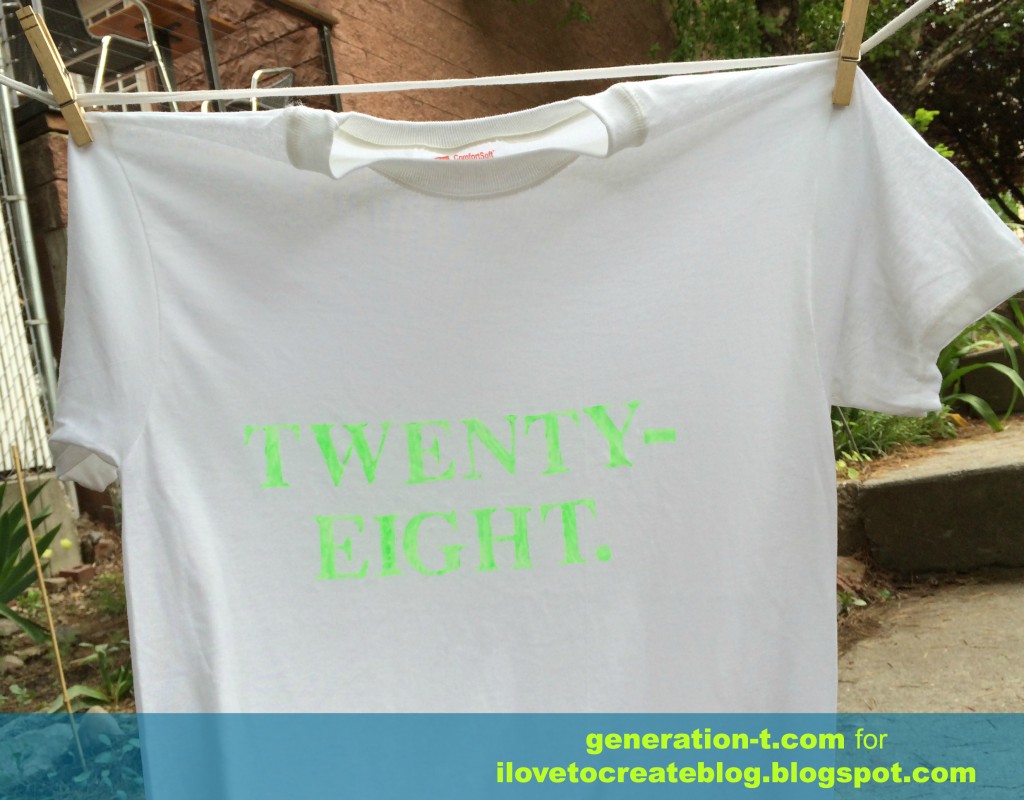
I made a series of three, but if you scroll all the way down, you’ll see there’s no reason why you have to stop at the single-digit ages!

megan-nicolay-blog-footer-1

Materials:
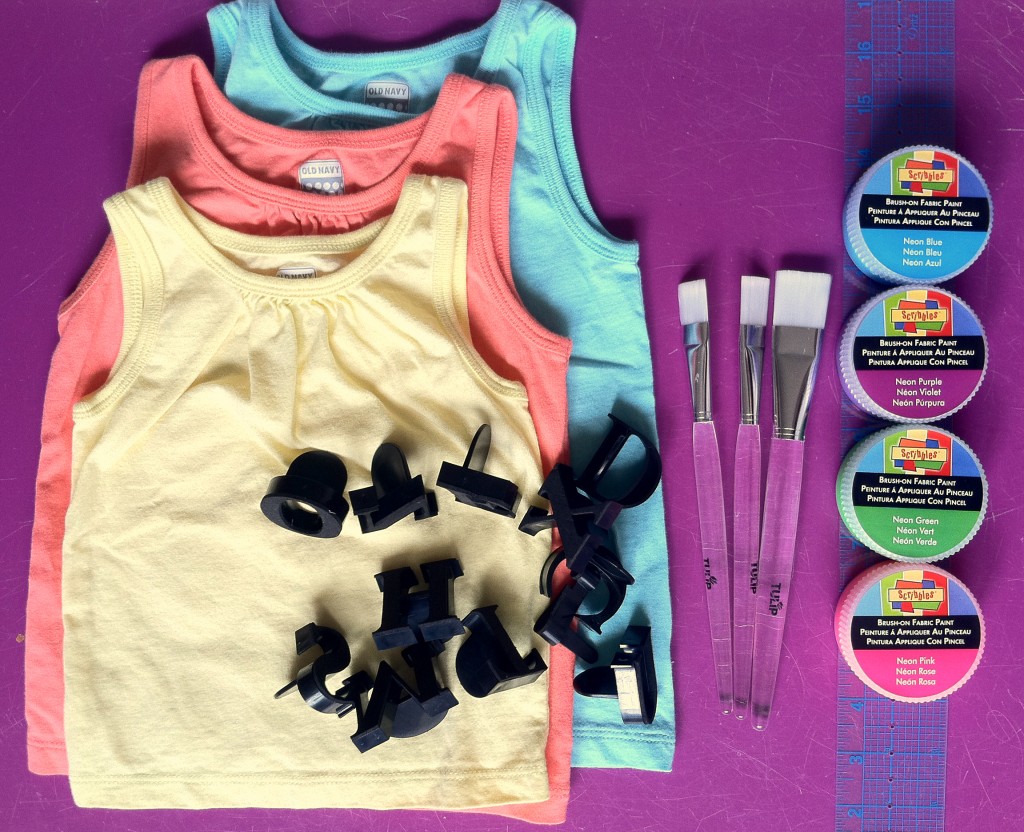
Scribbles Brush-On Fabric Paint
Scribbles Alphabet Stamps
Tulip Fabric Paintbrushes
-Ruler

-Plain T-shirt or tank top
-Scrap paper or cardboard (to prevent the paint from bleeding through the layers of the shirt)

Materials1 generation-t.com

Make it:
1.
For step-by-step photographed instructions, click through to the iLoveToCreate blog!

ONETWOTHREE generation-t.com

123FinishAlt generation-t.com

[ Comments Off on Spell-It-Out Birthday Shirts (for Every Age!) | Posted on May 27th, 2014 ]

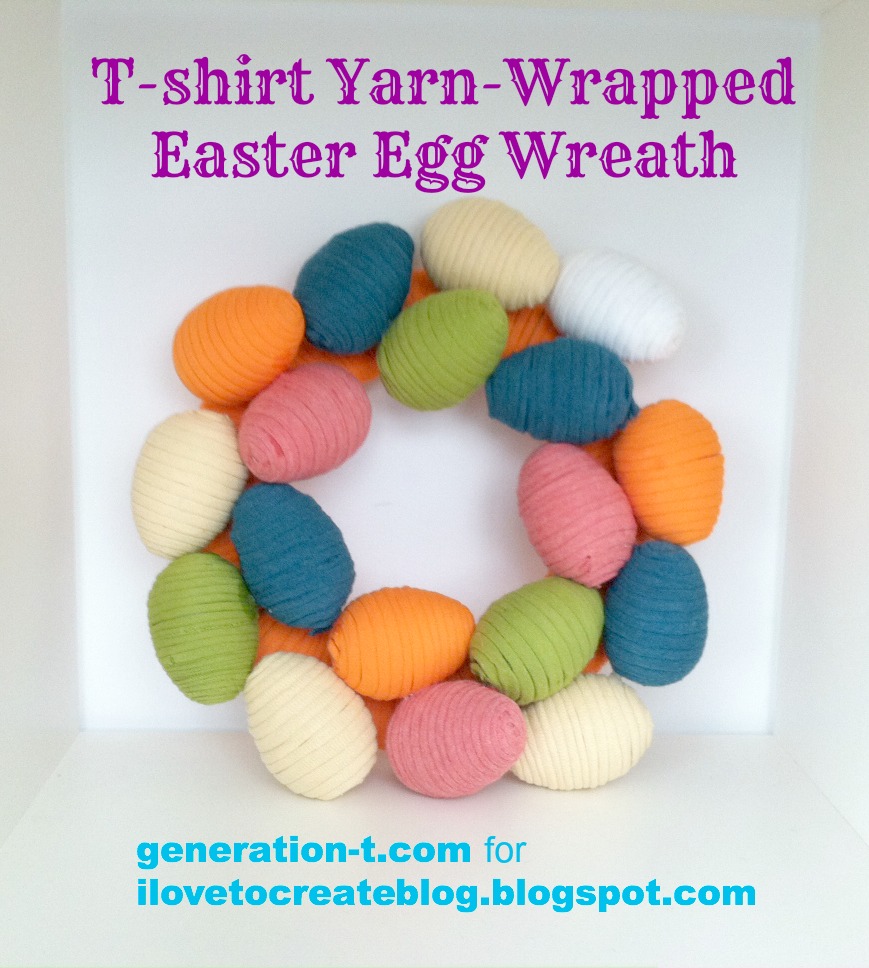
T-shirt Yarn-Wrapped Easter Egg Wreath

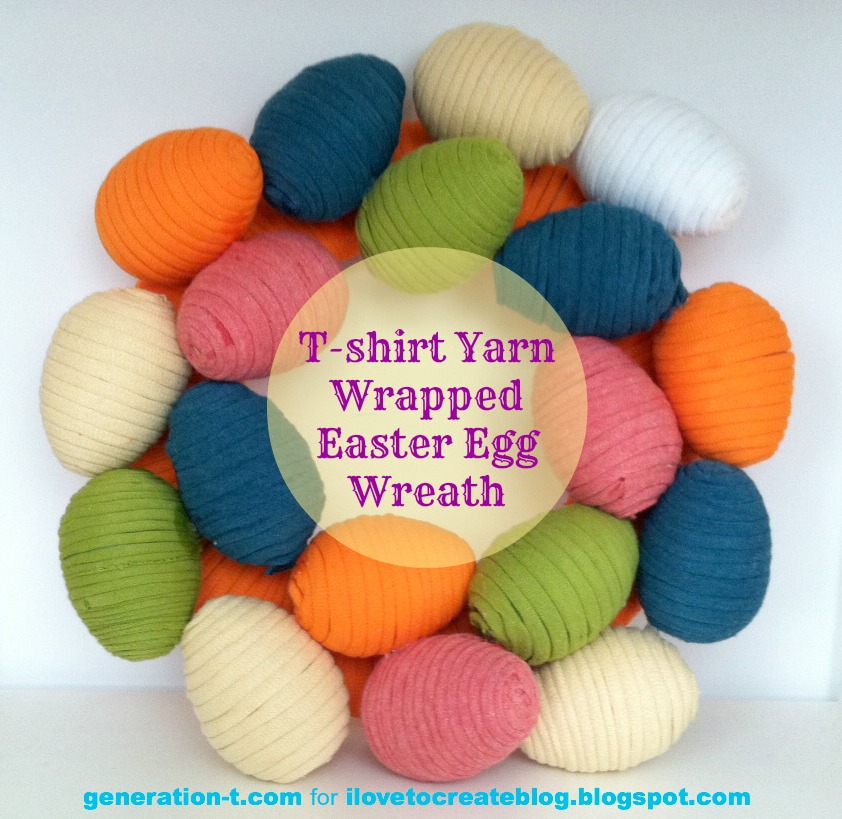
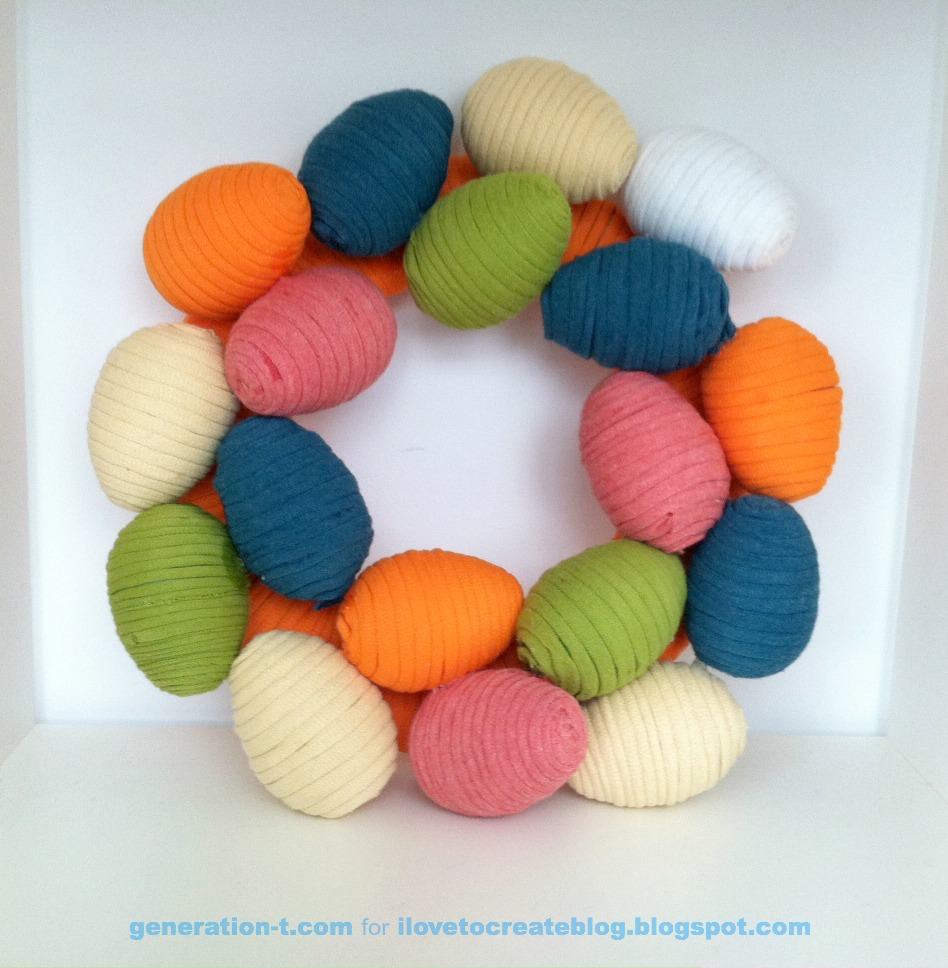
Egg Wreath generation-t.com
For this easy, bright DIY holiday decor, I was inspired by this yarn-wrapped egg wreath I stumbled upon on Pinterest. (Oh, and check out Aunt Peaches’s yarn-wrapped eggs tutorial over at the iLoveToCreate blog!) But, being that I have stashes of T-shirt scraps rather than traditional yarn, I adapted the project to my own scrap heap (and recycling bin). Pick traditional pastels from your T-shirt stash, go for brights, or tie-dye all those shabby old white ones to make ombre eggs.

megan-nicolay-blog-footer-1

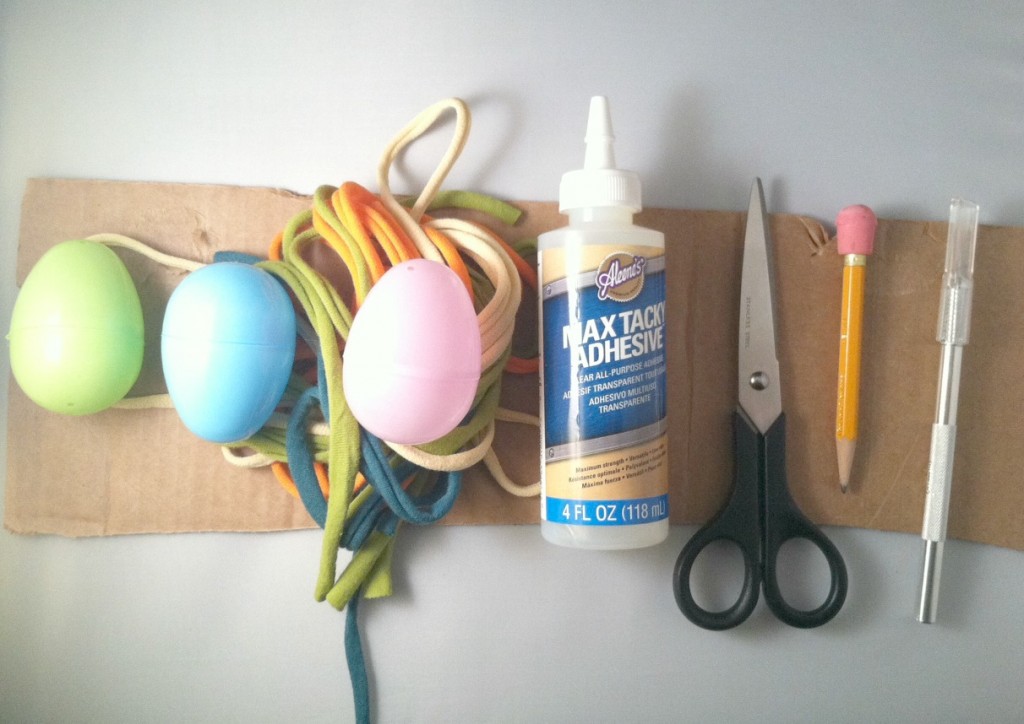
Materials:
-18-24 plastic eggs

-18-24 lengths of T-shirt yarn, plus more for the wreath base (ideally, yarn should be stretched from 1/2″ to 3/4″-wide strips)
Aleene’s Max Tacky Adhesive
-fabric scissors
-cardboard box (to make the wreath base)
-pen/pencil
-craft knife
-tape (optional)
Tulip Beads in a Bottle (optional)
Tulip One-Step Tie-Dye Kit (optional)

Egg Wreath materials generation-t.com

Make it:
Click through to the complete step-by-step tutorial over on the iLoveToCreate blog.

Finish Egg Wreath generation-t.com

t-shirt yarn wreath generation-t.com

[ 1 Comment | Posted on March 25th, 2014 ]

T-shirt Transformer Scarf: Wear It Your Way!

Here’s an easy T-shirt transformation project from Generation T: Beyond Fashion (project #9, Transformer), courtesy of Homemade Holiday 101 that requires just one seam’s-worth of sewing! So if your crafty self is feeling at all unsure whether you’ll actually be able to knit that scarf in time for Christmas, grab the nearest two T-shirts (the larger the better), a pair of scissors, and a needle and thread (or a sewing machine!), and make a whole scarf-plus in about 10 minutes.

T-shirt Transformer generation-t.com

Materials:
2 T-shirts of the same size (L or XL)
Scissors
Ruler
Chalk marker
Straight pins
Needle
Thread

Make it:
For step-by-step instructions and illustrations, go to Homemade Holiday 101: 30-minute Scarf.

BONUS:
Just a reminder that Generation T and Generation T: Beyond Fashion ebooks are on sale for $2.99 throughout the holiday season. Just head to HomemadeHoliday101.com to download!

homemadeholiday101logo

[ Comments Off on T-shirt Transformer Scarf: Wear It Your Way! | Posted on December 17th, 2013 ]

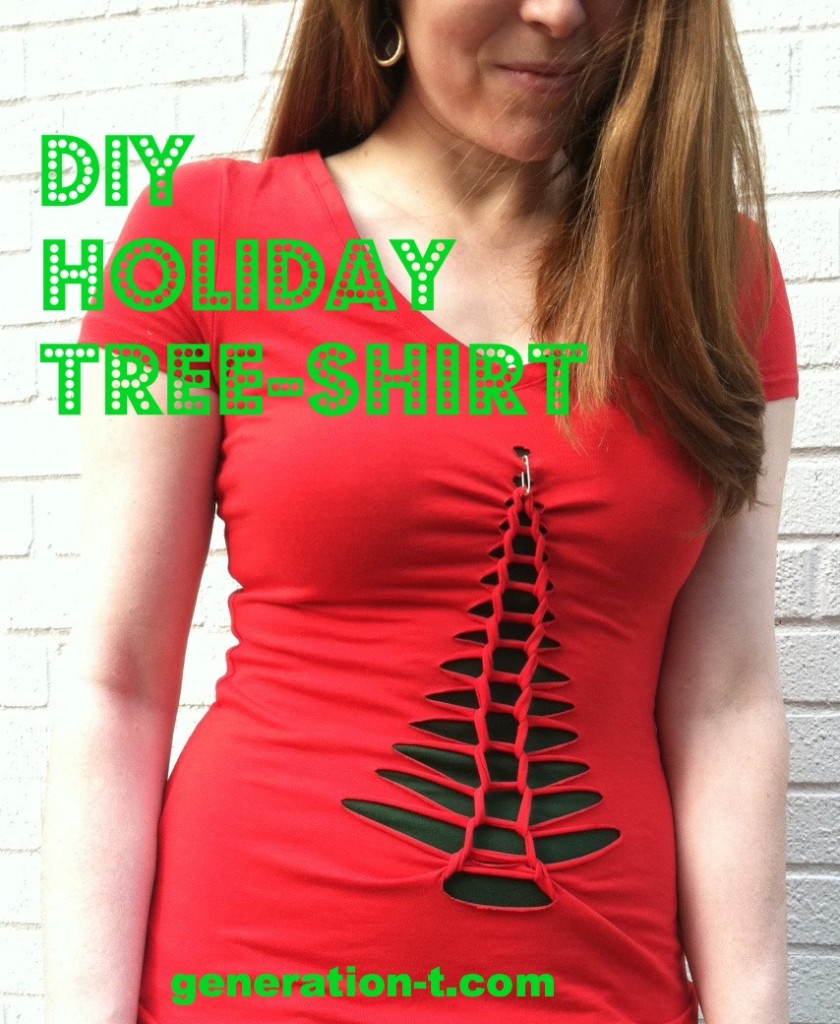
DIY: A Holiday Tree-Shirt!

Coming off Thanksgiving, a holiday that many people abbreviate to “T-Day,” of course makes me think of T-shirts….and how EVERY DAY is Tee Day! So, move over scratchy holiday sweater. Here’s a simple, no-sew holiday T-shirt (ahem, tree-shirt) that I designed as part of Homemade Holiday 101 (#homemade101). It combines techniques from the Brokenhearted tee in Generation T (project #2) and Back in Action tee in Generation T: Beyond Fashion (project #101).

Holiday Tree-Shirt finish generation-t.com

(OH, and…CLICK THROUGH TO HOMEMADE HOLIDAY 101 where the Generation T and Generation T: Beyond Fashion ebooks are on sale for $2.99 for a limited time!)

homemadeholiday101logo

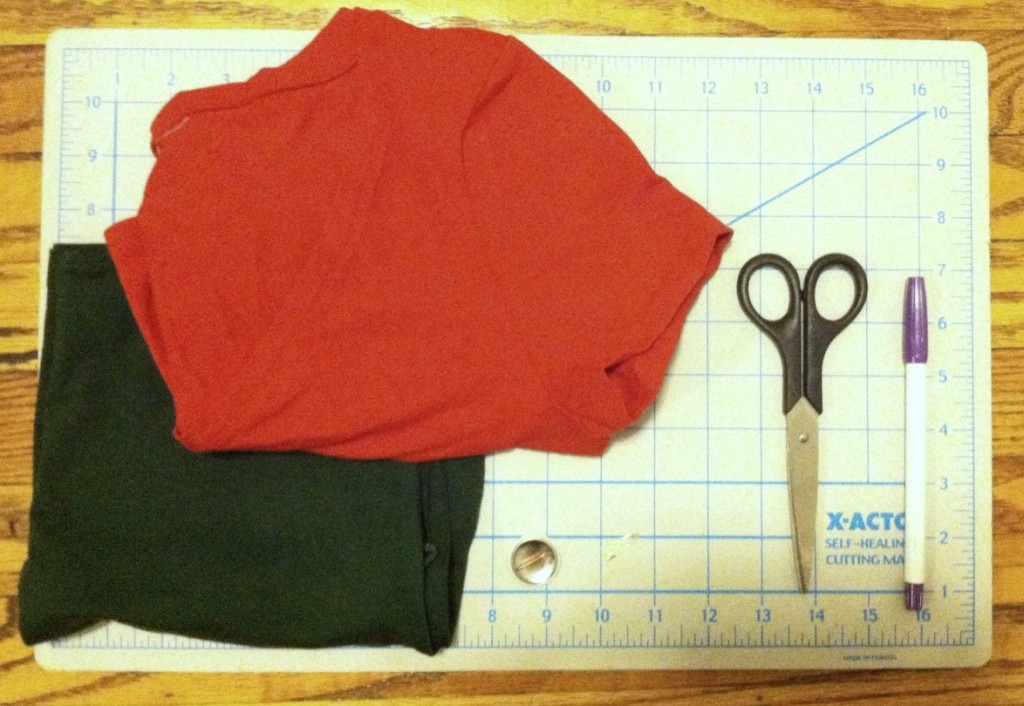
Materials:
-Red fitted T-shirt (mine has a small percentage Lycra)
-Green fitted tank top (or similar, to layer underneath)
-Disappearing ink fabric marker or fabric chalk marker
-Ruler/ straightedge
-Fabric scissors
-Safety pin or 1″ round pin

holiday shirt materials generation-t.com

Make it:

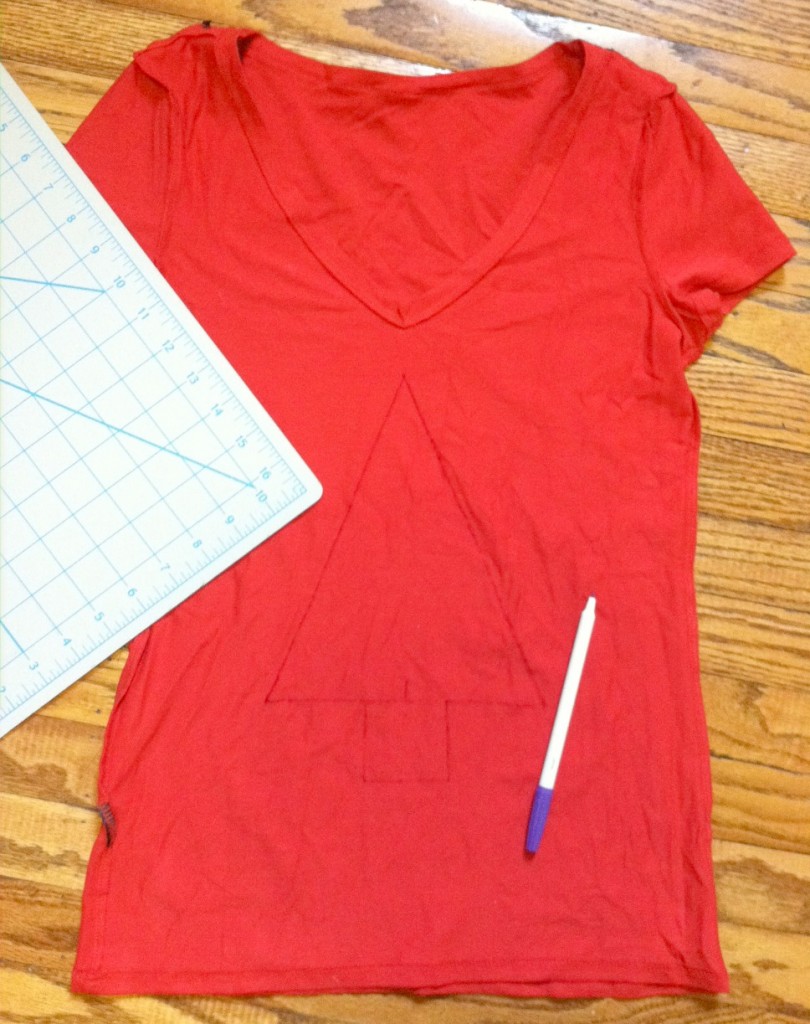
1. Turn the T-shirt inside out and, using the straightedge, draw an isosceles triangle with a small rectangle at the bottom (aka, a simplified evergreen tree shape). My tree is about 7″ across at its widest.

holiday shirt 1 generation-t

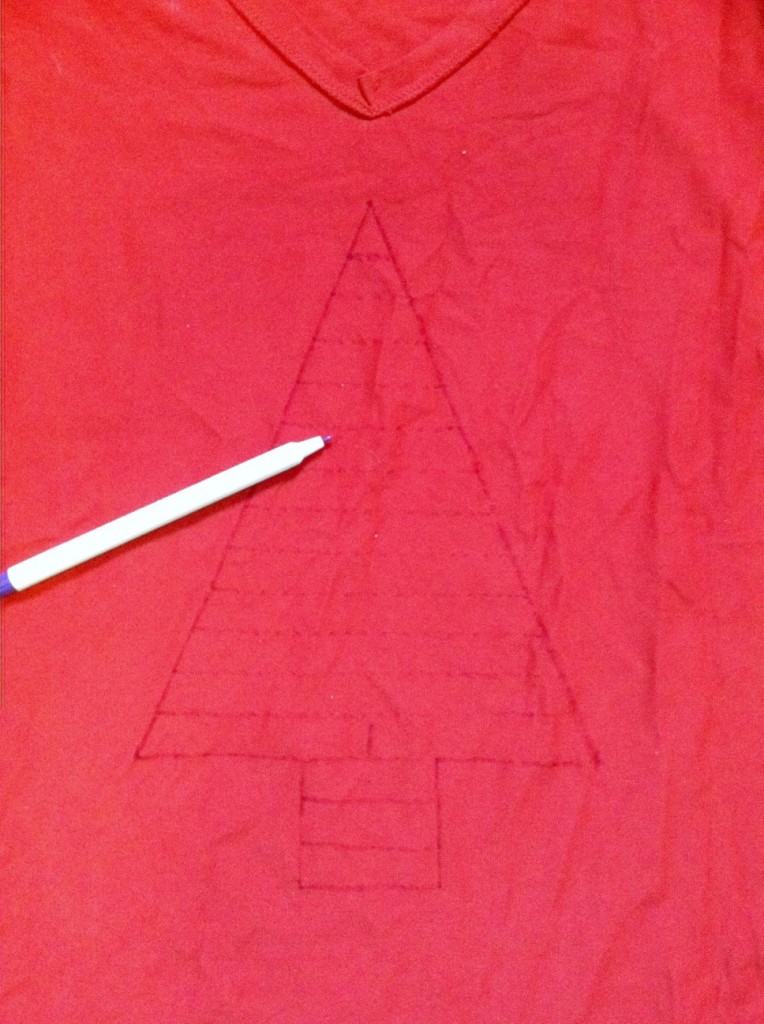
2. Use the straightedge again to mark horizontal lines from the base of the tree to the top, about 1/2″ to 3/4″ apart.

holiday shirt 3 generation-t.com

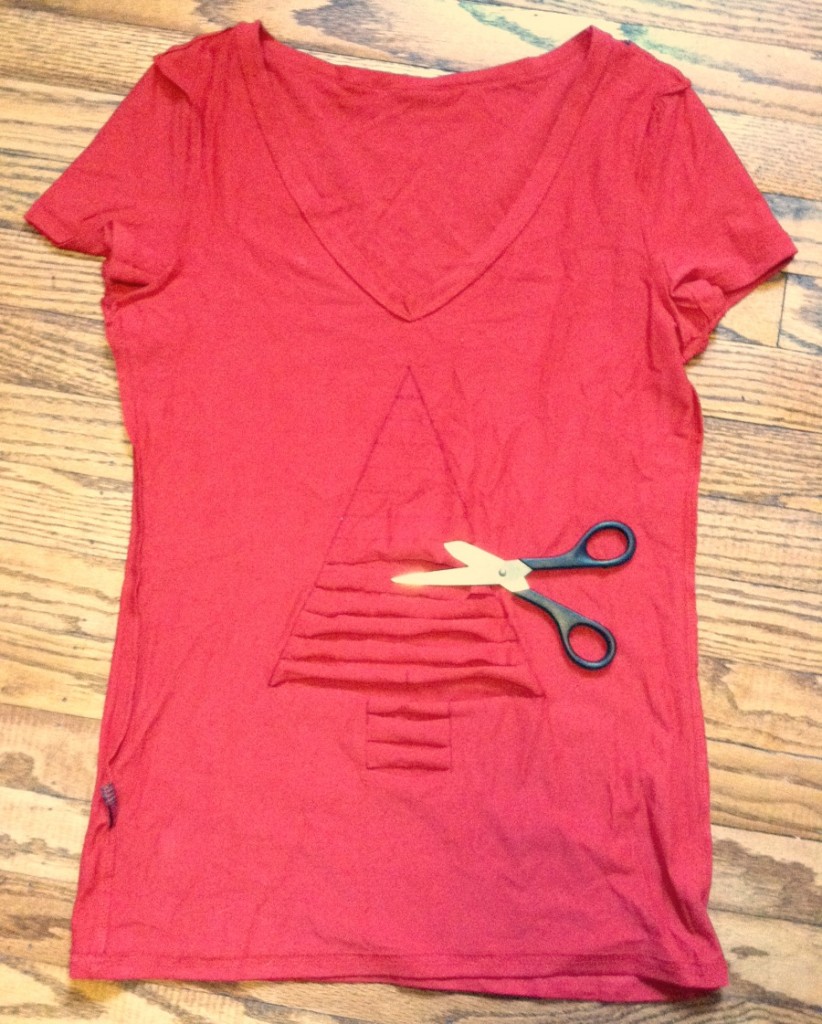
3. Cut along the horizontal lines only, making sure to cut through only the top layer of the shirt.

holiday shirt 5 generation-t.com

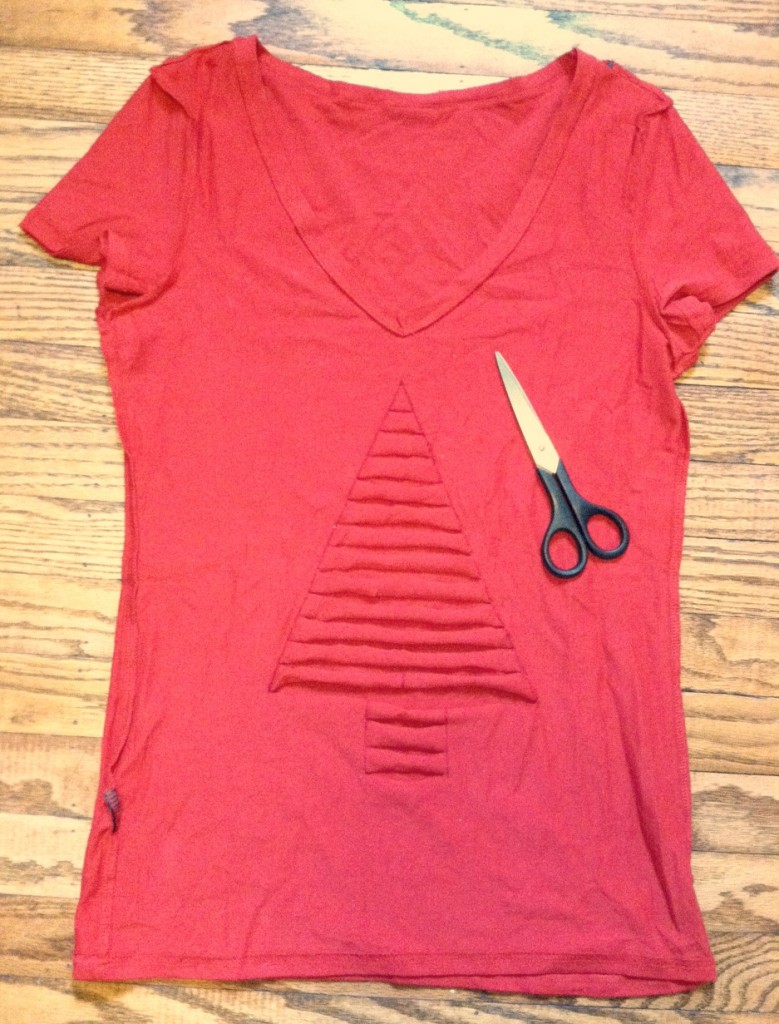
4. Cut all the way to the top, making a small snip (about 1/4″) at the peak of the tree. Tug gently at the sides of your T-shirt to stretch out the strips (so they curl a little).

holiday shirt 6 generation-t.com

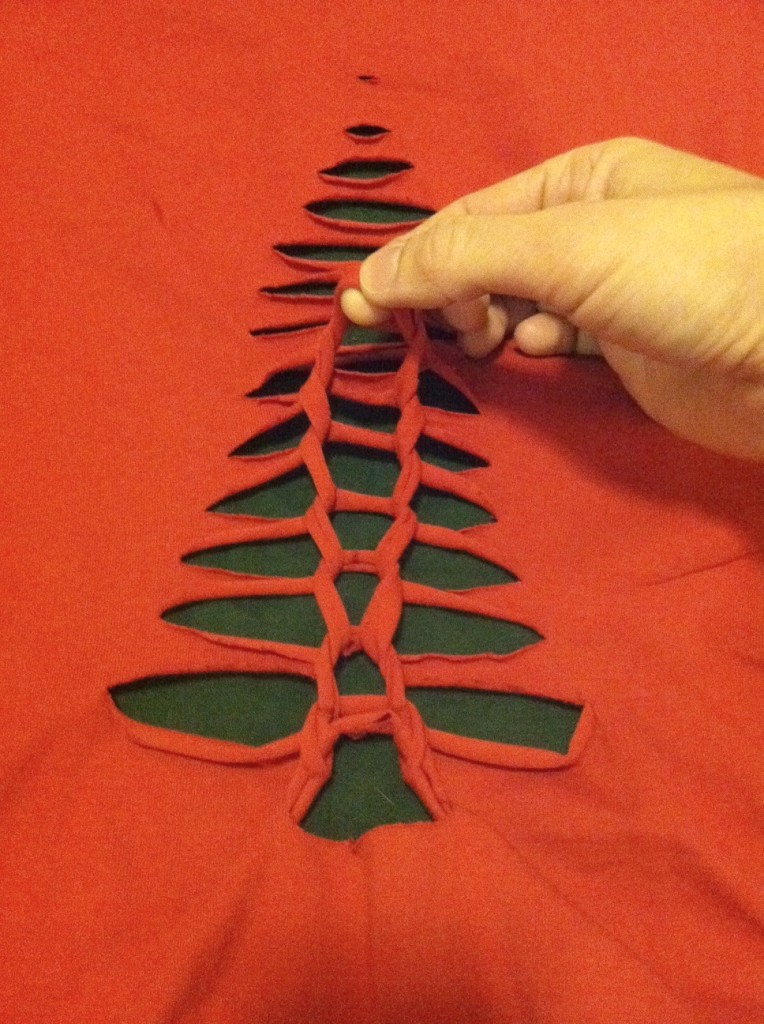
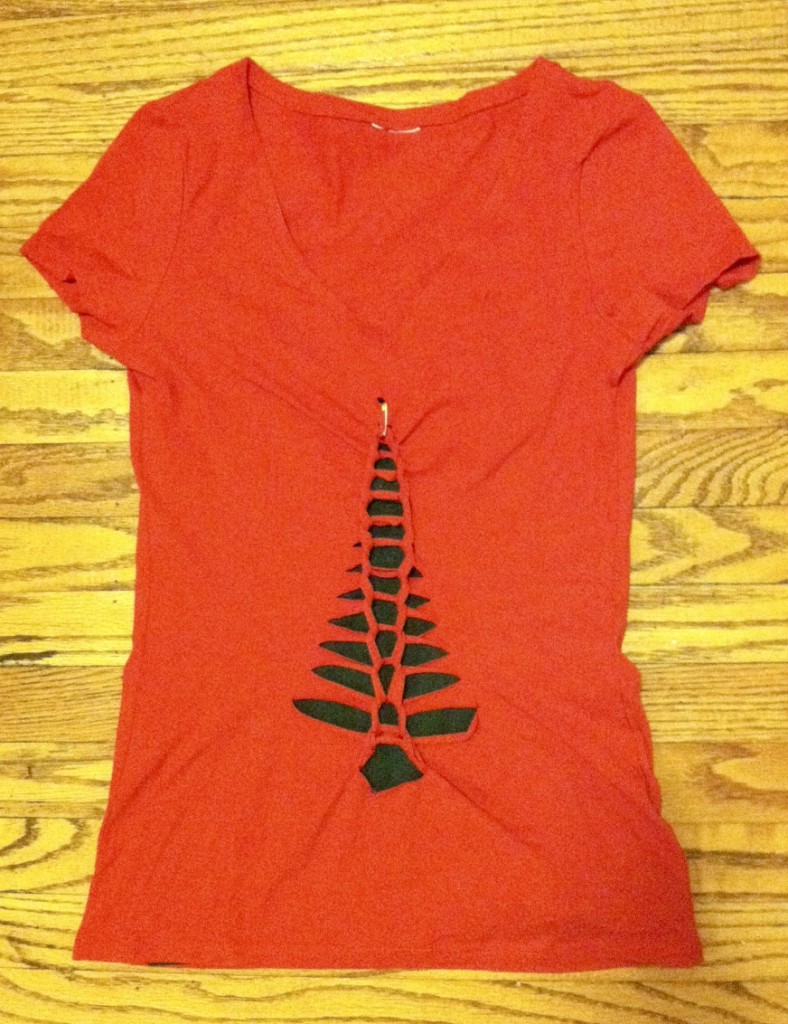
5. Turn the T-shirt right side out, and layer the green tank top underneath so you can see the shape of the tree clearly. You can stop right here and have a terrific-looking slashed tee, but forge on for another minute to get the woven effect: Take the first two strips at the trunk of your tree and loop strip #2 under strip #1. Drop strip #1. Then loop strip #3 under strip #2, dropping strip #2. And so on…

holiday shirt 8 generation-t.com

6. …to the top! Safety pin the second-to-last loop through the top snip. Tuck the safety pin inside so it shows less, or embrace the shiny bit of sparkle. Or, for a little more flair, trim your tree with a personalized 1″ round pin (replacing the safety pin).

holiday shirt finish generation-t.com

7. Try it on. Then….Go sing carols! Bake cookies! Replace the safety pin at the top with a sparkly brooch so you have a shining star up on the highest bow!

Holiday Tree-Shirt finish 3 generation-t.com

homemadeholiday101logo

[ 5 Comments | Posted on December 2nd, 2013 ]

Fall Fashion: Decorating with Leaves, 3 Ways!

Before the snowflakes make their grand and permanent seasonal entrance, I’m stuck on fall. The leaves are so beautiful this time of year in Brooklyn. I was up in New England for peak color, but even the last few weeks in Brooklyn have yielded a lovely array of color and variety.Leaf main generation-t.com
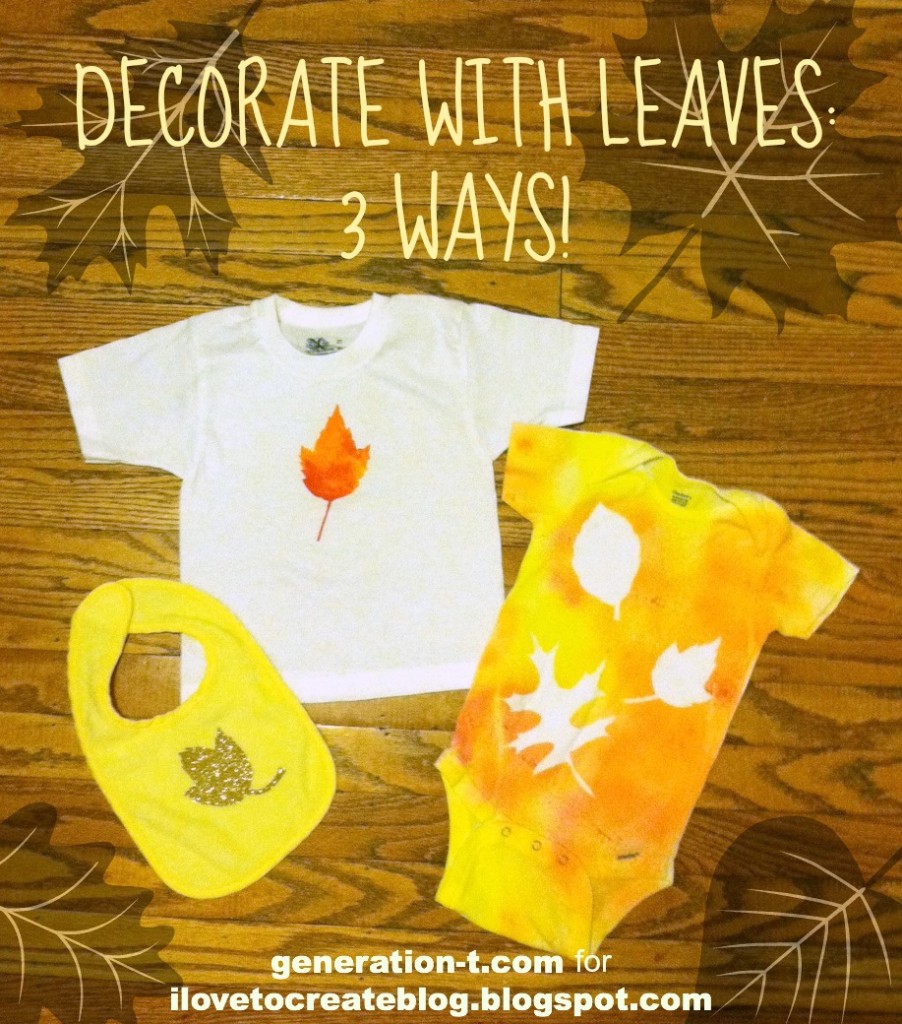
Of course, no matter how you try to keep them, the color fades, and they become dry and brittle. Here are three projects with a common autumnal theme that, like the snowflakes I made and painted last year, help make nature last a little longer.

megan-nicolay-blog-footer-1

INSPIRATION 1: DIY Leaf Stencil: This one starts with your basic stencil…
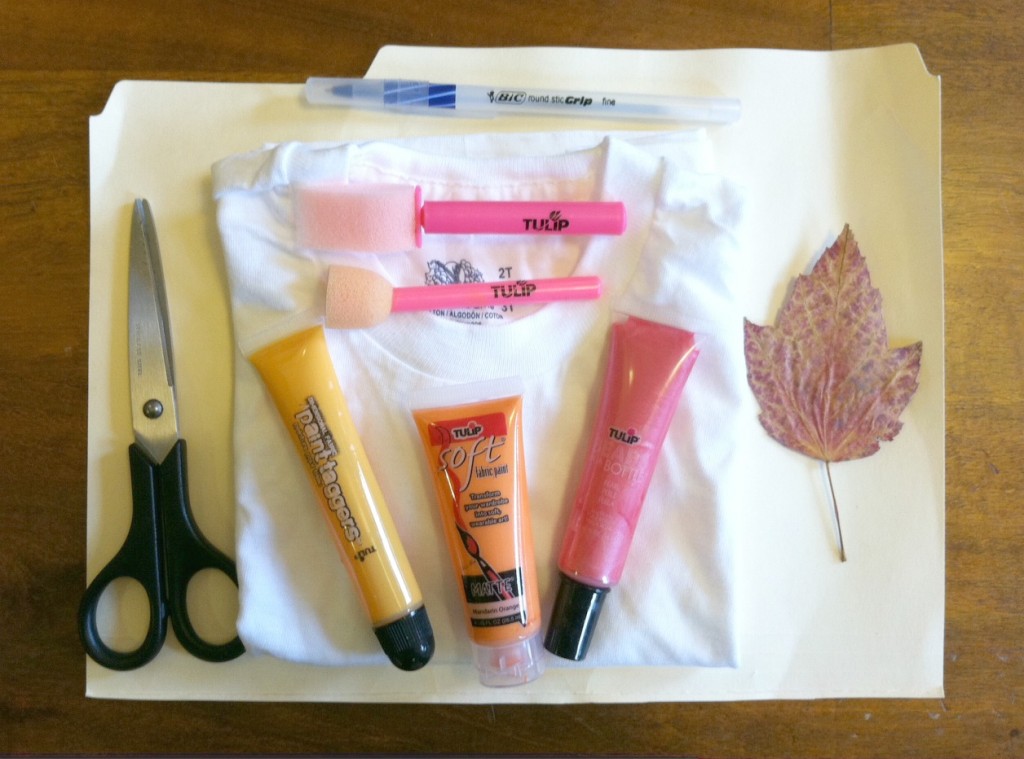
Leaf stencil materials
Materials:
-variety of Tulip soft paints and/or Tulip 3D Fashion Paints (in shades of red, orange, and yellow)
Tulip sponge brushes and/or Tulip sponge pouncers
-variety of pressed leaves for inspiration
-sheet of card stock (or scrap manila folder)-pen or pencil
-scissors or craft knife and cutting mat
-plain T-shirt (lighter colors work best, but white is not required!)
-paint palette (or a plastic container from the recycling bin)
-scrap paper (optional) for inserting between the layers of a T-shirt

Make it:
For complete step-by-step instructions, visit the iLoveToCreate blog.
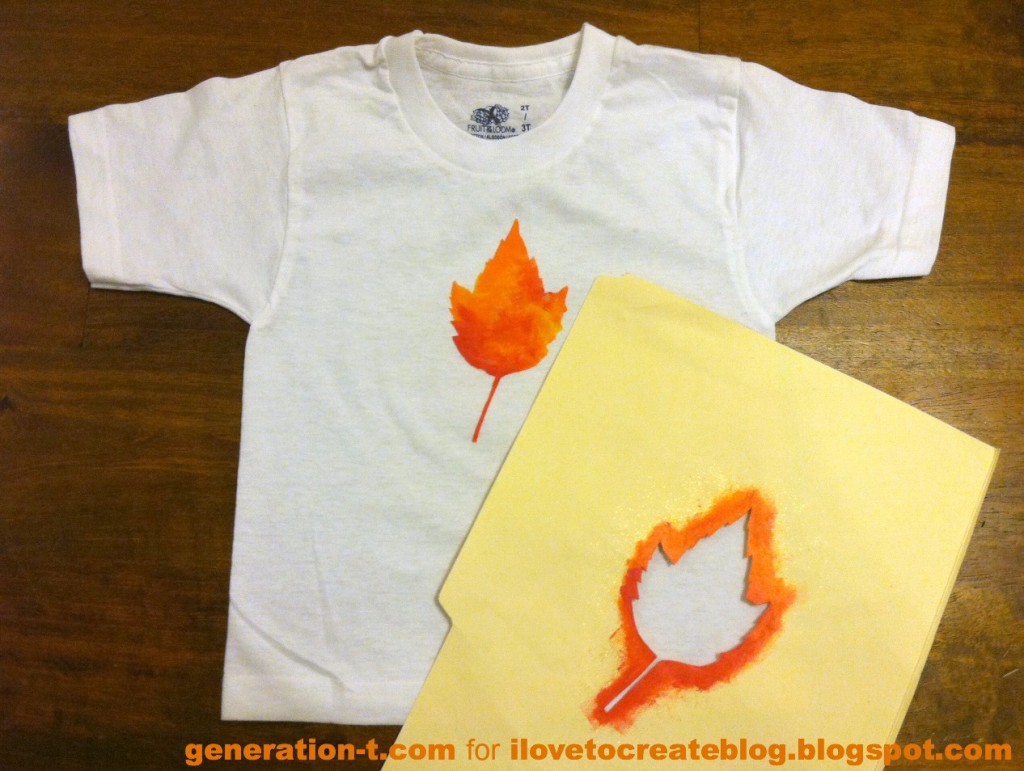
Leaf stencil paint finish

INSPIRATION 2: Reverse Leaf Stencil: This is the same concept as the stencil out of card stock, but you’re instead using freezer paper as your mask, and painting the space around the leaf.
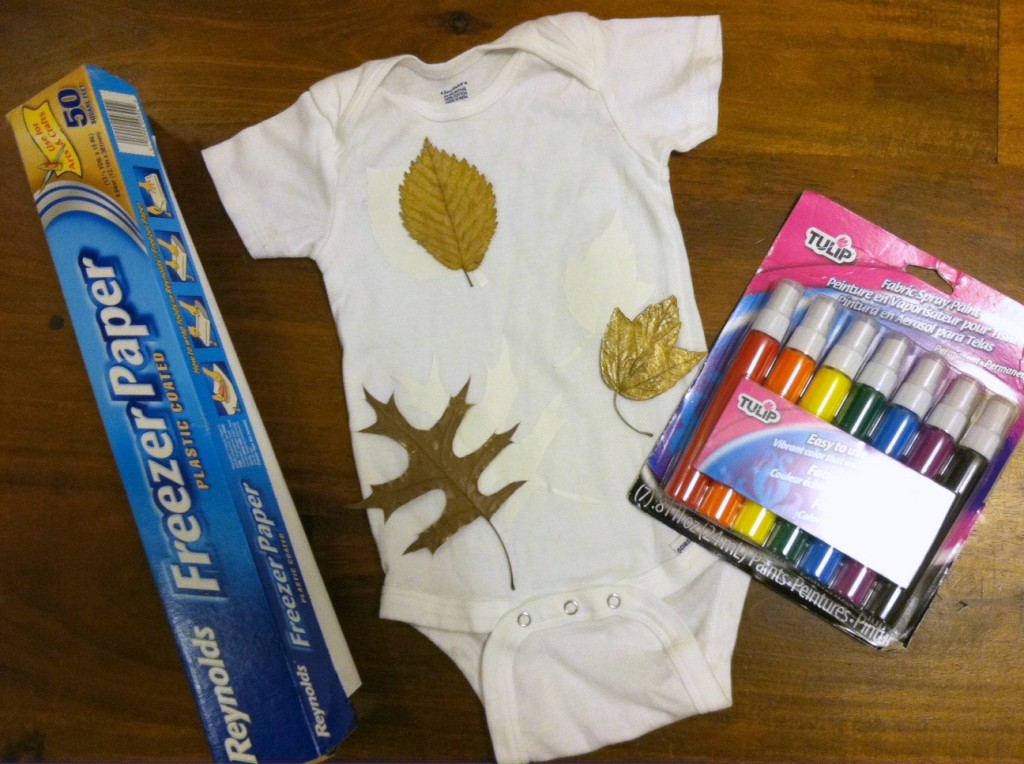
Leaf reverse materials

Materials:
-variety of Tulip Fabric Sprays (in shades of red, orange, and yellow)
-variety of pressed leaves for inspiration
-sheet of freezer paper
-pen or pencil
-scissors or craft knife and cutting mat
-iron and ironing board
-plain T-shirt or onesie (lighter colors work best, but, again, white is not required!)
-scrap paper (optional) for inserting between the layers of a T-shirt and to protect your work surface from paint

Make it:
For complete step-by-step instructions, visit the iLoveToCreate blog.
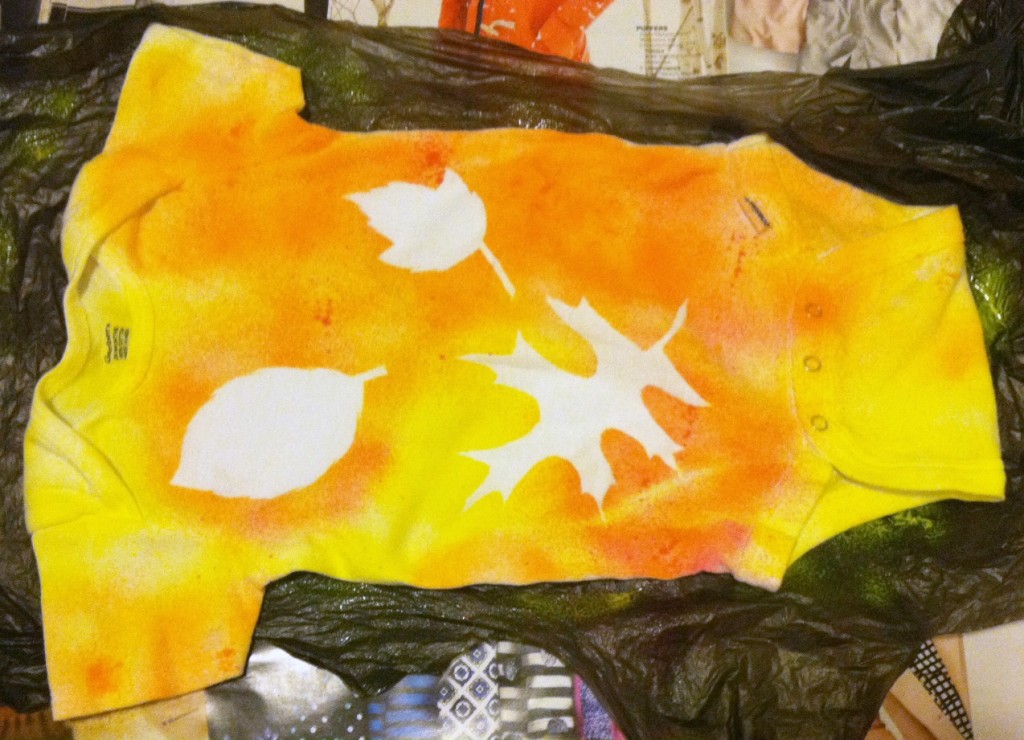
Leaf reverse peel

INSPIRATION 3: Glitter Leaf Appliqué: Like the reverse leaf stencil, you’re using the actual leaf shape (rather than the negative space) to create your decoration. The best part about this one? No waiting around during drying time–since there is no drying time!
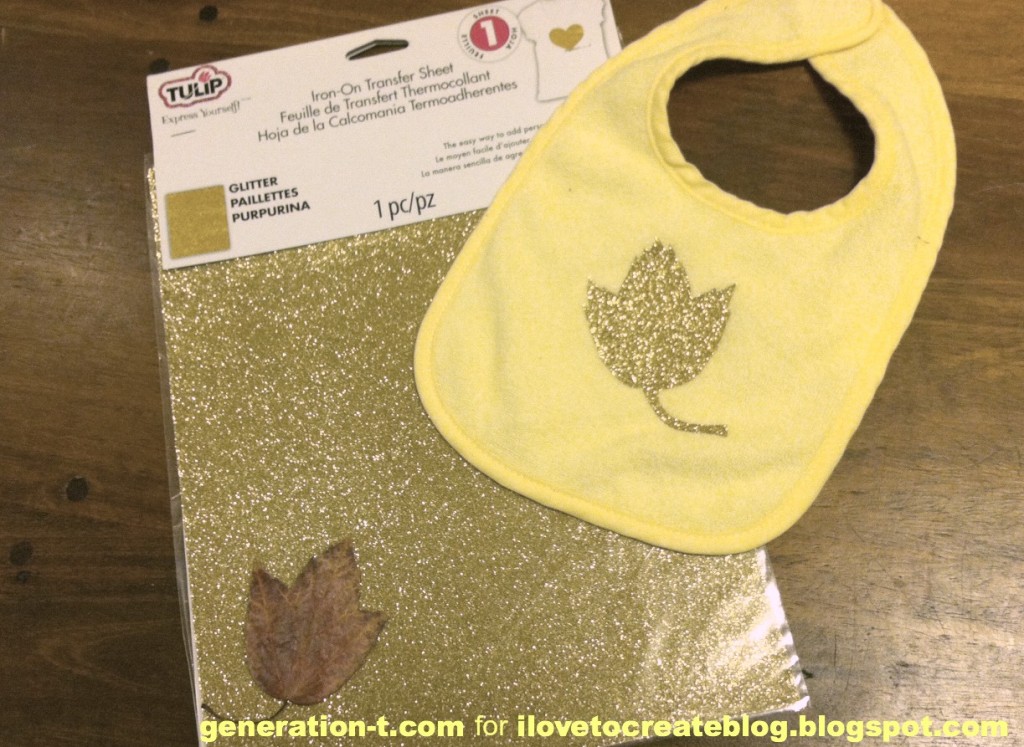
Glitter leaf materials

Materials:
Tulip Fashion Shimmer Iron-on Sheet (in gold)
-variety of pressed leaves for inspiration
-ballpoint pen
-scissors or craft knife and cutting mat
-iron and ironing board

-plain bib, T-shirt, or onesie

Make it:
For complete step-by-step instructions, visit the iLoveToCreate blog.
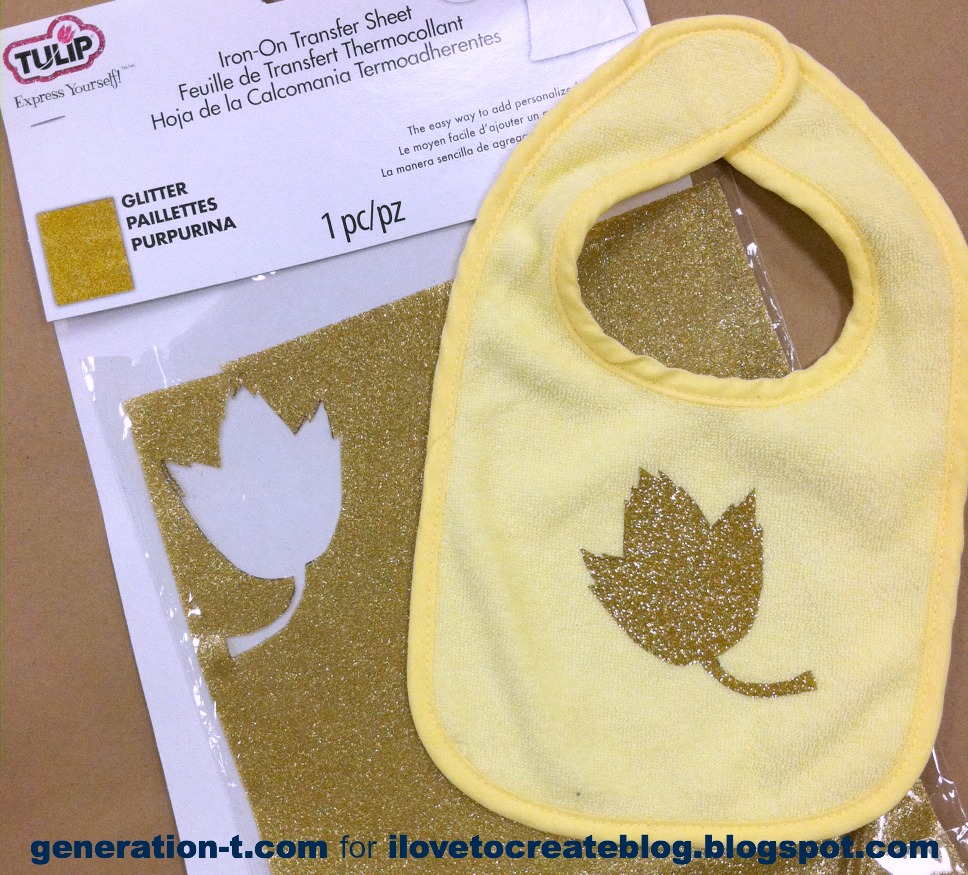
Glitter Leaf finish

Stay tuned next week for one more way to use autumn leaves as inspiration for decorating fabric. (PS: I made myself a really rad upcycled skirt!)
[ 1 Comment | Posted on November 26th, 2013 ]

Dye Easter Eggs with Shaving Cream

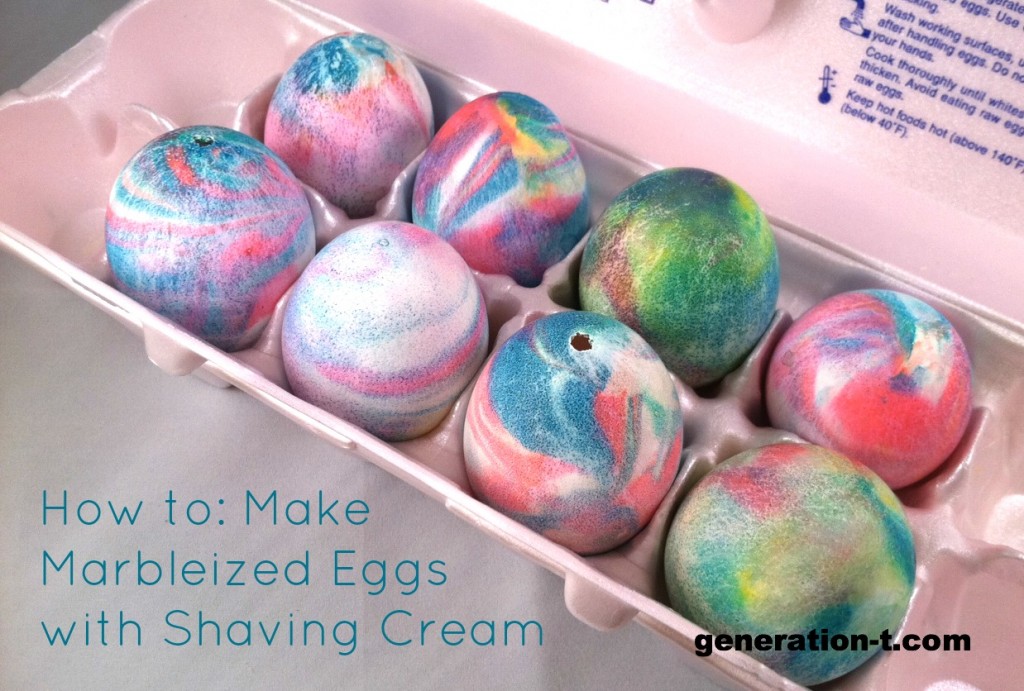
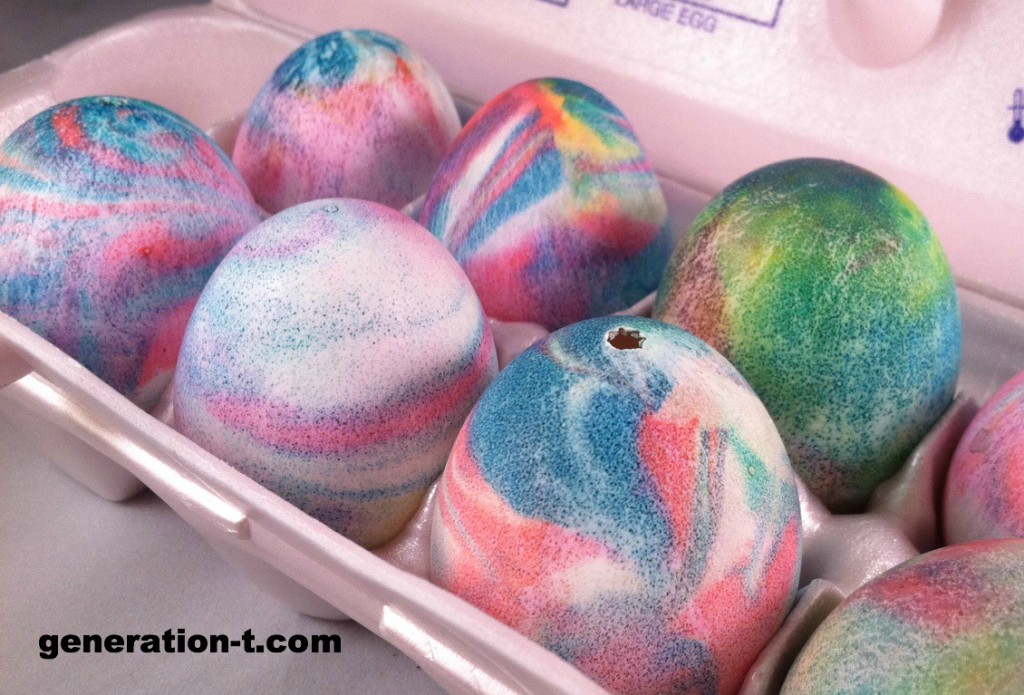
Okay, we kicked off a week of non-T-shirt-related posts with the Glitter Dot Easter Eggs yesterday, because as teased last week, I taped a bunch of how-to videos for About.com and since so many of them are Easter-themed, that’s what’s comin’ atcha! I’m definitely not the first person to use shaving cream and food coloring to dye my Easter eggs, but the amazing marbleized effect on the surface of the egg is so irresistible…

Materials:
-eggs (blown or hard-boiled)
-food coloring
-foaming shaving cream
-plastic spoon or knife
-bamboo skewer
-drying rack
-paper towels
-a timer (4-5 minutes)

Make it:
-Click below to follow along with the video tutorial for Marbleized Eggs with Shaving Cream for About.com.

Update: I heard from a commenter that you can do this technique with Cool Whip, too! Have you tried it?


[ 1 Comment | Posted on March 27th, 2013 ]

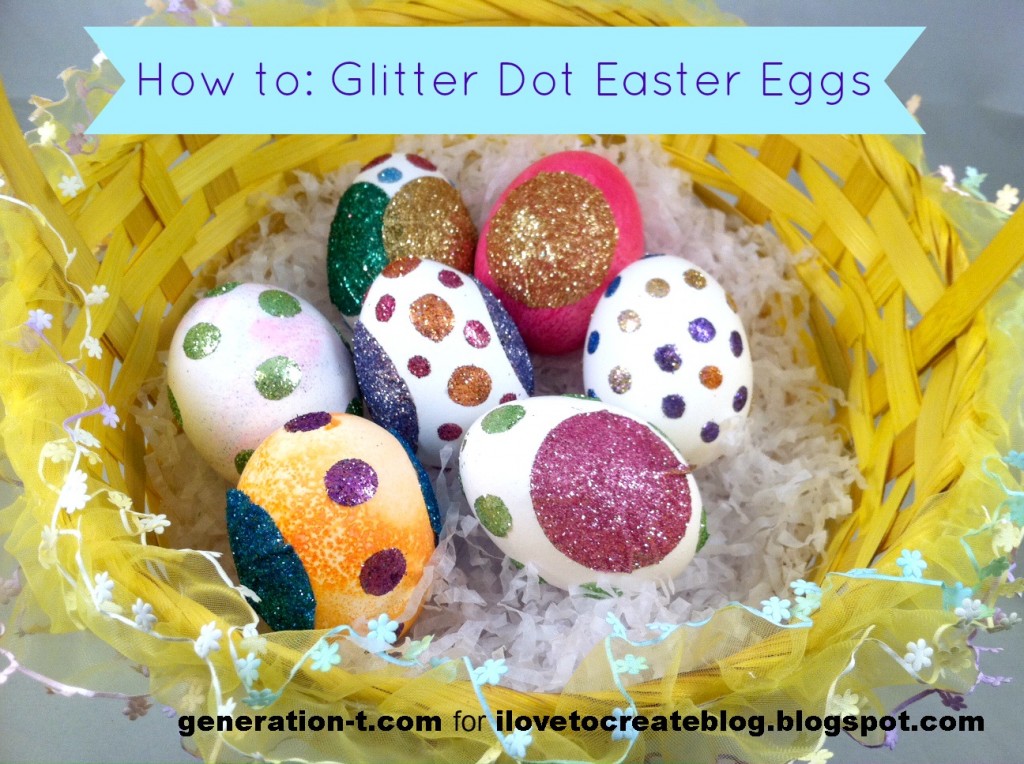
iLoveToCreate: Glitter Polka Dot Easter Eggs

I’m pretty traditional when it comes to decorating eggs at Easter time (dollar store egg dying kit, anyone?), but to be honest, it was getting kind of dull year after year. So this year, I dug through my craft stash to find a material that might have good crossover potential — one that was likely developed for one particular use (say, scrapbooking) that I could easily apply to something else (like Easter eggs). And voila!

Bring on the polka dots! Bring on the disco sparkle! The best part? No waiting around for dye to set or glue to dry. This is egg decorating with immediate (and rather shimmery) results.

For materials for the project and how to make these sparkle-riffic eggs, click below to watch the video tutorial I did for About.com and/or follow the step-by-step illustrated instructions (and a variation) at iLoveToCreate.com!


[ 2 Comments | Posted on March 26th, 2013 ]

Weekend Craft Fun!

A busy weekend! On Friday I taped seven — seven! — craft tutorials for About.com. I’ll let you all know when the links are live so you can all get in on the craft action — we decorated eggs (three ways!) and umbrellas, and made some keepsake art pieces for the wall. Here’s a behind-the-scenes sneak peek (you can see what a giant I am!).
On Saturday I went away to camp — Brooklyn Craft Camp, that is. It was fun to be a craft camper — fun to have that time set aside to do nothing but make things and chat with my neighbors at each craft table. I practiced my embroidery under the expert eye of Jessica at Miniature Rhino, made cut paper cards with Julie of Your Secret Admiral, attempted crochet with Cal of Hodge Podge Farm, and made a painted bead necklace with Christina of MissBatch. Jay McCarroll was the keynote speaker — and there was a Pom-Pom Bar courtesy of PurlSoho! More photos to come later this week, once I get everything unpacked and uploaded. (I know, I know, it’s not like it was two weeks away at summer camp, but I came home with a lot of bags!)

Stay tuned!

[ Comments Off on Weekend Craft Fun! | Posted on March 18th, 2013 ]