Coming off Thanksgiving, a holiday that many people abbreviate to “T-Day,” of course makes me think of T-shirts….and how EVERY DAY is Tee Day! So, move over scratchy holiday sweater. Here’s a simple, no-sew holiday T-shirt (ahem, tree-shirt) that I designed as part of Homemade Holiday 101 (#homemade101). It combines techniques from the Brokenhearted tee in Generation T (project #2) and Back in Action tee in Generation T: Beyond Fashion (project #101).

(OH, and…CLICK THROUGH TO HOMEMADE HOLIDAY 101 where the Generation T and Generation T: Beyond Fashion ebooks are on sale for $2.99 for a limited time!)

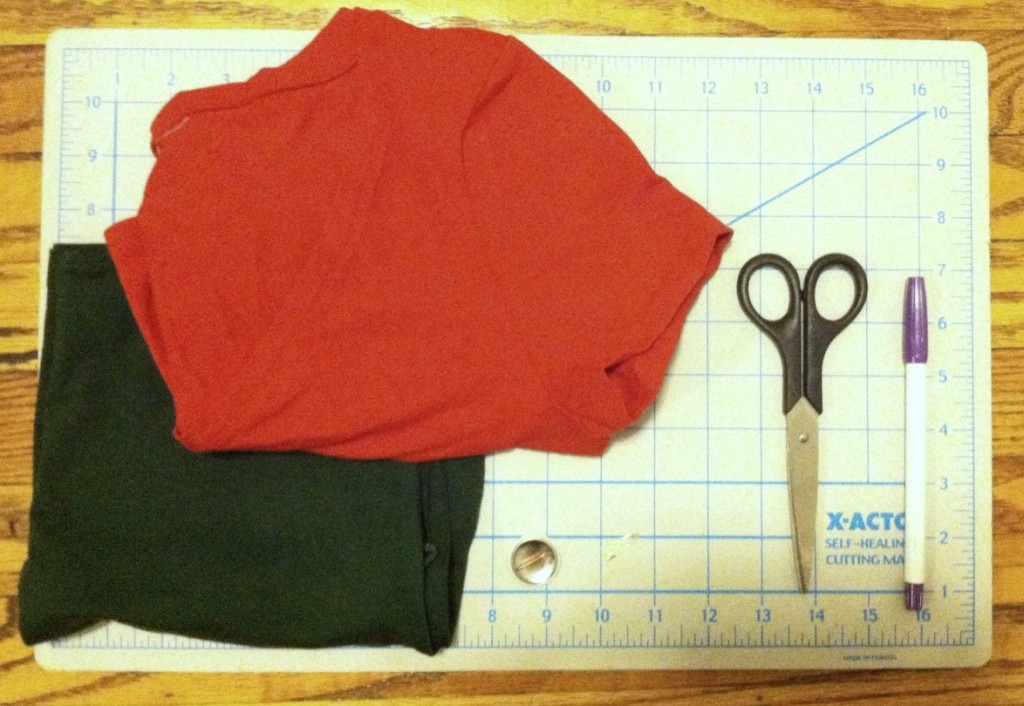
Materials:
-Red fitted T-shirt (mine has a small percentage Lycra)
-Green fitted tank top (or similar, to layer underneath)
-Disappearing ink fabric marker or fabric chalk marker
-Ruler/ straightedge
-Fabric scissors
-Safety pin or 1″ round pin
Make it:
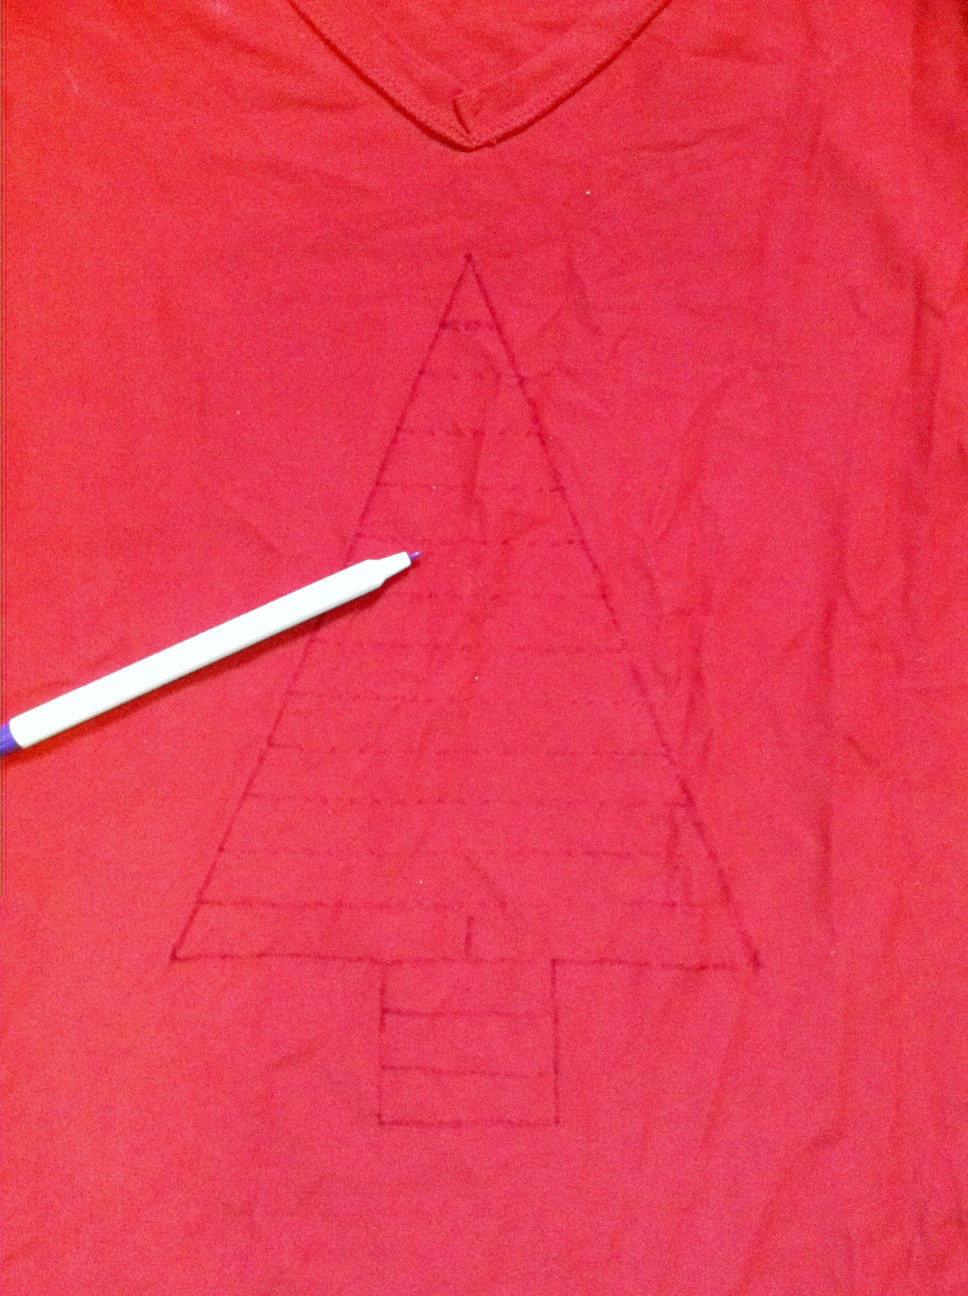
1. Turn the T-shirt inside out and, using the straightedge, draw an isosceles triangle with a small rectangle at the bottom (aka, a simplified evergreen tree shape). My tree is about 7″ across at its widest.
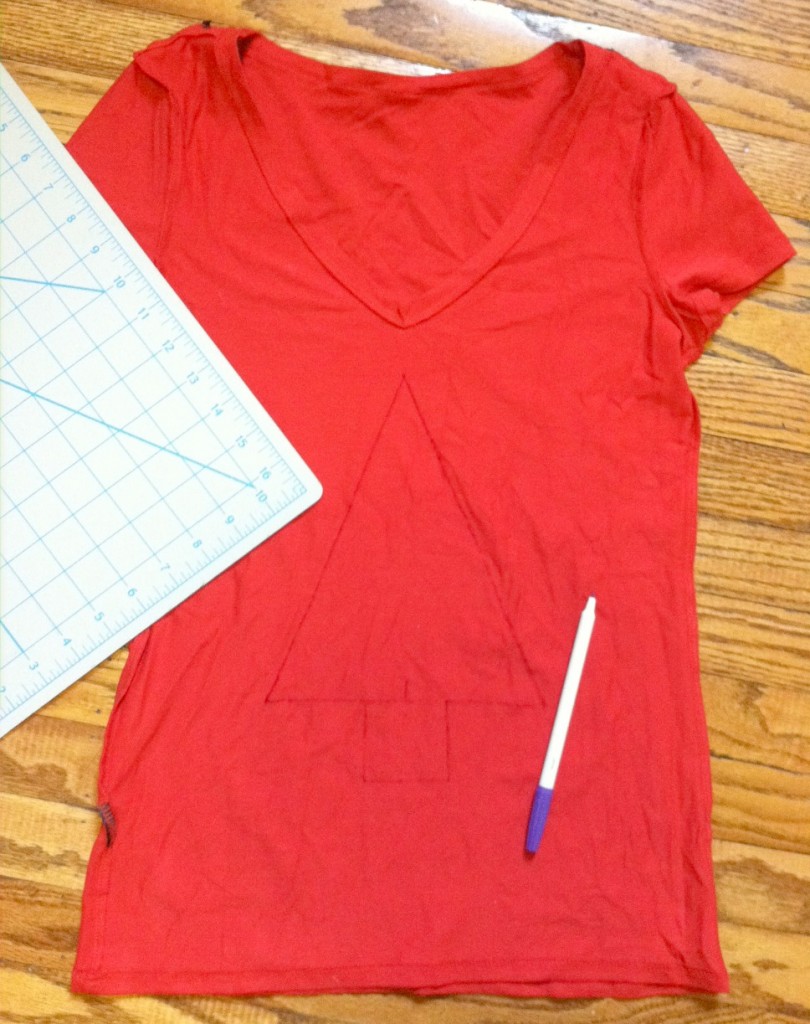
2. Use the straightedge again to mark horizontal lines from the base of the tree to the top, about 1/2″ to 3/4″ apart.

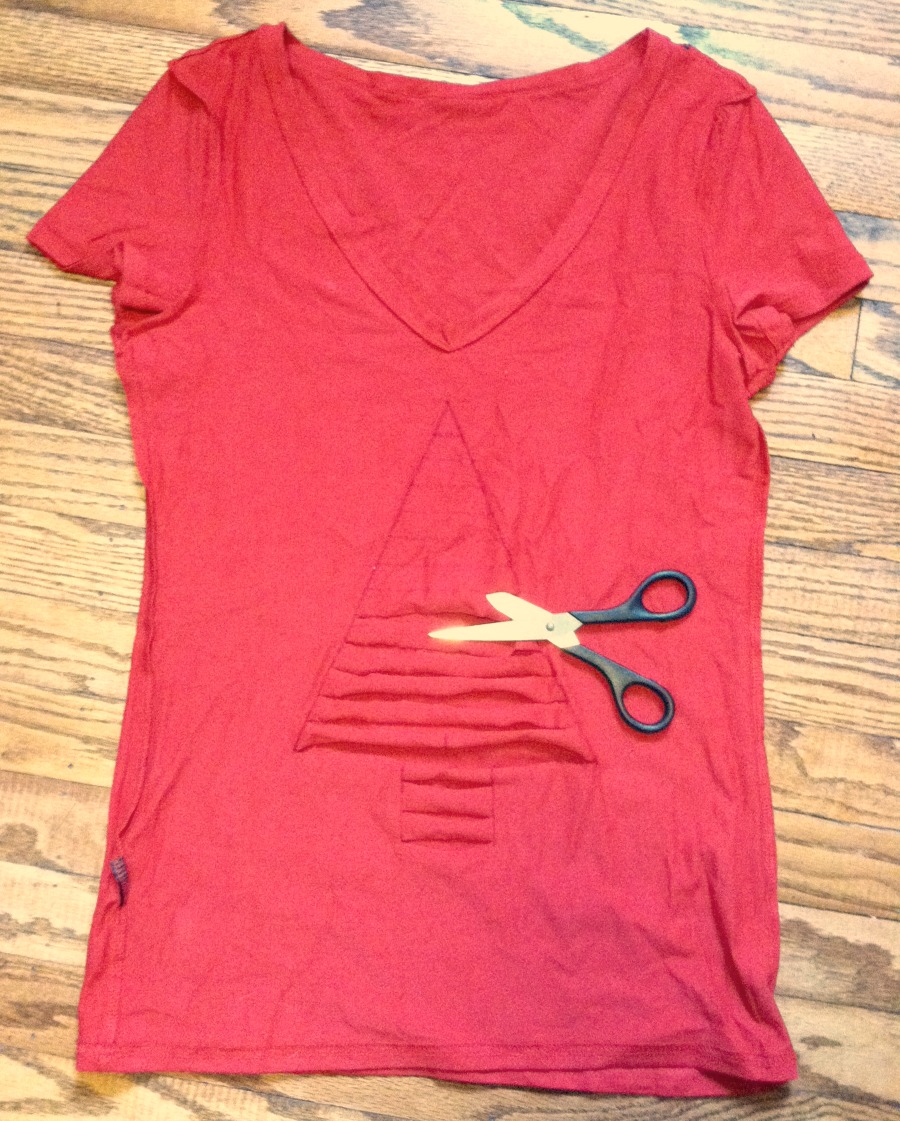
3. Cut along the horizontal lines only, making sure to cut through only the top layer of the shirt.

4. Cut all the way to the top, making a small snip (about 1/4″) at the peak of the tree. Tug gently at the sides of your T-shirt to stretch out the strips (so they curl a little).

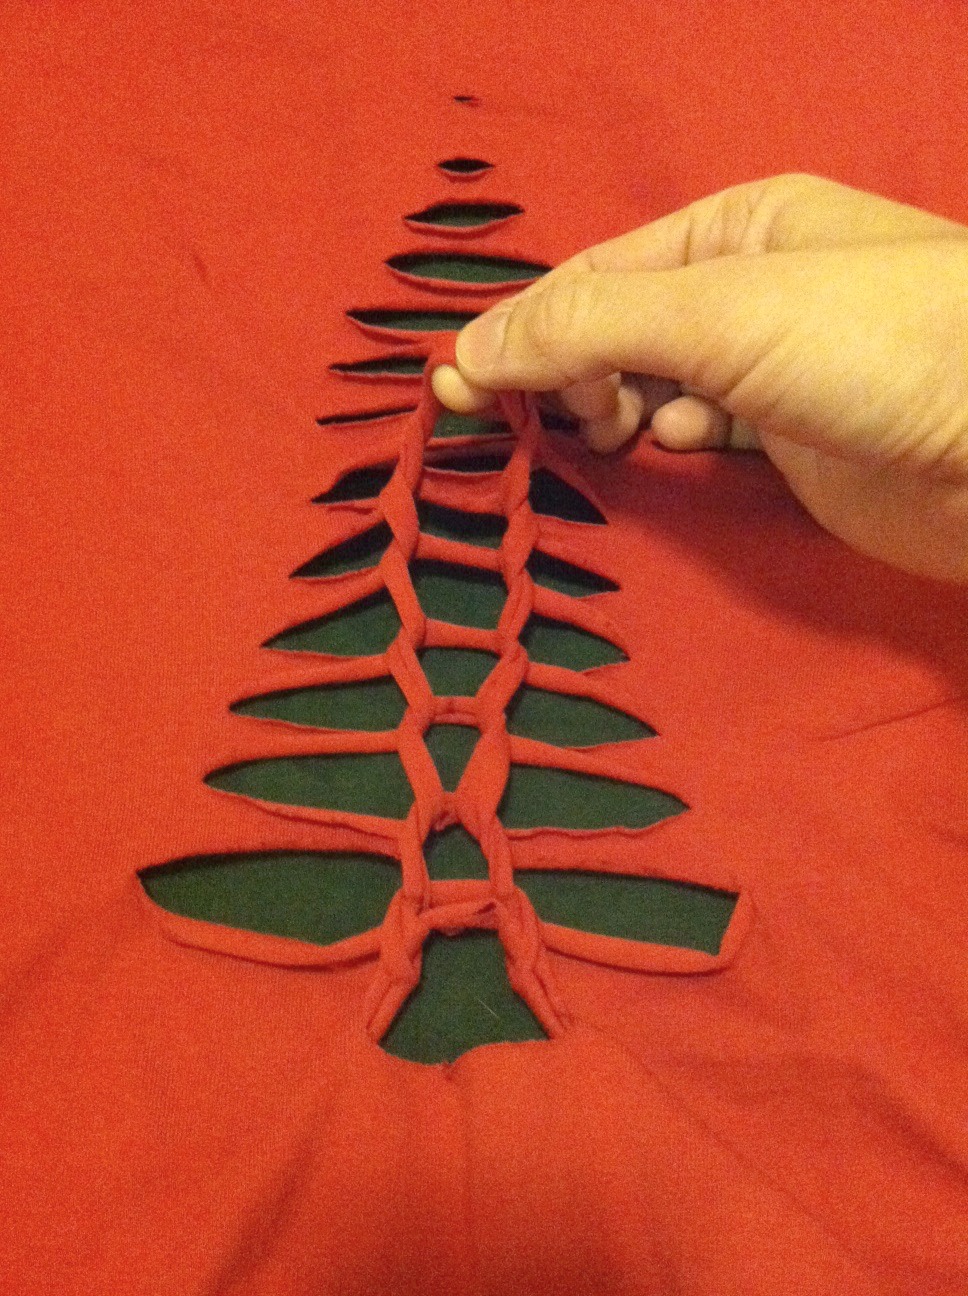
5. Turn the T-shirt right side out, and layer the green tank top underneath so you can see the shape of the tree clearly. You can stop right here and have a terrific-looking slashed tee, but forge on for another minute to get the woven effect: Take the first two strips at the trunk of your tree and loop strip #2 under strip #1. Drop strip #1. Then loop strip #3 under strip #2, dropping strip #2. And so on…

6. …to the top! Safety pin the second-to-last loop through the top snip. Tuck the safety pin inside so it shows less, or embrace the shiny bit of sparkle. Or, for a little more flair, trim your tree with a personalized 1″ round pin (replacing the safety pin).
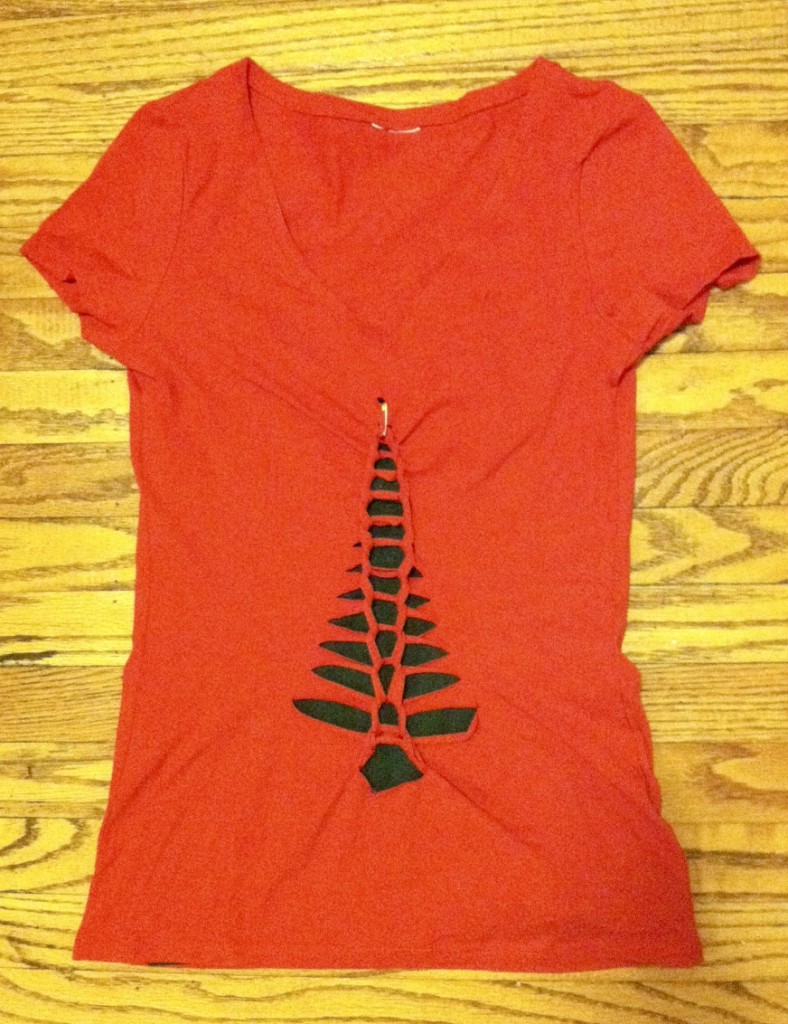
7. Try it on. Then….Go sing carols! Bake cookies! Replace the safety pin at the top with a sparkly brooch so you have a shining star up on the highest bow!