Posts Tagged ‘T-shirt surgery’

Brooklyn, NY @ Park Slope Library

The weather is getting chillier here in the northeast part of the country (or not–wasn’t it just in the 70s yesterday?), but that doesn’t mean I’m packing up my T-shirts (never out of season! never out of style! Just…more layers!). Come join me for a crafternoon Tee Party T-shirt refashioning workshop.

gen-t-at-ps-library

There will be books. There will be T-shirts to cut. There will be scissors. Just bring yourselves!

WHEN: NOVEMBER 5, 2:00-4:00 PM
WHERE: Park Slope Library
431 6th Avenue
Brooklyn, NY 11215

Hope to see you! xox

[ Comments Off on Brooklyn, NY @ Park Slope Library ]

DIY: Crossback Tank Top

Summer is all about easy, breezy fashion (stay cool) and tie-dye (stay fun!). Here’s an ombre-style surface treatment for a quick-and-easy T-shirt transformation. From plain white T-shirt to a smock-styled, crossback tank top that’s nearly no-sew (about 6 inches of stitching) in no time. Smock it to me!Smock Tank Finish generation-t.com

megan-nicolay-blog-footer-1

Materials:
-Plain white T-shirt
Tulip One-Step Tie-Dye
-Scissors
-Needle and thread or sewing machine
-Plastic container from the recycling bin

Smock tee materials generation-t.com

Make it:
Click through to the iLoveToCreate blog from a complete step-by-step  photo tutorial!

Smock tank finish1 generation-t.com

[ Comments Off on DIY: Crossback Tank Top | Posted on July 22nd, 2014 ]

From Our Readers: Brenda!

Happy Earth Day, friends! Today’s “from our readers” feature introduces Brenda, a Canadian expat living it up in Mexico and slashing up old T-shirts whenever she can. She asked me a question over Twitter awhile ago, and I was just too slow in answering (I do so understand when the scissors start getting a little twitchy, and one needs to forge on!), so Brenda, resourceful lady that she is, found a design on the Internets to help fulfill her vision (if anyone knows the source, let me know so I can properly link it! UPDATE: Properly linked to the source shirt!). See the result of Brenda’s T-shirt snipping (white T-shirt, left).

And this one (green T-shirt, right), inspired by the butterfly variation on the slashed “Brokenhearted Tee” (project #2 in Generation T: 108 Ways to Transform a T-shirt):

Happy Earth Day to all! What sweet T-shirt hacks are on your creative calendar? What are you making next?

[ Comments Off on From Our Readers: Brenda! | Posted on April 22nd, 2013 ]

T-shirt Jam Session with BoingBoing!

On a warmer day a few weeks ago, Jamie Frevele of BoingBoing and I sat down with my sewing machine, a couple pairs of sharp scissors, and Jamie’s stash of T-shirts (she has some amazingly iconic ones in there — Rosie the Riveter, Captain America, the New York City tee that John Lennon was famously photographed wearing — sleeves cut off — in New York in 1974 by Bob Gruen) to have a little Tee Party. And a party it was…

Without further ado, here’s how to cut the perfect neckline, and how to transform that old boxy tee into a fresh ‘n’ foxy tank top in T-minus 60 seconds (yes, we’re rife with T-shirt puns up in here). Here’s how it all went down, no-sew style:

For an additional tutorial (bonus!) on how to easily re-size a T-shirt with two easy seams — click through to see Jamie’s (@jamielikesthis) step-by-step photos of how we transformed her iconic New York City tee from this:

Into this:

The T-shirt (à la John Lennon) is boxy no longer!

Happy new T-shirt to Jamie, happy birthday to John Lennon (today would have been number 72), and happy T-shirt refashioning to you all!

[ 2 Comments | Posted on October 9th, 2012 ]

From Our Readers: CC!

One of my favorite familial designations (big sister, mother, daughter, niece, cousin) is that of “Aunt.” So you can imagine my elation last week when I got an email from CC, another proud auntie who recently sent a copy of Generation T as part of a care package to her niece when an emergency appendectomy (!) threatened to derail the family vacation. Her niece (and nephew) were bummed about the change in course (who wants to go to the emergency room when you’re expecting a relaxing week on Cape Cod?) and Auntie CC had just the remedy. Needless to say, her gift was well-received: “I was on auntie cloud 9 when I got this photo. Thanks for making me look good!”

The young lady (standing here with her brother, who’s wearing a pretty cool T-shirt himself) was so proud of the butterfly slashed tee she made (variation on project #2 Brokenhearted in Generation T that we all hearted so much last month) that she selected it to wear on her first day of school. Now that, my friends, is quite the compliment!

She used the same technique as you would for the slashed heart, but simply used the outline of a butterfly as a guide instead. The great thing about this look is she can change the color of her tank top underneath and change the color of her butterfly — orange for a monarch or yellow for a tiger swallowtail.

Happy back-to-school!

[ Comments Off on From Our Readers: CC! | Posted on September 7th, 2012 ]

I Love to Create: Easy Breezy Heat Wave Tee

This design falls into the category of fashion as necessity: When temperatures push 90 and 100 degrees, there’s little else you want to wear besides a T-shirt. But even a tee can seem stifling when you add humidity to the mix. Here’s a T-shirt hack that’s meant to keep the air circulating–it features a cut-out back and a looser fit. (Of course, a trip to the local ice cream haunt doesn’t hurt the cooling plan either!)

I encourage you to dig into your fabric stash to find an unlikely contender for the fabric insert on this one. The fabric I used was originally purchased by my brother from a discount bin to use as a bed skirt. I inherited it when he moved, and my mom and I made curtains to filter the light in my apartment. Now the remnants have been reincarnated as part of this heat-beating T-shirt. What a life cycle! Tip: Check the give of your fabric–you shouldn’t have to worry too much about working on the bias (the diagonal of the fabric) since the rest of the T-shirt will have plenty of stretch, but consider your layout before you cut!
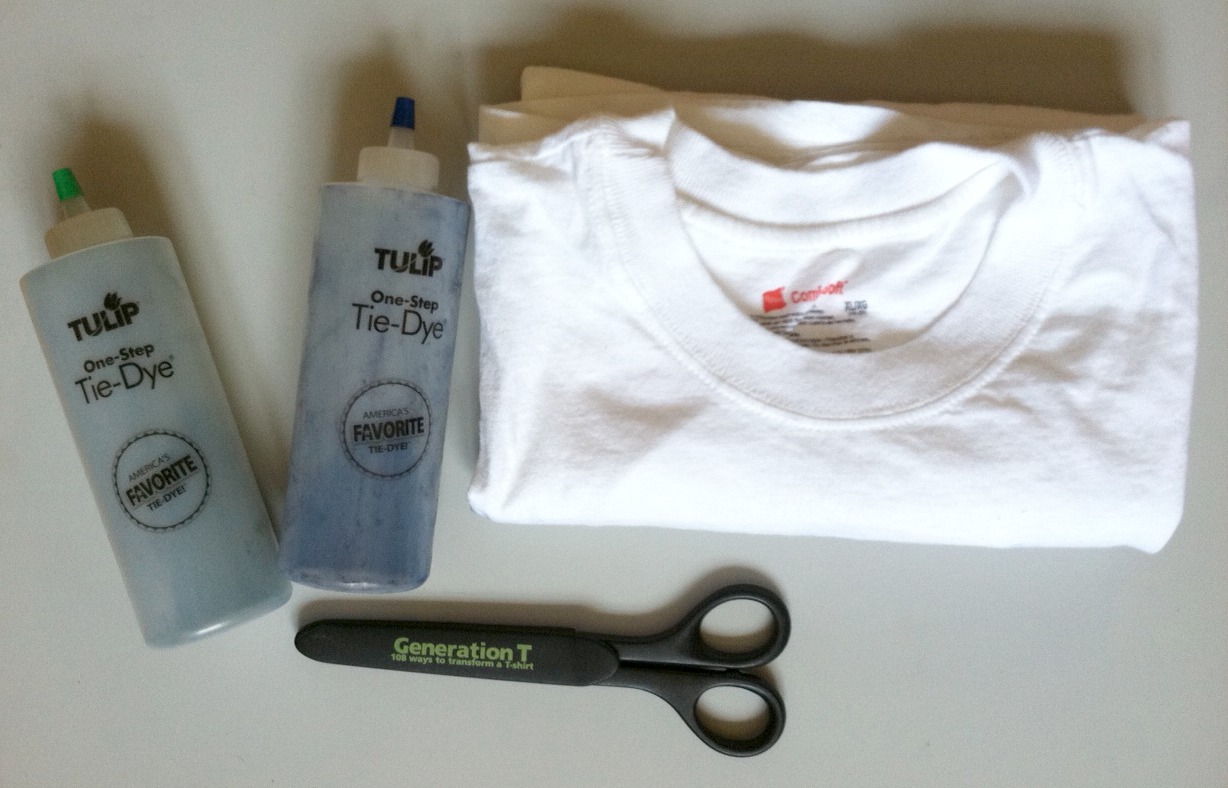
Materials:
-regular fit T-shirt
-fabric scissors
disappearing ink pen
-ruler
-straight pins (optional)
Aleene’s OK Wash-It fabric adhesive (or a sewing machine and thread to match your fabric)

Make it:

1. Turn the T-shirt inside out and lay it face down. Measure and mark about 3 1/2″ to 4″ in from either edge along the hem. Then draw a straight line from each mark to its adjacent sleeve (at the armpit).

2. Cut along that line through only the back layer. Continue cutting around the sleeve, just inside the seam (again, through only the back layer), along the top shoulder seam, and along the back of the neckband. Continue cutting until the back panel of the shirt can be removed. Set the front of the shirt aside momentarily.

3. Lining up the bottom edges of the fabric pieces, lay the back panel of the T-shirt over the backing fabric and trace the panel, extending the shape on either side to accommodate for the 3 1/2″ to 4″ wedge that was cut away. (The extra fabric will help create the flare.) Cut out the shape from the backing fabric.

4. Lay the fabric against the front piece of the T-shirt so that the edges of the two pieces line up, right sides together. Use the permanent fabric adhesive to glue the inside edges together. Optional: Use straight pins to hold the fabric edges in place before you glue.)

5. Ease the edges together, pinching and pressing them in place. Then let dry completely.

6. Turn the tee right side out and touch up any gaps along the seams.

7. Layer the tee over a thin tank top if you’re feeling demure, or be bold by wearing a colorful, barely there undergarment (the point is to limit the layers of fabric on the skin after all!).

Variations:
-Replace a panel along the top of the sleeve as well.
-Replace a smaller panel in the back of the T-shirt with a cotton crocheted doily.
-Make the flare more exaggerated and fluttery.
-Experiment with different fabrics (silk scarf, old mesh sports jersey, a linen table cloth).

Next up? Though I quite like the subtle contrast in whites (the stark cream with the more ivory gauze), I’m going to experiment with dye the next time I make this design!


[ 4 Comments | Posted on July 24th, 2012 ]

I-Love-the-’80s Fringe Fabulous T-shirts

It’s springtime, which means one thing to me: T-shirt weather! It’s an exciting time here in the Land of Generation T, because as many of you know, it only gets better: After spring comes summer, which means we all get a little more scantily clad — T-shirts turn into tank tops and tube tops and ooh-la-la! So grab your scissors (to cut away some of that extra fabric, of course), crank up the color (bring on those fabric spray paints), and hop in your fabulous fashion time machine, because fringe is enjoying a bit of a renaissance this season. Last weekend, I dialed back the decades and dug into my craft stash to make some classic ’80s-inspired geometric tees.

Materials:

-light-colored T-shirt (I used a light blue one)
-ruler

-masking tape
fabric scissors
fabric spray paint (variety of colors)
-scrap newsprint paper

Make it:

1. Lay the T-shirt flat. Use masking tape to mark a horizontal line about 8″ up from the bottom of the shirt. Find the vertical center of the shirt and apply tape to the chest-region of the T-shirt to create a crisscrossing geometric pattern.

2. Insert the newsprint paper between the layers of the T-shirt to prevent the paint from bleeding through. Then apply fabric spray paint over the taped area. Apply another color or two, then let dry.

3. Peel back the tape, and then lay down more tape (I cut the tape strips in half, thirds, and quarters to make thinner lines) across your pattern to create a modified plaid pattern. Then spray paint more color!

4. Let dry completely before peeling off the tape to reveal your design.

5. Cut off the bottom hem of the T-shirt, just above the stitching. Then, using the tape marker you pressed down in step 1 as your guide, cut 1/3″- to 1/2″-wide fringe from the bottom edge of the shirt.

6. Cut off the sleeve hems, just above the stitching, and cut out the neckband, just below the neckband edge in the front and the back, and about 2″ wider on the sides.

7. Gently tug on the fringe to stretch it out (the fabric edges will curl in). Try it on!

8. Grab up additional T-shirts and experiment with your paint patterns and fringe — cut it on a diagonal, in a chevron-inspired V-shape, make it long or short!

Then pack a picnic, sling your boombox over your shoulder, and turn up any of the decade’s Billboard hits!


[ 5 Comments | Posted on May 22nd, 2012 ]

From Our Readers: Willow!

This past July, I visited a local coffee shop in my hometown in New Hampshire and bumped into a young fan named Willow, who was there with her mom, and who happened to be sporting a “Sidewinder” skirt that she made herself from Generation T: 108 Ways to Transform a T-shirt (project #52).

She did amazing work on that skirt, and she’s pretty darn cute, to  boot!

[ 1 Comment | Posted on December 29th, 2011 ]

New York, NY @ The Duplex

Sharpen your scissors, folks! (Okay, don’t worry about the scissors, we’ll provide them — and sharpen them, too.) Just pack an old T-shirt that you want to freshen up, and come to the free T-shirt refashioning event at The Duplex in NYC’s West Village on Tuesday October 18, 2011 from 7 to 9 pm! Megan will teach two designs from her books Generation T and Generation T: Beyond Fashion (and if the time allows, a bonus look, too!). Scissors and any other necessary tools will be provided, books will be for sale (get them signed!), and drinks (also for sale!) will be served by the talented Matthew Fletcher. Hope to see you there.

The Duplex
61 Christopher Street (at 7th Avenue)
New York, NY 10014

[ 3 Comments ]

From Our Readers: Onyx!

tia haltertopA blast from the past, but still in time for summer 2011! Shortly after Onyx’s dad came to one of my summer 2009 book tour events for Generation T: Beyond Fashion in Portland (sadly, Onyx was out of town!), Onyx made the Pinup Girl halter top at home. Her aunt came over for a visit, and she generously gifted it to her. Instead of using a punk pin for the “pinup” part (the gathers at the front), she used a safety pin and sewed on a barrette–a very cute and creative variation!

Other viable variations include a couple of stitches to keep the gather in place, a button or two (or three!), or a big sparkly bead or brooch. Sum-sum-summertime!

[ 1 Comment | Posted on August 2nd, 2011 ]