Other Projects

Generation T gift tags!

As quickly as the wreaths, tinsel garlands, and snowflakes swirled into place in stores the morning after Halloween, the red hearts and doilies are already up and about for Valentine’s Day. I’m still recovering from the sugar high of the holidays, but what I do love about the holidays is giving gifts — especially of the handmade variety!

Unfortunately, I wasn’t able to make these available to you in time for all of your DIY Christmas gift giving, but fortunately, we give gifts year round (they’re called birthdays, graduations, mothers/fathers/grandparents days, and so on… and yes, that reddish holiday I mentioned above called Valentine’s).

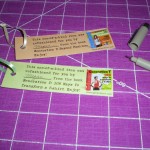
So, to ring in this new year–nay, new decade–of celebrating, I’d like to introduce a brand-spanking new feature that I made for you — free downloads of printable tags that you can add to your handmade Generation T gift, so the recipient knows they’re getting a Generation T original — made by you!

They’re super easy to use. Just click on the appropriate book title in the “Free Downloads” icon in the right column of the website. The files are PDFs, so make sure you have a program that will open them. Then hit “print” and follow the directions to cut out, hole punch, sign, and attach, and you’re good to go!

Happy giving,

Megan & Generation T

[ 2 Comments | Posted on January 24th, 2010 ]

Stenciled Brownies

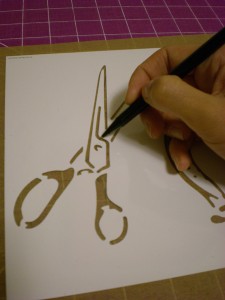
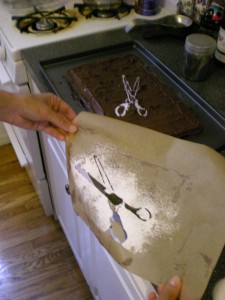
Remember the book review I did for Stencil 101? Well, I was fascinated by the idea of stenciling on food (yummy and pretty!), so I decided to try it for my book launch at the B&N in Park Slope recently. I’m a huge fan of all of Ed Roth’s stencils, but I particularly love the scissors stencil in the book, and thought it’d be perfect to decorate the batch of brownies I planned on making for my DIY Tee Party. Seeing as scissors (neck-and-neck with seam rippers) are my favorite de/reconstructing tool, it was only right  to feature them! Here’s what I did, along with some photo-documentation:

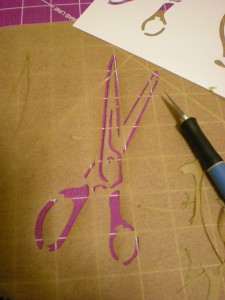
1. Tear the scissors stencil page from the book (it’s perforated) and trace it with a pencil on a piece of parchment paper. 2. Use a craft knife to cut around the traced marks until the parchment paper stencil matches the original.

dscn1997dscn2002

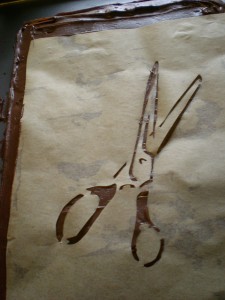
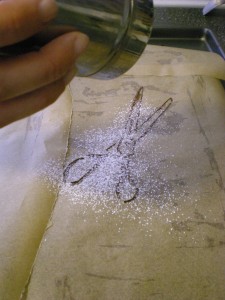
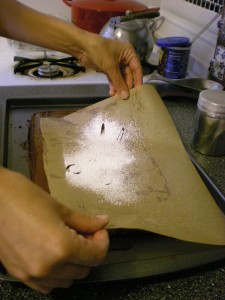
3. Place the new (food-safe) stencil over the top of the frosted cake (or brownies). Note: Frosting is recommended because it will hold the powder better (cocoa powder for light-colored frosting, confectioner’s sugar for dark-colored frosting) than a plain cake surface. 4. Gently and evenly powder the cake surface, going over the stencil.

dscn2008dscn2013

5. Peel back the parchment paper, careful not to spill the sugar collected on the stencil. 6. Ta-da! Serve it up to all your DIY besties!

dscn2018dscn2019

**Thanks again to Ed Roth of Stencil 1 for this great idea from his book Stencil 101. And stay tuned! He’s got a new book, Stencil 101 Decor, featuring 10 original plastic stencils (the first book has cardboard), due out in October 2009.

[ 2 Comments | Posted on June 19th, 2009 ]

DIY Wedding — Embroidery Style

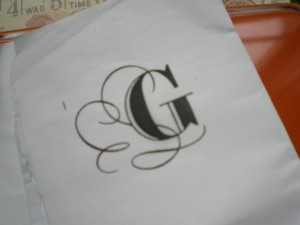
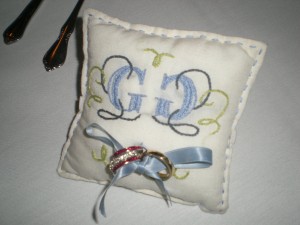
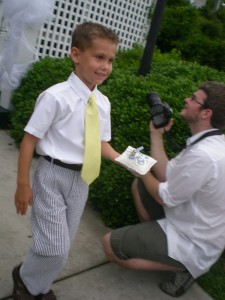
One of my best friends got married last weekend, and now that I won’t be giving away the surprise, I’m posting a gift I made for the ceremony. The bride’s nephew was playing the part of ring-bearer and I decided to make a pillow to match his blue searsucker pants (and to keep the rings from getting lost at the hands of a five-year-old!). Since both last names start with a “G,” that was the base of the design. I found a font a liked, increased the size, and traced two facing Gs onto the white fabric with a disappearing ink fabric pen. I gathered three blue and green colors–the bridesmaids all wore “colors of the ocean,” so I wanted to make sure the waves and the seaweed were well represented.

pillow_g

Then I drew in some extra swirls and started stitching! Satin stitch on the inside of the Gs, split stitch for the outlines and swirls, running stitch around the edge (reinforced by a machine stitch underneath), and a couple little knots to sew the ribbon on in the center.

gg_pillow

I also added an elastic strap on the underside so it would stay put on the ring bearer’s hand. Here it is in action:

avery_pillow1

For those of you keeping a tally, this is my seventh embroidery project (a cloud pillow, a day of the dead skull, a World/Inferno band logo tie, a golden ratio tie, a pair of valentine swap personalized panties, an apron, and a ring pillow!) Any suggestions for what should come next?

[ Comments Off on DIY Wedding — Embroidery Style | Posted on June 8th, 2009 ]

If you build it…

Lately I’ve been decorating my non-existent studio. In my mind, it’s quite a darling space-high ceilings, white walls I can decorate with bold-colored posters and framed fabrics, huge windows that let in lots of natural light, and with enough room to decoratively display my growing collection of vintage sewing machines and typewriters. And though this space has yet to be discovered (by me, at least – let me know if you’ve seen it!), I’ve strangely been “gathering” items to go in it. A poster from the London Design Museum. A drafting table from a friend’s sidewalk sale. My pop-art Frida prints. The vintage globe from eBay. The mica lampshade from Florida (I love lamp?)…

Oh, a girl can dream…but for now, I make do using the floor of our small apartment, swapping out my laptop from our shared desk to make room for the sewing machine on the occasion that there’s a pair of pants to hem or a T-shirt to refashion!

What does your dream studio look like? And ooh, let’s make this desert-island-y: If you were stranded in your magnificent design/work studio, what three items would you have with you?

[ 6 Comments | Posted on June 12th, 2008 ]

Stitch It

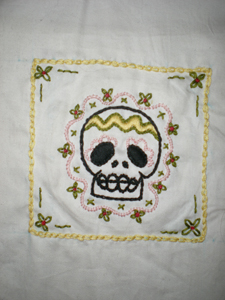
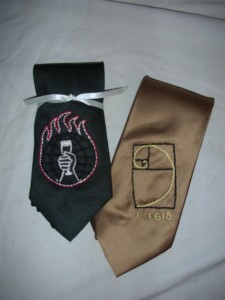
Let me preface this by saying that I first learned embroidery when I was seven–my mom taught me some basics and I stitched the outlines of a few white clouds on a sky-blue pillowcase. During my tween years, I laid down that thick embroidery needle to pursue embroidery floss in a new way: macramé friendship bracelets and hair wraps. It wasn’t until I took a class with Jenny Hart of Sublime Stitching a few years ago that I really got back in the game. I made a Day of the Dead sampler in the class and immediately set to embroidering two ties for my brother (with his band’s logo) and dad (with the golden ratio) for Christmas that year.

day_of_the_deadembroidered_ties

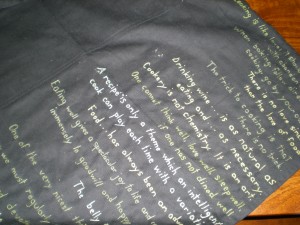
In any case, I’ve had to wait to post this, my most recent DIY project, so I didn’t spoil the surprise. Mr. T turned 30 today and I finally got to share the project that, with more than a few setbacks, took me more than a year to make. It started as a Christmas present, then was pushed to an anniversary present, then a (29th) birthday present, then a wedding present, then back to Christmas, anniversary, and finally…birthday! Mr. T loves to cook-he likes to chop and mix ingredients like I like to cut and sew. But he doesn’t have an apron…and you know I can’t settle for just a plain old apron. So I thought: What does an English-teaching food-lover need from such a garment (besides keeping his clothes splatter free)? Combining his love of syntax and symbolism with his love of sautéing and seasoning, I set out to find quotations from some of his favorite writers and chefs on the subject of food, eating, dining, cooking, and other related exploits, and freehand embroider them across the bottom of the apron. Whew, did I ever bite off more than I could chew! (So to speak.)

But here it is, already complete with some sauce splatters, and despite the blisters on my fingers, I’m quite proud!

lukes_apron

[ 7 Comments | Posted on March 28th, 2008 ]

Happy Valentine's Day!

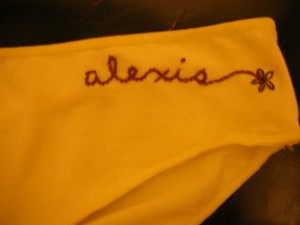
My neighbor recently invited me to a “Panty Exchange Party” for Valentine’s Day–where every guest is secretly assigned to another guest in advance of the party, sizes are exchanged, underwear style preferences are shared (thong, brief, boyshort), and the rules are laid: each guest brings two pairs of underwear for their assignee, one “sassy” and one “sweet”. For sassy, I found a nice lacey pair to gift, for sweet, I bought a pair of plain cotton undies from American Apparel and embroidered her name on them! (Apologies for the bad lighting in the photo, the undies are pale yellow with eggplant embroidery floss for the cursive and avocado green for the flower.)

dscn3635

If you’re interested in throwing your own underwear exchange party (sorry, the word “panty” has the tendency to make me cringe a little), here’s how:

About two weeks in advance, email everyone (for comfort, start with ladies only!) who you’d like to participate to see who’s game. When they respond, make sure they include their underwear size and style preference . Once you have a complete list, invite a third party (someone who’s not participating) to act as the moderator: She draws the names and creates the secret matches (you should only know the name of the person you draw, not the person who draws you), then emails each party participant at least a week in advance so everyone has ample time to purchase, make, or decorate her two pairs of undies. On game day, wrap your two gifts with the recipient’s name on them. One person starts by opening her gift, and tries to guess who it’s from!

[ Comments Off on Happy Valentine's Day! | Posted on February 14th, 2007 ]

Making the Banner

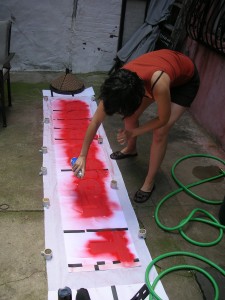
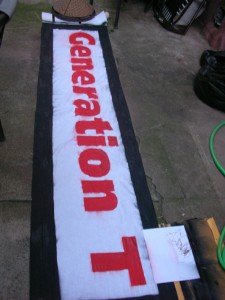
In preparation for the Renegade Craft Fair (September 16 and 17), I made this banner in the back courtyard (every booth needs a proper banner!). To make the stencil, I enlarged the font, printed it on multiple sheets of paper and taped them together in sequence. I carefully cut around the edges of the letters using a craft knife, removing the inner letter.  I laid the stencil over the white fabric and weighted it down on the corners. I sprayed a light coat of red paint over the letters and black around the edges (the outer edge of the stencil provided a clean edge). After the paint was fully dried, I carefully peeled away the stencil to reveal “Generation T.” Ta-da!

dscn18001dscn1803

[ Comments Off on Making the Banner | Posted on September 8th, 2006 ]