Other Projects

I Love to Create: Sparkle Kitty Ears!

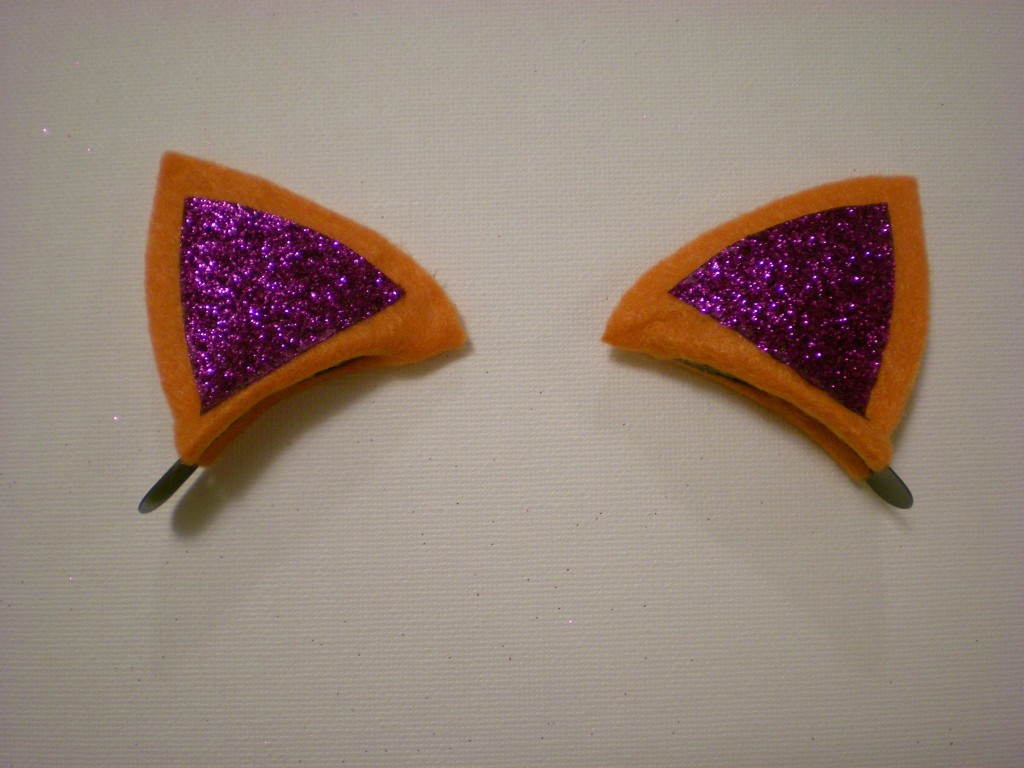
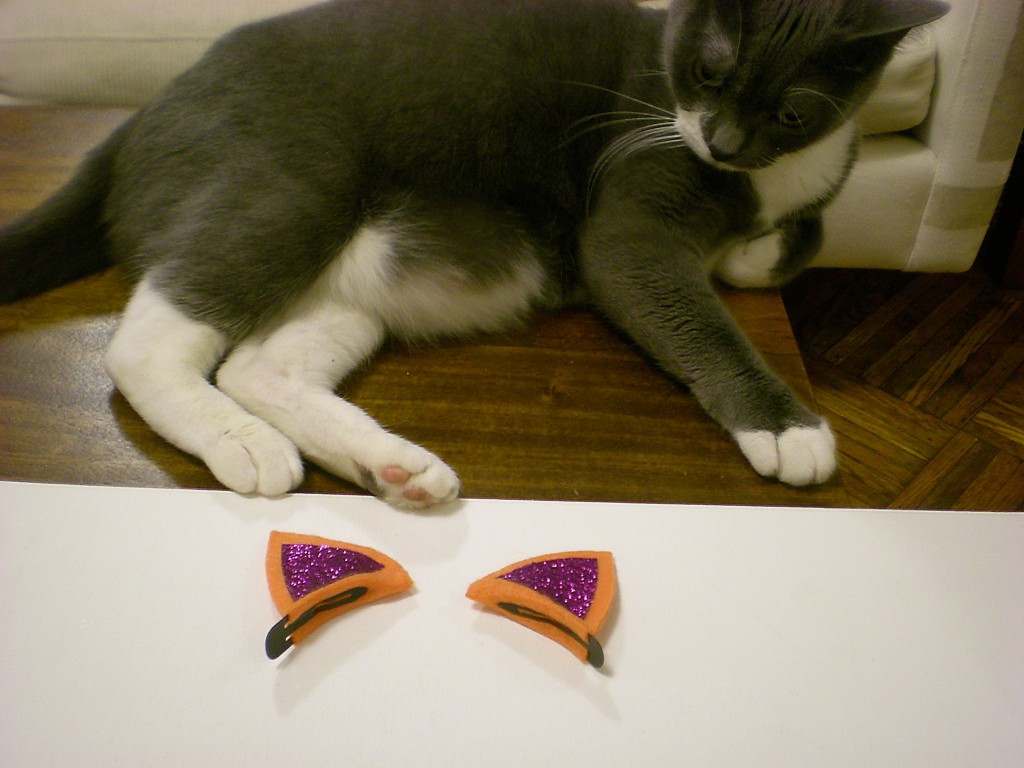
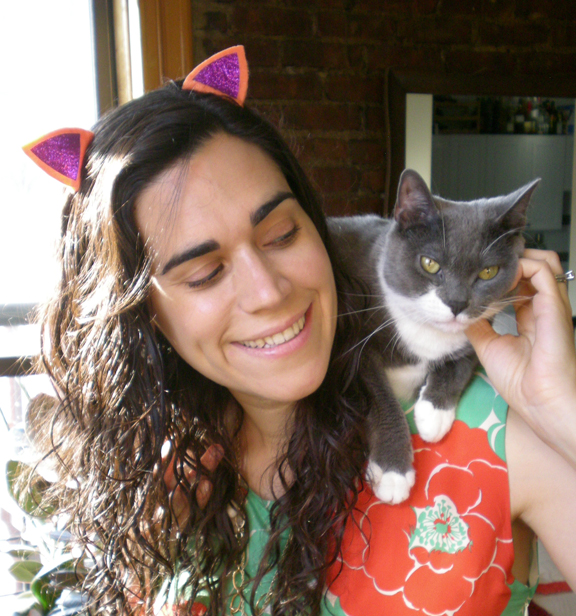
Clip-on cat ears for when you’re feeling a little bit feline! The occasion? Well, to be perfectly honest, I set out making these for my niece’s 5th birthday (she happens to love cats–her cat, Mo, in particular), but I didn’t finish them in time (despite the fact that they only take about 10-15 minutes to complete!). It turns out, though, that there was a higher power (called glitter) at work and the delay was well worth it: I recently got a delivery of Tulip’s new iron-on glitter sheets and I realized that the delay was meant to be (because what would these ears be without the sparkle?).

Save these for Halloween if you want, but why wait? I believe in wearing fun accessories whenever the mood strikes–because, hey, some days you just feel like a cat and here’s the perfect accessory to let you indulge that feeling. And talk about fun in the sun–these ears sure do sparkle!

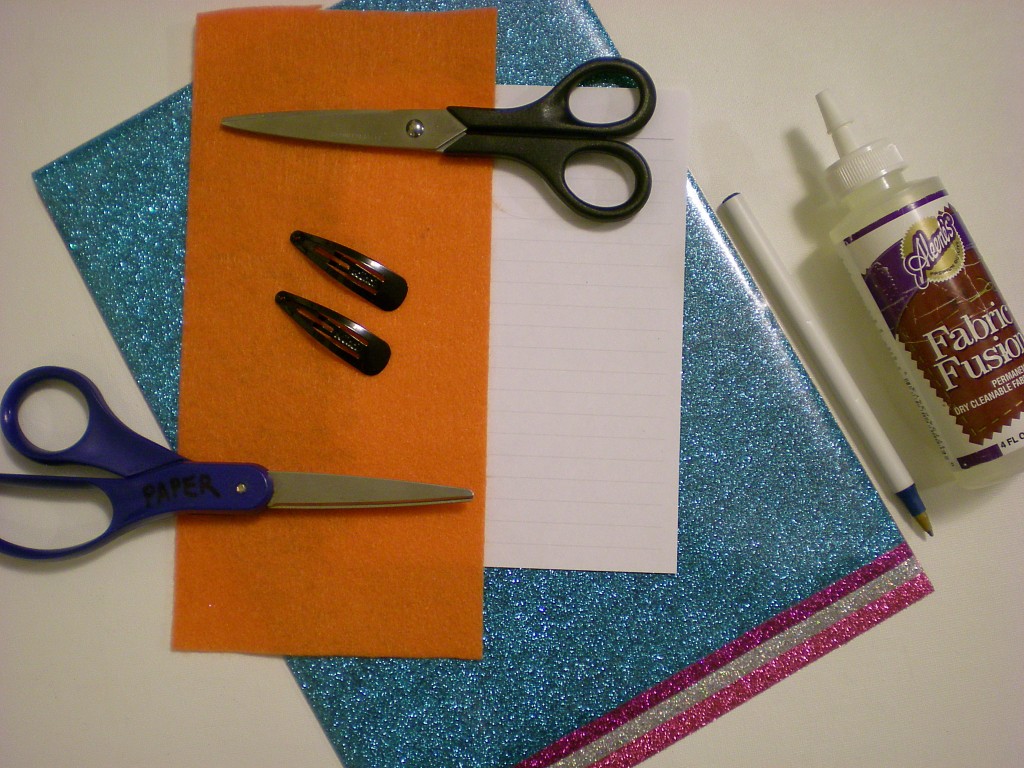
Materials:
-Pen or pencil
-Scrap of paper
-Colorful felt
-All-purpose scissors
-Fabric scissors
-Metal snap barrettes
Aleene’s Fabric Fusion fabric glue
Tulip Fashion Glitter Shimmer Transfer Sheets
-Pressing cloth
-Iron

Make it:
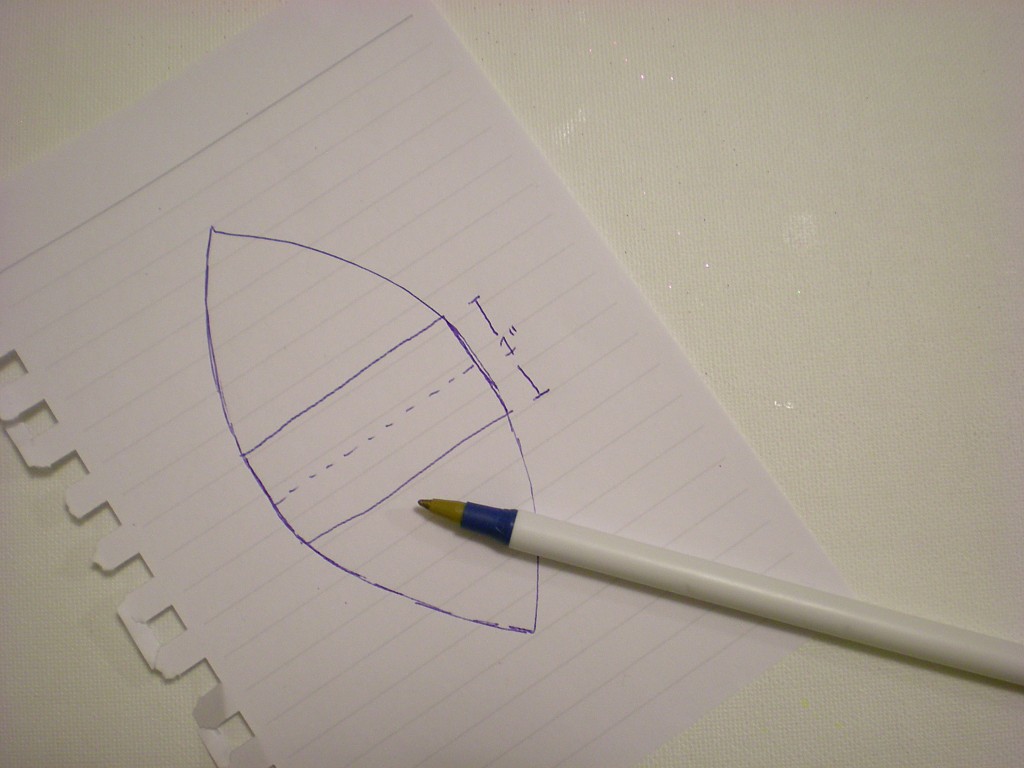
1. Use the pen and paper to sketch out a slightly rounded triangle, about 2″ high. Add 1/2″ at the base of the triangle and then mirror the shape below it to create the template. Cut it out with the all-purpose scissors. (You can also fold the paper at the base after you’ve drawn the top triangle and the extended base, and cut around the shape through both layers.)

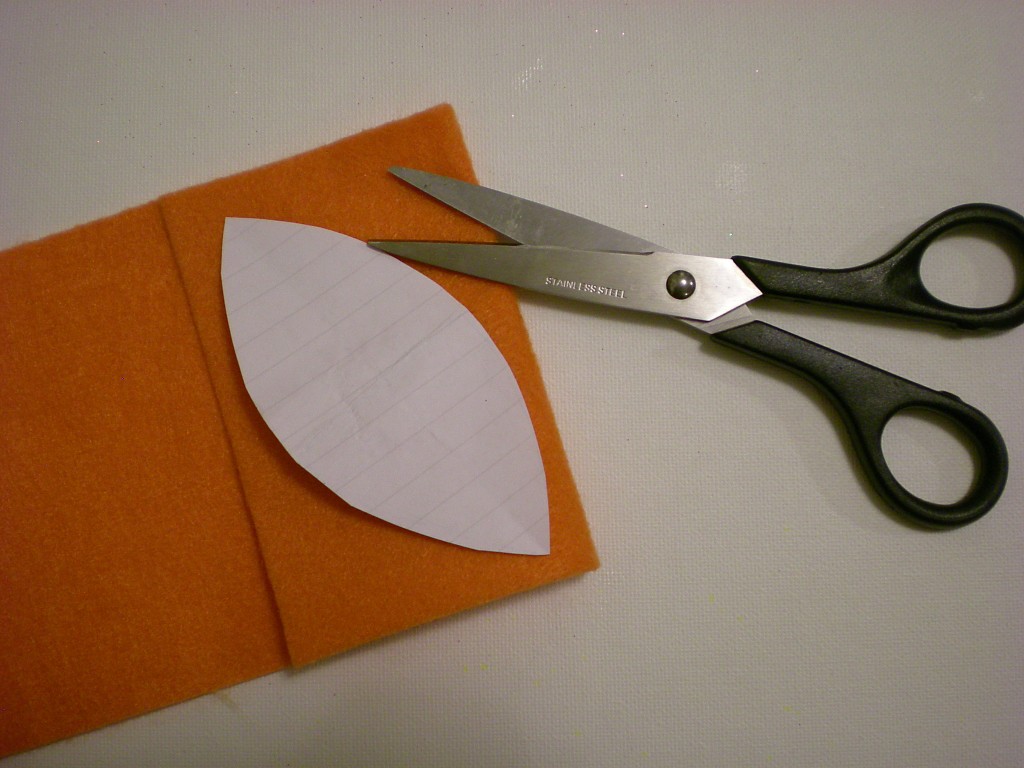
2. Fold over the felt and lay the template on top of the folded section. Use the fabric scissors to cut around the template, through both layers.

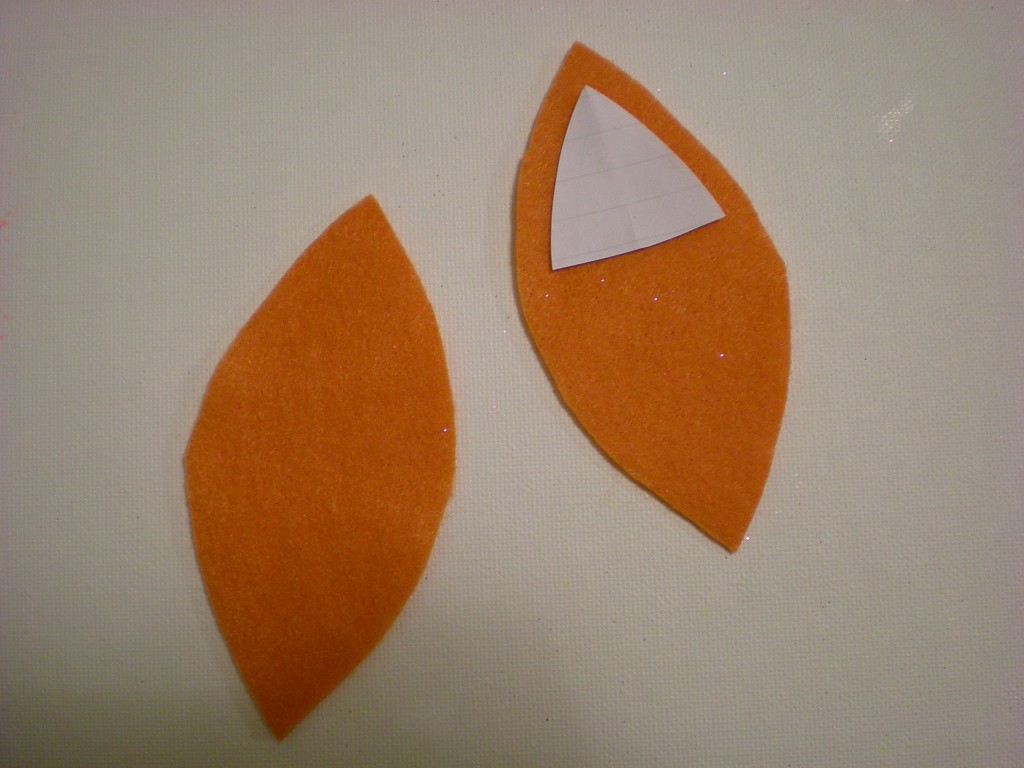
3. Mark and cut a second template, in the shape of a rounded triangle, about 1/4″ smaller on all sides than the original triangle in Step 1.

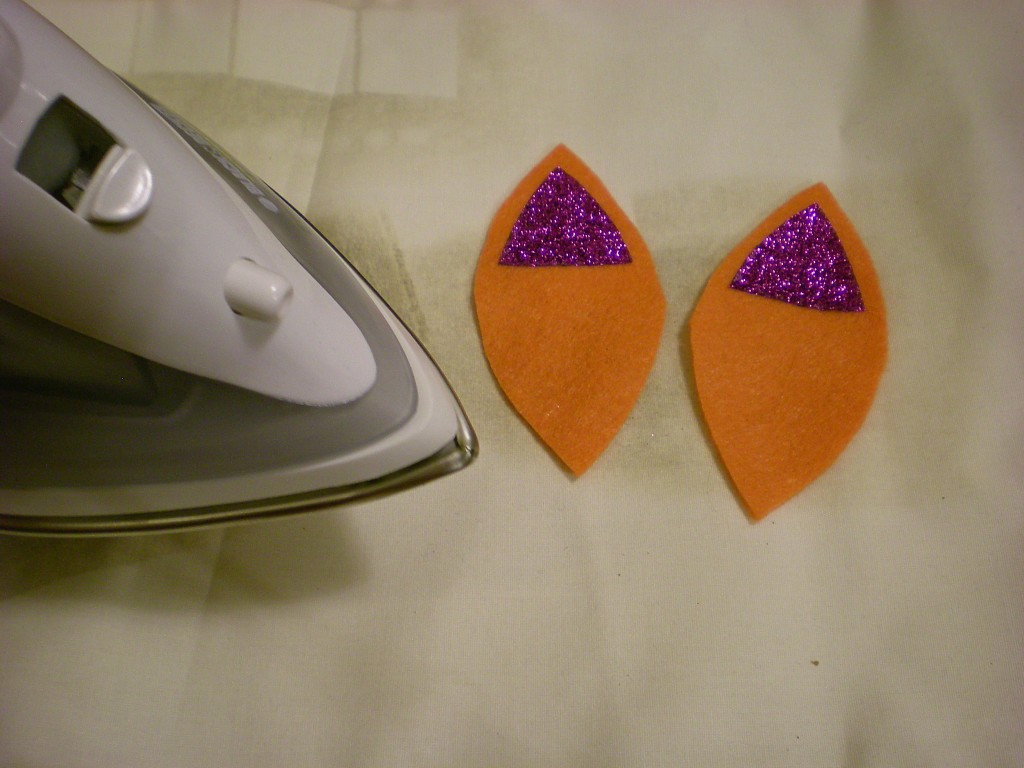
4. Select a color from the iron-on glitter sheets and trace the second template twice onto the shiny surface. Use the all-purpose scissors to cut them out. Peel away the shiny surface layer and arrange them on the felt ear pieces. Lay a pressing cloth over the ears, and press firmly with the iron for about 40 seconds. (Repeat if necessary to set the glitter transfer.)

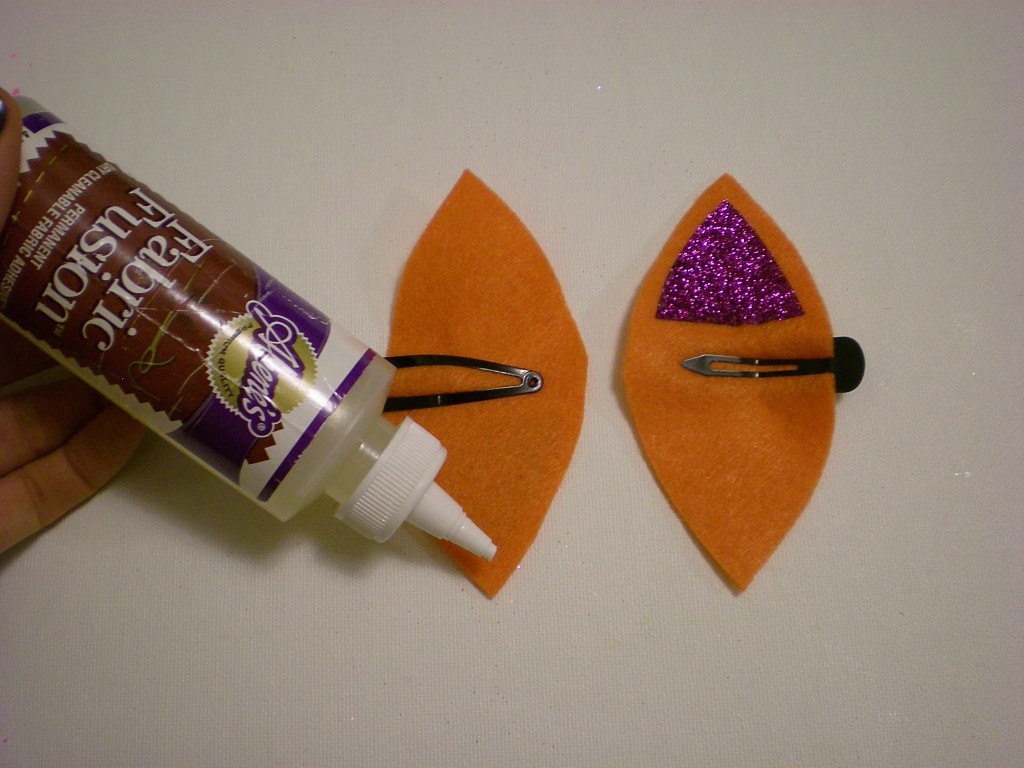
5. Clip the metal barrettes in the center, on each side of each felt ear piece, so that the top of the barrette corresponds to the wrong side of the ear piece and vice versa. Generously apply fabric glue around the edge of the wrong side of the ear piece. (The felt absorbs a lot of the glue, so don’t be stingy!)

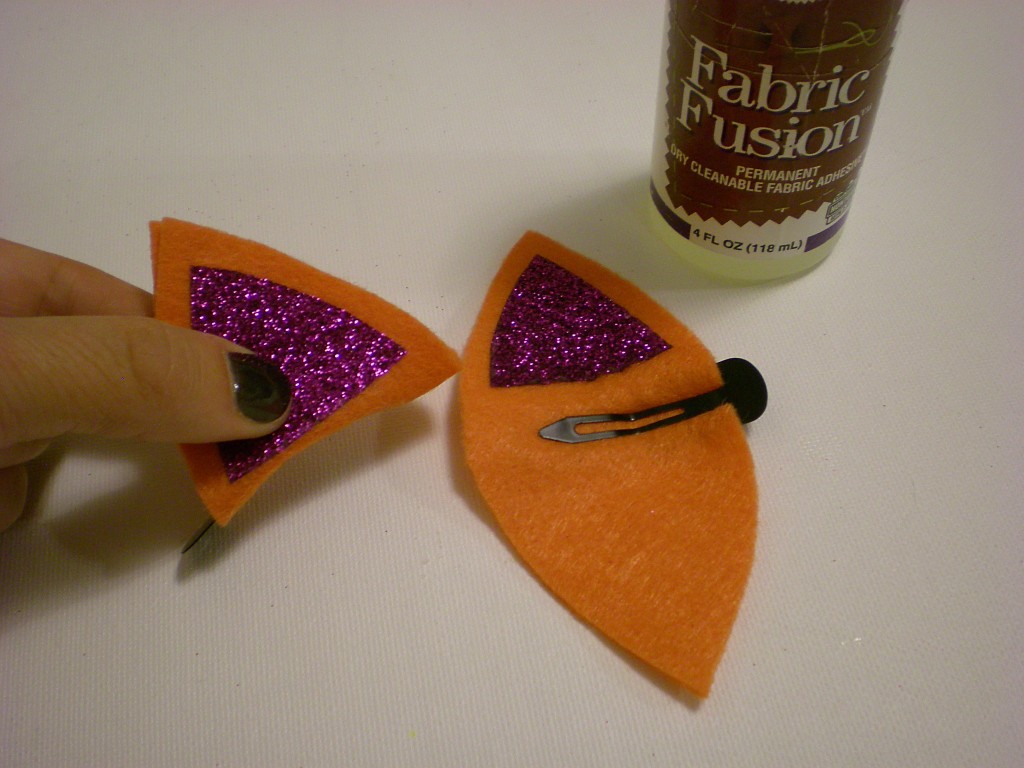
6. Fold the ear piece around the top of the barrette to seal the glue, and repeat on the second barrette.

7. Let dry. Optional: Clip the layers together with extra barrette clips while the glue dries!

8. Quick! Try them on before the actual cat who’s been helping you craft gets a little too interested and starts batting them off your workspace!

(Special thanks to Tulu the cat for “helping.”)


[ 10 Comments | Posted on June 28th, 2011 ]

I Love to Create: A DIY Necktie for Dad!

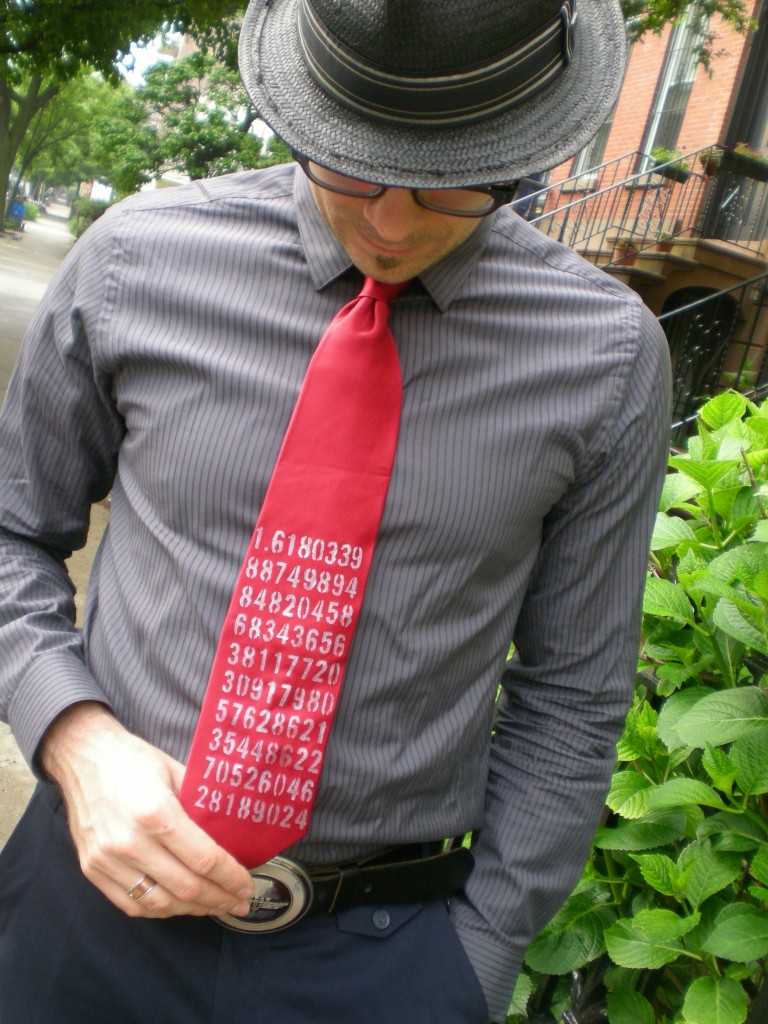
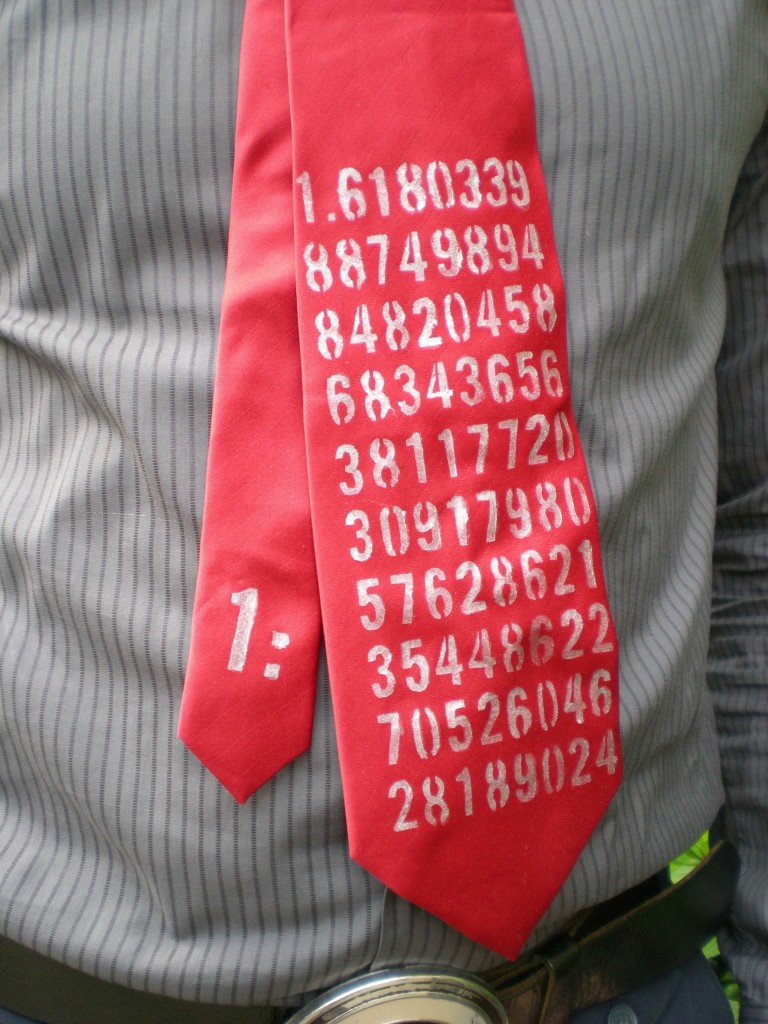
I know, I know — a tie can be the ultimate in clichéd gifts for dad. But hear me out: The problem isn’t with ties themselves, it’s boring ties.  Below is a technique for making a one-of-a-kind tie for that one-of-a-kind guy. Note: Lest there be any confusion, the photo below is not my dear ol’ dad, but my charming husband (“Mr. T”), who’s always a good sport when it comes to modeling my projects!

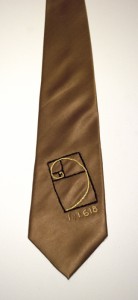
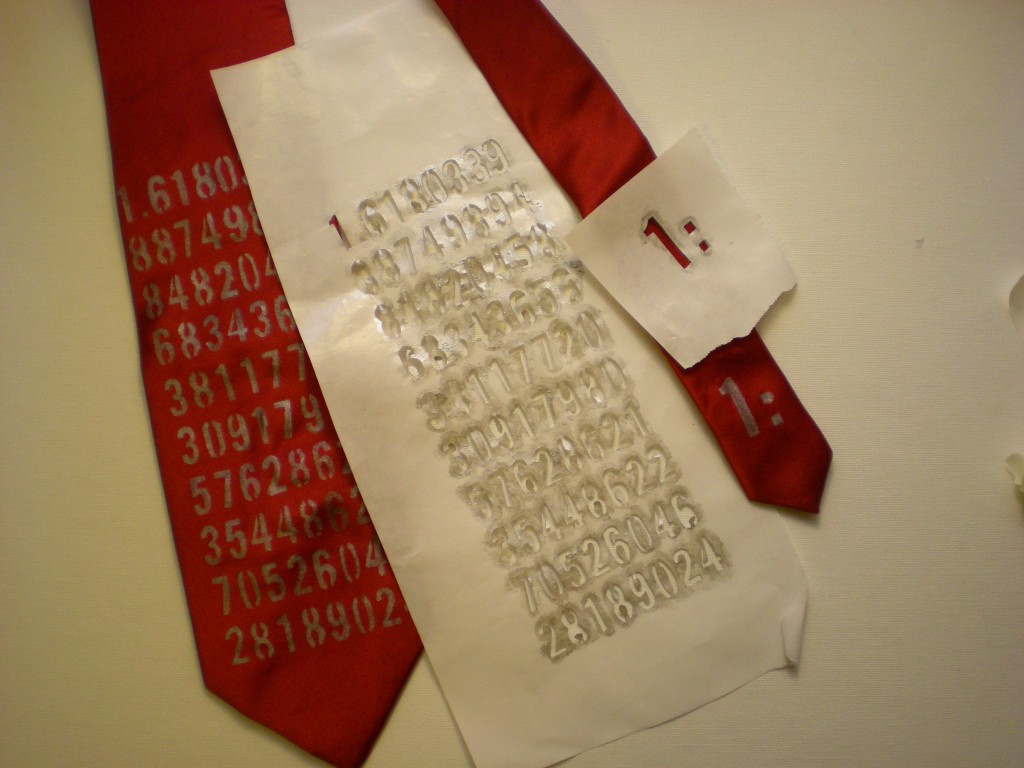
I have a history of making ties for my dad — not because he’s necessarily a tie-wearing kind of guy, but the school where he teaches has a dress code that states that all the guys have to wear a tie. It seems a little silly, given that he’s an art teacher and a tie dangling into a tray of photo developer or getting splattered with clay in the ceramics room is far from ideal, but he’s always embraced the tie with a great bit of humor and creativity. Though we couldn’t dredge up the handmade tie I gifted him when I was 7 (suffice it to say, I must have cut out the tie myself, too, because it was about 6″ wide and at least 6″ too short), I decorated it with felt pieces arranged into the shape of a smiley face. In high school, I was obsessed with going to the bead store, so I stitched some metal charms onto a black silk tie (above left). More recently, I embroidered the golden spiral inside a golden rectangle on the end of a tie (above right). But for my dad’s next tie, I’m using fabric paint. Here’s a project that a kid of any age can get into, and any dad will appreciate.

Materials:

-Plain necktie

-Image or pattern to turn into a stencil

-Freezer paper

-Pen or pencil

-Craft knife and cutting mat

-Artist’s tape

Tulip Fashion Graffiti Paint Taggers fabric paint

Round paintbrush (for stenciling)

Paint tray

Make it:

1. If you have the option, first tie the tie properly and mark the areas of fabric that will be most visible (it would be a shame to spend time on some delicate design only to have it hidden in the middle of the knot or under the collar). Otherwise, it’s wise to keep the design down on the widest part of the tie. (I marked my tie, but then decided to keep the design near the ends.)

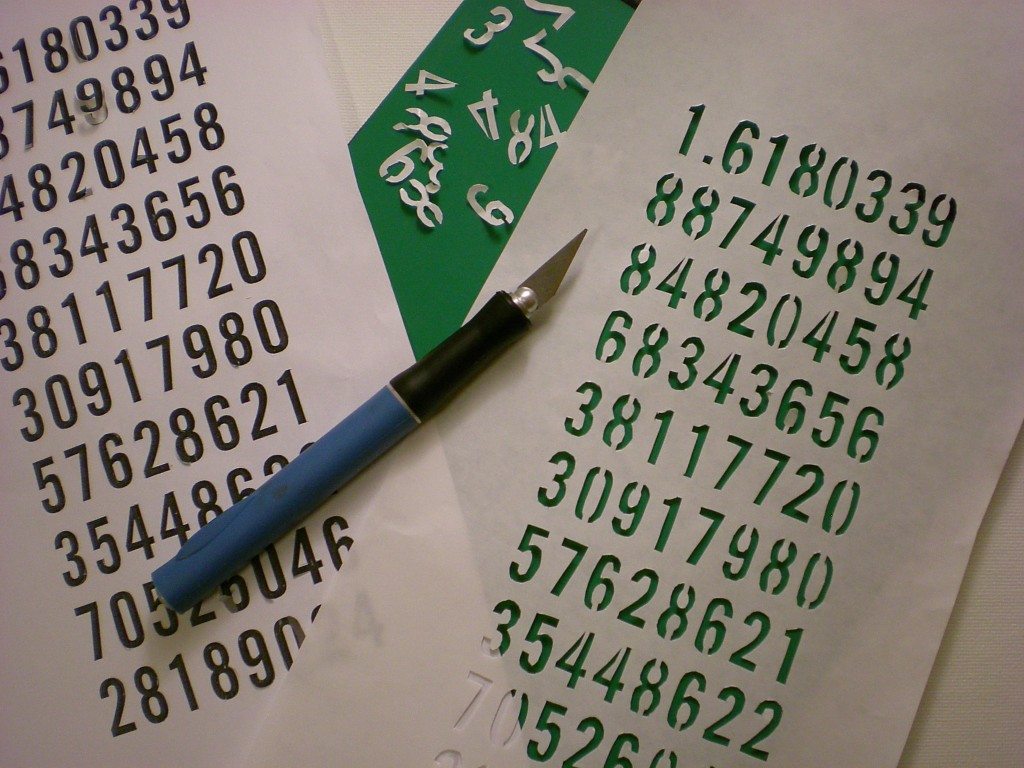
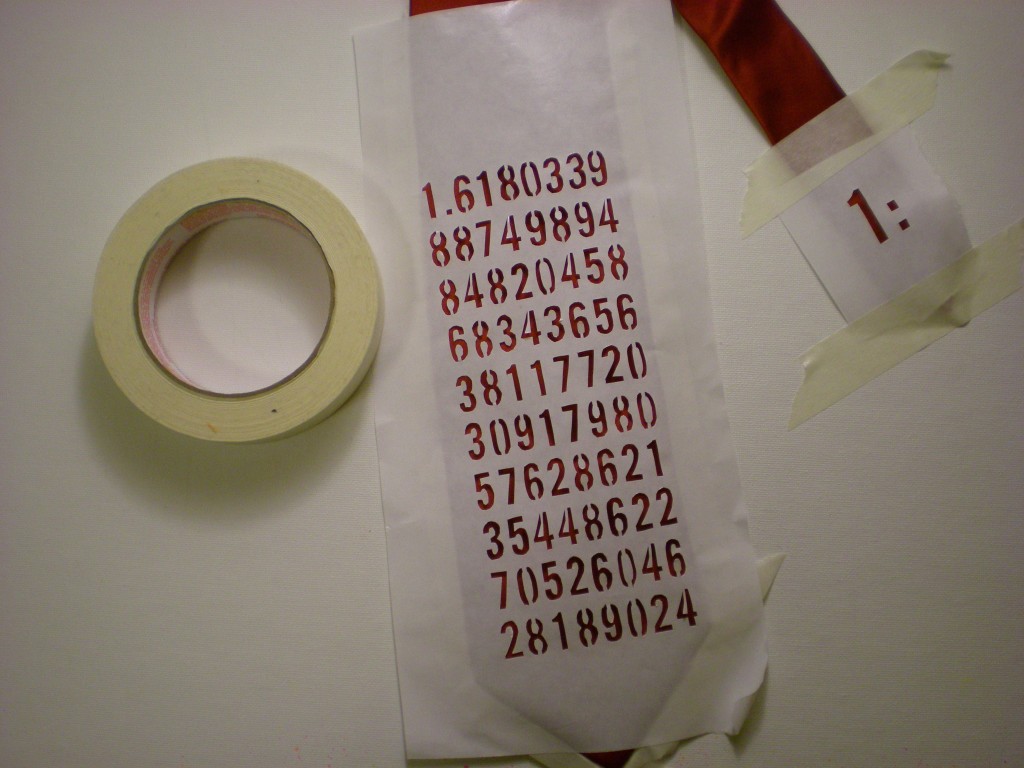
2. Choose your design and print it out. My dad has always been fascinated by the golden mean, a naturally existing ratio of approximately 1 to 1. 618 (see the embroidered tie above) that is used to describe the relationship of many living things found on earth (it’s in the  pattern of the seeds in a sunflower, the architecture  of the spiral chambers in a shell, the growth of leaves on a plant stem, the ratio of hand to elbow and head to torso, and so on…). My dad even designed the house I grew up in using this ratio as the model. Then layer a piece of freezer paper over the printout and trace it. If you use letters or numbers (like I did), make sure you add the appropriate vertical lines to the type treatment so that when it comes to cutting and painting, you don’t end up with an “O” or a zero that’s missing its center. Use the craft knife to carefully cut out the stencil. Note: At this point, yes, I fully recognize that “#1 Dad” would have been far easier, but hey, it’s all about personalization, and he happens to be my “#1 to 1.618033988749894848204586343656 Dad.”

4. Arrange the stencil over the tie and tape it in place to prevent shifting. (I taped the front and back to make sure it was secure.) Note: Artist’s tape should peel off well, but test a piece on the back of the tie to make sure it won’t damage the fabric.

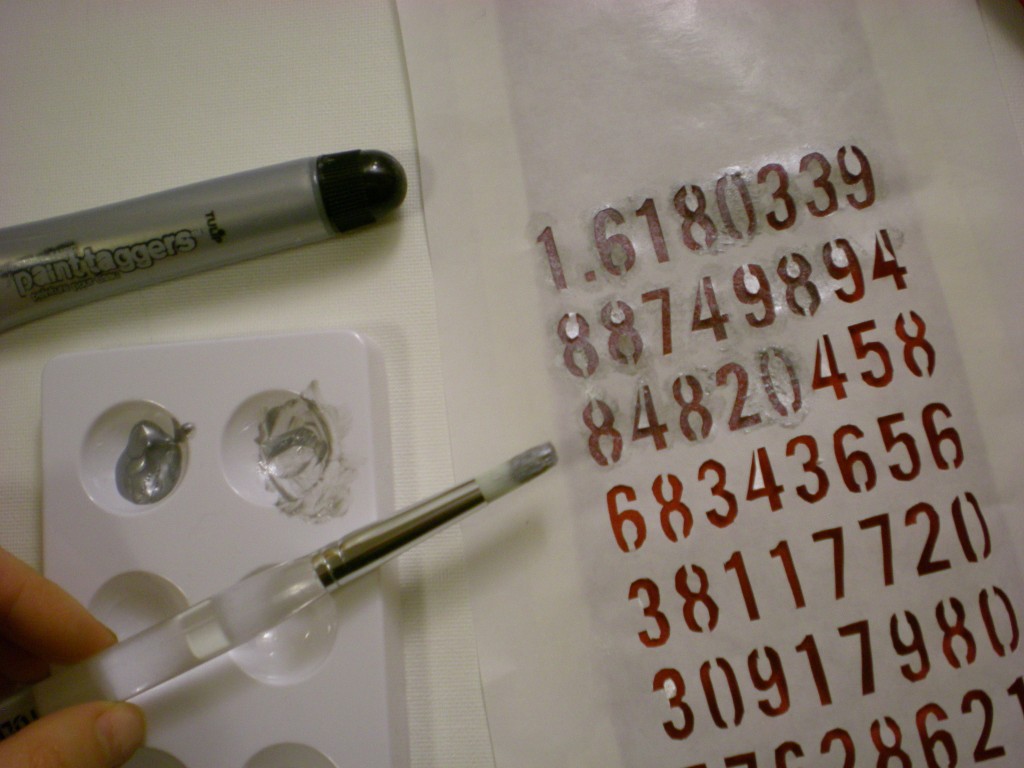
5. Adding very little paint at a time, dab the brush over the stencil. I picked a metallic silver paint, because I like the sheen and my dad can handle a little flair. To keep the paint from spreading underneath the edges of the stencil, hold the brush vertically so the bristles are perpendicular to the paint surface, and use a blotting motion.

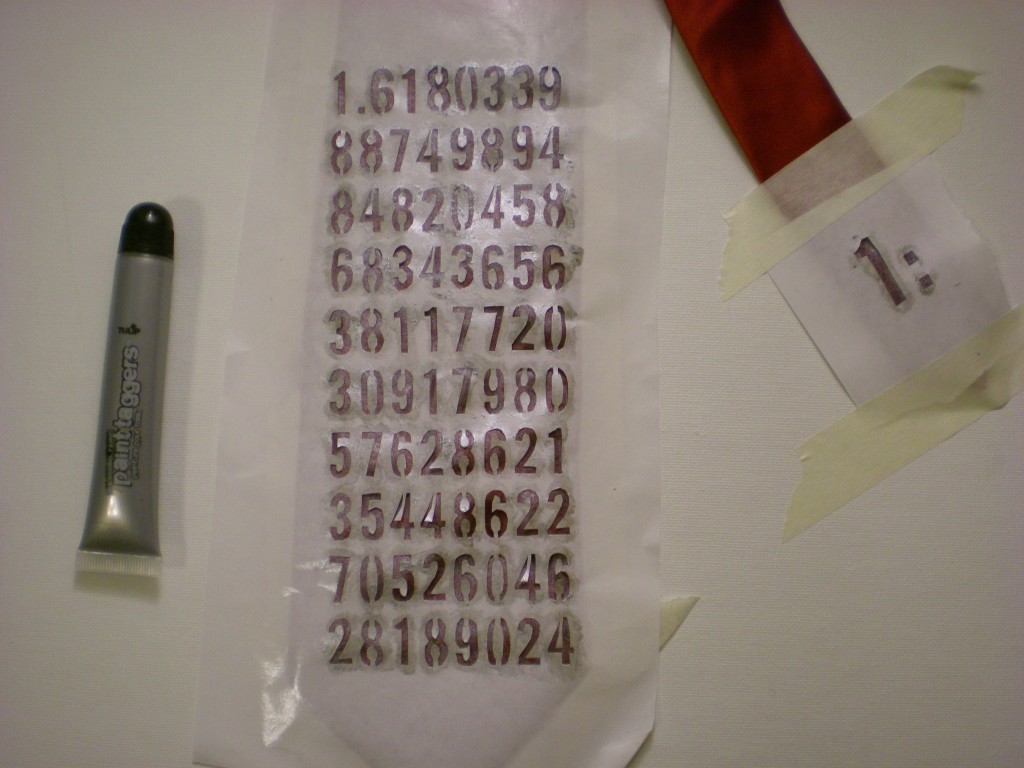
6. When you finish painting (don’t forget the short end of the tie — I decided to incorporate the first part of the golden ratio there, but you could also hide any semi-secret message there), let it dry.

7. When the paint has dried completely, carefully remove the tape and peel the stencil off the tie.

7. Now it’s time to gift it. (Or convince your husband that he has to try it on this morning before he goes to work so you can photograph it before you pack it up and ship it off in time for Father’s Day on June 19!)

Variations:

-For different pattern ideas, try any of the paint or sticker techniques in my 4 Ways to Spray post.

-Forget the stencils altogether and freehand a design with fabric paint.

-Forget the paints altogether and glue on felt appliqués!

-Bonus points if you make the tie out of T-shirts!


[ 14 Comments | Posted on May 24th, 2011 ]

How to: Host a Crafty Baby Shower

In November, I attended a baby shower for some expectant friends in our nation’s capital and it reminded me of a post I’ve been meaning to write from back (last year!) when April rain showers gave way to May baby showers in this neck of the woods. At Generation T headquarters in Brooklyn we hosted a celebration for our friends, Mary Heath and Darren who were expecting a lovely June flower! Now, when I’m in party planner mode, I can’t help but get all DIY — from activities to food to drinks to party favors.

FOOD: While Mr. T and I hung the streamers, Heather and Amy mixed some homemade sangria. Yum.

And delicious cookies were sent courtesy of Aunt Jean in Seattle! Double yum.

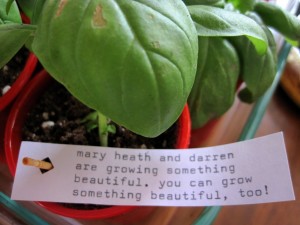
PARTY FAVORS: Earlier in the day, I re-potted some basil plants in some cups I had left over from another party and attached the tags I had typed on my typewriter the night before (my favorite comment was when someone asked: “Wow, what computer font did you use for these?”).

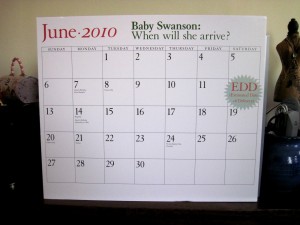
ACTIVITY 1: Earlier in the week, I had a friend help print and mount a blank calendar page to predict baby’s arrival (complete with EDD, or Estimated Date of Delivery)! $2 per entry — winner splits the pot with baby (and if nobody guesses right, baby takes all)!

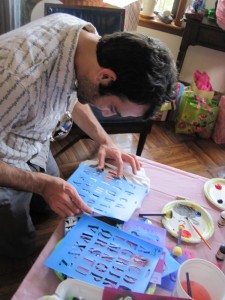
ACTIVITY 2: Baby onesie decorating!

Materials:

-plain white onesies in a variety of sizes (for baby to grow)

-fabric markers

-fabric paint

-foam and stencil brushes

-a variety of stencils

-paper plates (for use as painters’ palettes)

-old file folders, opened up and cut into quarters (to insert inside the unsnapped onesie to prevent color from bleeding through from front to back)

-a clothesline and clothespins to hang the onesies!

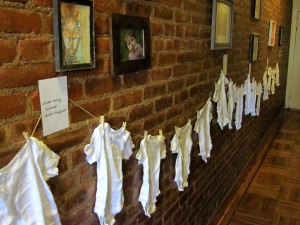
Below, the blank onesies.

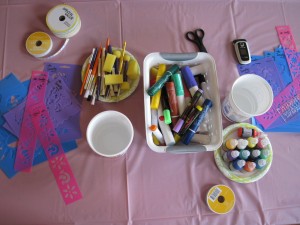
The materials are ready and waiting…

And, action!

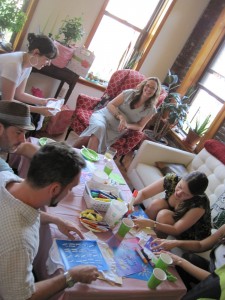
Guests are busy stenciling and painting away.

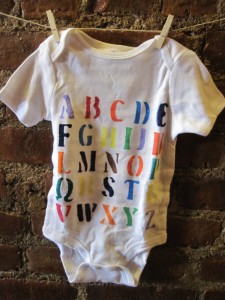
The finished onesies are clipped back on the wall to dry (and provide festive decoration in the meantime!). A little lady can’t help but learn her ABCs when they’re painted on her belly!

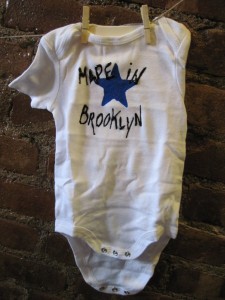
“Made in Brooklyn.”

Mama-to-be surveys baby’s new wardrobe.

NOTE 1: Substitute T-shirts and a birthday girl and you’ve got a birthday party activity!

NOTE 2: Substitute plain cotton undies and a bachelorette, and you’ve got a fabulous girls’ night (and a whole lot of crazy underthings for the honeymoon)!

NOTE 3: Take photos!

All photos shown here courtesy Amy Pierce Photography.

[ 1 Comment | Posted on March 31st, 2011 ]

DIY Skirts and Pillowcases and Cakes, Oh My!

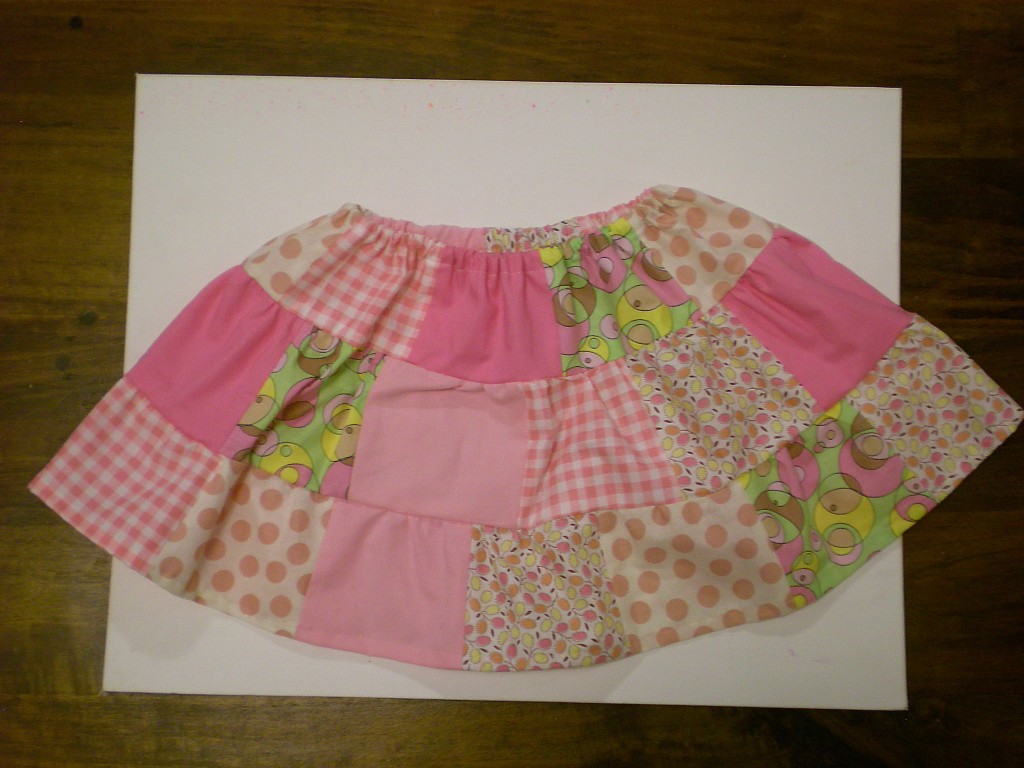
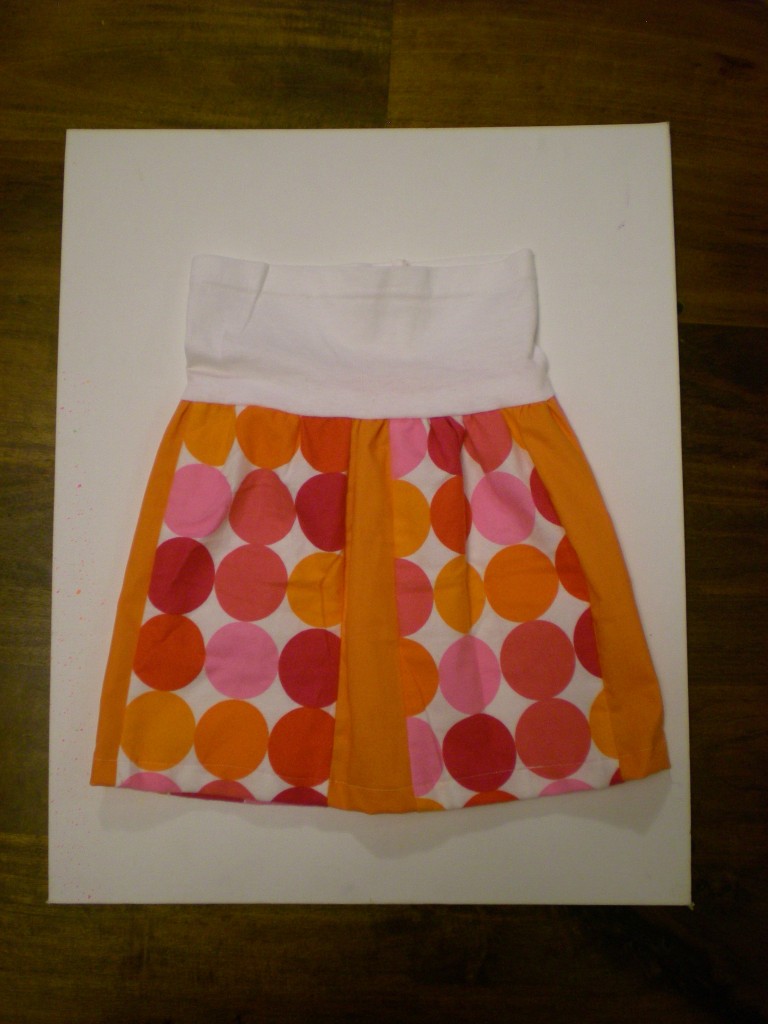
In the spirit of the DIY Christmas, I thought I’d share a sampling of the ways in which I incorporated the handmade into my holiday season.  You all read about the headbands and hair ties I made for my niece — I also whipped up two skirts for her (she happens to loooove the color pink–can you tell?). I made this one using a tutorial from TheMerryChurchMouse, who calls this design “The Charming Little Skirt.”

Skirt number two is adapted from the “Easy Elastic Waistband for a Little Girls Skirt” by TheMotherHuddle — the waistband is made from a scrap T-shirt hem!

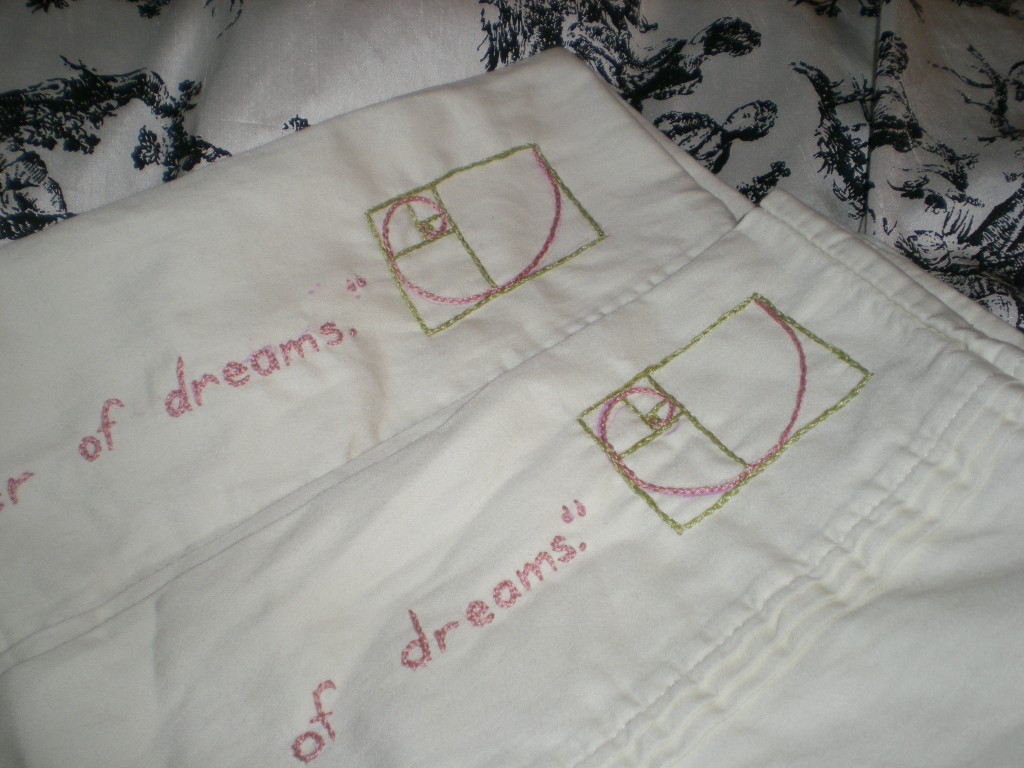
I also embroidered pillowcases for my sister-in-law. Mr. T found the perfect quotation that combines dreams (appropriate for pillowcases) and architecture (her profession): “An architect is the drawer of dreams.” –Grace McGarvie I added the golden spiral and rectangle since it is the only architectural influence I know! (My dad designed the house that I grew up in and based the entire design around the golden section.)

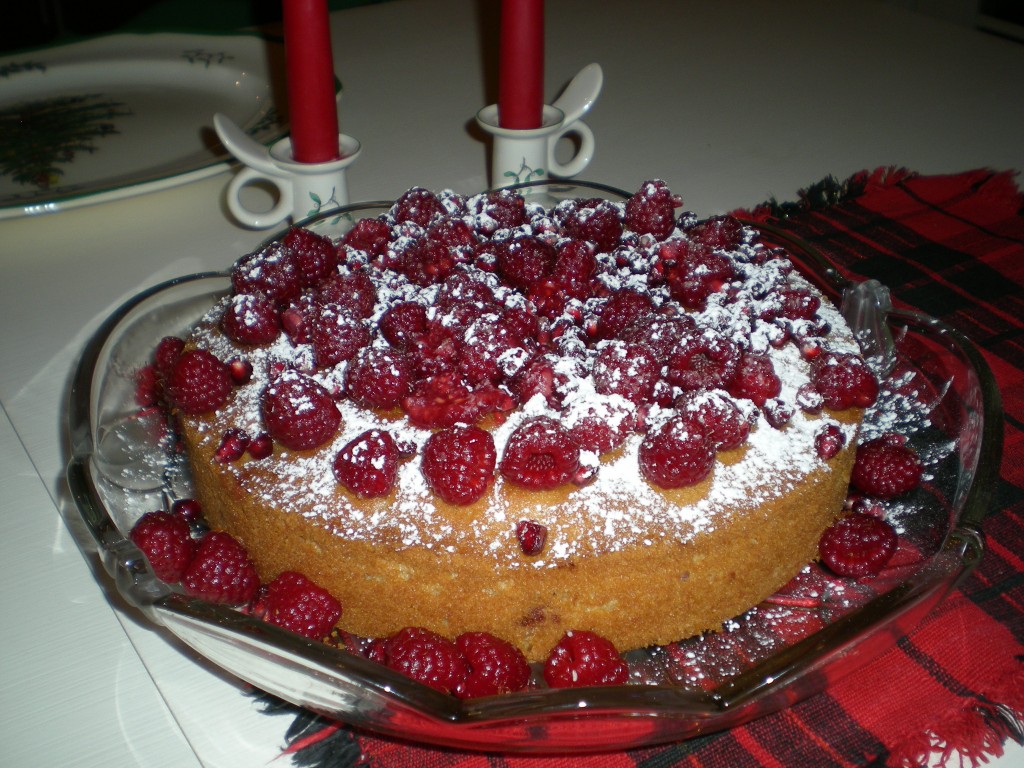
And to finish with something tasty, this is the Lemon Olive Oil Cake I made for Christmas eve dinner at my in-laws. (Adapted from this recipe.)

If only I had photos of the chocolate truffles Mr. T and I made for dessert the following night…alas, they, like the cookies a week earlier, did not last long enough for a photo shoot. But we scored a stand mixer from his mom for Christmas, so more baking is definitely in our future!

What about you? Will any of your holiday gifts kick-start the DIY project aspirations you have for 2011?

[ 4 Comments | Posted on January 9th, 2011 ]

How to: Softie Robots

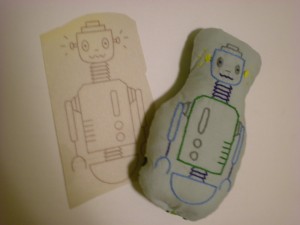
I came to make these little soft-bots quite by accident. I was testing some patterns for a project at my day job, and suddenly found myself in the company of five robot outlines that had been ironed onto several fat quarters of fabric I had picked up from a local quilt shop. What was I going to do–not stitch them? Never. So I set to embroidering each robot in my spare time (on the subway to and from work, at jury duty despite having my scissors confiscated, during my lunch break in the park). And then they sat. (One reason why the step-by-step photos are less than stellar is that the process for making them was so very stretched out!) It wasn’t until a not-so-recent craft night that I took the next step: cutting them out and pairing each bot with its backing. Now that I’ve finally completed the mini-army of ‘bots, it’s time that they found homes…. Thankfully, in the amount of time that it took me to complete them, several of my friends have had babies. And every new baby deserves a new ‘bot!

Materials:

-Scrap fabric for embroidering (light colors work best with iron-ons)

-Scrap fabric for backing (use patterns!)

Aunt Martha’s Heat Transfer Pattern “SR1 Robots Invade”

-Scissors

-Embroidery needle and thread

-Embroidery hoop

-Chalk marker or air-soluble marking pen

-Straight pins

-Sewing needle and thread (or sewing machine)

-Fiberfill

-Cotton twill tape (optional)

Make it:

1. Select your light scrap fabric. Cut out the pattern and transfer it to the fabric with a warm iron.

2. Select the embroidery floss colors. (I used 3 to 4 colors for each robot.) Separate 4 strands from the selected floss and thread the embroidery needle. Secure the fabric template into the embroidery hoop and start stitching!

3. Mark and cut about 1″ to 1 1/2″ around the stitched robots. Select appropriate backing material and place the cut piece against the backing. Cut around the piece to create a matched backing piece. Pin around the edges.

4. Sew around the pinned edges about 1/4″ from the edge, leaving a 1″ to 1 1/2″ opening at one end. Turn the fabric right side out and stuff it with fiberfill.

5. Stitch closed the opening and you’re done! Optional: If you’re feeling adventurous, stitch a personalized tag with 2 strands of embroidery floss on cotton twill tape.

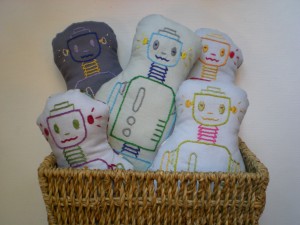
And voila: Here they are, five robots in a basket. In a creative stroke of inspiration, I named each ‘bot for its destined owner: Clockwise from lower left, that’s Levi-bot, Elliot-bot, Luke-bot, William-bot,  and Lillian-bot. Hope to update soon with photos of the ‘bots in their new homes!

For other great fresh, alternative embroidery patterns, check out Jenny Hart’s Sublime Stitching designs.

[ 7 Comments | Posted on January 4th, 2011 ]

I Love to Create: No-tug Headbands!

Last month, in preparation for the holiday party circuit, I shared the tutorial for the Softie Spiral Headband. This month, I’m making headgear for the younger generation. These headbands, inspired by a project from one of my favorite books, Crafty Mama, are for my four-year-old niece (though I’m not a Crafty Mama, the Crafty Auntie title is one I take very seriously).

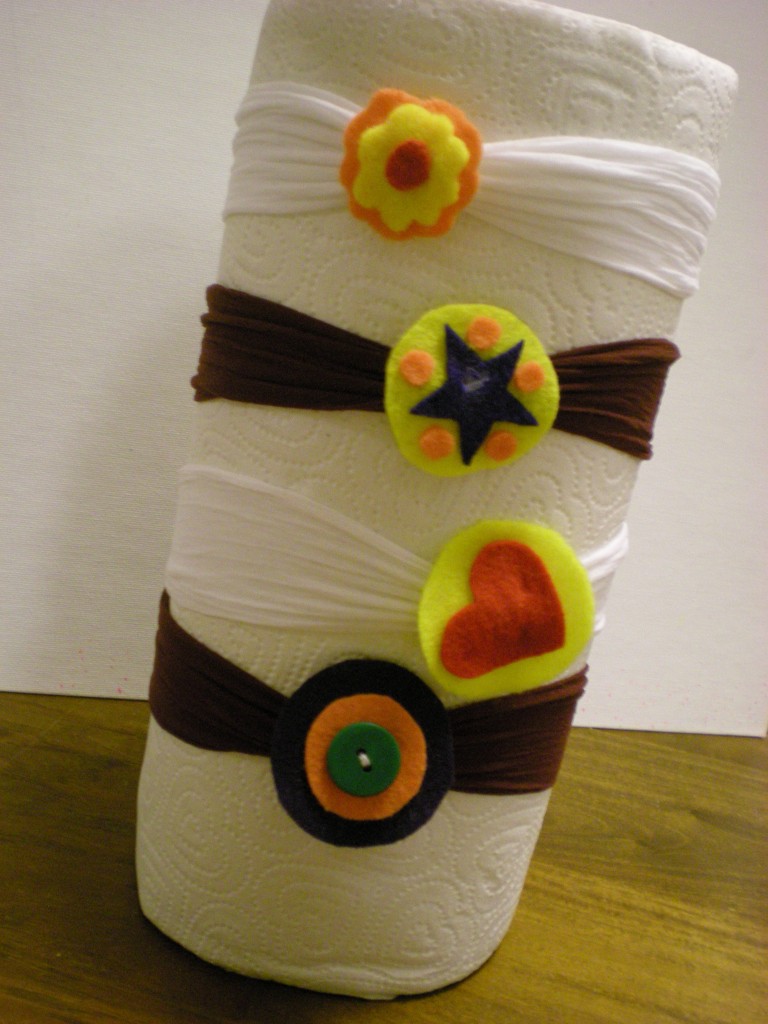
The back story is that my niece is attempting to out her bangs (I tried it, too, at her age — until I had that perfectly disastrous alignment of mom-on-the-phone, scissors-in-hand, and an oh-so-brilliant scheme to rid myself of my bangs far more quickly: I cut them off completely). My niece is more patient than I, but the available solutions to bangs-in-the-face either poke (plastic or metal-based headbands), prod, or pull (barrettes), or are too tight or too loose. In other words, the classic Goldilocks situation. But these stretchy soft headbands are just right. (A Christmas morning photo offers up the results — scroll down to the bottom, since the paper towel roll just doesn’t do the headbands justice!)

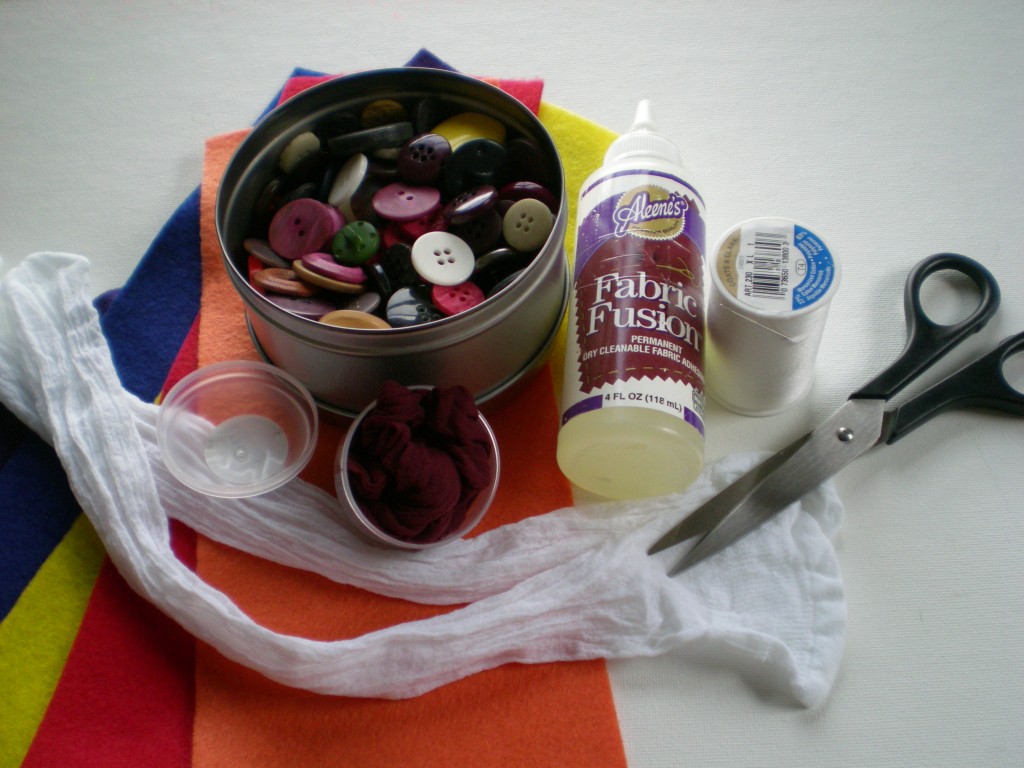
Materials:

-package knee-high stockings (1 stocking makes 1 headband)

-scissors

-needle and thread (color to match the stockings)

Aleene’s Fabric Fusion Permanent Dry Cleanable Fabric Adhesive

-colorful felt pieces

-buttons (optional, for embellishment)

-clothespins (optional, for clipping in place while gluing/drying)

Make it:

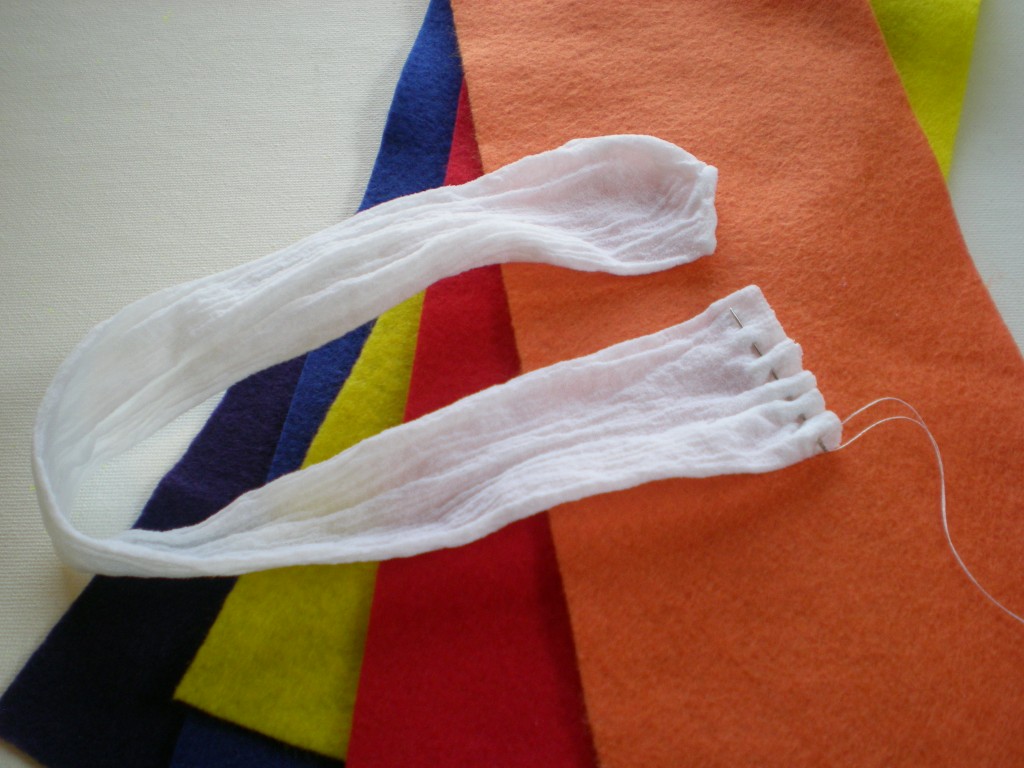
1. Remove the stockings from the packaging and stretch them out. Cut about 1″ off the top of one stocking and set it aside. Thread the needle, knot the end, and make a running stitch about 1/4″ from the cut end of the stocking.

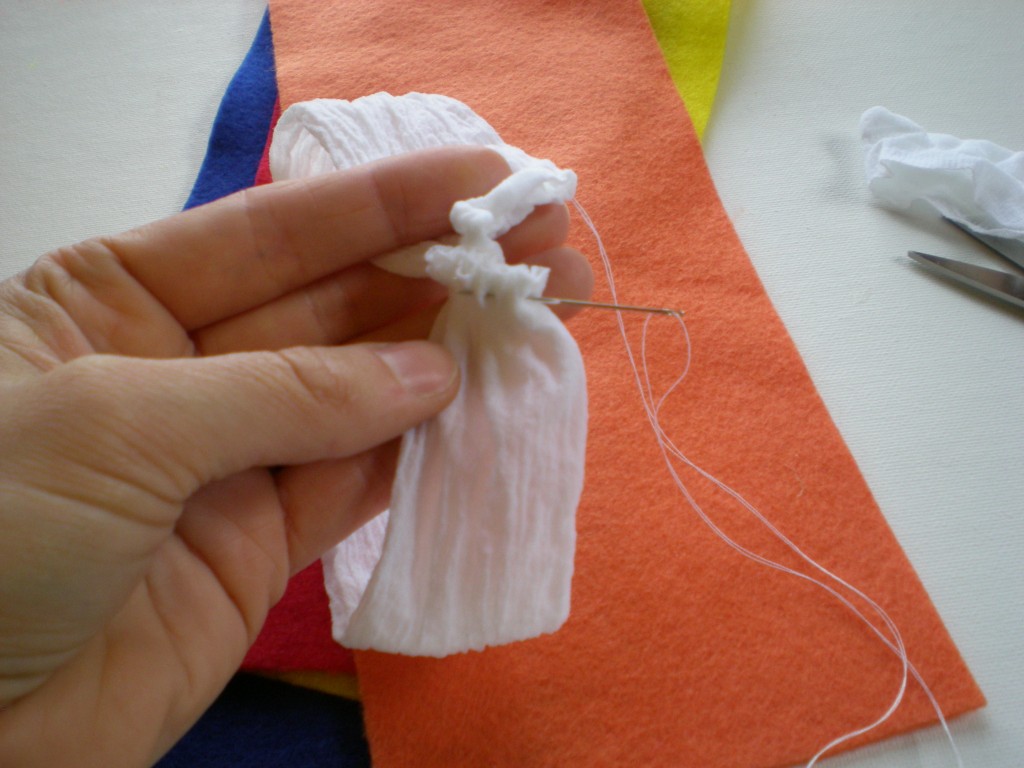
2. Sew a running stitch along the toe end of the stocking and gently pull the thread to gather the two ends of the stocking together, forming a loop. Make a few more stitches to secure the ends, and knot.

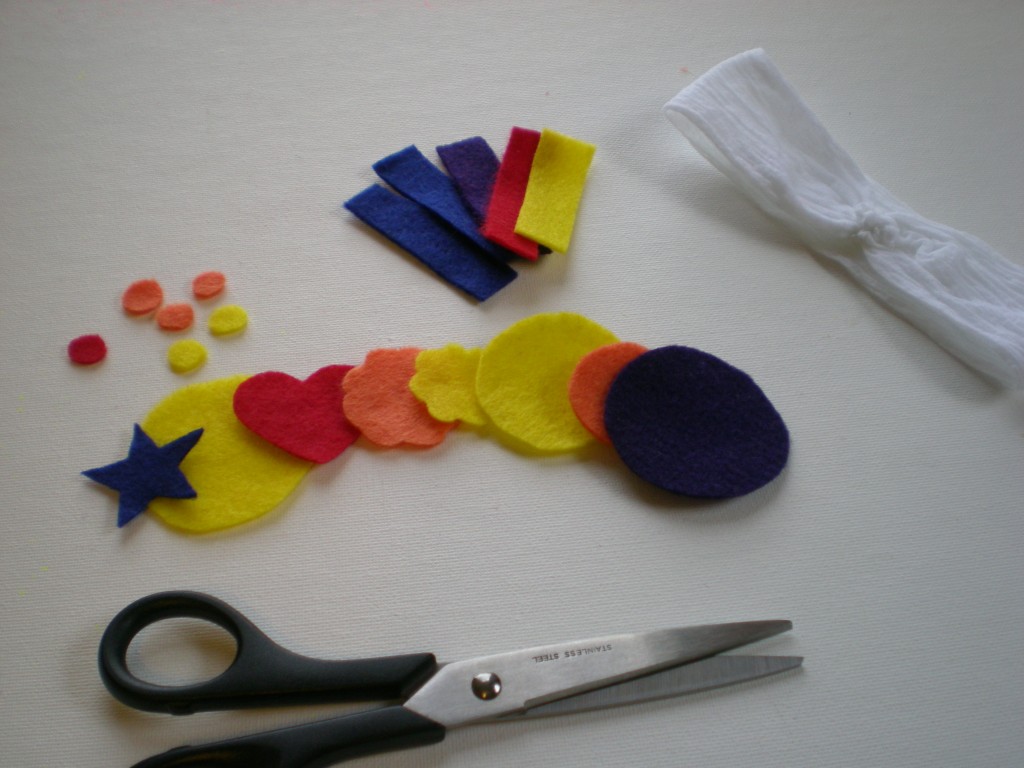
3. Set the loop (the headband) aside, and cut decorative shapes from the felt pieces. Cut several felt strips about 1/2″ by 3″.

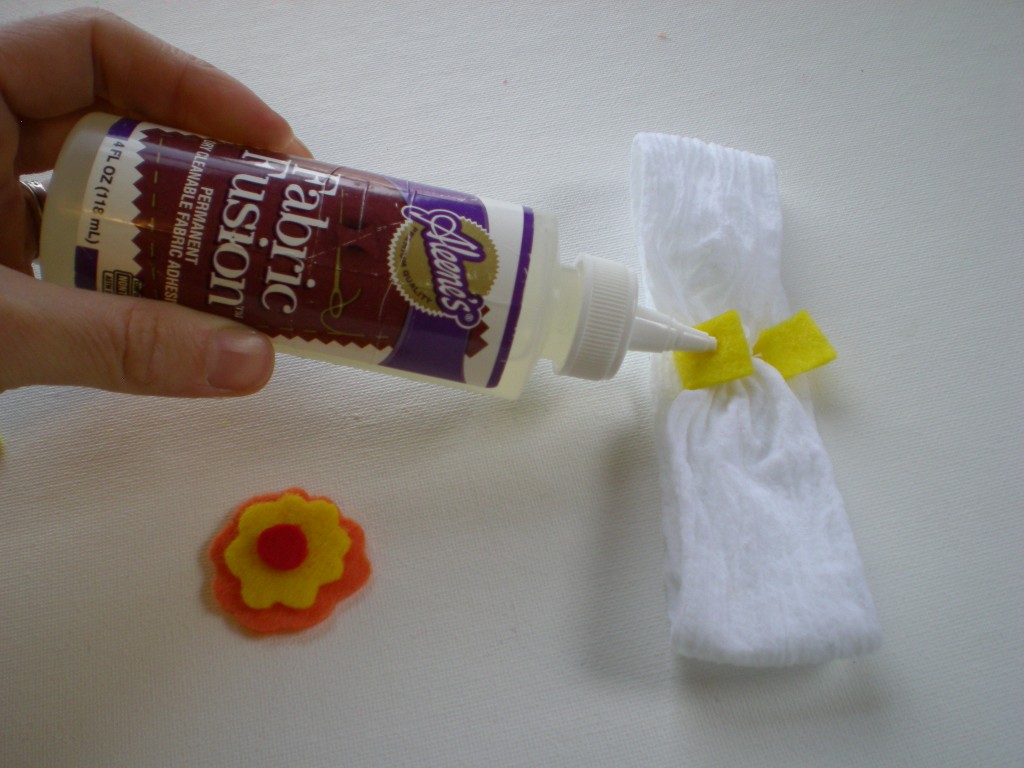
4. Wrap one felt strip around the gather on the headband (to hid the stitching and provide a base for the embellishment). Apply glue liberally to the ends of the strip and fold them over each other. Let dry, and reapply glue as needed. (Felt is a very porous fabric, so the glue gets absorbed easily.) While the glue dries on the headband, mix and match felt shapes to make embellishments. Optional: Add buttons, glitter, ribbon, even fabric scrapbook embellishments to personalize the headband.

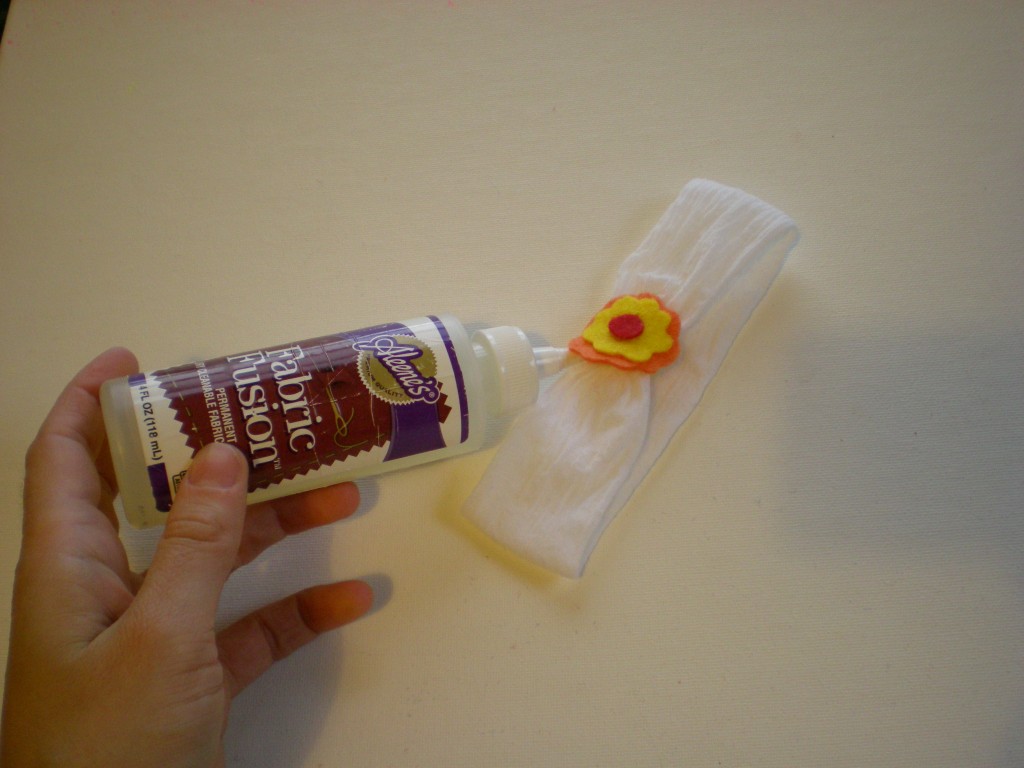
5. Glue the felt embellishment over the felt seam and let dry. (Again, apply that glue liberally!)

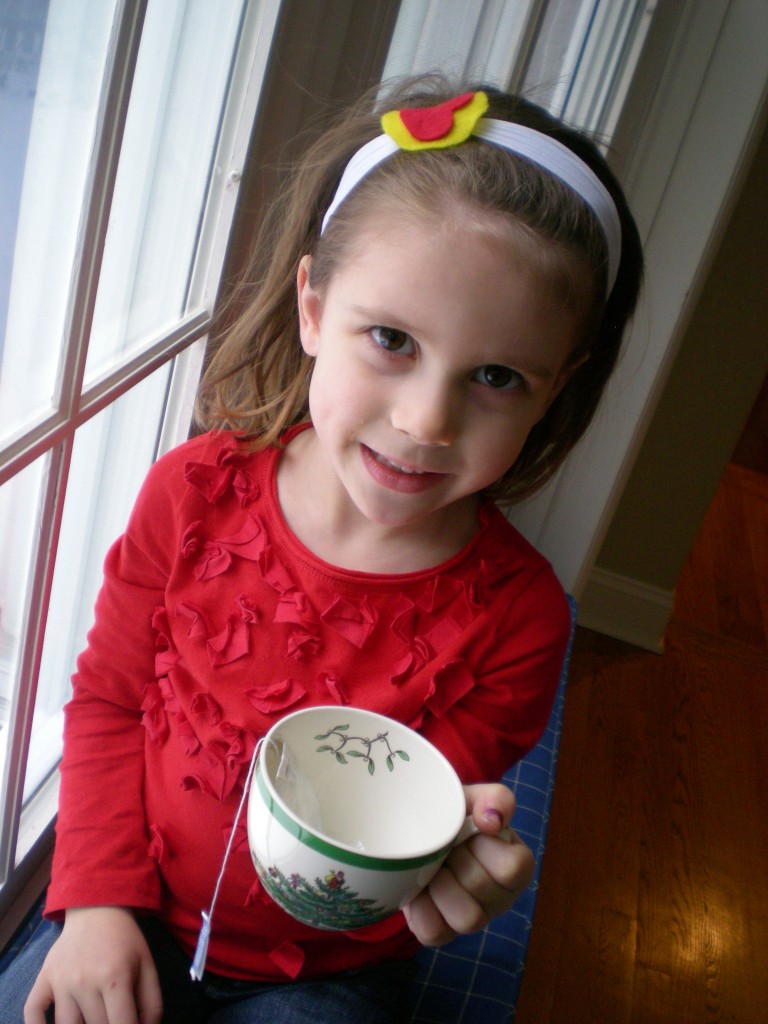
6. You’re done! The stocking headband now becomes the perfect stocking stuffer! Or skip straight to the wearing part — with no complaints of pulled hair, and no shaggy bangs covering up her sweet little face! Tea party, anyone?

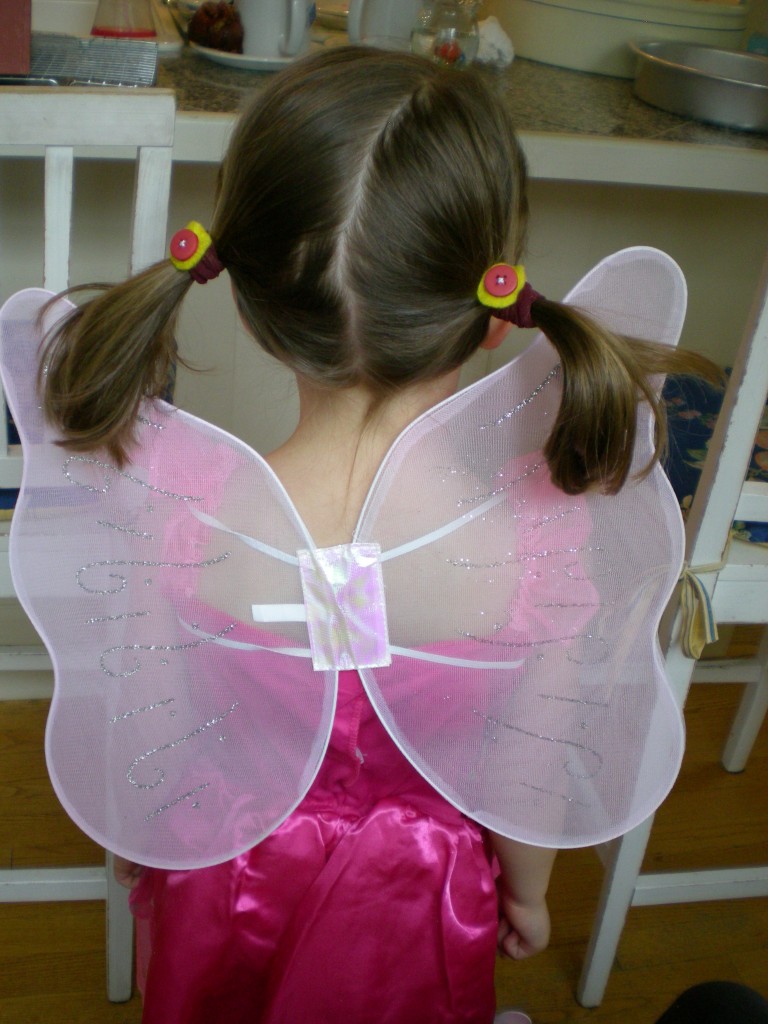
Bonus: Remember the 1″ bit of fabric you cut off the top of the stocking in step 1? Follow steps 4 and 5 to make No-tug Hair Ties! Perfect for taming pigtails, ponies, and braids. (Fairy wings come separately!)

Double bonus: If you buy your stockings at the pharmacy or the dollar store, they often come in little round plastic containers that can easily be converted into a simple cat toy — drop a button inside, snap it tightly closed, and roll it across the floor.


[ 5 Comments | Posted on December 28th, 2010 ]

How-to: Organize a No-Pressure Craft Night!

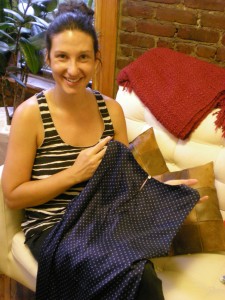
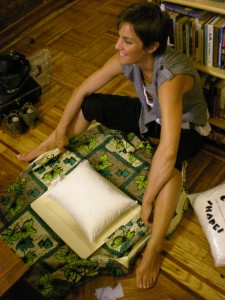
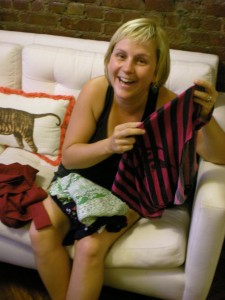
Sometimes the pressure of finishing a creative project can overwhelm the act of starting it. But craft night doesn’t have to include a big project (must. knit. sweater.), oh no. Rather, to celebrate the feeling of accomplishment that comes with actually finishing something, go small. Invite people over for an evening of creative progress: Replace the button on that blouse (like Chloe did!) so you can cycle it back into your wardrobe. Finally sit down with that fabric you’ve been saving forever to make those pillows for your friends’ wedding on Saturday (like Sara!). Stitch up that torn seam on a tank top or fix that hem that’s kept you from wearing that cute skirt for the past two years (like Maria did!). Or, move forward that crochet project that’s gotten buried at the bottom of your bag or that knitting project you’ve put off in favor of wedding planning (like Kim!).

It’s simple: Send out the invite, reminding people of what they might have in that terrifying to-do pile (I know I tend to block it out), and set the scene:

1) Make sure you have some basic repair materials and tools including buttons, snaps, patches, needles, and a variety of thread colors — even set up your sewing machine for light fixes if you feel up to it.

2) Set out some light fare for snacking (and encourage everyone to bring something to share). Again, the theme here is no-stress!

3) Craft it out!

4) Make plans to do it again.

The result: Everyone had tons of fun and, on the efficiency scale, they were positively giddy with what they accomplished in just 1 to 2 hours. Maria managed to work four pieces back into rotation in her closet! And I finally cut out and sewed up all the embroidered softie robots I’ve been working on….But that’s for another post!

[ 5 Comments | Posted on August 26th, 2010 ]

Wedding Bells, DIY Style

It’s been three years today since Mr. T (no not that Mr. T) and I tied the knot, and I think I was so caught up in the overwhelmingly awesome experience of it all that I couldn’t bring myself to post any tutorials at the time. But when I happened upon Jennifer Perkins’s (aka the Naughty Secretary) wedding nostalgia post back in March, I was inspired to put together a little walk down memory lane myself, in hopes that it might provide inspiration to someone else!

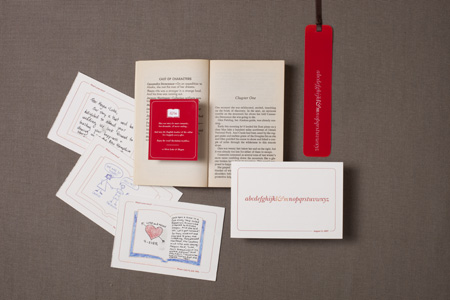
Naturally, our wedding was heavy on the personalization and DIY, low on the budget, and like most weddings, a true family affair. My sister Sophie, a graphic designer, designed the save-the-dates (we sent out a romance novel to each guest with a personalized book plate and “mark your calendar” book mark — the particular gem featured below stars a cave-dwelling gentleman protagonist-from-another-time named Thor). (You’ll notice many of the details are literary-themed — that’s what happens when a writer/editor marries an English teacher!)
The invitations were letterpressed (our big splurge) by Coeur Noir in Williamsburg, Brooklyn (can’t DIY everything–sometimes it’s better to delegate!) and also designed by Sophie.
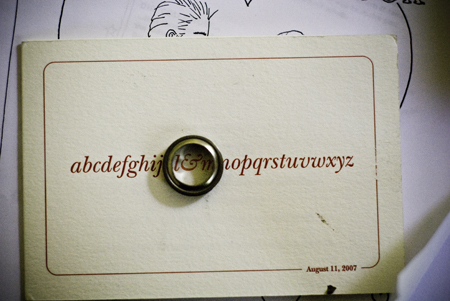
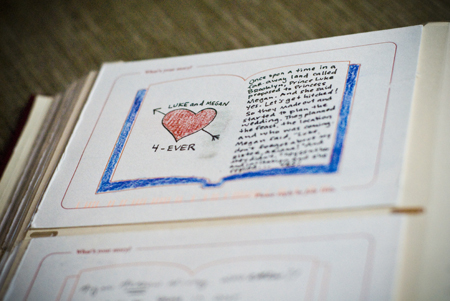
They were envelope-free with a tear-off rsvp postcard with the prompt “What’s your story?” that allowed guests to get a little creative in their replies. (My sister Ariana‘s colorful reply below.)
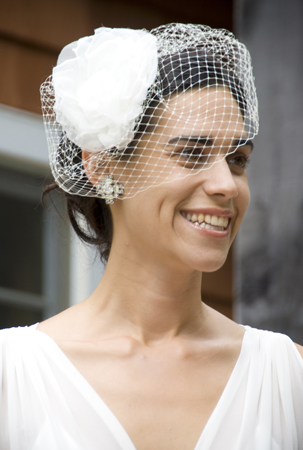
To answer the big question, no, I didn’t wear the T-shirt wedding dress (I had already spent a lot of time in it for the Generation T photo shoot, plus I wanted it to be a surprise!). I wore a simple on-sale J. Crew dress that I had my friend Diana Rupp help me adjust one day in her workshop while I was wearing it! She introduced me to Michelle Courtois who took me on a whirlwind trip through the garment district to purchase the materials for my birdcage veil and detachable silk flower–which she hand-crafted and made to fit.
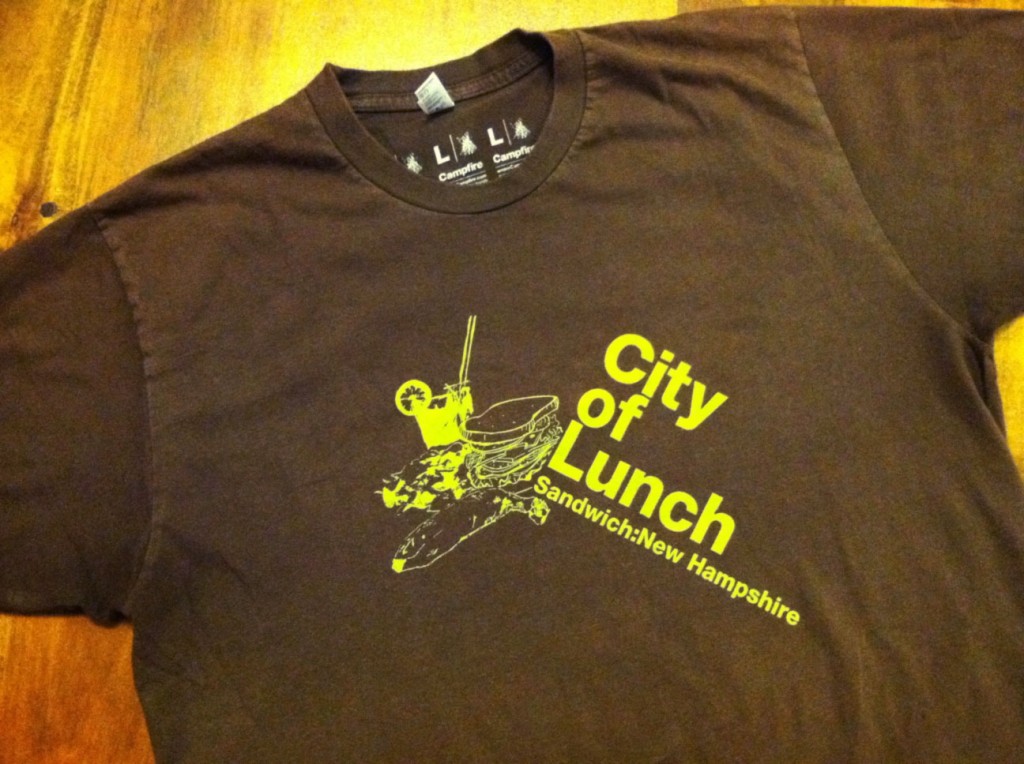
But lest you think the occasion was T-shirt free, we commissioned a special T-shirt hand silk-screened by our friends at Campfire Goods to give to the members of our wedding party…no word as to whether anyone’s done any T-shirt surgery on them!
(Come to think of it, my sister-in-law and mother-in-law made 1″ punk pins for the rehearsal dinner that would be perfect to complete the Pin-up Girl halter top from Generation T: Beyond Fashion.)

And though I saved corks for a year to use as place card holders, we ended up having a buffet (no assigned seating) in the beautiful old two-story barn where we had the reception.
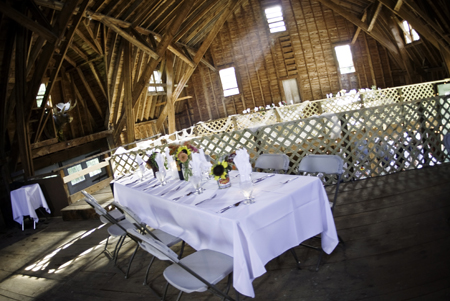
The buffet-style dinner was catered by Marie Gerli Catering (who I used to work for during the summers in high school!) with local fresh vegetables from the family farm up the road.

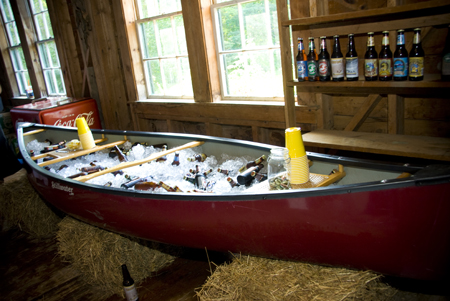
We floated the beer and wine in a pile of ice in my family’s canoe, propped up on some hay bales in the barn.
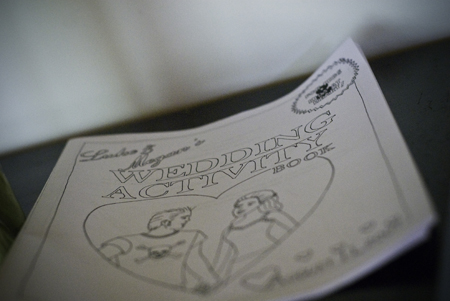
I made and distributed a “Wedding Activity Book” to guests young and old so they could entertain themselves if the toasts went on too long.
I spent way too much time on it, but had a ton of fun personalizing the workbook with coloring pages, connect the dots, mazes, matching games, trivia (in the form of a GSAT, or Granite State Aptitude Test, in honor of the state I grew up in), and a homemade Mad Libs describing the proposal.
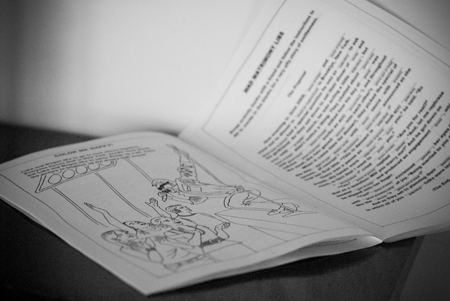
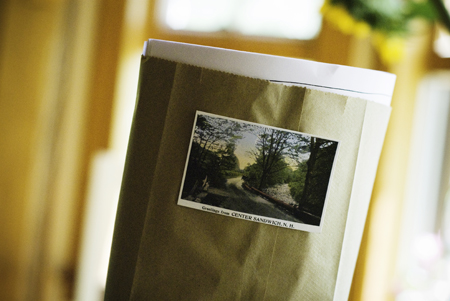
The welcome bags, decorated with a reproduction of a vintage postcard from the town where I grew up, included the activity books, packets of crayons, bottles of NH spring water, some locally made maple candies, and directions to all the fun hikes, swimming holes, and the 24-hour ice cream spot, of course.
My father-in-law, an interior decorator with a real green thumb, created simple bouquets of dahlias for me and my bridesmaids and groom’s lady.

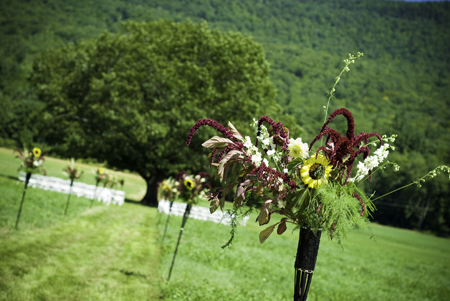
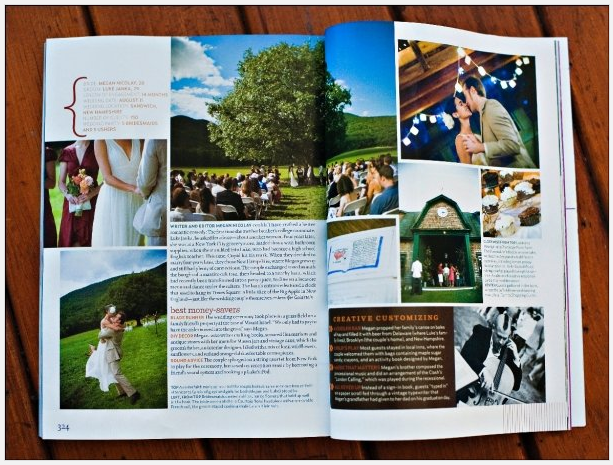
He was also the mastermind behind the beautiful flower arrangements at the ceremony site. He found a bunch of bamboo tiki torches that he brilliantly repurposed into flower containers to line the aisle in the field. (Mr. T and I got married under that big oak tree.)
My mom and I saved and collected tins and mason jars for months to use for the flower arrangements on the tables.

My brother Franz, a musician, composed the processional (the recessional was The Clash’s London Calling, which he arranged for string quartet). Our friends from the Anti-Social Music collective made up the quartet who played at the ceremony and at the reception at the barn.

Our guest book, a scroll of paper fed through the Hermes 3000 portable typewriter my dad received as a gift for his high school graduation, was an homage to my Oma and Opa, who ran a typewriter and office machinery business out of their home for all the decades I knew them!

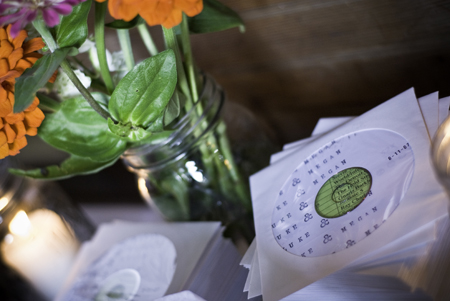
Mr. T spent hours creating the ultimate playlist (we went DIY iPod-style and borrowed speakers from a friend). And we did opt for the ubiquitous wedding CD (yes, those are hand-stamped labels) — we love music and wanted to share some of our favorite tunes so people could take the dance party home.
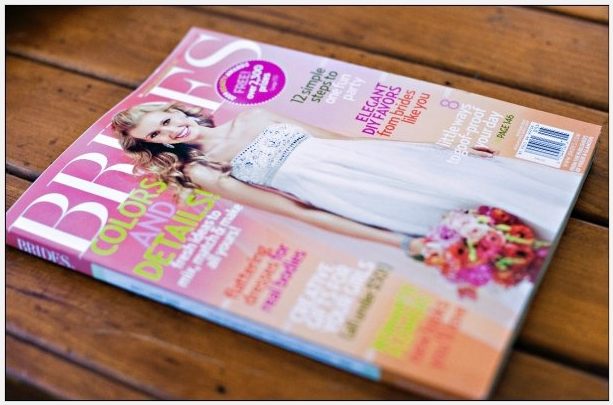
Our photographer, the incredibly talented Brooke Mayo, whose photographs you see here, submitted the photos to Brides Magazine, where selected shots and details appeared in May 2009!
My ladies wore brown cowboy boots and red dresses! I strung a necklace of natural pearls for each of them to accessorize with.
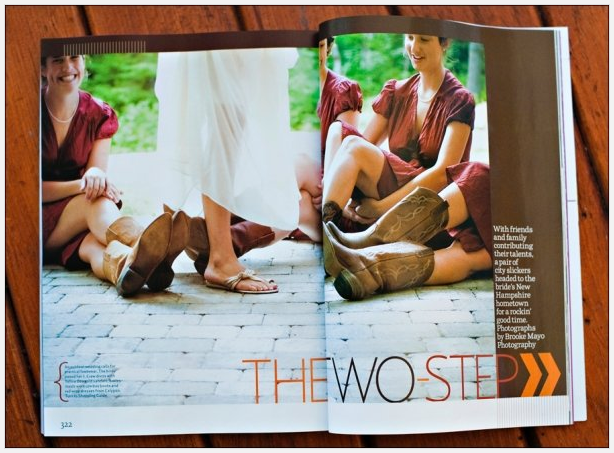
Here are the details the Brides thought were most notable: The flowers! The tree! The lights! The barn! The cupcakes! The invites! Our friend Pat, who often sports a mohawk and plays a mean cello!
It was an amazing day, filled with wonderful handmade details–so  thanks for indulging me, and giving me the opportunity to reminisce!

And even though I’m well past planning my own wedding, I love attending others’ events so I can take note of my favorite DIY details! What about you? Any tips or favorite party details to share with the Generation T community?

Save-the-Date photo by Tory Williams.
T-shirt and button photos by Megan Nicolay.
All other photos by Brooke Mayo!

[ 14 Comments | Posted on August 11th, 2010 ]

Project Time: Appliqué Onesie

There’s nothing like good, solid project time! One evening recently, my friend Chloe and I sat down for a crafty session in the Generation T workshop. Chloe’s friend recently had a baby boy and she was inspired to make a personalized onesie for the little fella. This project is reminiscent of Tattoo You, project #79 in Generation T: Beyond Fashion, but with a baby onesie instead of an adult T-shirt, plus some embroidery. (Apologies for the poor photos, we were working under rather low-light conditions….except for the last photo taken by Max’s mama!)
Materials:

baby onesie
scrap T-shirt sleeve
skeins of embroidery floss in desired colors
embroidery needle
embroidery hoop
scissors
pencil
paper
disappearing ink pen
needle and thread


Make it:
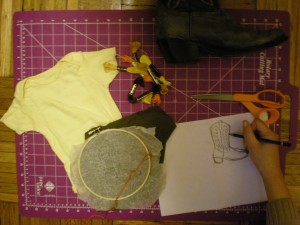
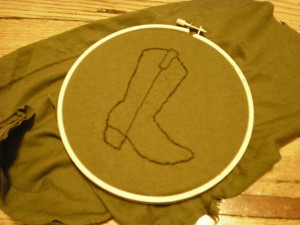
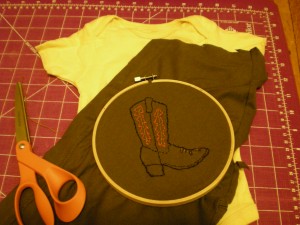
1. Gather the materials and choose a theme! (Chloe picked cowboy.) Sketch the design. (We sketched a cowboy boot that she borrowed from my closet.)

2. Transfer the design to the T-shirt sleeve fabric and gently (so it doesn’t distort the design) stretch the fabric in the embroidery hoop. (Note: Many people use stabilizer at this stage to prevent stretching, but we didn’t have any on hand, so just worked the fabric very gently.) Stitch the outline of the design.

3. Stitch the interior of the design. Then remove the fabric from the hoop and cut around the design, leaving a 1/4″ allowance, to make a patch.

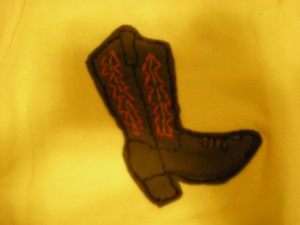
4. Pin and sew the patch through only one layer of the front or back of the onesie. (Note: We stitched along the boot outline with matching regular thread so it wasn’t visible.) Optional: Stitch the recipient’s name or initial to personalize the garment.

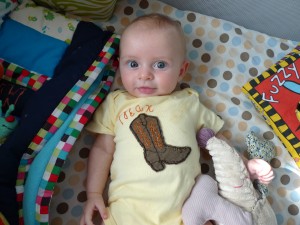
5. Then tie off all the ends, remove any remaining pins, and wrap it up for the adorable recipient! Here’s baby Max, the littlest cowboy. Yee-haw!


[ 2 Comments | Posted on July 15th, 2010 ]

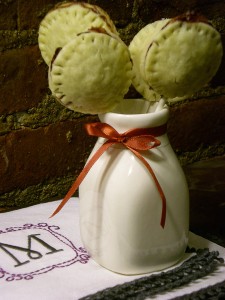
Making Pie Pops (and Eating them, too!)

As you know,  I sometimes stray from T-shirts. Because, hey, when the creative urge hits, it’s not always screaming for jersey knit. In this case, I was in the kitchen with rolling pin in hand.

I first read (or rather observed the cuteness) of these little pastries over at Bakerella this summer, then followed the strand back to Luxirare, where I saw the whole beautiful story unfold. I generally like small desserts that allow me to try multiple flavors. Think cookies–the perfect way to taste a dozen little desserts at once. I also like pie–a lot. Mr. T and I would have had pie at our wedding reception except there was no way we could decide on any single flavor. So we enjoyed four flavors of cupcakes instead–chocolate, red velvet, carrot cake, and lemon poppyseed. In retrospect, we could have had multiple pie flavors; I just would have insisted on eating at least four slices of pie.

This is all to say, I wish these pie pops had been discovered sooner! Because they’re the perfect opportunity to taste many a pie filling in one sitting. I followed Bakerella’s photo tutorial, with a few variations of my own: 1) I used Betty Crocker pie crust mix (add water and roll out) since I couldn’t find the pre-rolled dough at my grocery store. 2) Bakerella’s comment that hers came out too doughy (filling-to-crust-ratio was leaning too much toward the crust) inspired me to roll out my dough thinner–I actually got 15 pops out of dough I rolled out for a 9″ pie, and overstuffed the centers with filling. 3) Rather than using (or mixing up) traditional pie filling, I used my all-time favorite fruit spread, Spoon Fruit from American Spoon Foods. I used Cherry-Berry, Strawberry, Blueberry, and Sour Cherry–I particularly love these because they aren’t sweetened with sugar, just all real chunks of fruit. My grandmother, Maja, introduced them to me a dozen years ago and always sent me a gift box every Valentine’s Day. My mom has since taken over the tradition, so I had a cupboard full of jars to choose from. 4) I also made a couple of chocolate-hazelnut filled pops using Creme de Noisette by Pralus Master Chocolatier, a recent indulgence that’s proving to be habit-forming. Packaged in a squeeze tube, and easily mistaken for hair product if it wasn’t in a cupboard over the stove, it’s basically a gourmet Nutella made with all real ingredients–eating a bowl of Vanilla Swiss Almond ice cream hasn’t been the same since I bought my first tube of this stuff.

The Pie Pops recipe has already been well-documented as I noted and linked above, so I’ve decide to offer an illustrated tutorial to complement all that’s come before. Enjoy.

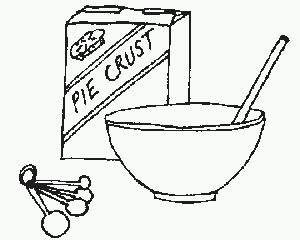
1. Follow the directions on the pie crust mix to make a ball of dough.

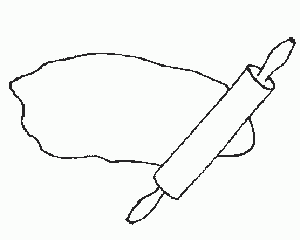
2. Flour your work surface and roll out the dough about 1/8″ thick.

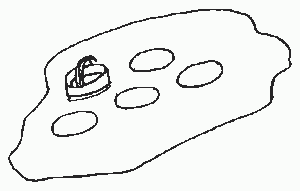
3. Use a round cookie cutter about 2 1/2″ in diameter to cut out an even number of dough discs. (Roll your dough scraps back into a ball and repeat steps 2 and 3 until all dough has been used.)

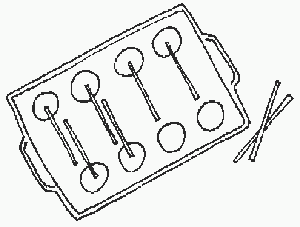
4. Arrange half of the discs on the cookie sheet and press a lollipop stick into each.

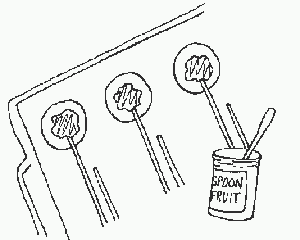
5. Spoon about 1 1/2 teaspoons of Spoon Fruit or 1 teaspoon of Creme de Noisette into the center of each disc on the sheet.

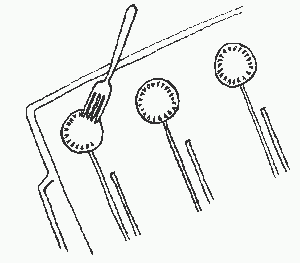
6. One at a time, gently lay the dough discs that remain over the filling and the end of the pop stick. Pinch the ends closed by gently pressing with the tines of a fork.

7. Brush the tops with egg white and stick in the oven for about 15 minutes or until lightly browned.

8. Let cool and…eat! (And be sure to try every flavor.)


[ 2 Comments | Posted on March 6th, 2010 ]