T-shirt Projects

I Love to Create: Superhero Arm Warmers!

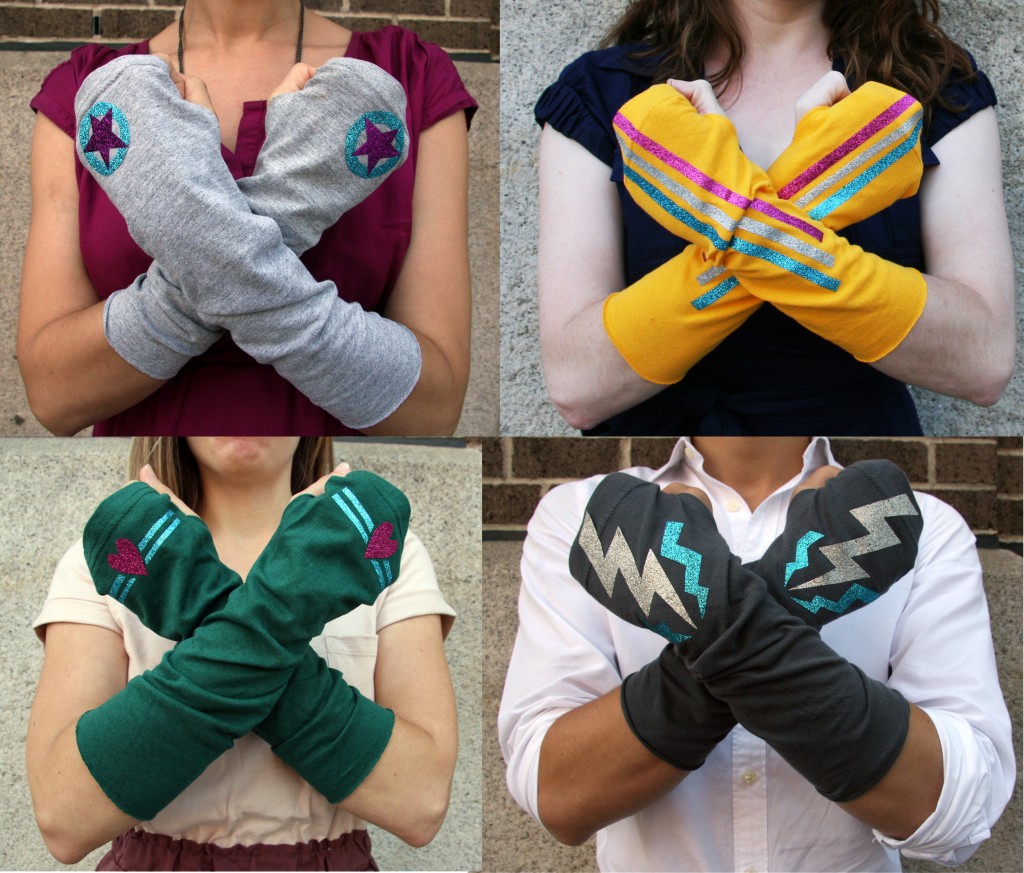
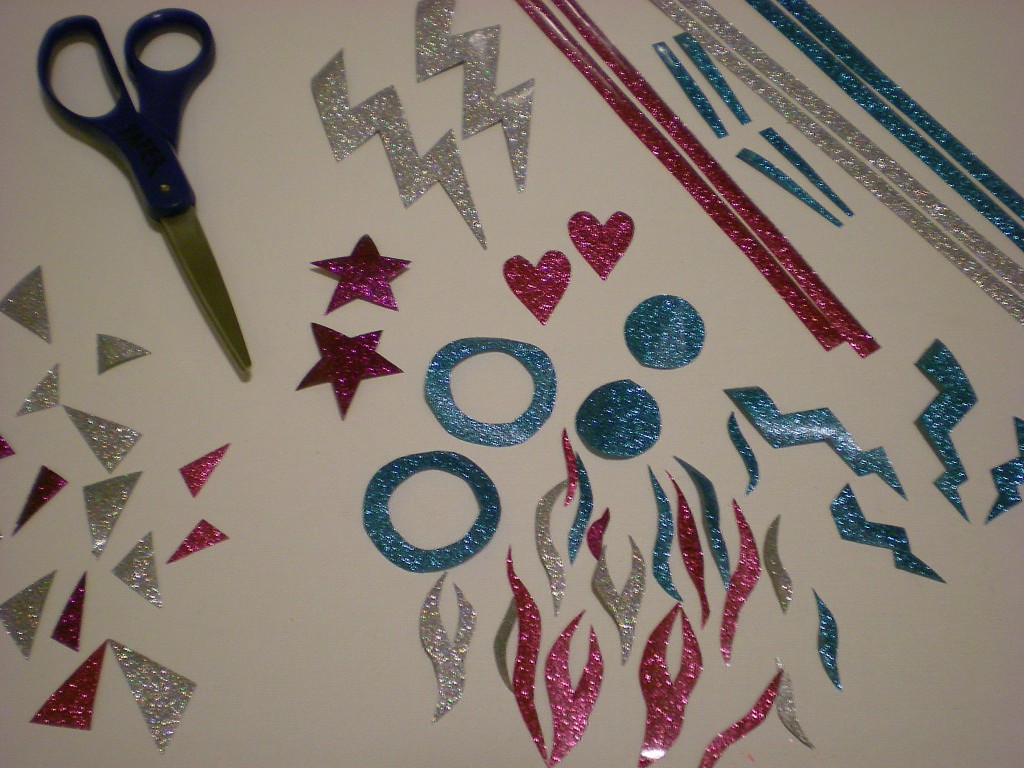
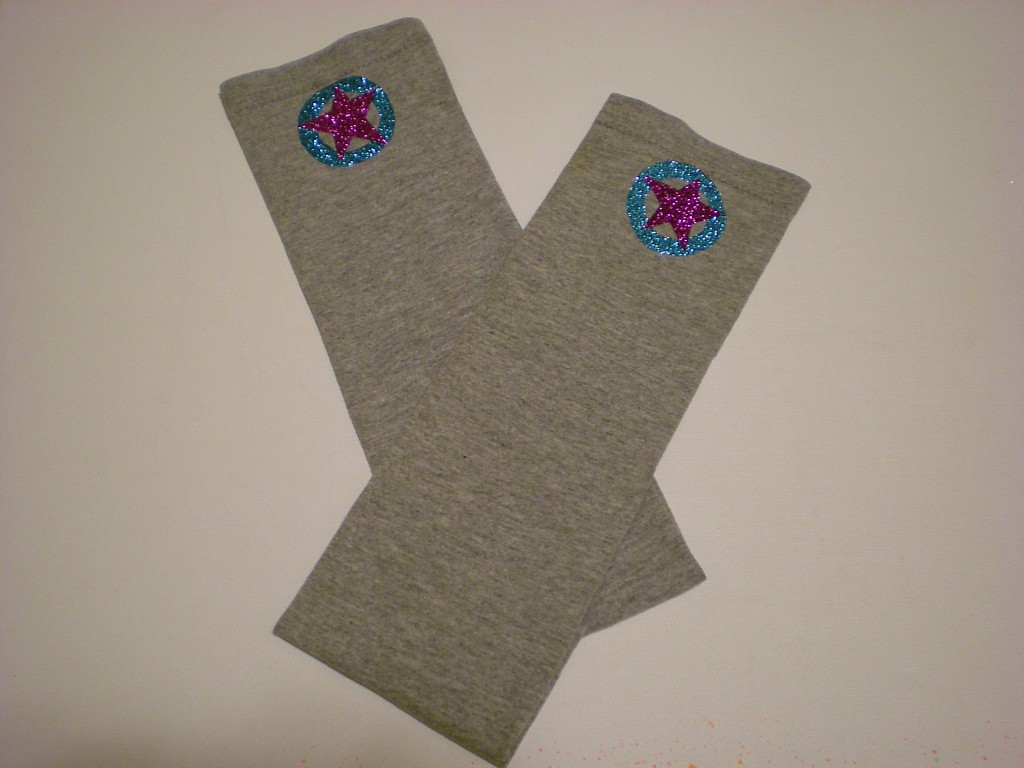
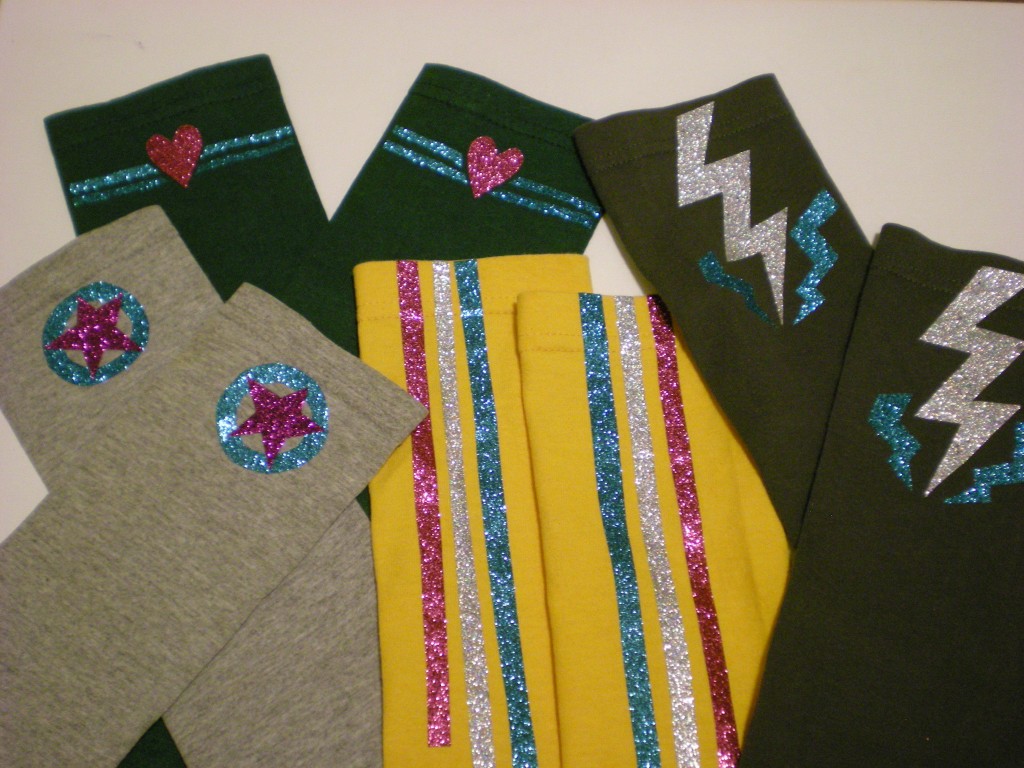
This T-shirt transformation project is my favorite of the accessories in my first book. They’re the Go-go Gauntlets (project #73) from Generation T: 108 Ways to Transform a T-shirt. They’re super easy to stitch up in an afternoon, and even easier to embellish with iron-on glitter sheets–which seriously increase the superhero factor.

These arm warmers are especially good for:
1) Completing late night deadlines (reports, papers, presentations, tax filing, etc.).
2) Healing goose-bumped flesh in the over-air-conditioned spaces of warm-weather climates.
3) Protecting long-armed folks from that pesky draft caused by the gap between the glove and sleeve in cold weather climates.
4) Shielding the knuckles of bicyclists from biting winds when they ride really fast.
5) Executing superhero power stances.

Materials:
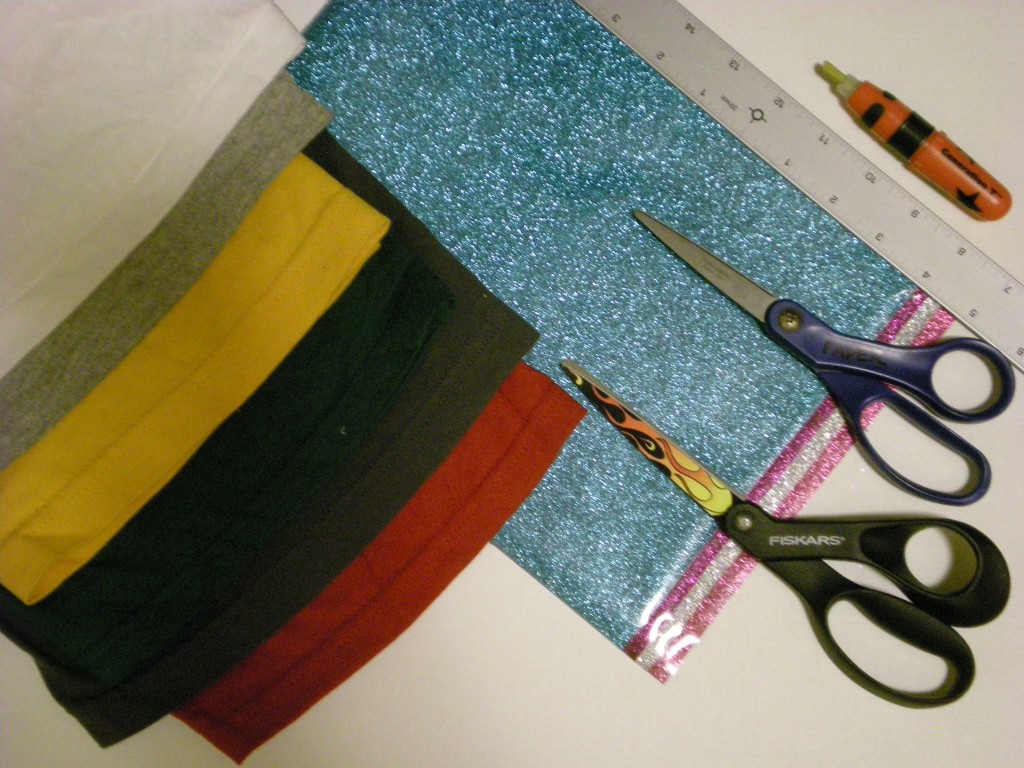
-1 or more old T-shirts (with the bottom hem intact)
-Fabric marking tool
-Ruler
-All-purpose scissors
-Fabric scissors
-Needle and thread (or sewing machine)
Tulip Fashion Glitter Shimmer Transfer Sheets
-Pressing cloth
-Iron

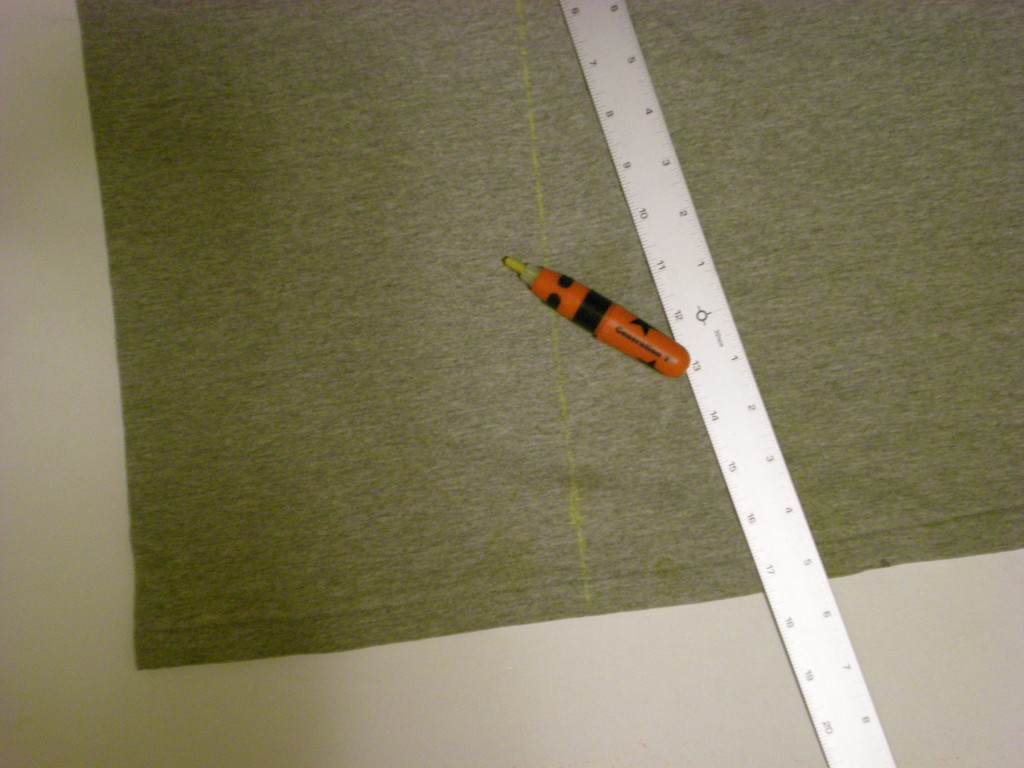
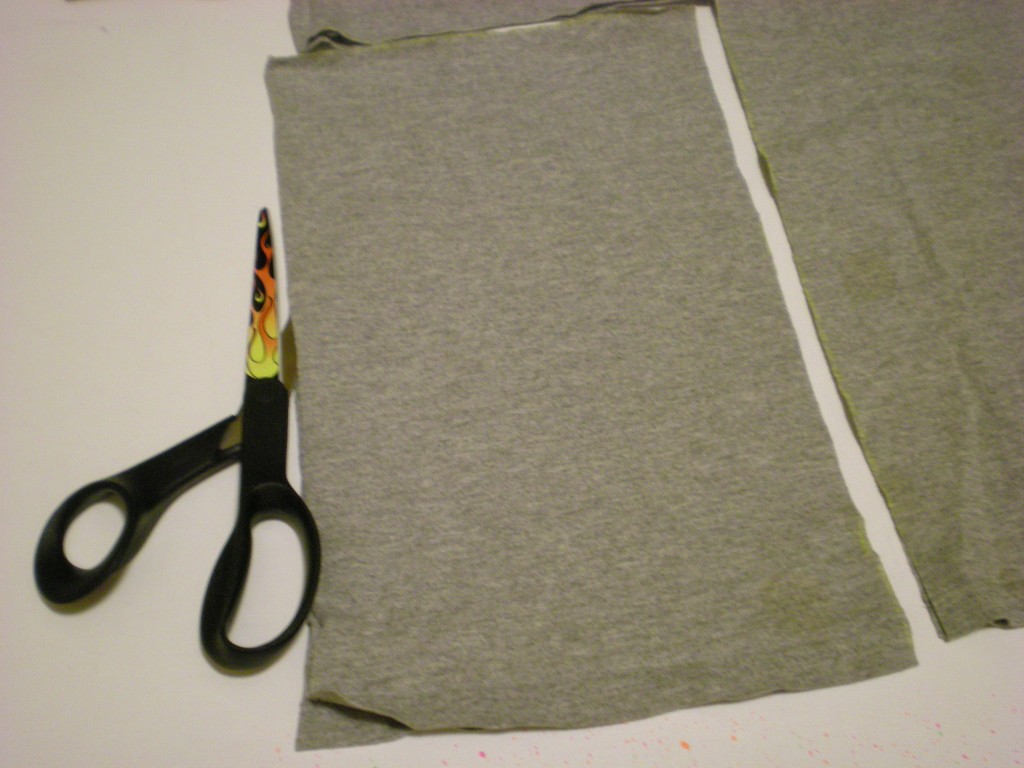
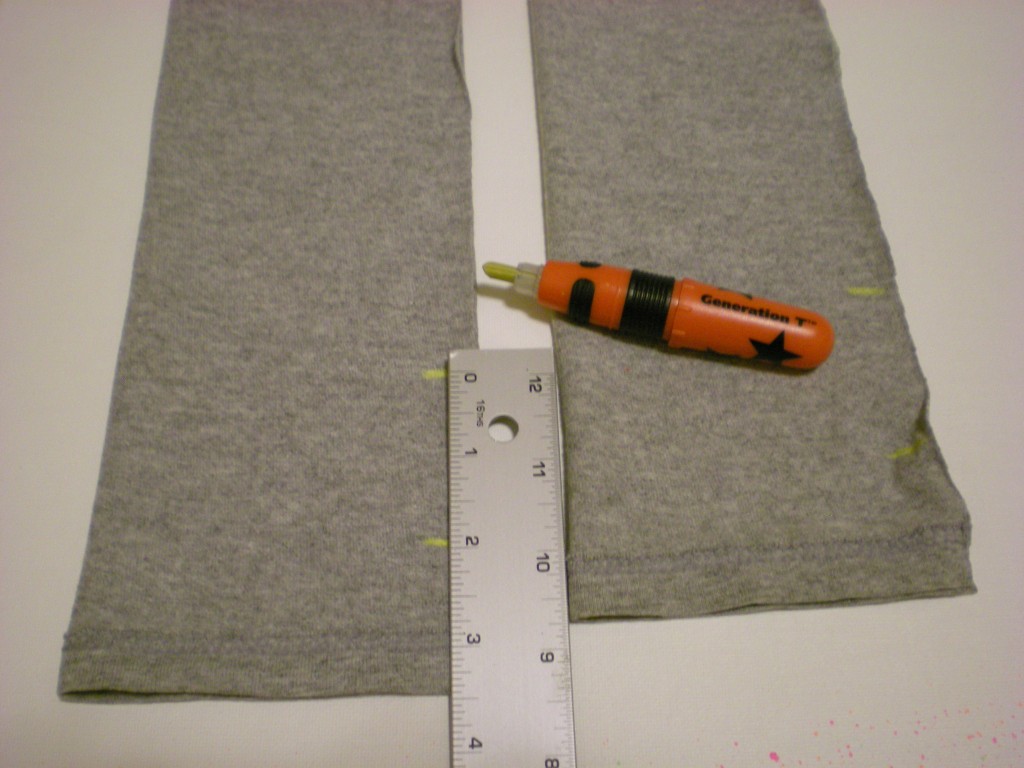
1. Measure the distance around the middle of your forearm (x). Mark a rectangle x” wide and between 11″ and 14″ tall that lines up along one of the side folds of the T-shirt and extends up from the bottom hem.

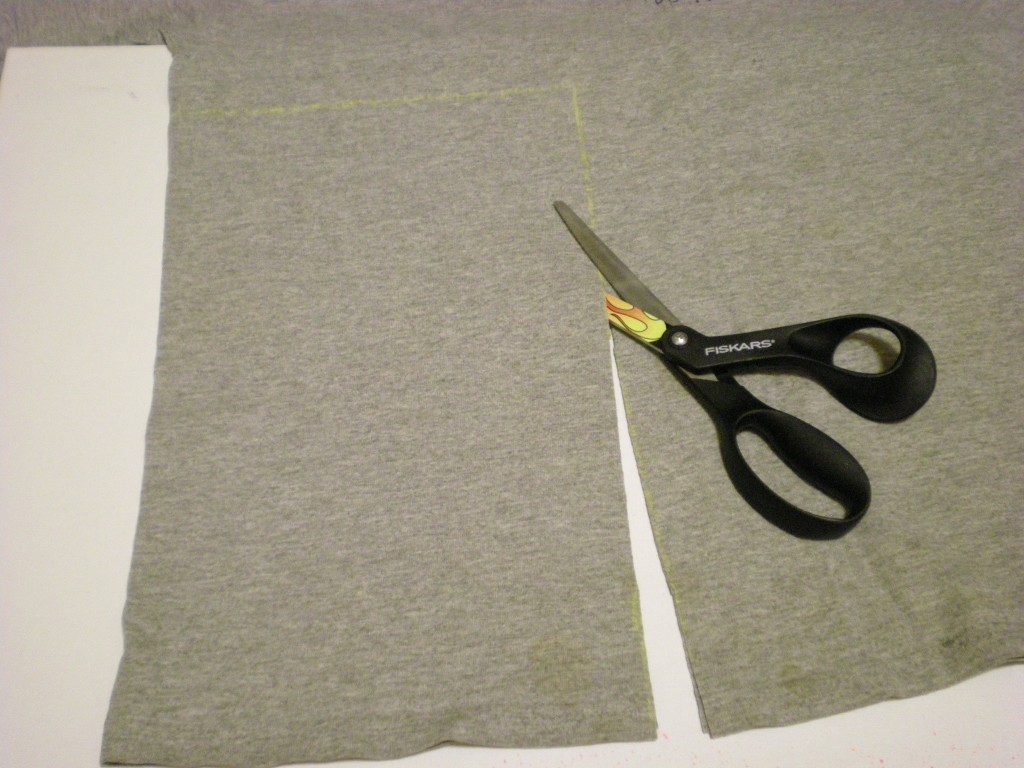
2. Use the fabric scissors to cut out the rectangle through both layers.

3. Cut open the side, along the fold of the shirt.

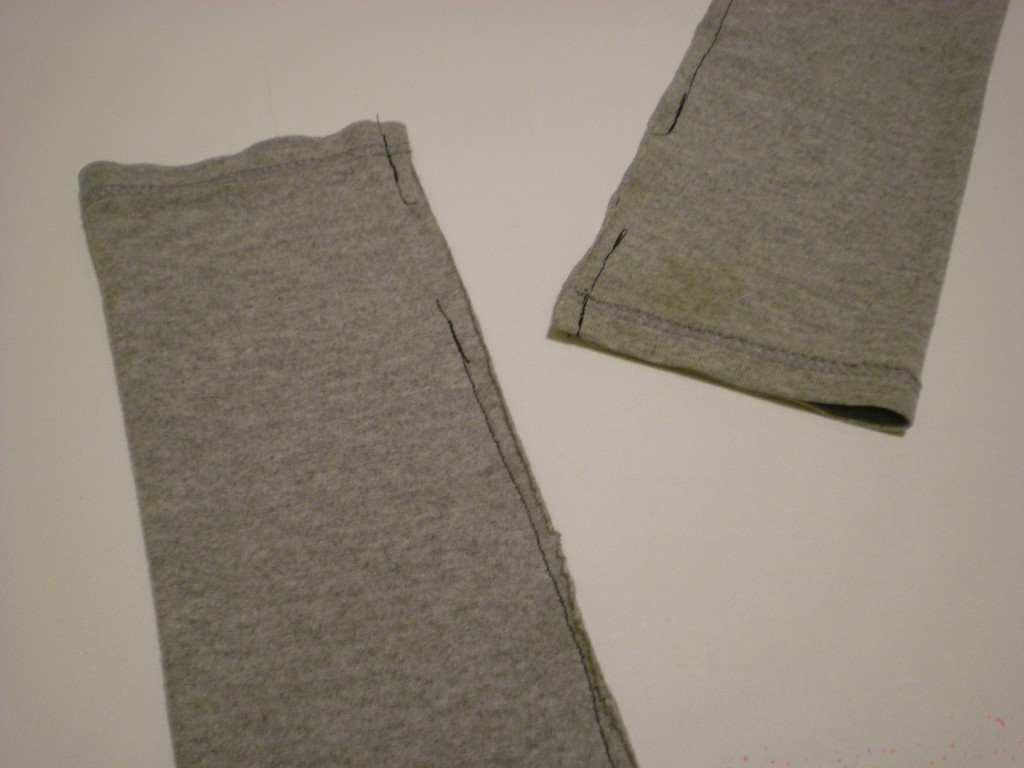
4. Fold each rectangle, right sides in, and make two marks along each of the open edges that measure 1 1/2″ and 3 1/2″ from the hem.

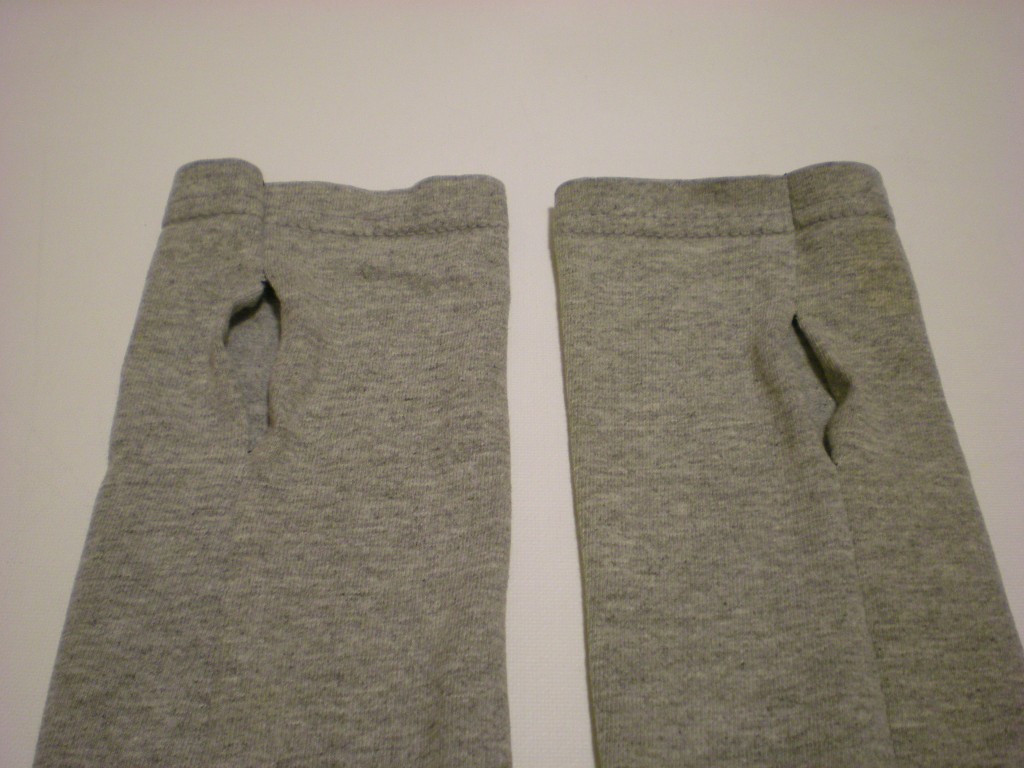
5. Stitch along the open edge, about 1/4″ from edge, leaving an opening (for the thumbs!) between the two marks.

6. Turn the arm warmers right side out and orient the thumb holes about one-third from the edge.

7. Use all-purpose scissors to cut out fun shapes from the iron-on glitter sheets (in pairs, if you want your arm warmers to match).

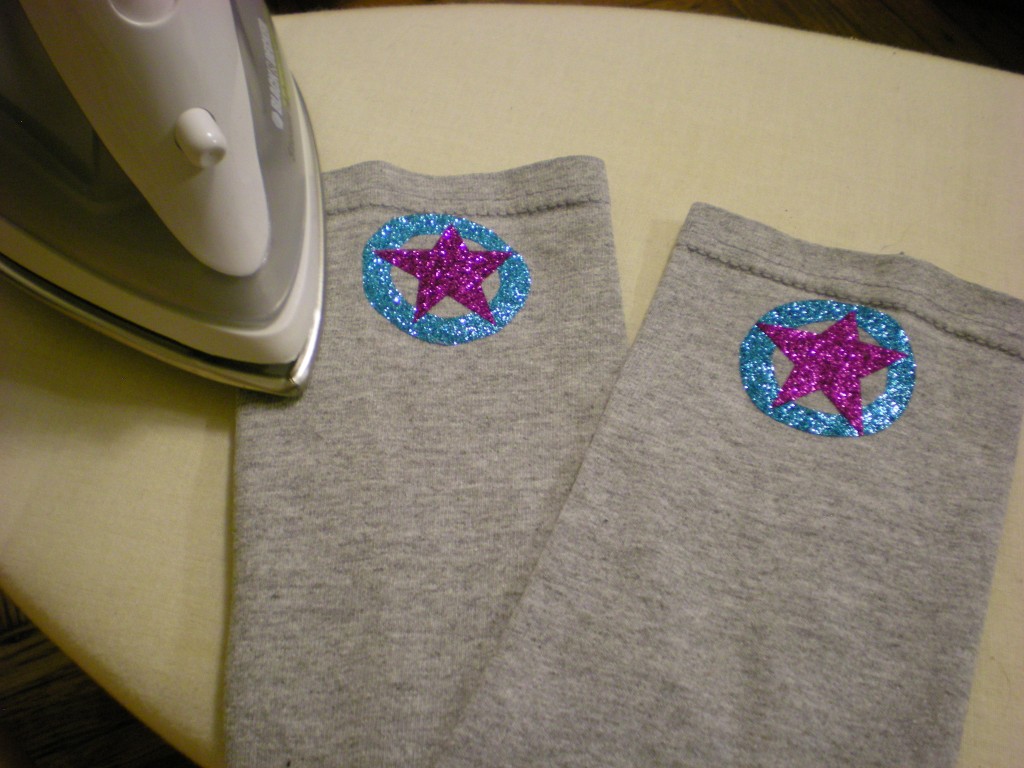
8. Keeping the arm warmers oriented as they were in Step 6, flip them over and arrange the glitter shapes near the hem. Peel away the shiny surface layer from the shapes, lay a pressing cloth over the arm warmers (being careful not to disturb the placement of the shapes), and press firmly with the iron for about 40 seconds. Repeat if necessary to set the glitter transfer.

9. Turn off and unplug the iron. Try on your new pair of superhero arm warmers!

10. Use all the shapes you cut out in Step 7 to make more!

Optional: Use remaining T-shirt scraps to make a matching superhero mask or headband!


[ Comments Off on I Love to Create: Superhero Arm Warmers! | Posted on July 26th, 2011 ]

I Love to Create: Spray 4 Ways!

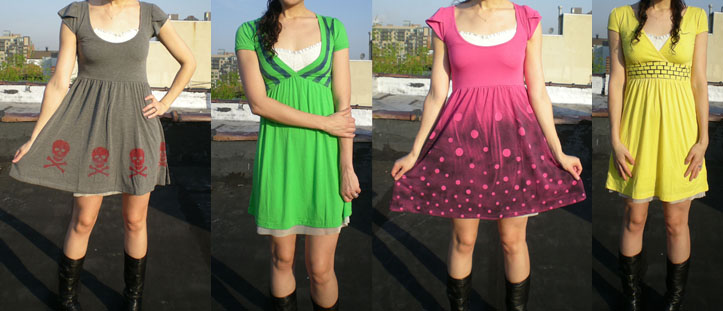
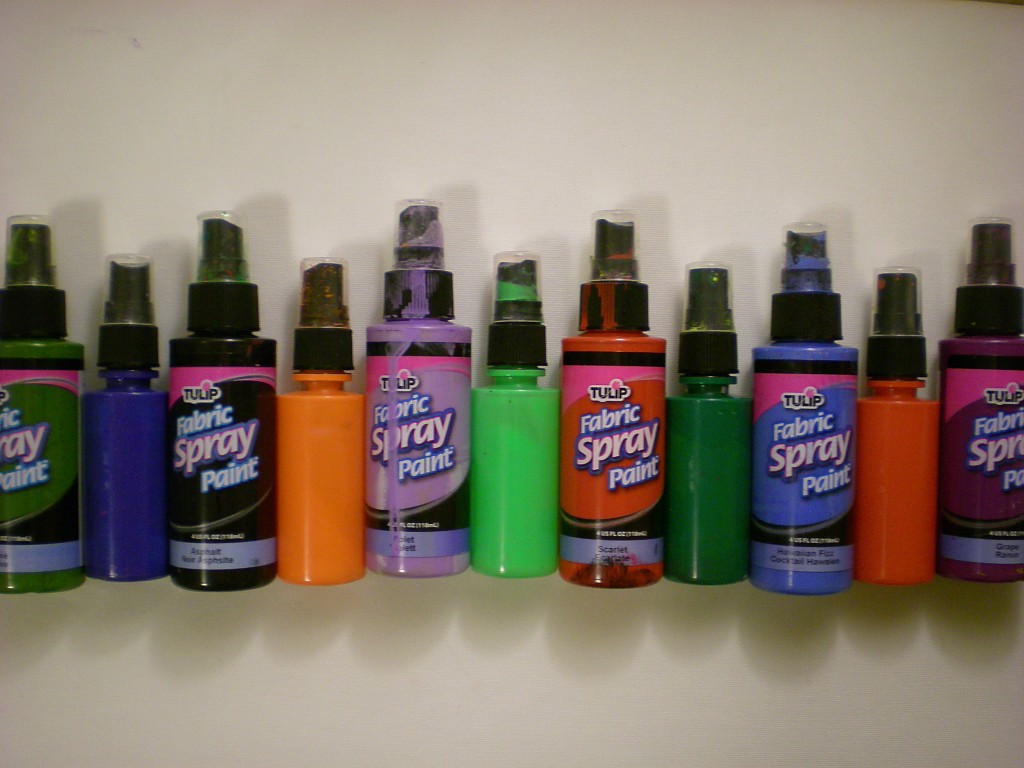
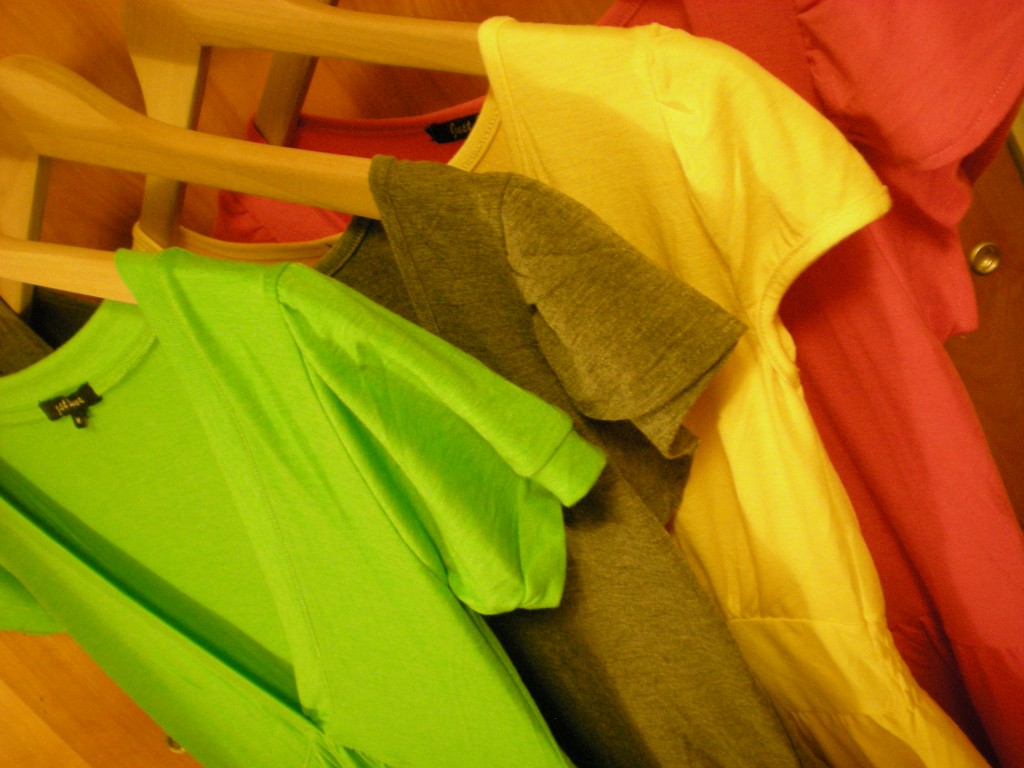
As some of you know, I’ve been just a little bit obsessed with my spray paints lately. And it’s because they’re the perfect quickie spiff-up and surface embellish for T-shirts, pillows, dresses–or any other fabric item you want to spray! Since it’s spring, though, I grabbed up some plain cotton dresses to spray. Here are four different ways to pair those fabric spray paints with templates made from materials around the house including masking tape, stationery stickers, and freezer paper. Pull your spray paints from your holsters!

Once your paints are assembled, select your surfaces (in all different colors–though light colors will take the paint best).

Then introduce any number of “secret weapons from around the house” (items that can be used as templates or stencils to mask parts of the fabric, e.g. freezer paper, permanent marker, a craft knife; map dot stickers; rectangle sticker labels; masking tape) in each of the individual projects below!

1. Yellow Brick Road

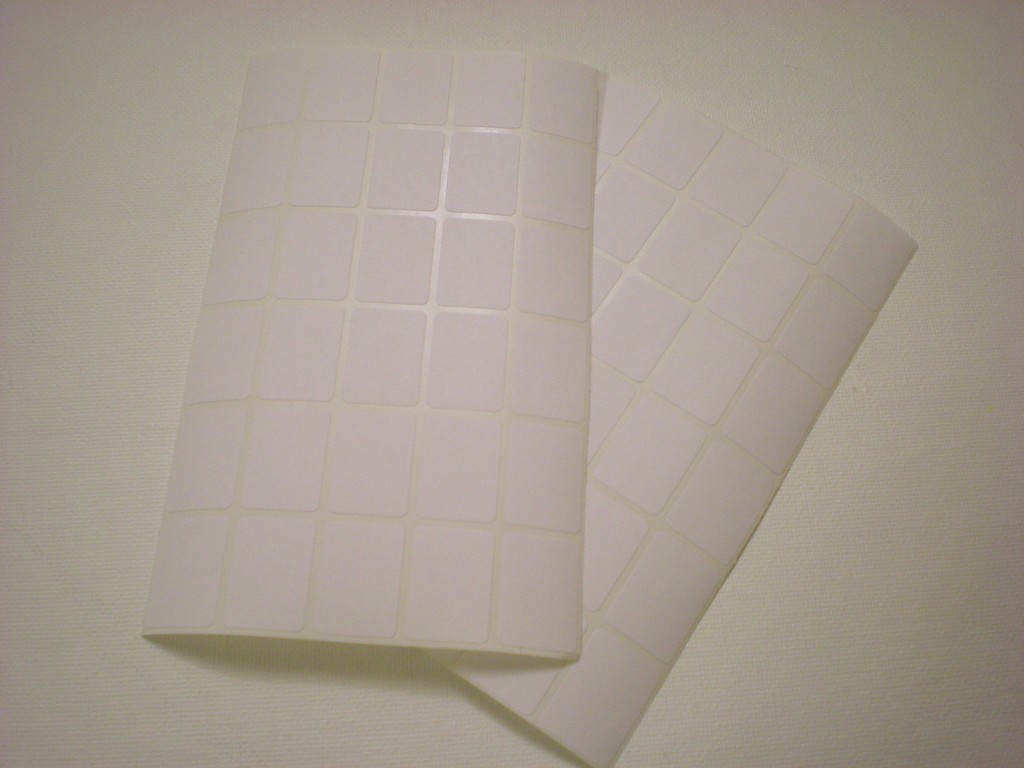
Secret weapon from around the house: Rectangle sticker labels

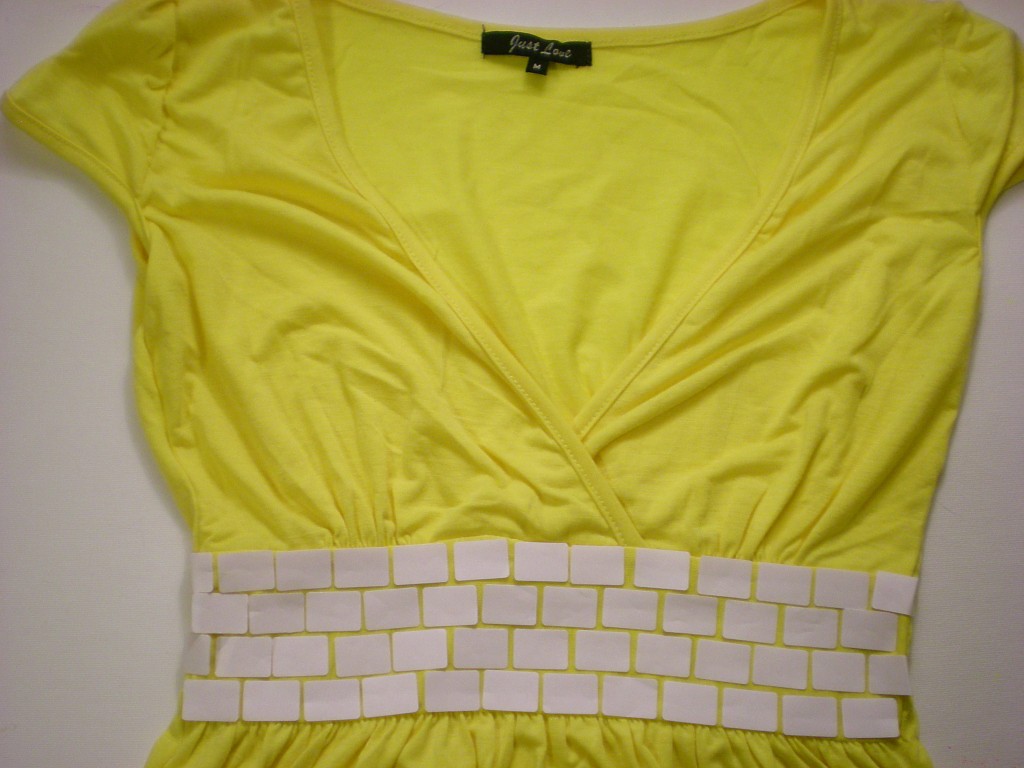
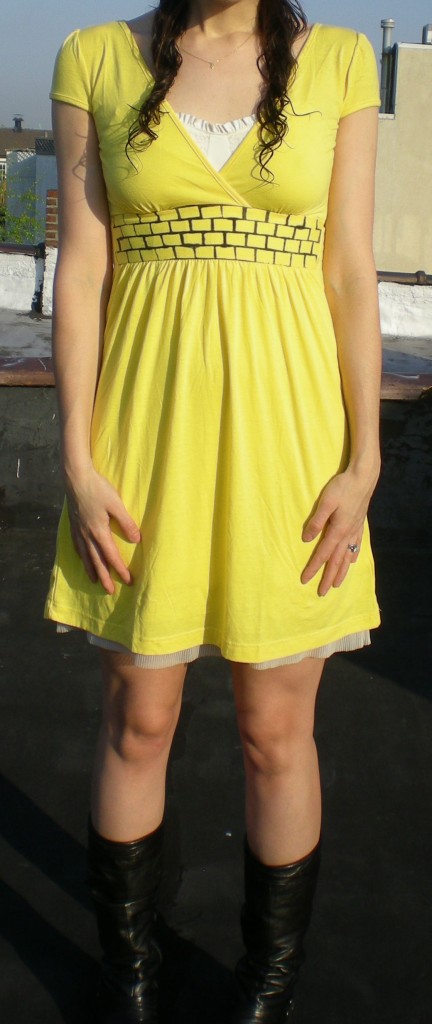
Originally, my plan was to stick on these labels in a checkerboard pattern to give the dress the feel of a racing flag. But the stickers so easily lent themselves to being bricks, that I immediately thought of the yellow brick road in the Land of Oz.

I chose to follow the yellow brick road along the waistband, but you could lay your bricks around the hem of the dress, up and over the shoulder, or a circle them all over the dress. I laid one row of bricks and then stuck down a second row, offsetting the first brick in the second row so that the rest of the stickers in that row would be slightly staggered to create the brick pattern.

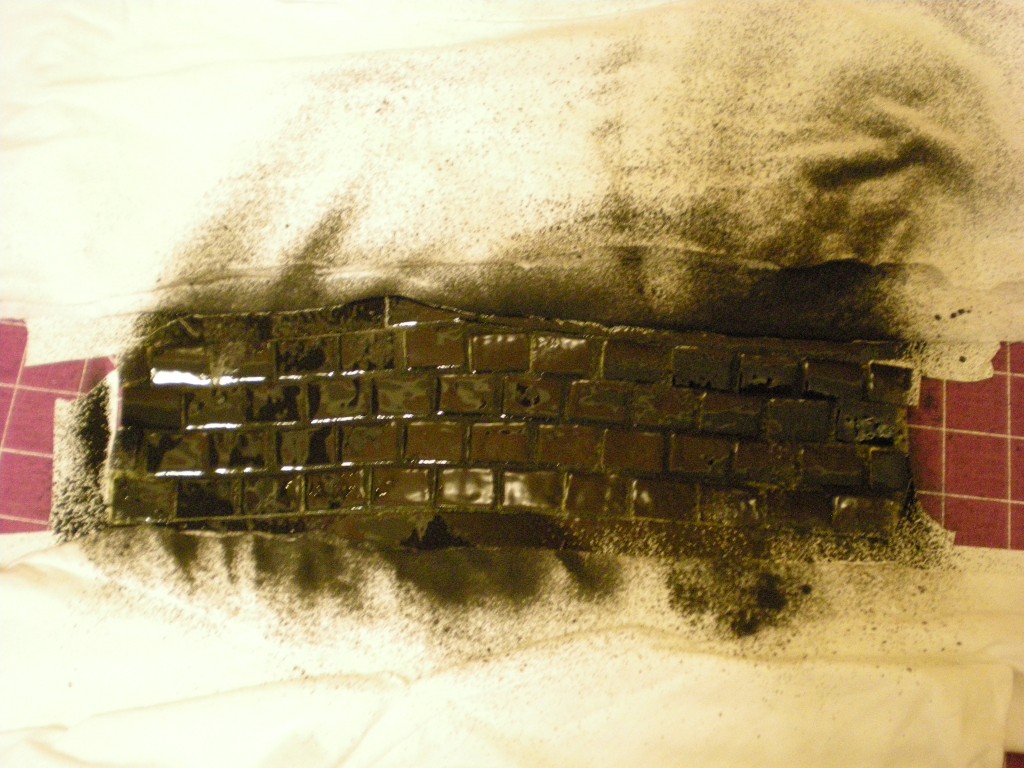
Mask the rest of the garment before spraying (I used T-shirt scraps and paper from my recycling bin) so that you can contain the paint to only the area you want to color. I used black spray paint to make the yellow bricks really pop!

Let the paint dry completely before you peel off the brick stickers and try it on!

2. Skull & Bones

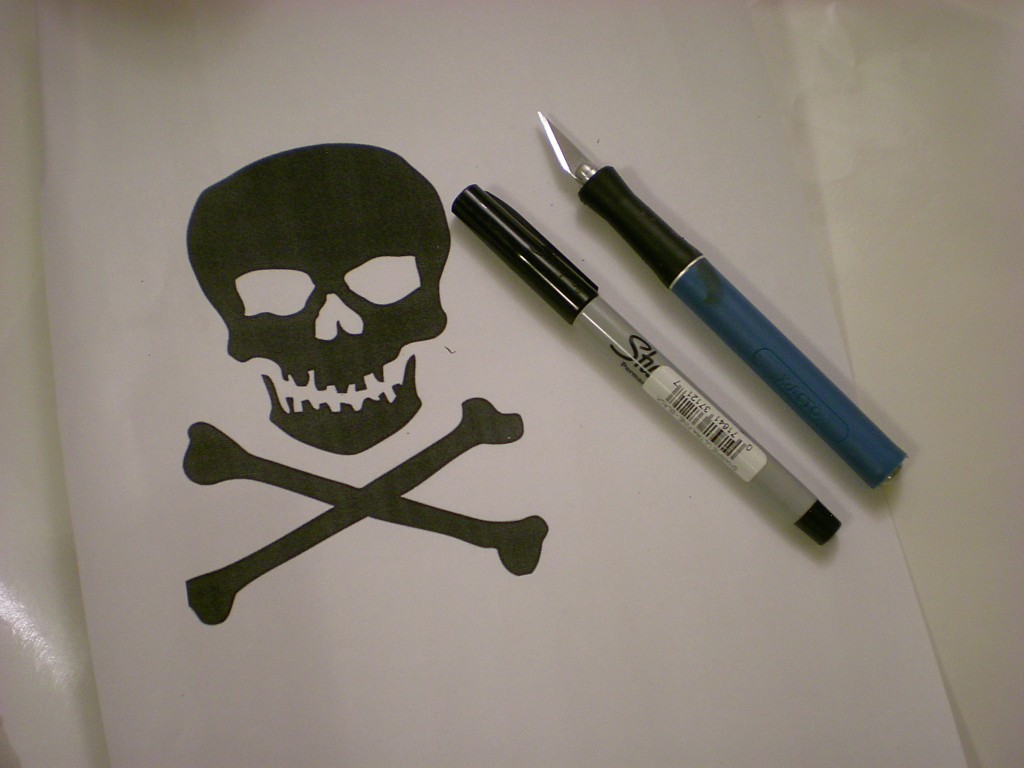
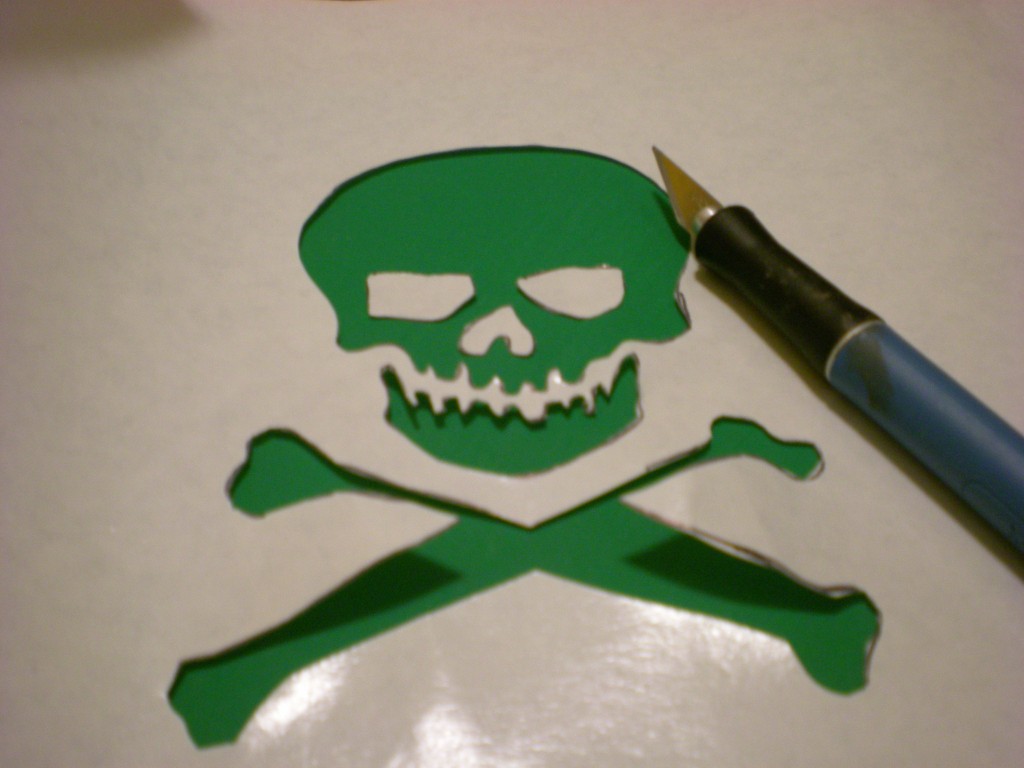
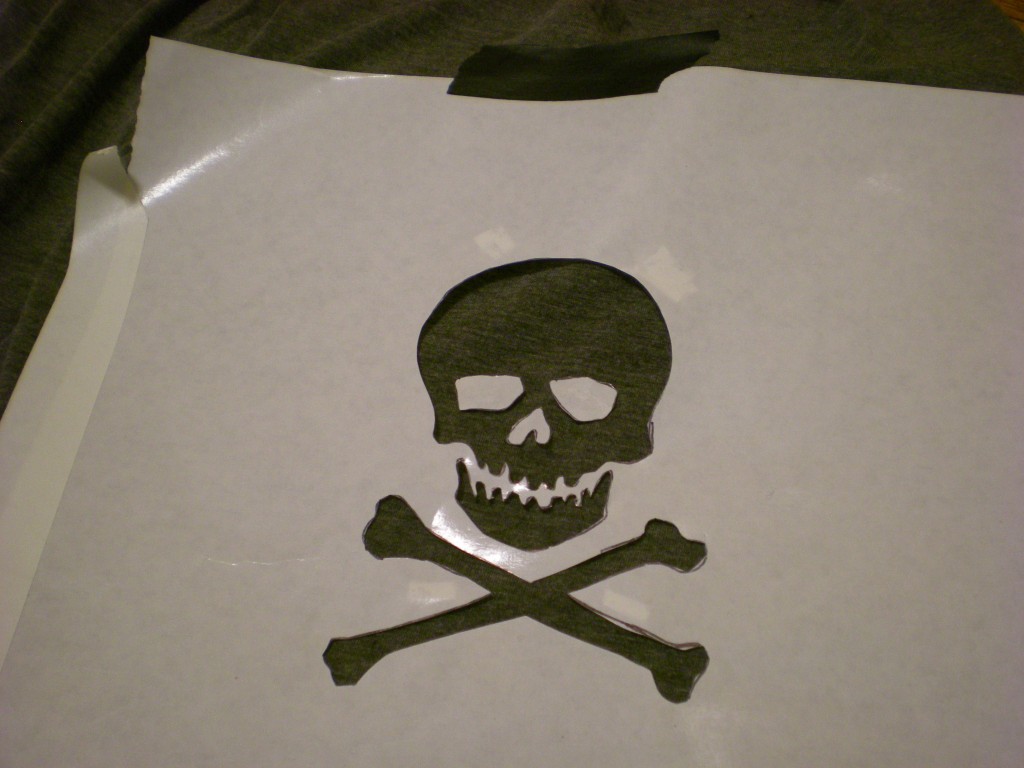
Secret weapons from around the house: Freezer paper, high-contrast image printout, marker, craft knife, and cutting mat

I chose the classic skull and crossbones as my image to download and print for creating the stencil, but any image is fair game!

Trace the design onto a sheet of freezer paper.

Then use the craft knife to carefully cut out the shapes.

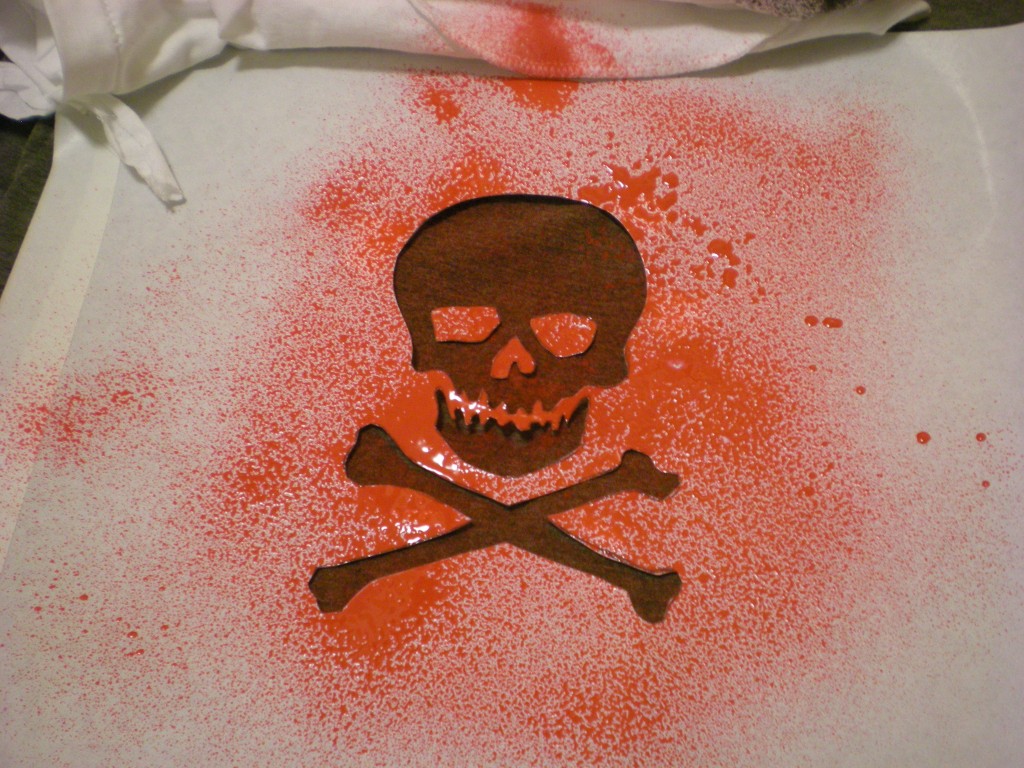
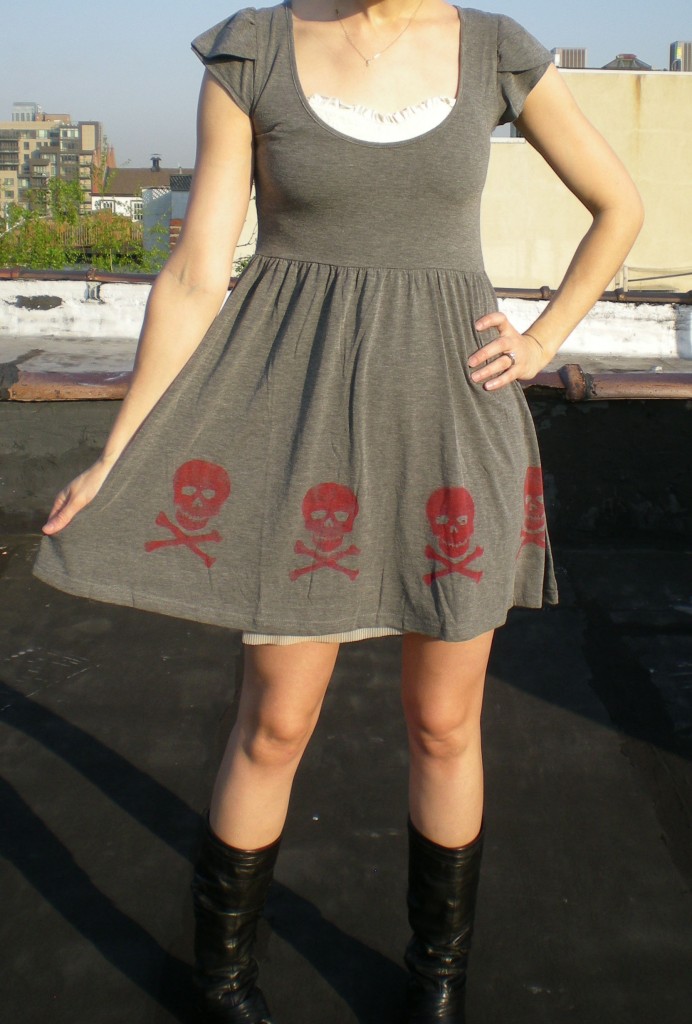
Tape the stencil onto the fabric surface (I placed it along the hem). Don’t forget to place any loose pieces (in this case, the eye sockets and nose cavity!). I sprayed red spray paint on the charcoal gray surface and reused the stencil to create a pattern around the bottom of the skirt.

Let each image dry slightly before moving the stencil to another part of the fabric.

Then let the image dry completely before spraying it onto the back of the garment. Let all the paint dry completely before you try it on!

3. Bubble, Bubble, Toil, and Trouble

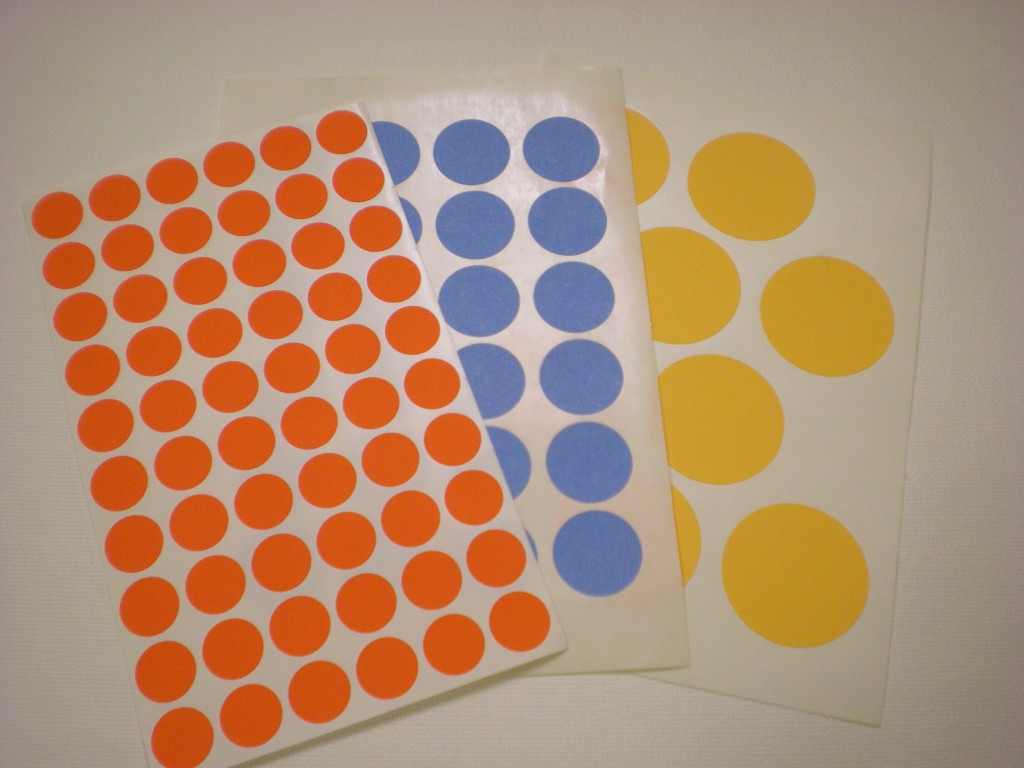
Secret weapon from around the house: Map or garage sale dot stickers in different sizes.

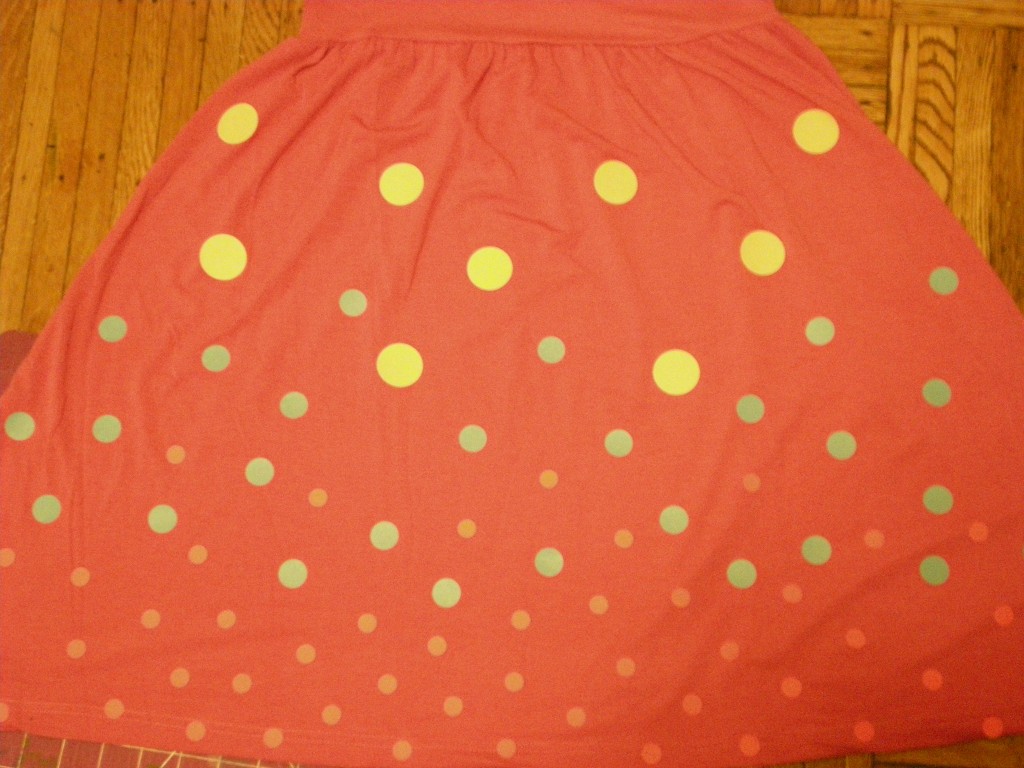
These stickers have so much potential. Beyond mixing up the sizes, you can arrange them into patterns, overlap them, use the surrounding sticker bits to create reverse dots, and so on. I used three sizes (3/4″, 1 1/4″, and 1 3/4″).

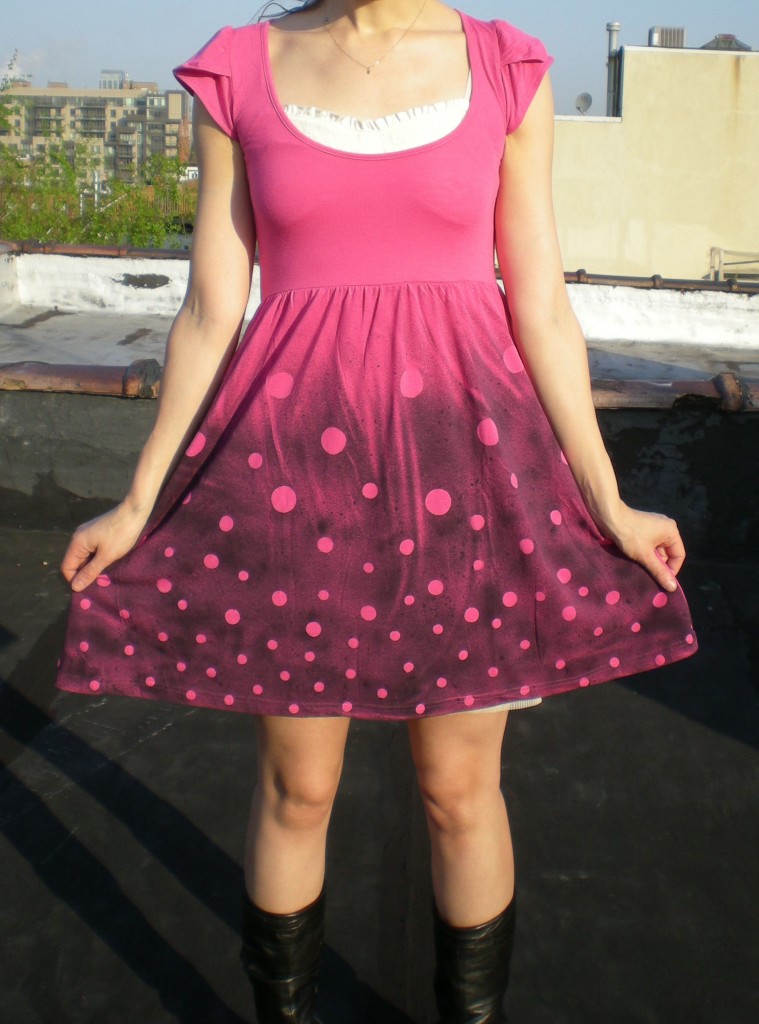
To create the appearance of bubbles rising up to the surface, I started with closely spaced small dots at the hem, then transitioned to more widely spaced medium dots, with the large dots finishing below the bodice.

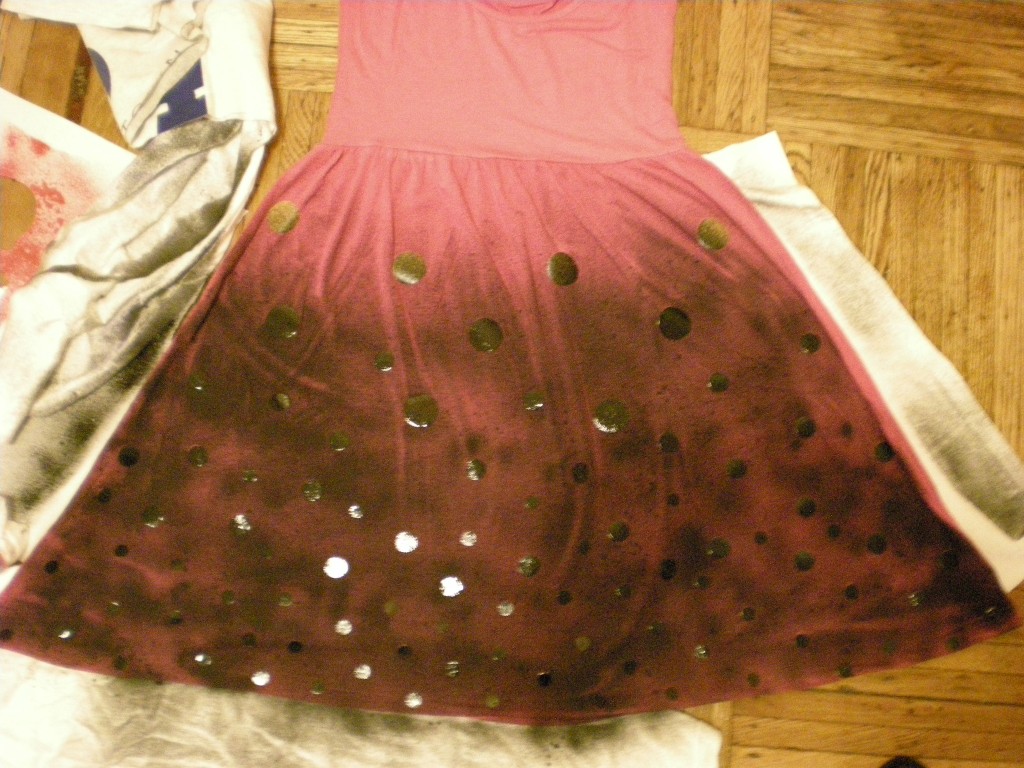
Mask all the parts of the garment you don’t want to color. I used black spray paint, fading out at the top, to make the pink really shine through! I also allowed the naturally occurring wrinkles caused by the gathered skirt to form “cracks” in the paint.

Let the paint dry completely before you put it on. Now that you’ve made your bubbles, go out and make some trouble!

4. Yipes Stripes!

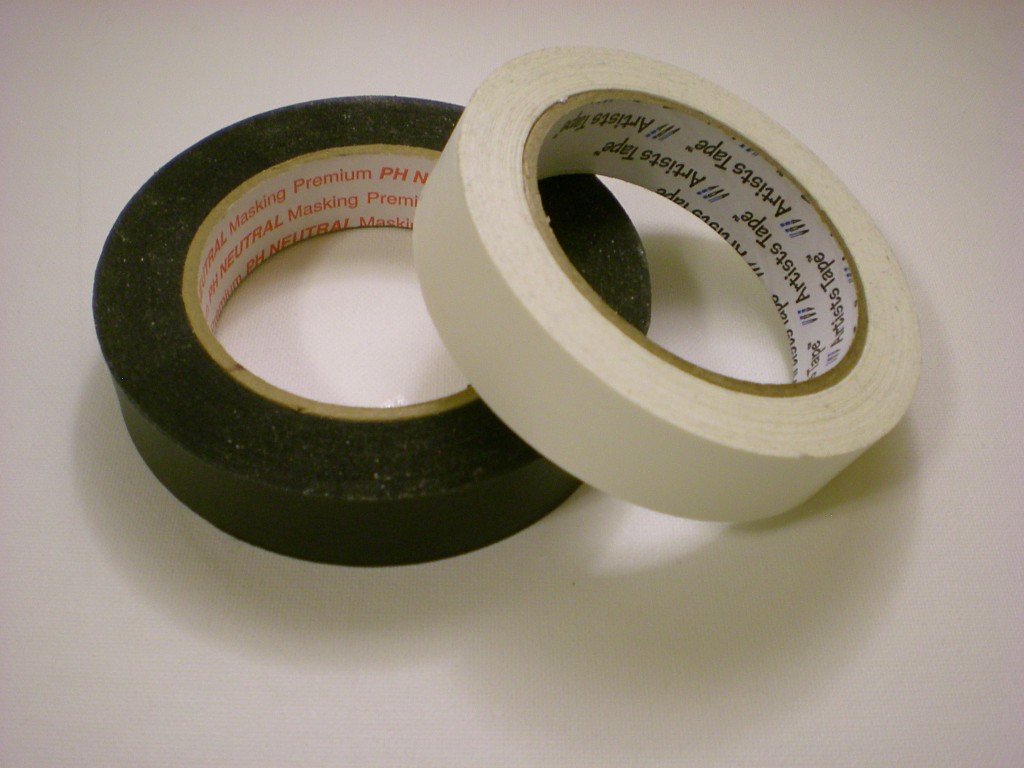
Secret weapon from around the house: Masking or Artists tape

Stripes are just the beginning–you can create plaid, checkered, or gingham patterns with a roll of masking tape. Keep in mind that the width of the tape (and how closely you align them) determines the width of your stripes!

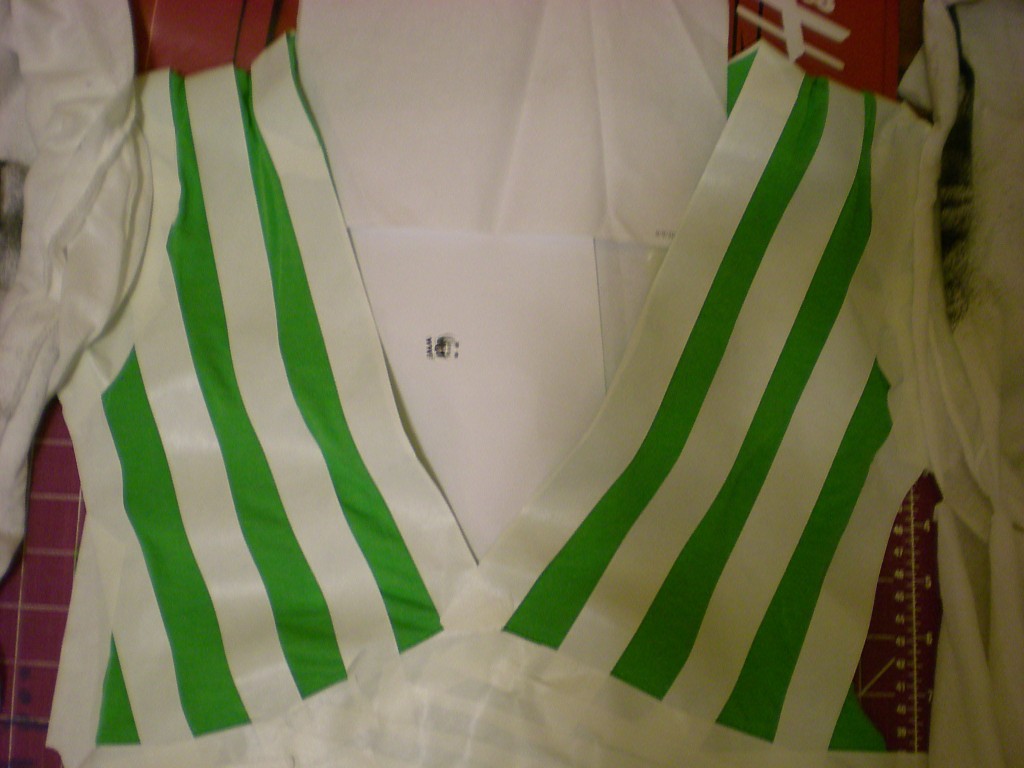
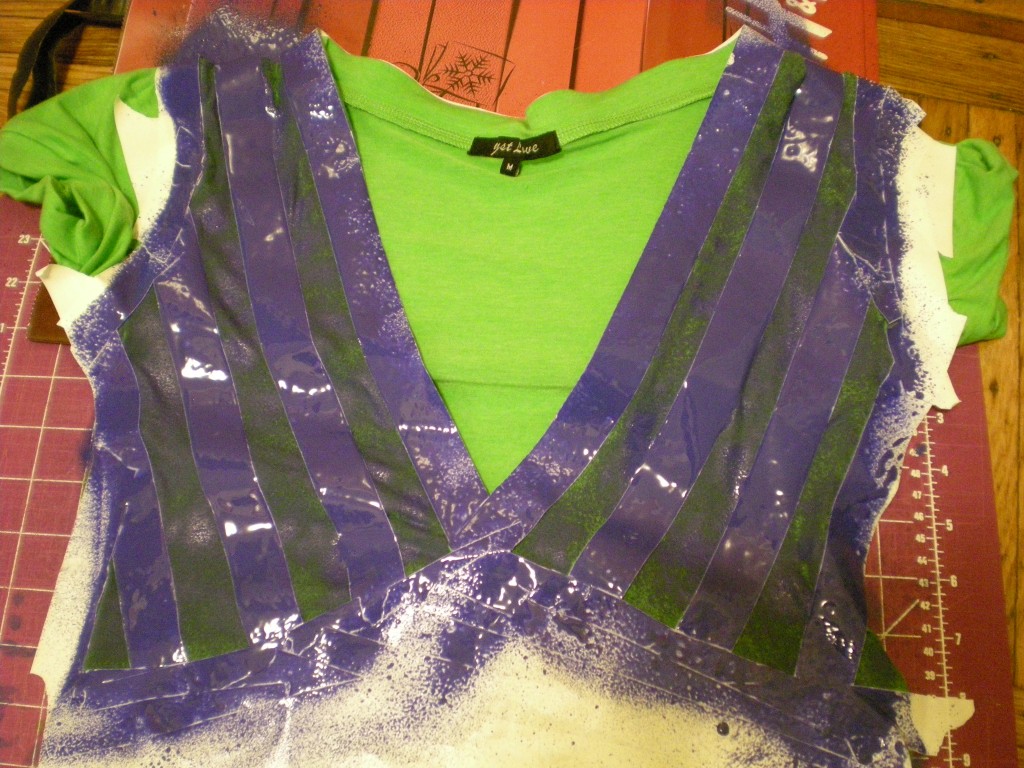
I followed the V-neck cut of the dress to create gently slanting diagonal stripes. Be careful to line up the tape strips carefully in order to keep your design symmetrical and even.

As always, mask the fabric you don’t want to paint! I chose blue spray paint to pair with my bright green frock–a springtime inspiration, for sure!

Let the paint dry before peeling off the tape to reveal your sassy stripes!

One, two, three, four — don’t stop now, let’s spray some more! How many more ways can you spray?


[ 20 Comments | Posted on April 26th, 2011 ]

How to: Rollover Tank Top

The Rollover tank top (project #42 in Generation T: 108 Ways to Transform a T-shirt) is located on pages 110 and 111 and was cut and stitched from my well-worn lavender Keep Earth Alive: RECYCLE T-shirt. Congratulations to Kiki, who wins a signed copy of Generation T: Beyond Fashion for being the first of our finalists to email me all the correct info!

And congratulations to the rest of you, too! Your sweet runner-up prize is this T-shirt tutorial for that Rollover tank top.

Materials:

1 T-shirt

measuring tape

scissors

tailor’s chalk

straight pins

needle

thread

Make it:

1. Lay the T-shirt flat and cut a 8″-wide loop off the bottom of the shirt. Set it aside.

2. Measure and mark 12″ from the new bottom of the shirt. Cut horizontally across at that mark through both layers of fabric. Then snip through the side of the loop, creating a long rectangular strip.

3. Lay the strip flat and mark a length equal to your bust measurement (x) along the long edge of the rectangle. Cut vertically to remove the excess fabric.

4. Fold the rectangle in half lengthwise, right sides together. Pin along the short ends and sew the edge with a whipstitch.

5. Remove the pins. Turn the resulting 12″-high tube right side out and lay it flat. Turn the loop from step 1 inside out and center it above the 12″ tube so that its bottom (cut) edge meets the 12″ tube’s top edge.

6. From both sides of the 12″ tube, measure 2 1/2″ in and mark with the chalk. Pin the tubes together between the two marked points and sew along the pinned edge using a whipstitch. Remove the pins.

7. Flip the shirt over and repeat step 6 on the back.

8. Try on the shirt and roll the top tube over 4″ to 5″ so the right side of the fabric is facing out. Rollover is complete!

Variations:

This project is excerpted from Generation T: 108 Ways to Transform a T-shirt (Workman 2006).

[ 1 Comment | Posted on April 24th, 2011 ]

How To: T-shirt Boa Scarf!

Hey there, Generation T! Are you ready to get really knotty? Today’s T-shirt tutorial comes courtesy of one of our esteemed readers: Ms. Liz Russo of Craft-Stop. It’s the “Tic Tac Boa,” project #115 in Generation T: Beyond Fashion — the boa scarf is perfect for spring, infinitely personaliz-able (pick a color, any color!), great for using up scraps (cut strips from old T-shirt sleeves) — oh, and did I mention it’s no-sew? Well, it is. Settle down in front of a good movie while you complete all the knots (you won’t notice when your fingers start to cramp) or, if it’s warm enough where you are, kick back in a park, your backyard, or poolside!

Watch the tutorial here:

Thanks again to Craft-Stop for featuring one of our projects!

[ 7 Comments | Posted on April 12th, 2011 ]

I Love to Create: A Poetic Pocket Square!

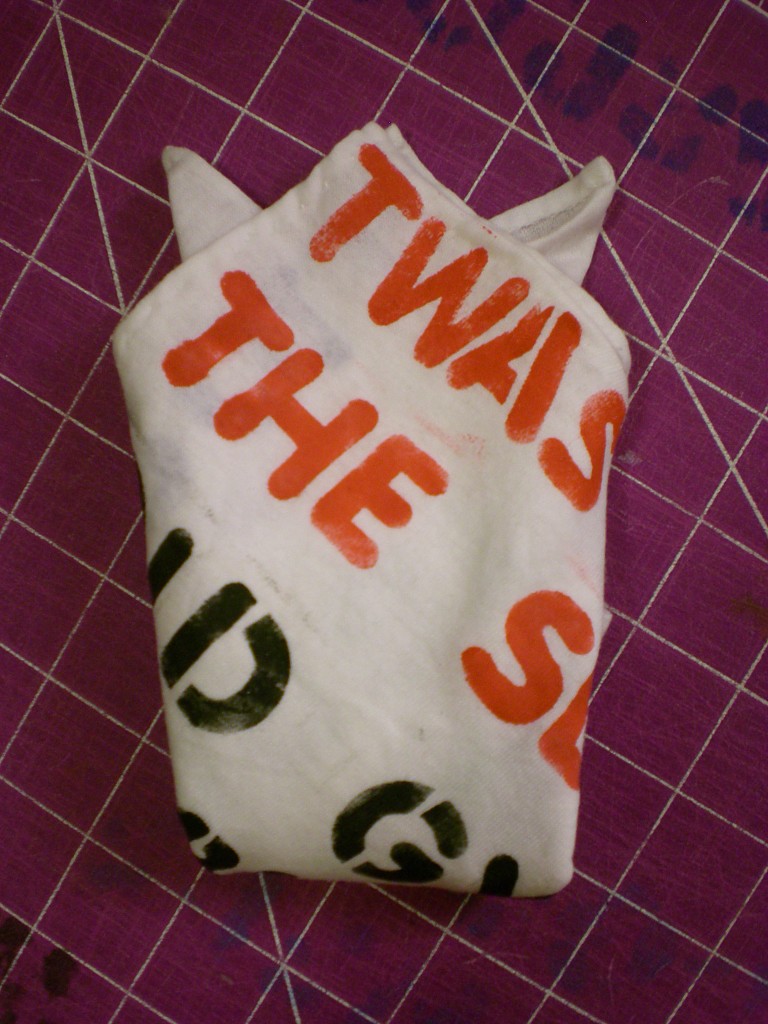
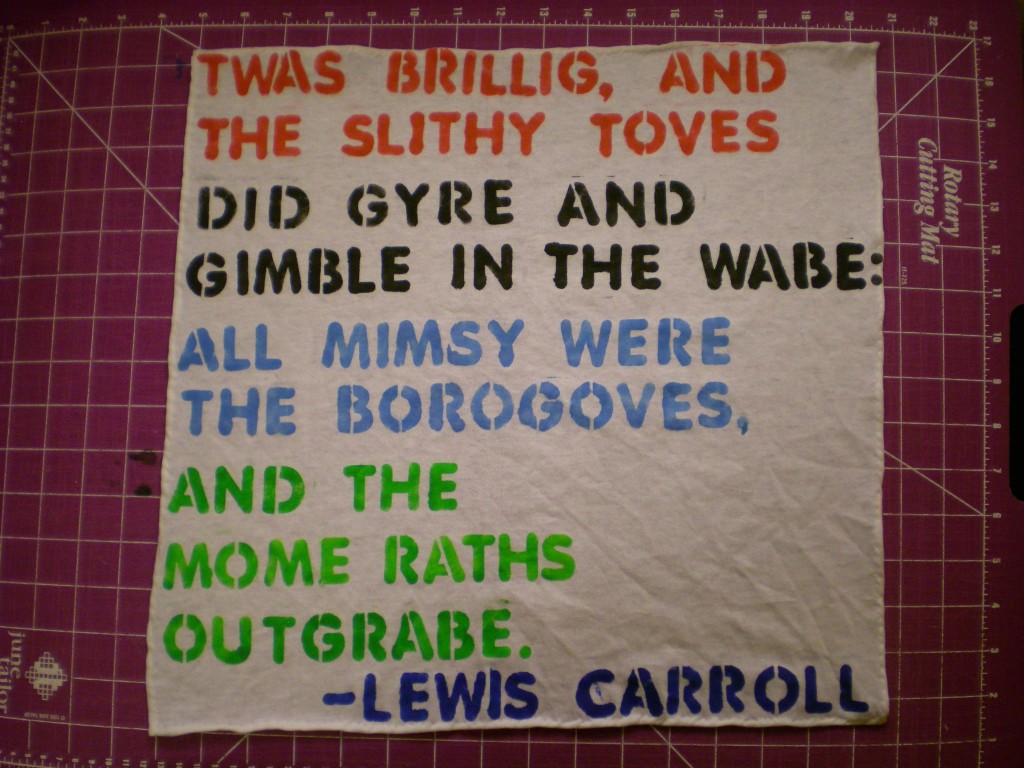
Looking ahead to April, it’s National Poetry month, and to celebrate, the Academy of American Poets is sponsoring National Poem in Your Pocket Day on April 14, 2011. Basically, you carry a poem around in your pocket, and take it out and share it throughout your day with friends, colleagues, and family. The poem can be an old classic, a modern ode, long, short, silly, or serious — Anne Sexton or Dr. Seuss, Will Shakespeare or Shel Silverstein,  Emily Dickinson or e.e. cummings… And if you can’t find a poem you’d like to share, write your own! But my point is, why limit the printed word to paper (or digital smart phone)?

Perhaps I’m taking this pocket thing too literally, but I do like to play with words and type — experimenting with the way the letters themselves can create fascinating visual patterns (even before we get anywhere near discussions of assonance, alliteration, and onomatopoeia!). A pocket square (or a hanky — just pop it in your purse!) is a more permanent way to commit to that poem. And, bonus: If you forget to take the poem out of your pocket before laundry day, you won’t end up with a pocket full of disintegrated, dried paper pulp.

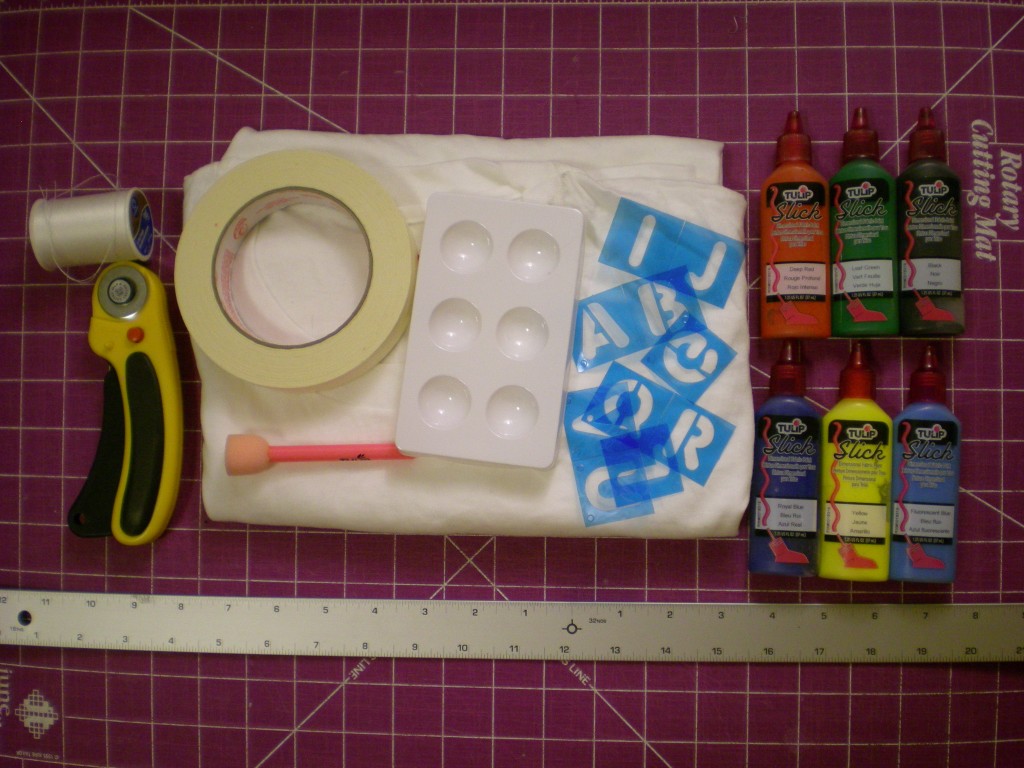
Materials:

-white or light-colored T-shirt

-rotary cutter, ruler, and cutting mat (or ruler, marker, and scissors)

-masking tape

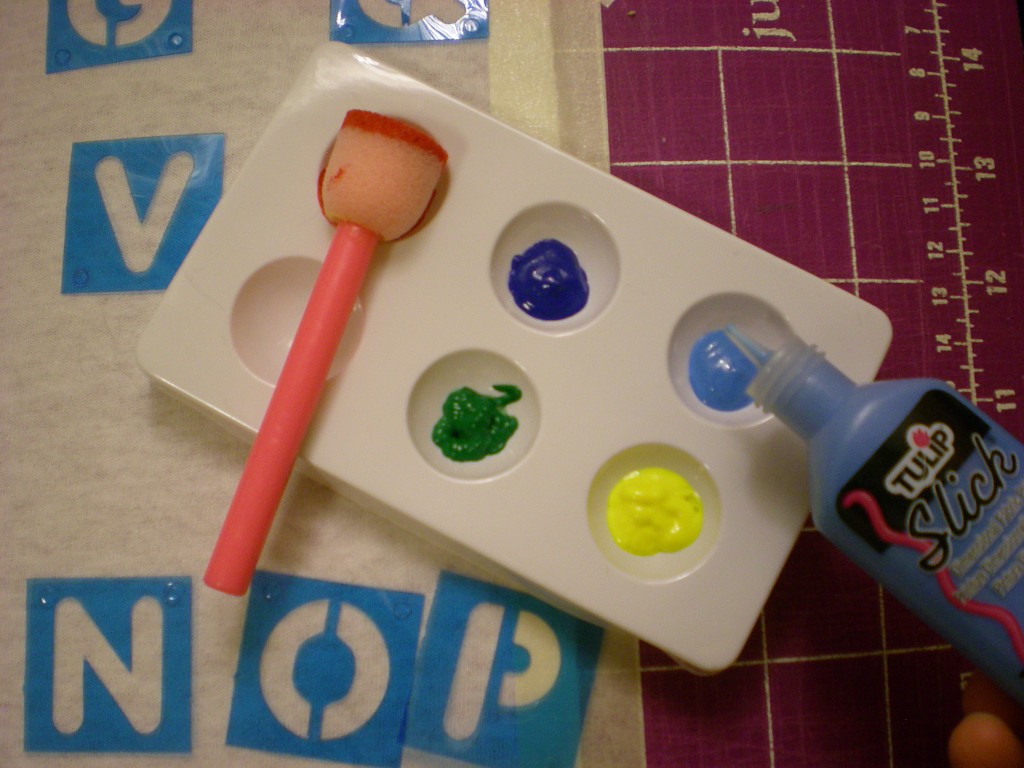
-letter stencils

fabric paint (variety of colors)

paint tray (optional)

sponge brushes

-needle and thread (in a color to match the T-shirt)

Make It:

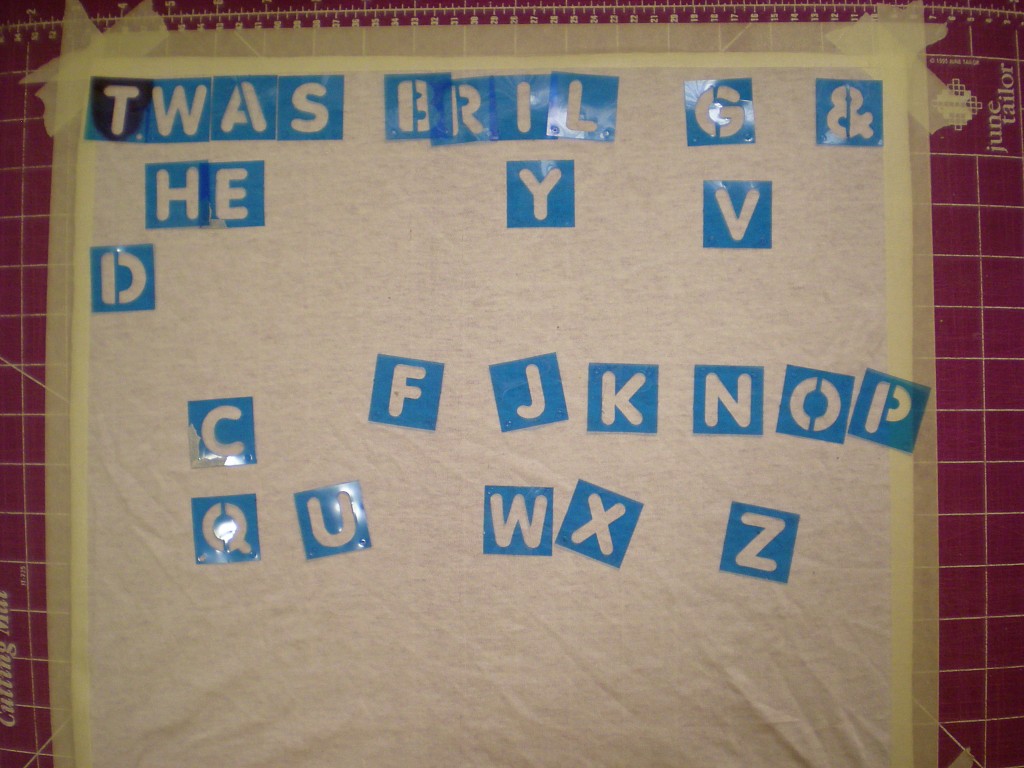
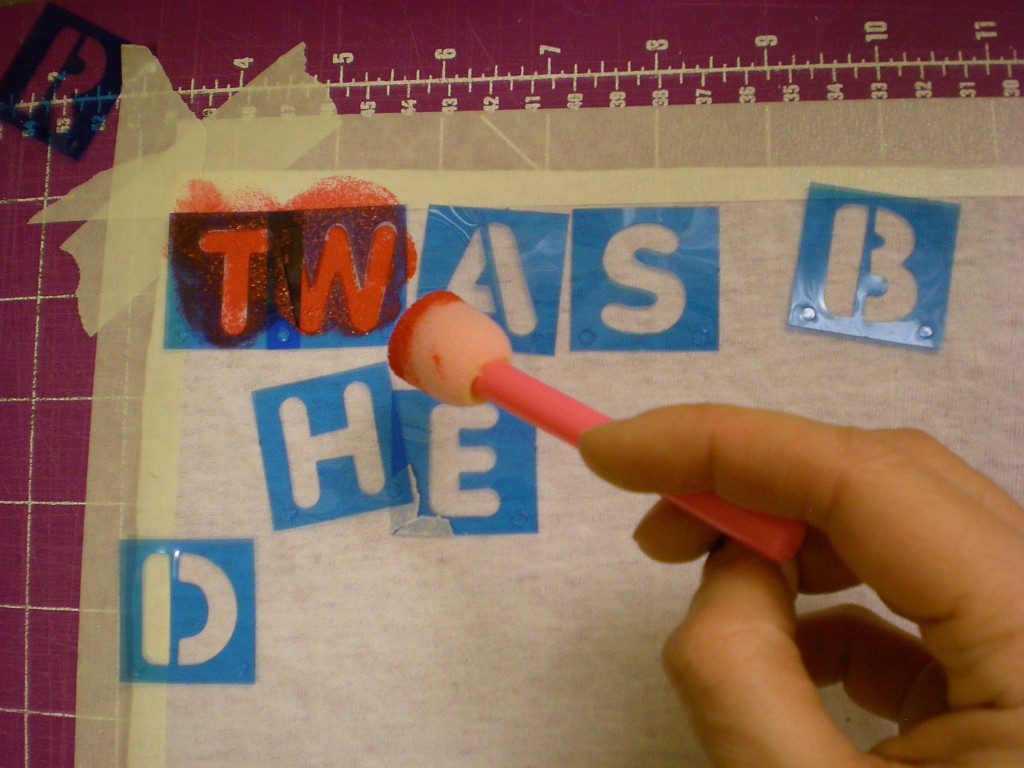
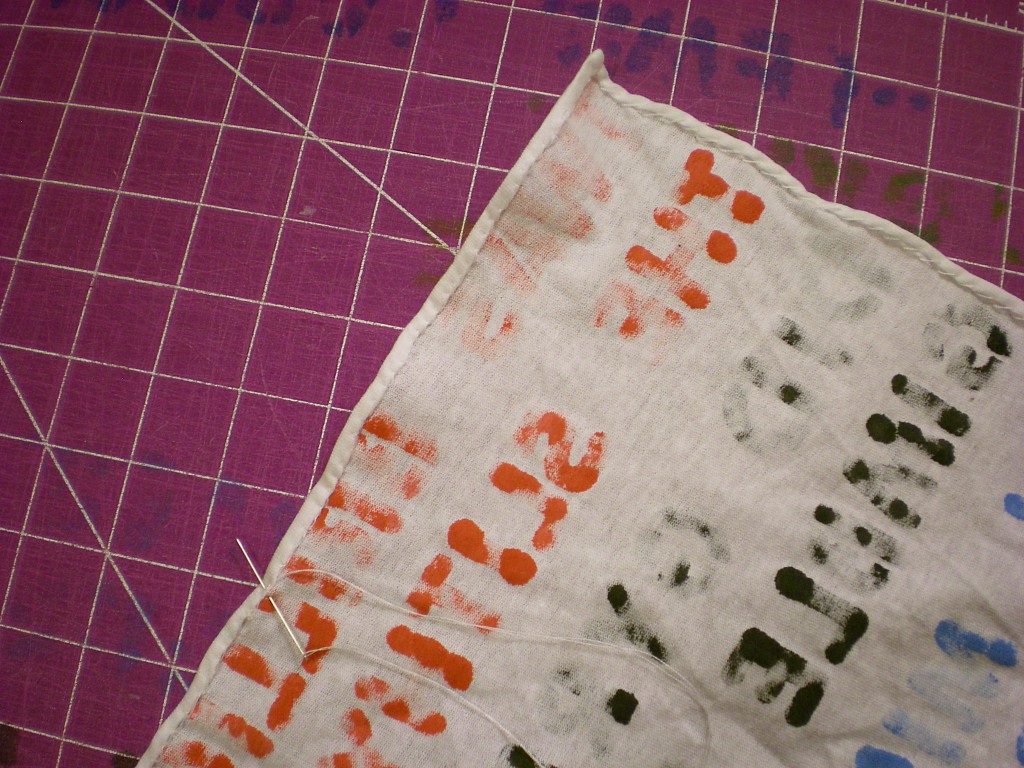
1. Cut a 17″ x 17″ square (or smaller, depending on your preference) from one layer of the T-shirt. Tape the edges of the square to your painting surface with masking tape. (This will allow for a margin as well as keep the fabric straight while you’re painting it.) Choose a poem or stanza and arrange the letter stencils on the T-shirt square. And don’t forget to save room to credit your poet! Note: The paint will bleed through (as evidenced in the following photos!) — use a paint surface that you don’t mind making permanently colorful!

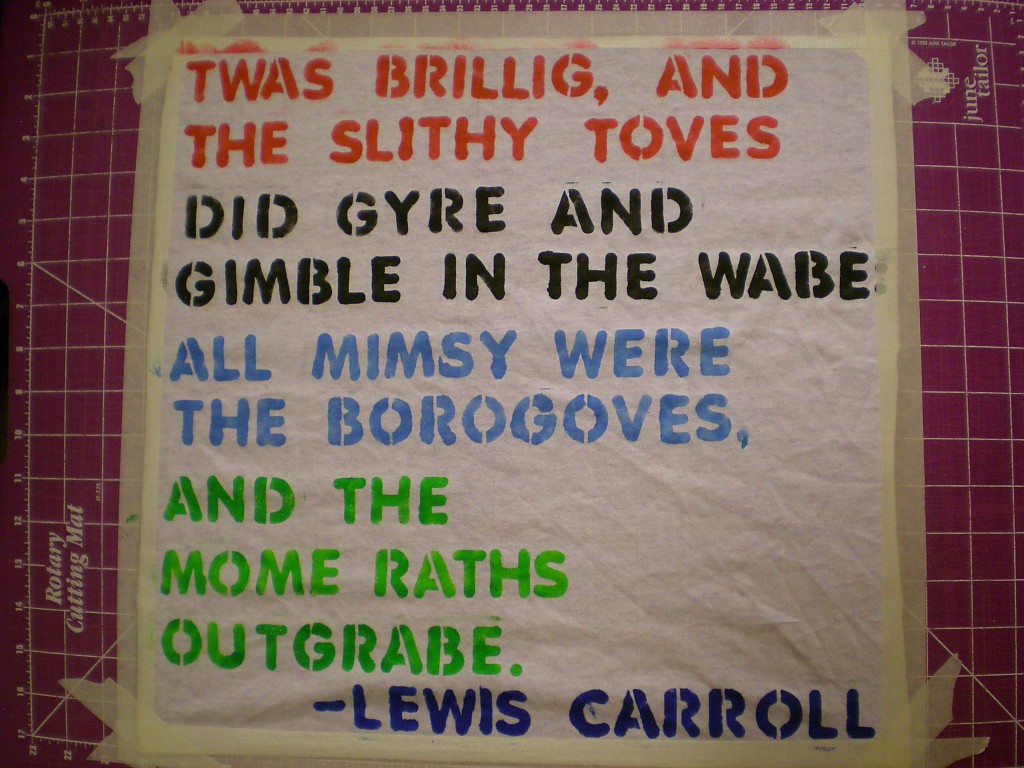
2. Select your paint colors. I chose to use a different color for each line of the poem to highlight the original line breaks. (P.S. Can you guess the poem, Wheel of Fortune-style, based on the letters placed above?)

3. Use the sponge brush to dab the paint over the stencil one letter at a time. Note: Some of the letters will need to be moved as you go, to ensure even spacing and to account for repeated letters.

4. Continue painting, changing colors as needed, until the square is filled and/or your stanza or poem is complete. (P.S. Yes, it’s Lewis Carroll’s “Jabberwocky.”)

5. Remove all the letters and peel off the masking tape to release the T-shirt square. Let the paint dry completely. (Don’t forget to wash your fingers if you, like me, inadvertently gave yourself a rather colorful but clumpy-looking manicure!)

6. Thread the needle, knot the end and carefully turn the edges under twice. Use a slip stitch to sew the edges in place around the perimeter of the T-shirt square.

7. Tie off the ends, snip your threads, and look online to….

8. …learn to fold (and unfold and fold and unfold–and read–and fold again) your poetic pocket square! So, is that a poem in your pocket, or are you just happy to see me?

Variations:

-Use fabric markers in lieu of paint and stencils to fit more text (and/or more stanzas) on the square.

-If poetry’s not your thing, paint or print a quotation that inspires you!


[ 3 Comments | Posted on March 22nd, 2011 ]

How to: T-shirt Hooded Scarf

Hat plus scarf? Yes, please! Pack just one item and save space for other necessary springtime accessories. In honor of the first full day of spring (the official start to the new season) and our bidding goodnight to winter, I present “Hoodnight Moon,” project #27 from Generation T: Beyond Fashion. This hooded scarf will bring out the kid in you. Pretend that you’re a mysterious spy in a foreign land… Wrap yourself up and hide from that not-yet-summery-breeze… Wear it to walk your dog, keep a low-profile at school, or take a late-night trip to the deli to buy a pint of ice cream and the next morning’s paper.

Make it:

Excerpted from Generation T: Beyond Fashion (Workman, 2009).

[ 5 Comments | Posted on March 21st, 2011 ]

How To: Amazing Technicolor Sleeve Scarf!

It’s hard to “think spring” when the maple syrup buckets are out, the frost heaves are quaking, and oh, it’s snowing. Not exactly T-shirt weather. And yet, T-shirts have their place.

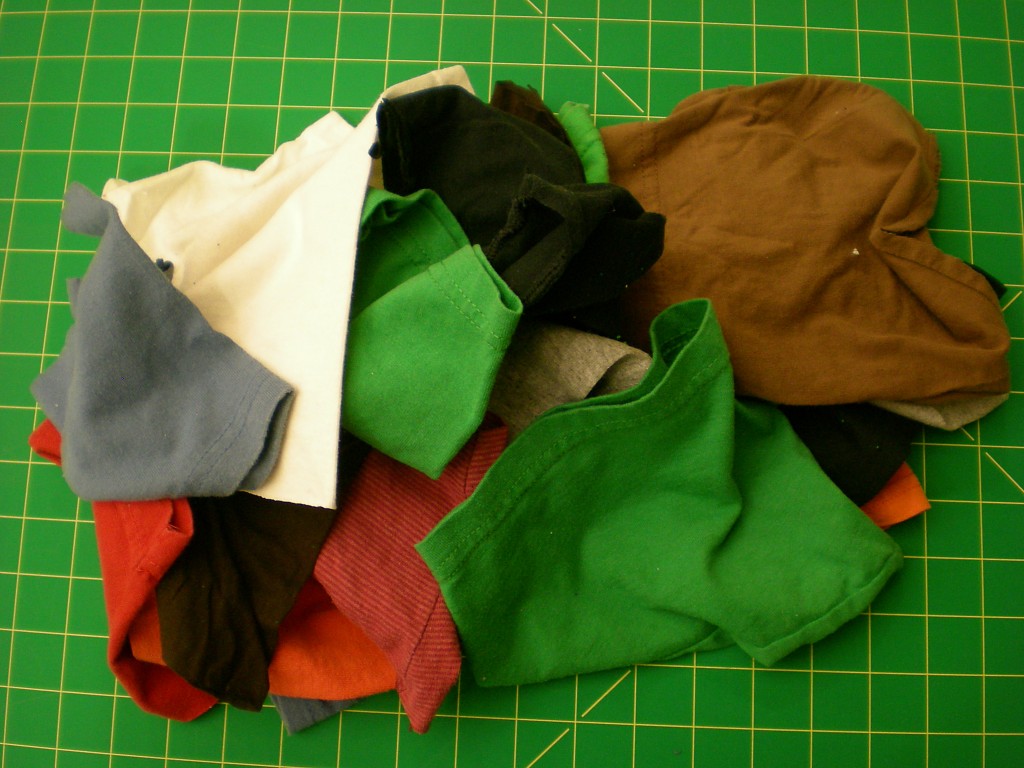
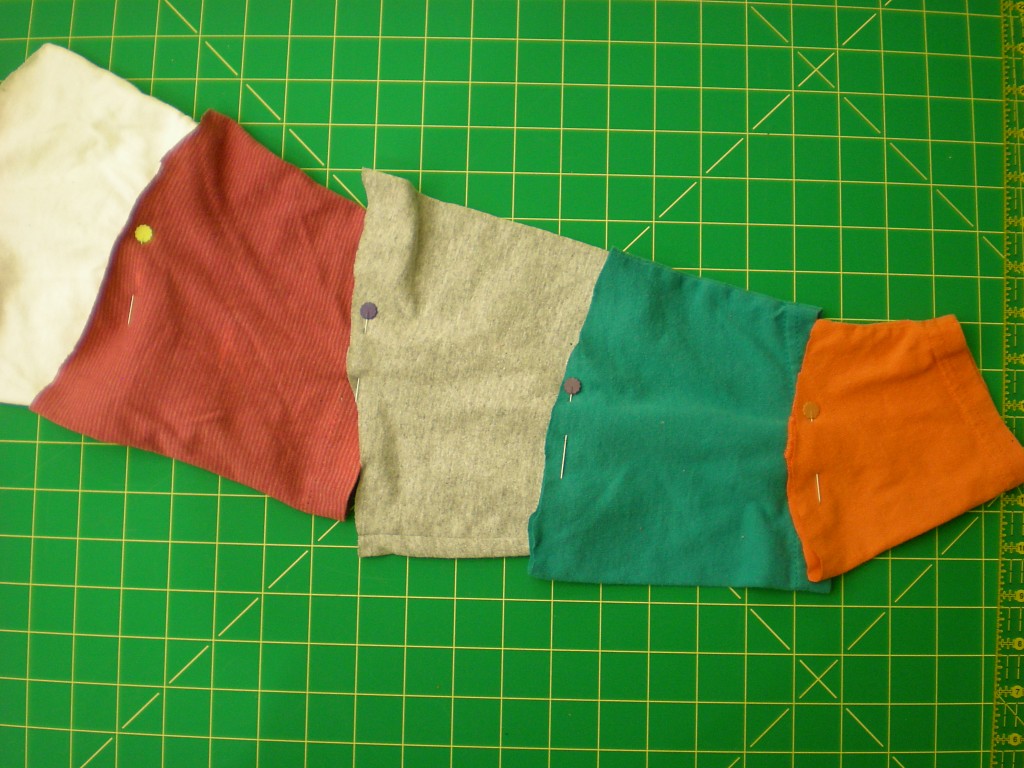
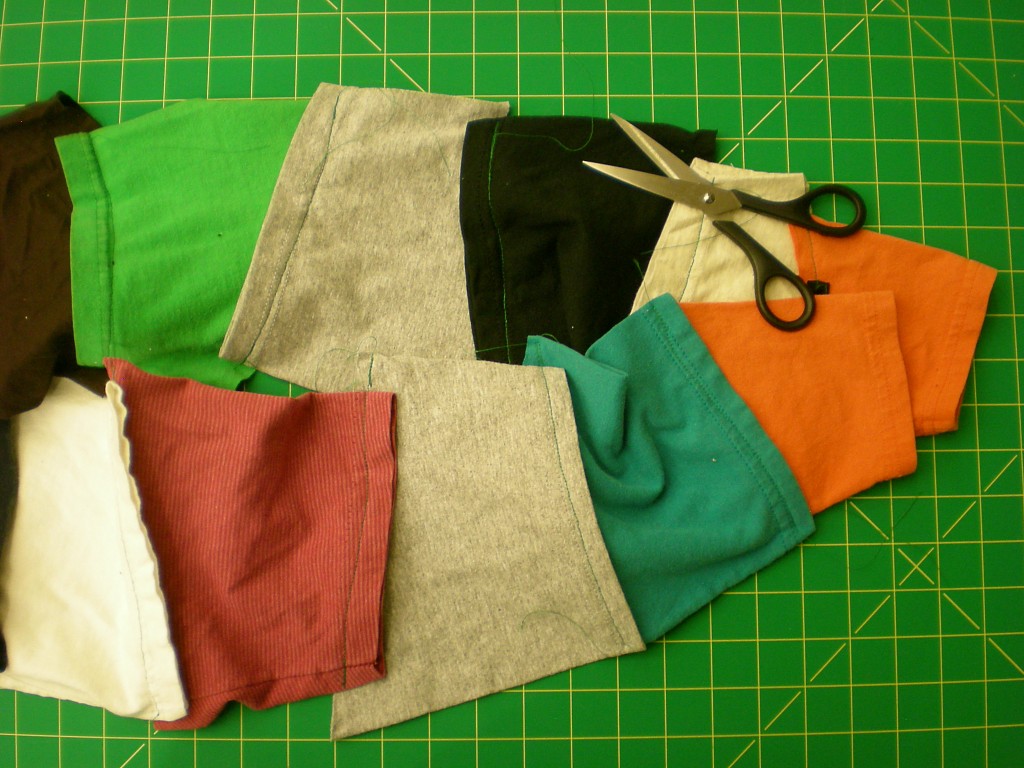
This scarf design grew out of a challenge for my first week students at Artward Bound: We were running low on T-shirts (having already refashioned 206!) and so we hit the scrap bin to make accessories.

I like the rough edges and charmingly awkward shapes and how they patchwork together (and yes, those white blurs are real, legitimate snow flakes swirling about).

Materials:

-16-20 T-shirt sleeves

-scissors

-straight pins

-needle and thread (or access to a sewing machine)

Make It:

1. Gather T-shirt sleeves in various colors and trim off extra fabric or stitching on the inside edge of the sleeve.

2. Line up the sleeves, overlapping the ends about 1″, and pin them in place.

3. Sew a straight stitch along each pinned overlap. Remove pins and trim the threads.

5. Wear your new scarf to add a splash of color (or eight) to a winter wonderland!

On a related note: Stay tuned! One of my students this week has fashioned a pair of pants almost entirely made from sleeves. Appropriately, I have nicknamed them “The Amazing Technicolor Dream Pants”–he’s pondering a blog to track their travel…i.e. The Brotherhood of the Traveling Amazing Technicolor Dream Pants).

[ 5 Comments | Posted on March 15th, 2011 ]

I Love to Create: A Shoe Travel Bag!

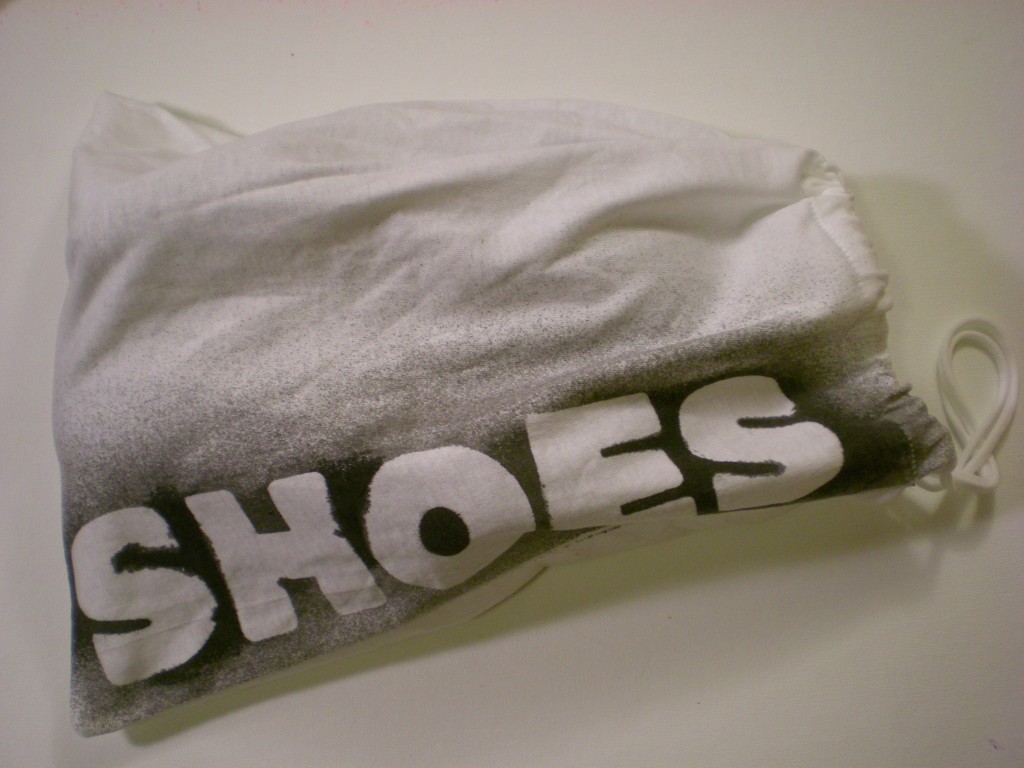
Living in New York, my shoes get especially dirty (it’s a special kind of filth). On the occasion that I’m traveling away from New York (which I am very soon!) and packing for that trip, I like to protect the clothes in my suitcase from all of the grime that collects on my shoes. (The streets may be paved in gold, but that’s definitely not what’s sticking to the soles of my shoes.) Here’s a simple project that makes use of an old T-shirt, requires very little sewing (you use the T-shirt hem as the drawstring casing!), and keeps the rest of your wardrobe fresh and clean. And, because the bag is made from an old T-shirt, it’s easy enough to toss in the laundry when you get home and unpack.

Materials:

-T-shirt (M or larger)

-Ruler

-Scissors

-Sewing machine (with a ballpoint needle and thread), or Needle and thread

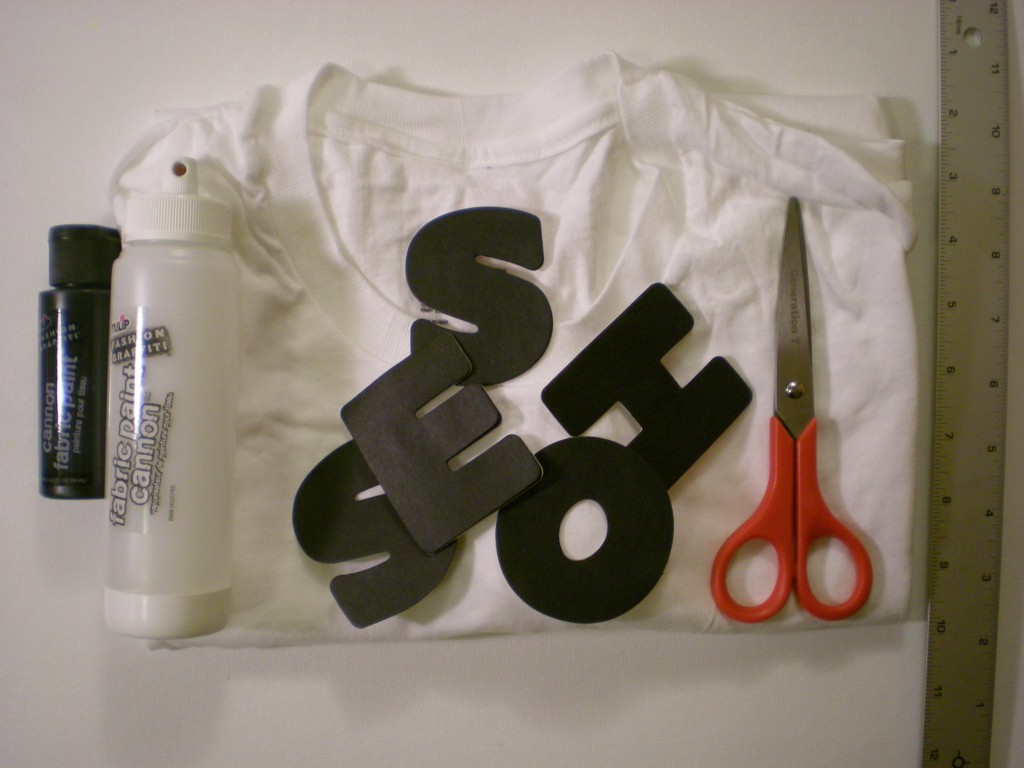
-Alphabet stickers (or make your own; I used letter-shaped sticky notes)

Fabric paint and paint cannon (black)

-Safety pin

Make it:

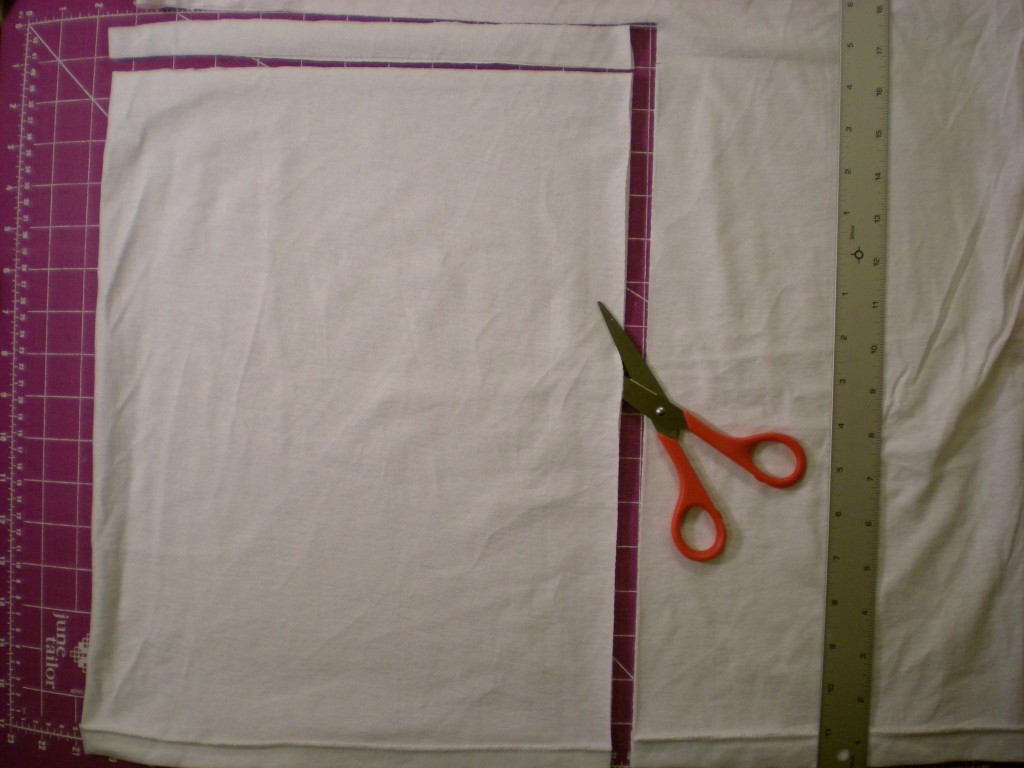
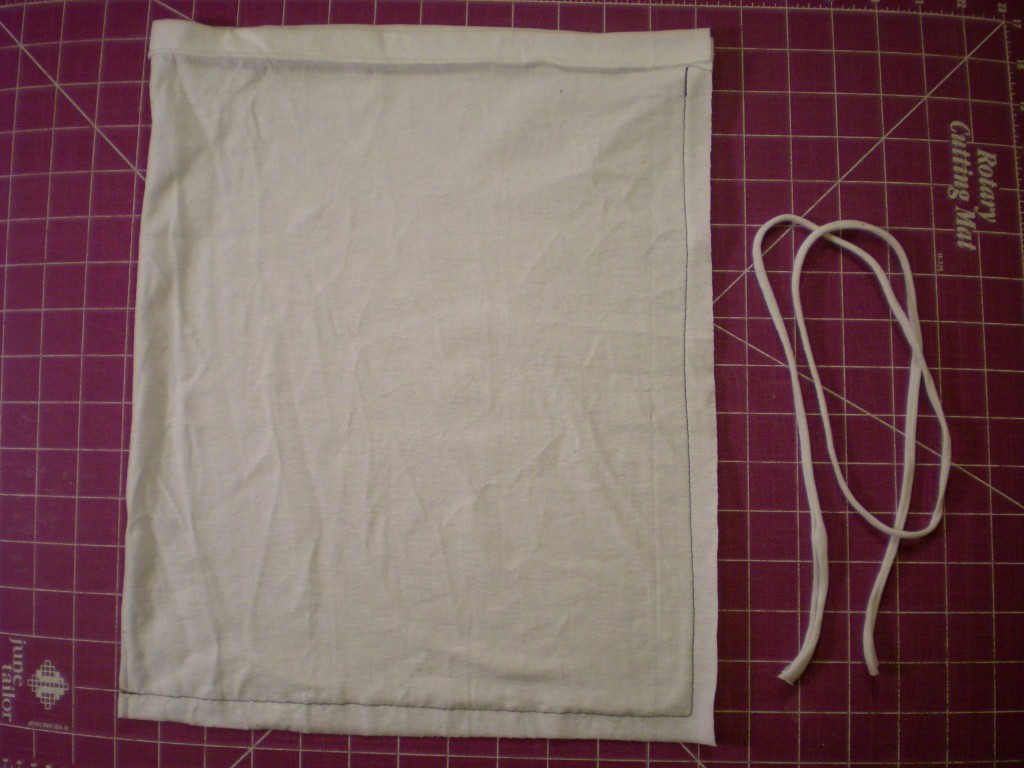
1. Turn the T-shirt inside out and lay it flat. Measure and cut a 12″ x 16″ rectangle extending in from one side and up from the bottom hem. Cut a 1″ strip from the top of the rectangle, through both layers. Set aside the strip.

2. Sew a straight stitch along the two cut edges of the rectangle, leaving a 1/2″ seam allowance, and stopping at the hem (this becomes the drawstring casing. (I used contrasting thread for visibility, but matching your thread to the fabric color is recommended.)

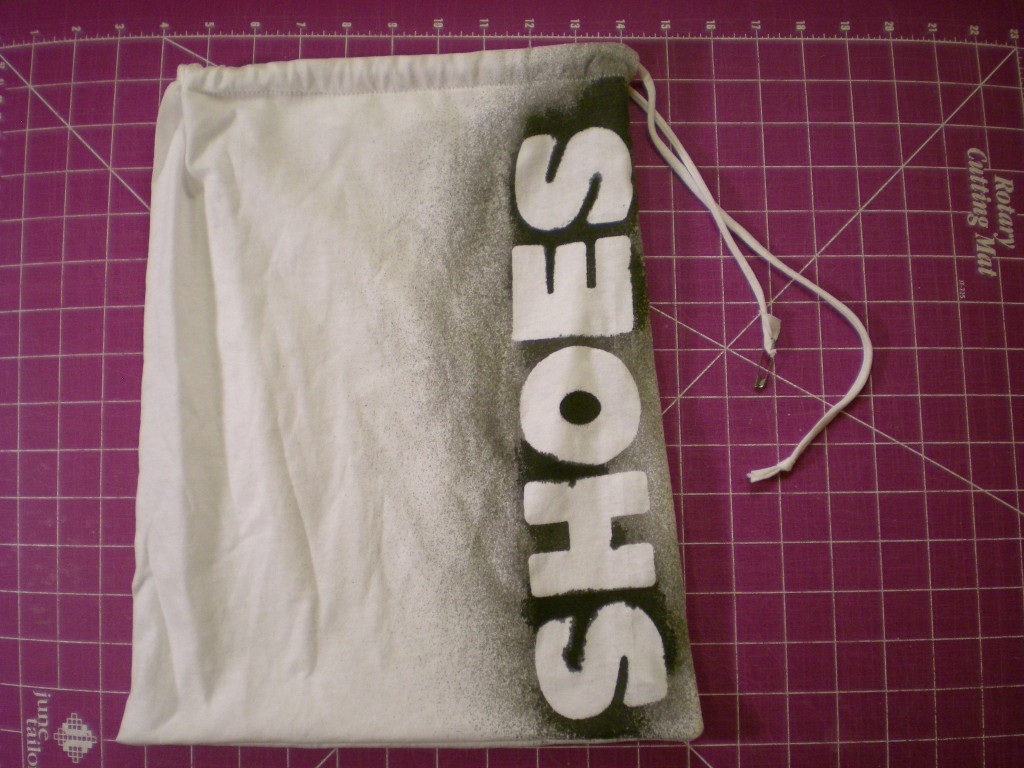
3. Turn the bag right side out and lay it flat, oriented with the hem (the opening of the bag) at the top. Stretch out the fabric strip to make a drawstring cord and set it aside again. Arrange the letters across the side of the bag. (Note: Use stickers to achieve a “clean” edge along the letters…I like the rough edges that a little paint seepage creates, so I let the edges of my letters curl up a bit.)

5. With the fabric paint, spray lightly over the letters and let dry completely. (Paint will seep around the sides of the letters that are not sealed flat, creating a rough-edged look to the lettering.)

6. Carefully peel off the letters to reveal the reverse silhouettes. Attach a safety pin to one end of the cord and draw it through the entire drawstring casing. Remove the safety pin and tie the ends together in a knot.

7. Now spin the globe, land your finger, and buy a ticket! If your shoes are made for walking, this T-shirt shoe bag is made for packing. Bon voyage!

Variations:

-Differentiate your various shoe stashes by making multiple bags–do away with the generic “shoes” label and instead indicate heels, flats, sneakers, and so on.

-Scrap the shoes altogether and use the bag to pack pajamas for a slumber party!

P.S. Happy National Craft Month! How will you celebrate?

[ 3 Comments | Posted on March 1st, 2011 ]

I Love to Create: T-shirt Baby Book!

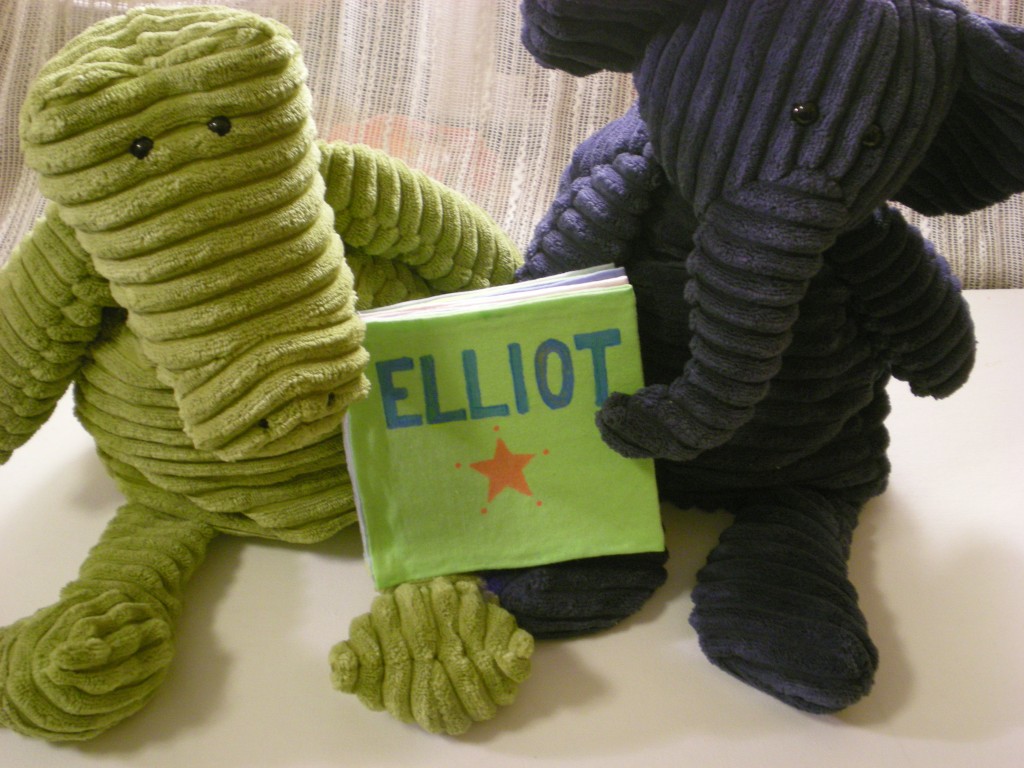
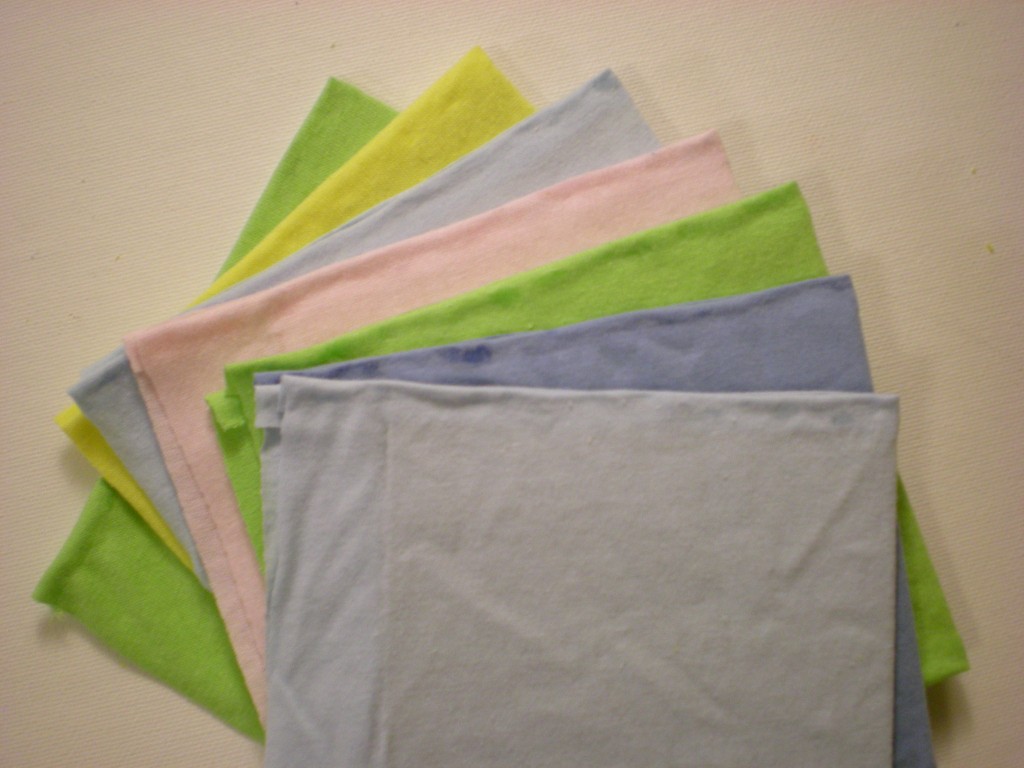
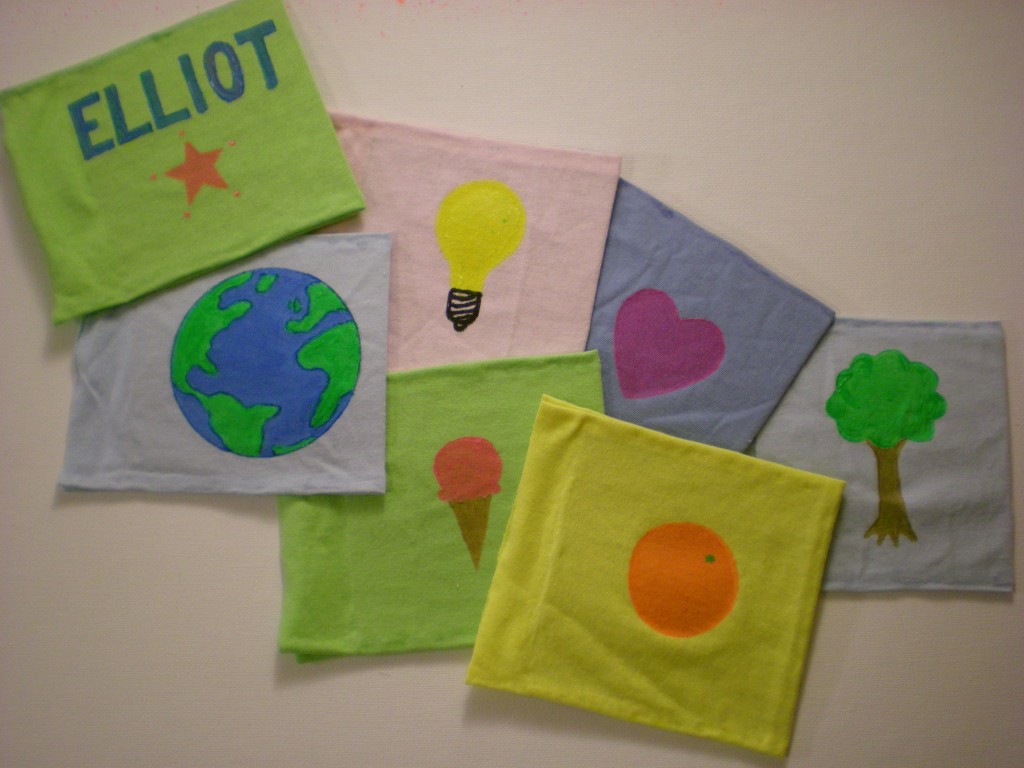
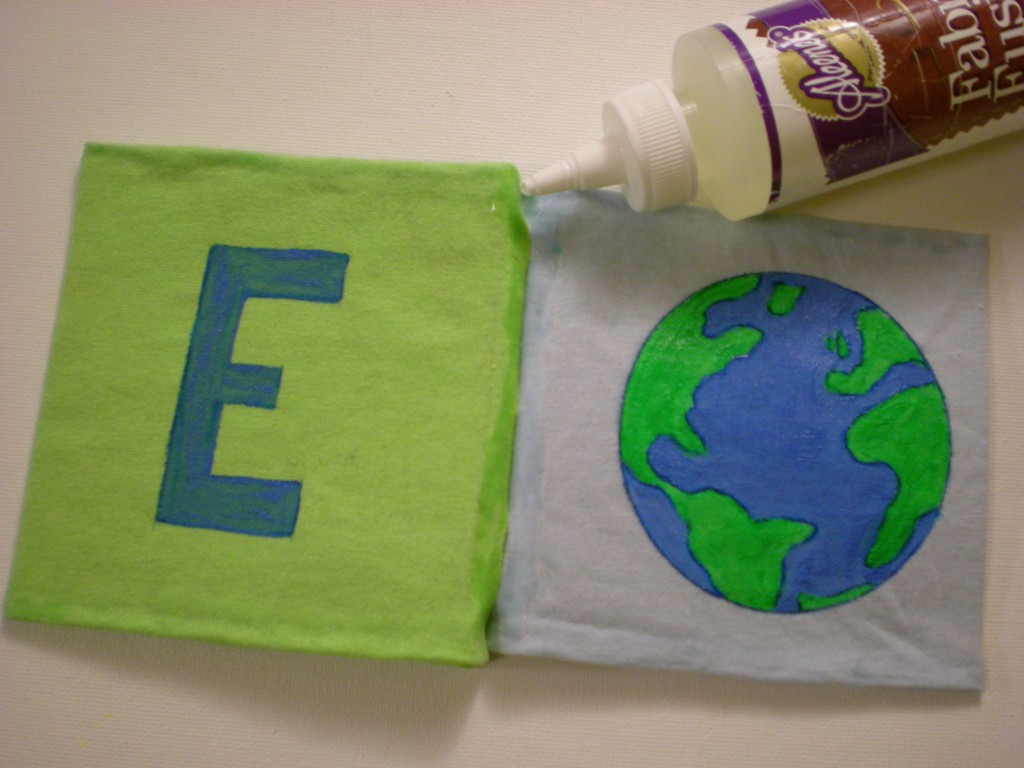
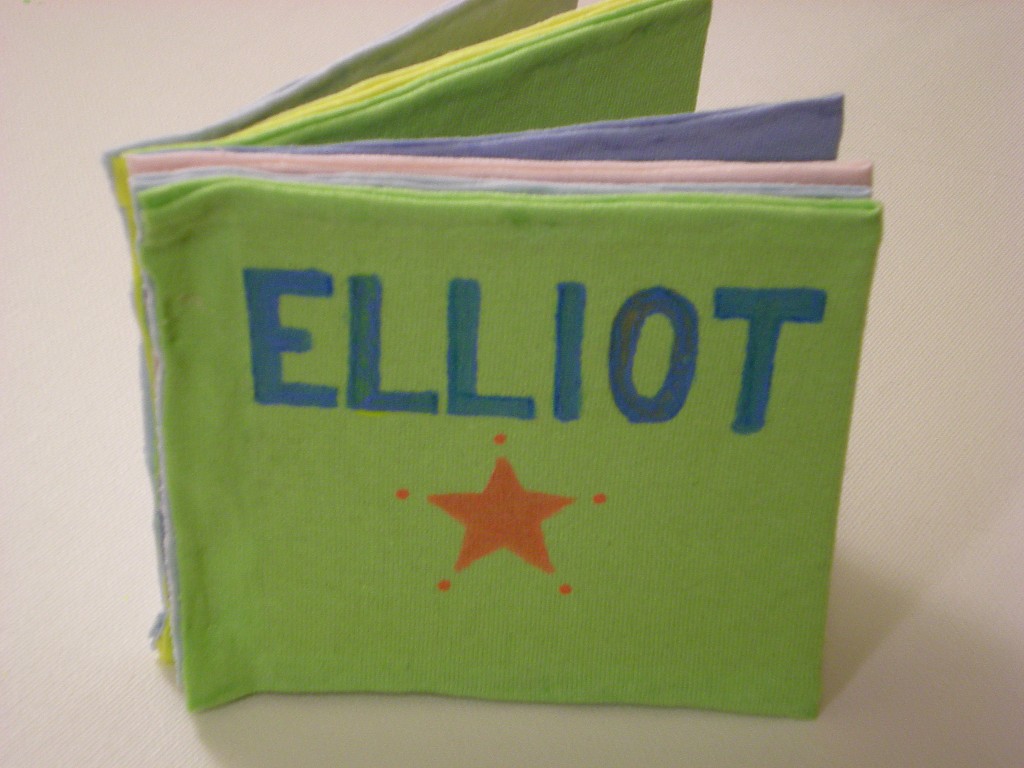
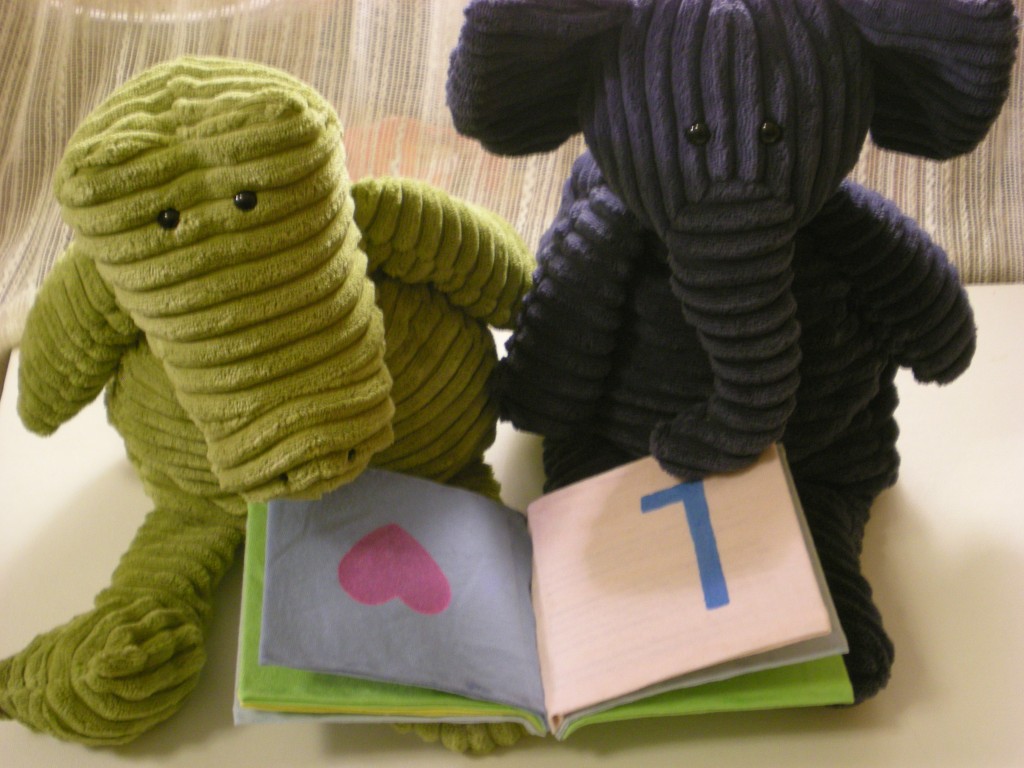
I like projects that help me use up the scraps that threaten to overwhelm my craft space. I also like projects that can be gifted. So this one’s a win-win: The T-shirt Baby Book is perfect for using the T-shirt sleeves that have been cut from another project (like a tank top) and it makes a great personalized baby gift. Once I picked the recipient (my friend’s new baby, Elliot), I had a lot of fun figuring out what words each letter of his name would represent (in other words, what could I illustrate easily?). I settled on: E = earth, L = light, L = love, I = ice cream, O = orange, and T = tree. Sorry, no pictures of baby Elliot and his new book just yet, so the book is presented by these two cute corduroy pals.

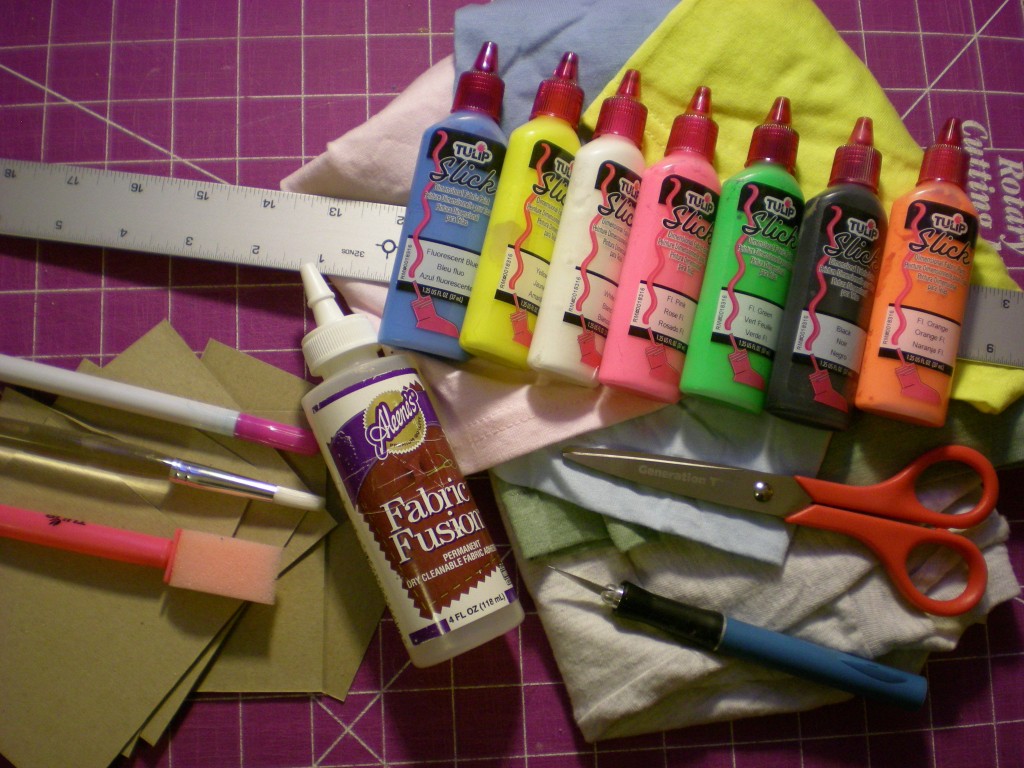
Materials:

-T-shirts or T-shirt scraps (in multiple colors)

-Scissors

-Ruler

-Craft knife

-Cutting mat

-Lightweight cardboard (cereal, snack, or tissue boxes work great!)

Aleene’s Fabric Fusion Permanent Dry Cleanable Fabric Adhesive

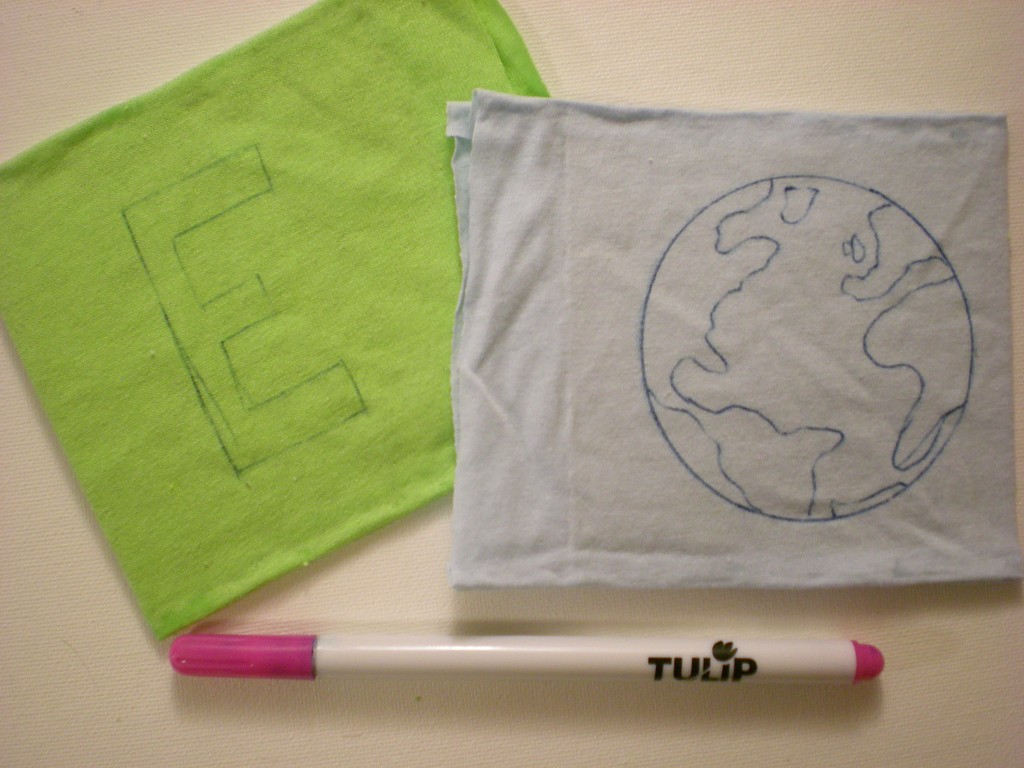
Tulip Disappearing Ink Pen

Fabric paintbrushes

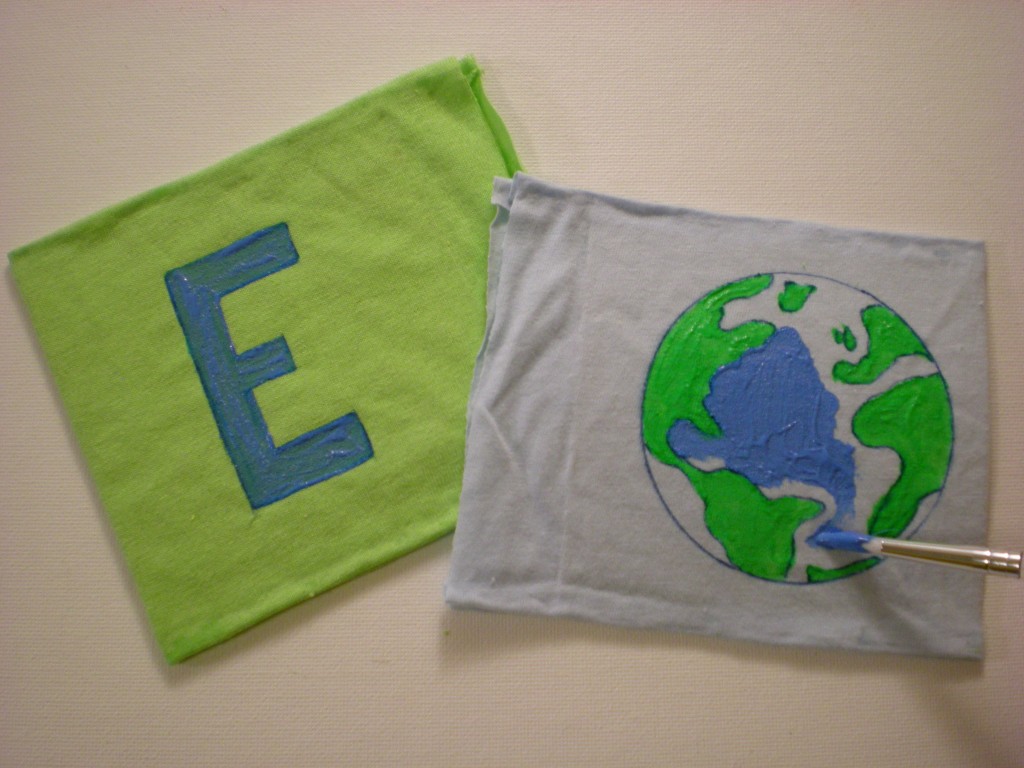
Tulip 3D Fashion Paint Blazin’ Brights (variety of colors)

-Clothespins (optional, for clipping in place while gluing/drying)

Make it:

1. Measure and cut one more 4″ x 4″ square of cardboard than there are letters in the baby’s name. (Example: Elliot has 6 letters, so I cut 7 squares.) Then cut as many 5″ x 10″ rectangles from the T-shirts as there are cardboard squares.

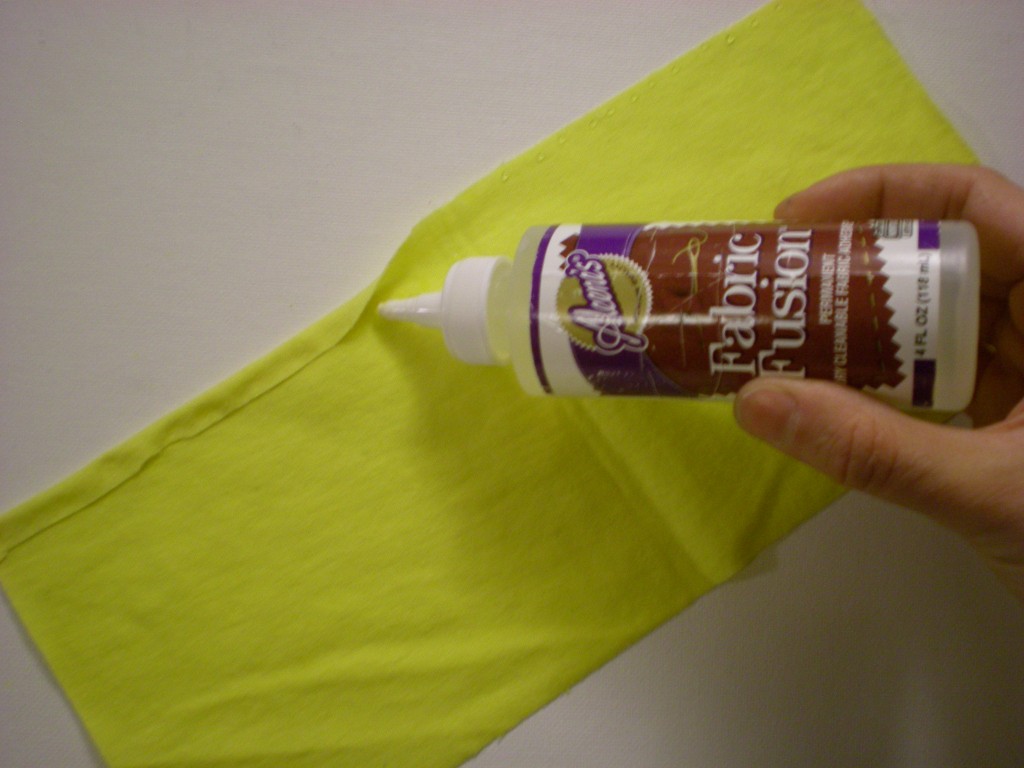
2. Squeeze a small ribbon of glue along one long side of one of the fabric rectangles. Then fold over the edge about 3/8″ and press. Repeat on the other long side.

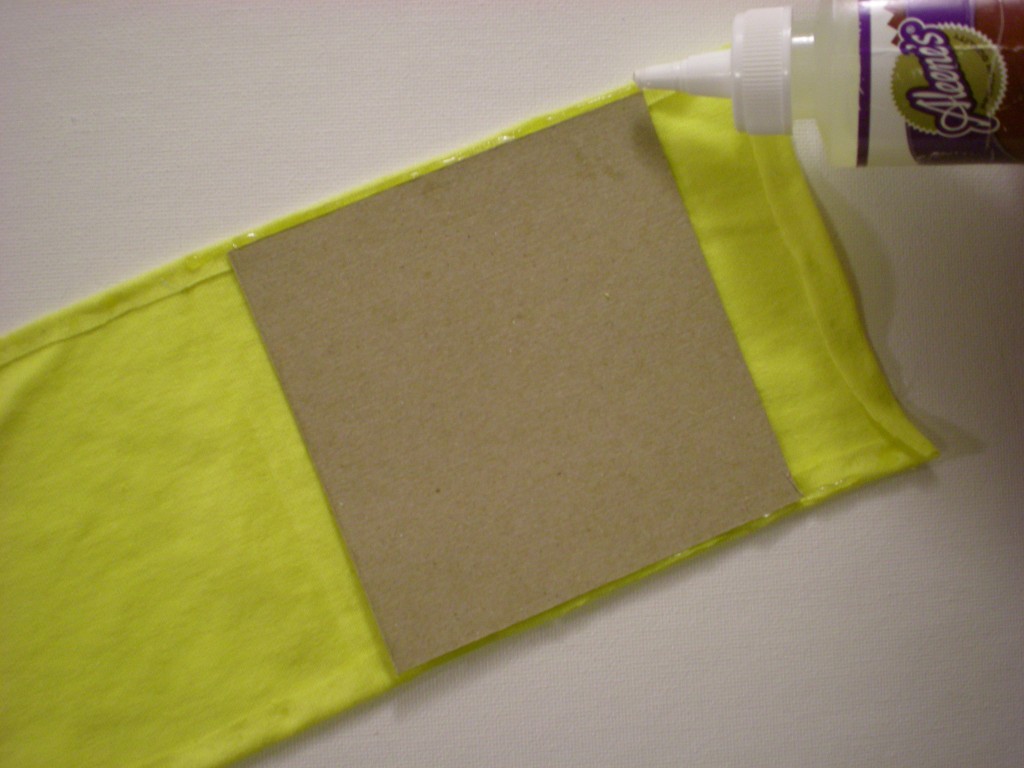
3. Find the center of the rectangle and line up one edge of one of the cardboard squares. Squeeze a small ribbon of glue along the fabric at the top and bottom edge of the cardboard.

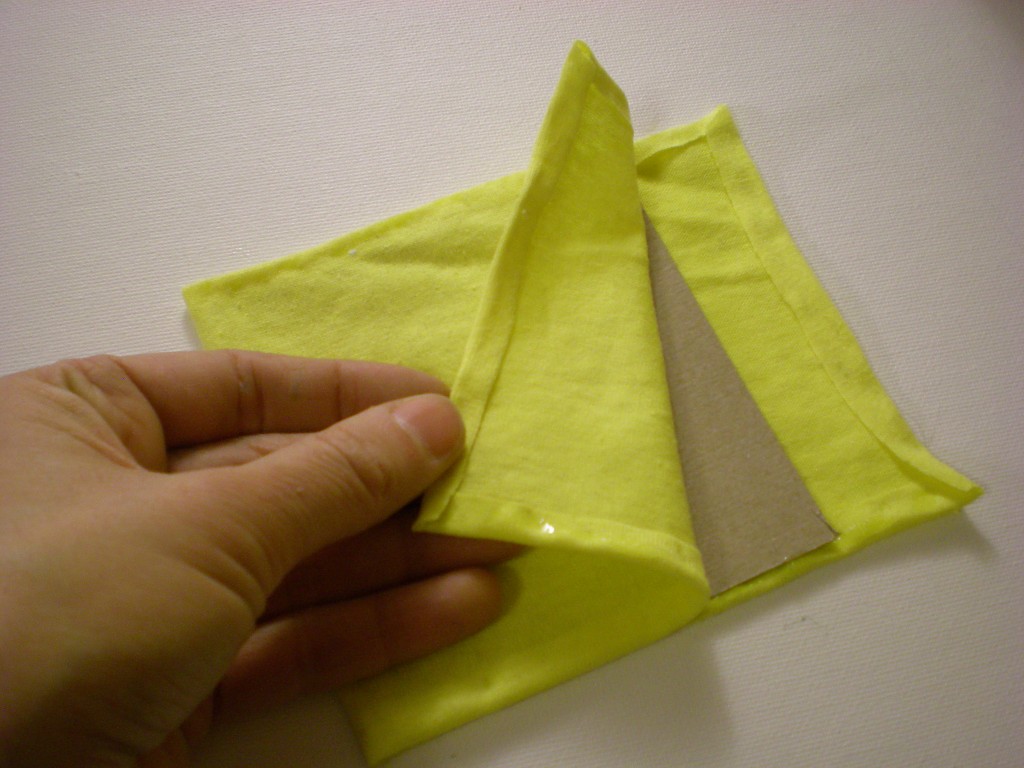
4. Fold the fabric in half, sandwiching the cardboard in between the layers. Press the glue into the edges to seal it. Squeeze another ribbon of glue against the cardboard and between the fabric layers on the open side. Press it closed.

5. Repeat steps 2 through 4 until all of the cardboard squares are covered. These are the pages of the book.

6. Use the air-soluble ink pen to begin outlining the letters and images on the book pages.

7. Color in the lines with fabric paint!

8. Paint all the right-folio pages first (including the front cover), let them dry, then paint all the left-folio pages, making sure you match up all the letters and images.

9. Trim the raw edges (the side of the pages that will go into the binding) down to 1/2″. Then squeeze a line of glue along one of the edges you just trimmed and press it against the adjacent page. Keep gluing and adding pages (in the correct order!) until the book is complete.

10. Let dry completely. Optional: Clip the binding closed with clothespins while it dries.

11. Then it’s story time! E is for earth. L is for light. L is also for love. I is for yummy ice cream. O is also for a delicious orange. T is for Tree (and Totally Terrific and….T-shirt book!).


[ 7 Comments | Posted on January 25th, 2011 ]

8 Ways to Transform a T-shirt (via HuffPo)

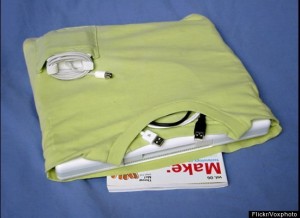
Add another 8 T-shirt projects to the hundreds of Generation T projects you’ve already got in your arsenal! This slide show collection includes projects from DollarStoreCrafts, Makezine, SuperNaturale, and more–courtesy of Care2’s Becky Striepe. Make’s T-shirt laptop cozy is shown here–plus a pillow, a quilt, a skirt, a necklace, a grocery tote, an appliqué, and…a pair of T-shirt undies!

And, 8 must be the hot little number because here are another “8 Ways to Recycle that Old T-shirt” posted by Valley News Live (list by Raquel Fagan; provided by Earth911).

[ 5 Comments | Posted on December 29th, 2010 ]