Posts Tagged ‘T-shirt transformation’

DIY: Crossback Tank Top

Summer is all about easy, breezy fashion (stay cool) and tie-dye (stay fun!). Here’s an ombre-style surface treatment for a quick-and-easy T-shirt transformation. From plain white T-shirt to a smock-styled, crossback tank top that’s nearly no-sew (about 6 inches of stitching) in no time. Smock it to me!Smock Tank Finish generation-t.com

megan-nicolay-blog-footer-1

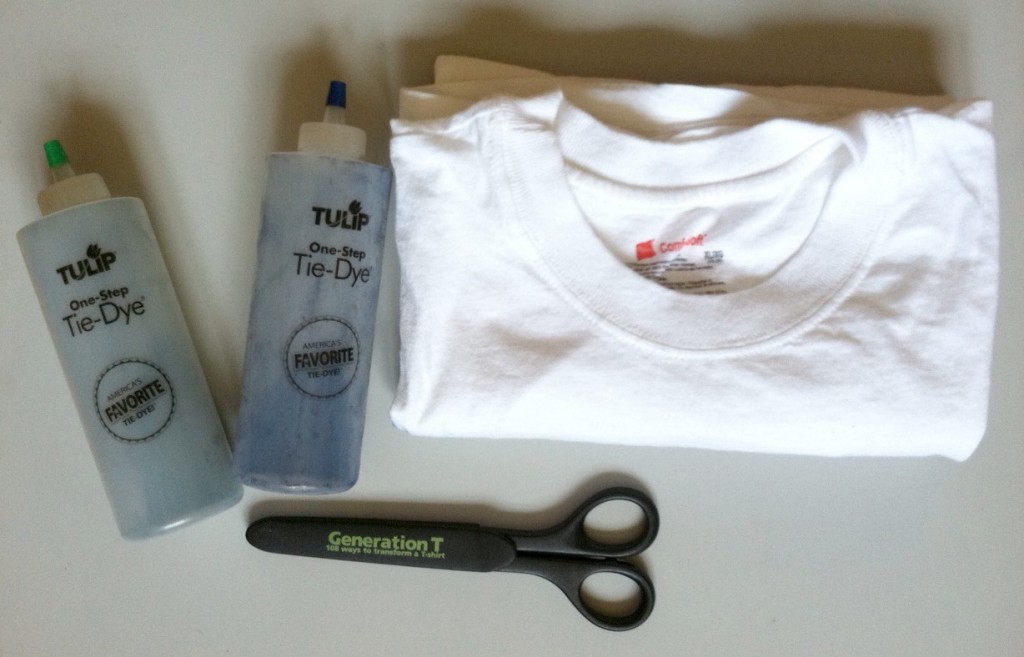
Materials:
-Plain white T-shirt
Tulip One-Step Tie-Dye
-Scissors
-Needle and thread or sewing machine
-Plastic container from the recycling bin

Smock tee materials generation-t.com

Make it:
Click through to the iLoveToCreate blog from a complete step-by-step  photo tutorial!

Smock tank finish1 generation-t.com

[ Comments Off on DIY: Crossback Tank Top | Posted on July 22nd, 2014 ]

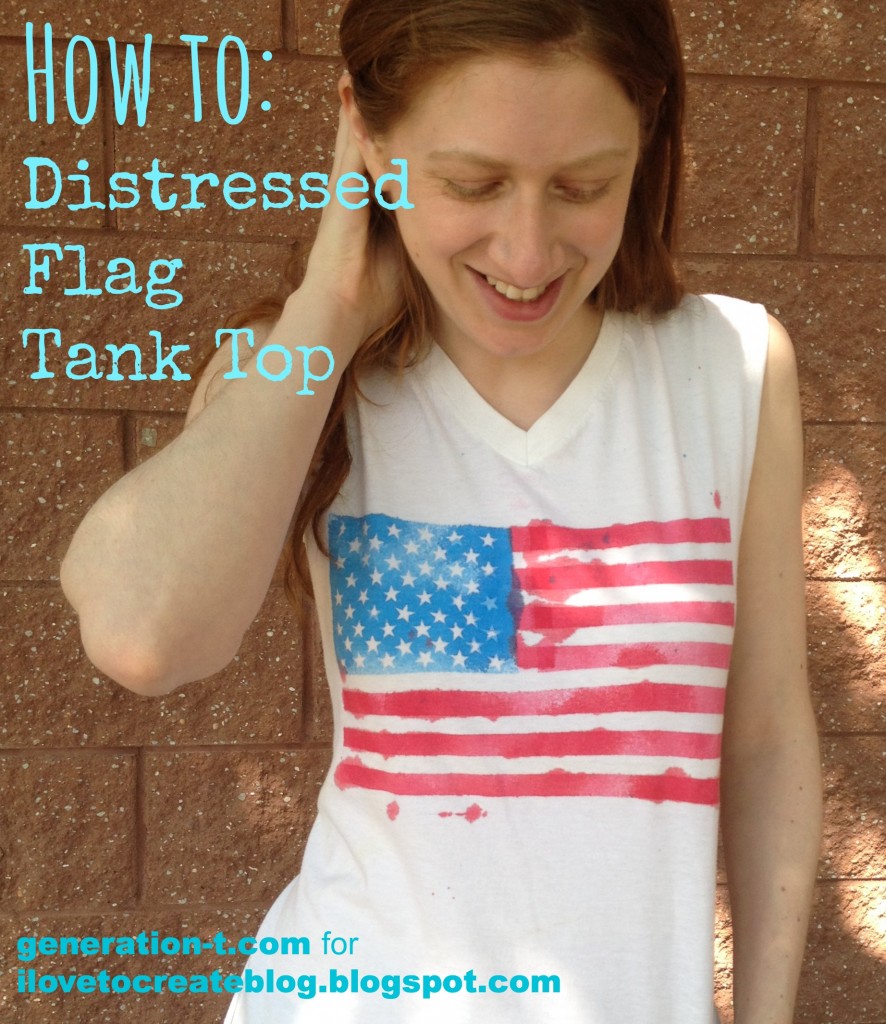
DIY: Distressed American Flag Muscle Tee

Between cheering on Team USA in the World Cup and all the 4th of July barbecues just around the corner, this project is at least a fashion twofer (at least — you can save it for next Memorial Day picnic, Flag Day…or whenever you’re feeling stylishly patriotic!).

USA tank top1 generation-t.com.jpg

With just a plain white T-shirt, some classic gold star stickers (50 of them, to be precise), clear tape, and fabric spray paint, you can, for just a few bucks, make a T-shirt that might otherwise retail for (gulp)…$84(!!!). Here’s how.megan-nicolay-blog-footer-1

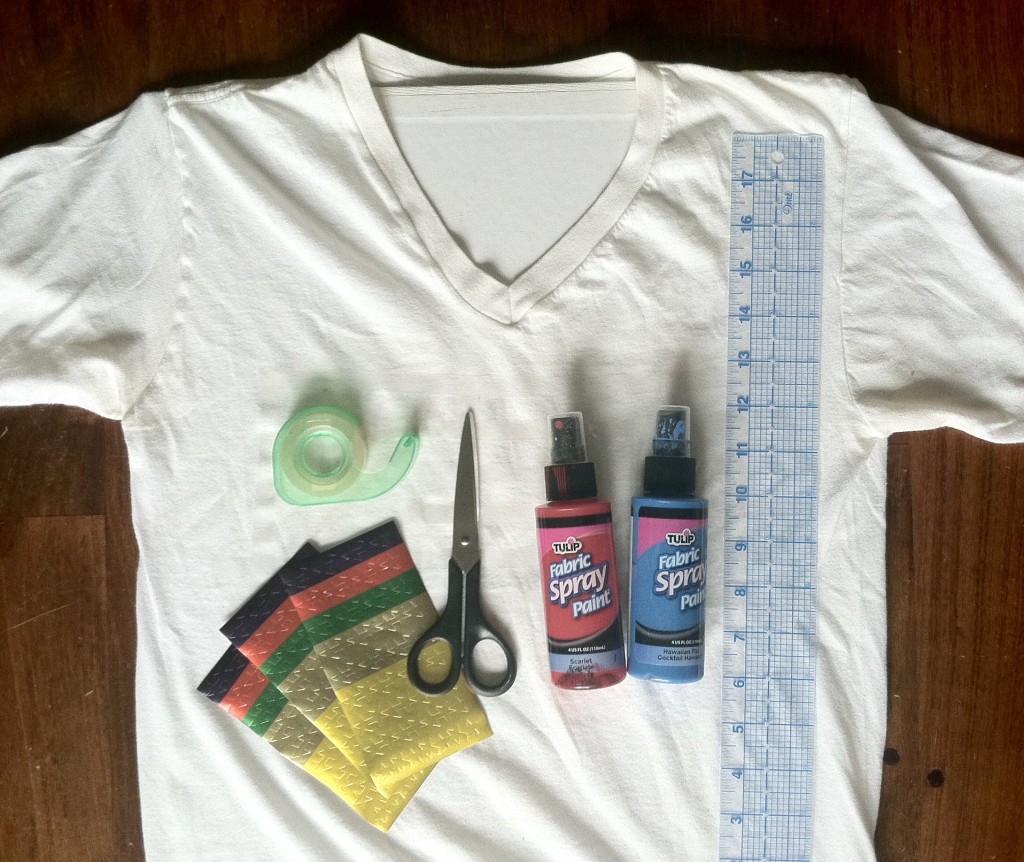
Materials:
-Plain white T-shirt (I chose an old V-neck, but crew-neck works just as well)
Tulip Fabric Spray paint in red and blue
-Gold or multi-colored star stickers (find them stocked with the teachers’ supplies)
-Clear tape (for best results, look for 1/2″-wide tape)
-Scissors
-Ruler
-Scrap cardboard and/or paper to mask and insert between the layers of the shirt

Flag Step1 generation-t.com

Make it:
1.
Head over to the iLoveToCreate blog for my complete step-by-step tutorial!

USA tank top2 generation-t.com


[ 3 Comments | Posted on June 24th, 2014 ]

T-shirt Transformer Scarf: Wear It Your Way!

Here’s an easy T-shirt transformation project from Generation T: Beyond Fashion (project #9, Transformer), courtesy of Homemade Holiday 101 that requires just one seam’s-worth of sewing! So if your crafty self is feeling at all unsure whether you’ll actually be able to knit that scarf in time for Christmas, grab the nearest two T-shirts (the larger the better), a pair of scissors, and a needle and thread (or a sewing machine!), and make a whole scarf-plus in about 10 minutes.

T-shirt Transformer generation-t.com

Materials:
2 T-shirts of the same size (L or XL)
Scissors
Ruler
Chalk marker
Straight pins
Needle
Thread

Make it:
For step-by-step instructions and illustrations, go to Homemade Holiday 101: 30-minute Scarf.

BONUS:
Just a reminder that Generation T and Generation T: Beyond Fashion ebooks are on sale for $2.99 throughout the holiday season. Just head to HomemadeHoliday101.com to download!

homemadeholiday101logo

[ Comments Off on T-shirt Transformer Scarf: Wear It Your Way! | Posted on December 17th, 2013 ]

I Love to Create: “You Complete Me” T-shirts!

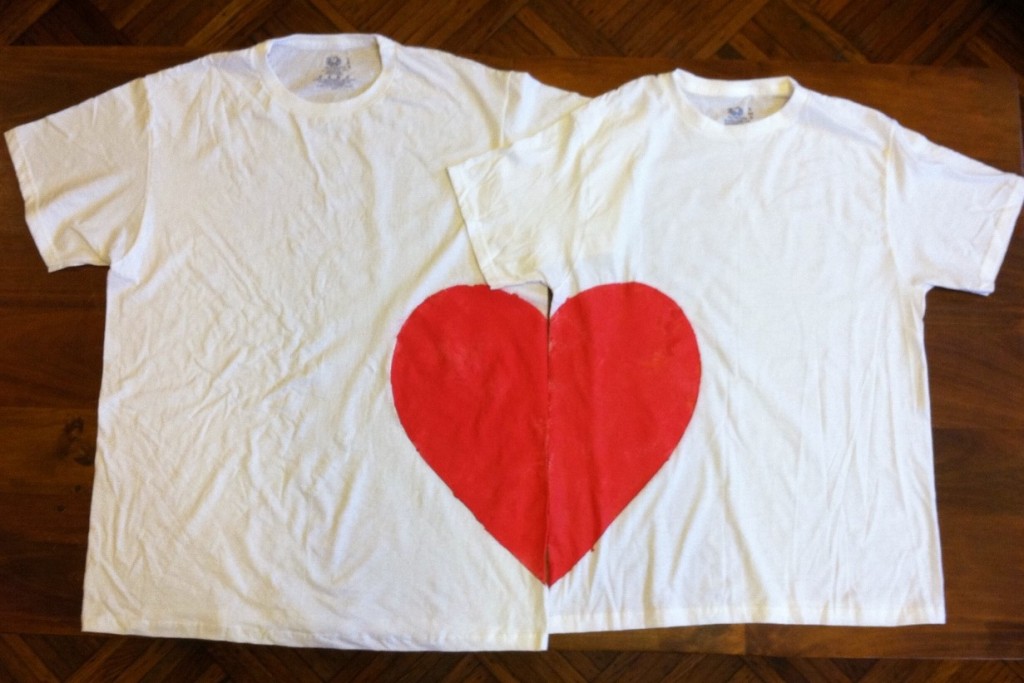
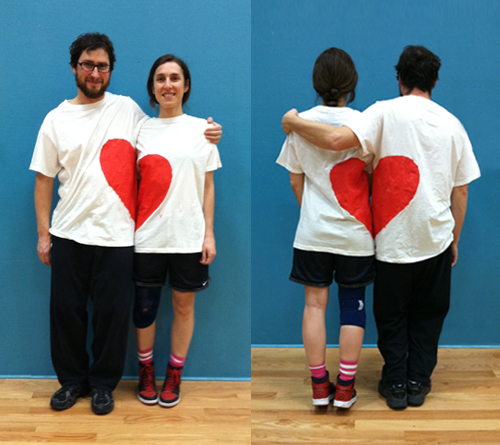
The sweetest thing to make for your best pal on Valentine’s day? The sweetest thing for your sweetie? I call it the “You Complete Me” Tee. Part friendship charm necklace, part Pinterest inspiration (these gloves!), each T-shirt in this pair appears, at first look, to be decorated with an abstract design when it’s without its match. When the two shirts are reunited, however, they form a heart. Awww…

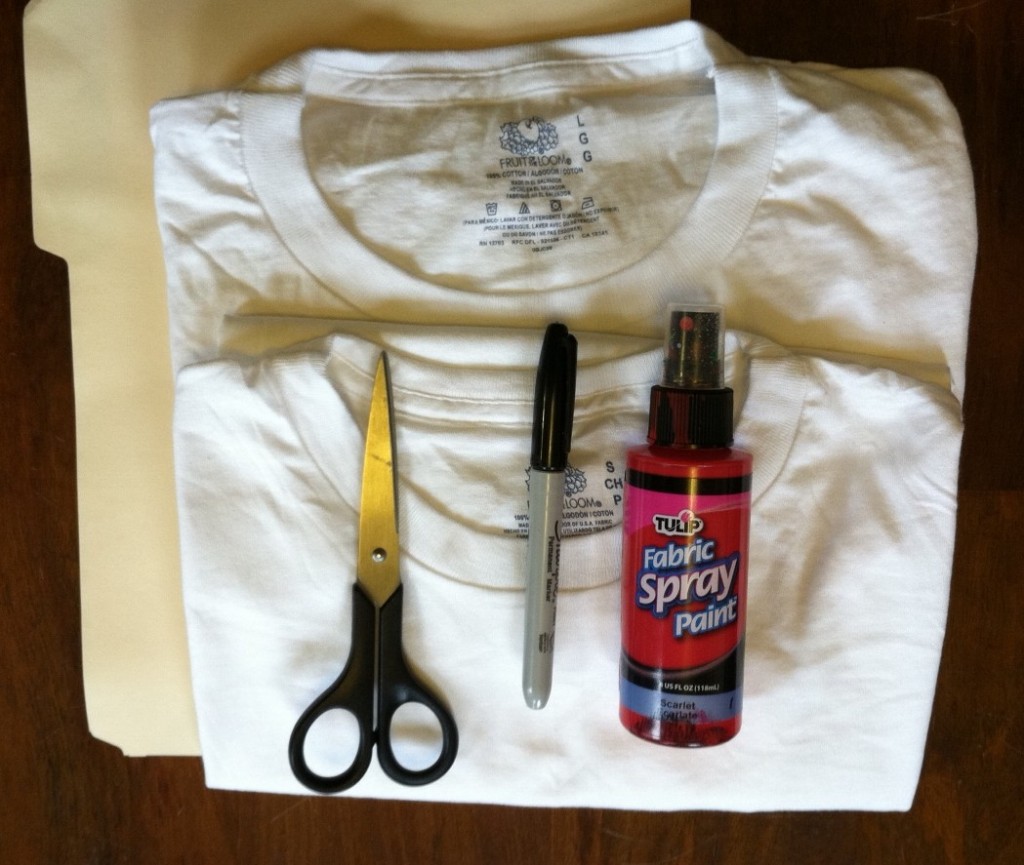
Materials:
-2 plain T-shirts (preferably light in color)
-scissors
-empty file folder (or other large piece of card stock)
-marker
Tulip Fabric Spray Paint (in red!)
-plenty of newsprint to protect your work surface

Make It:

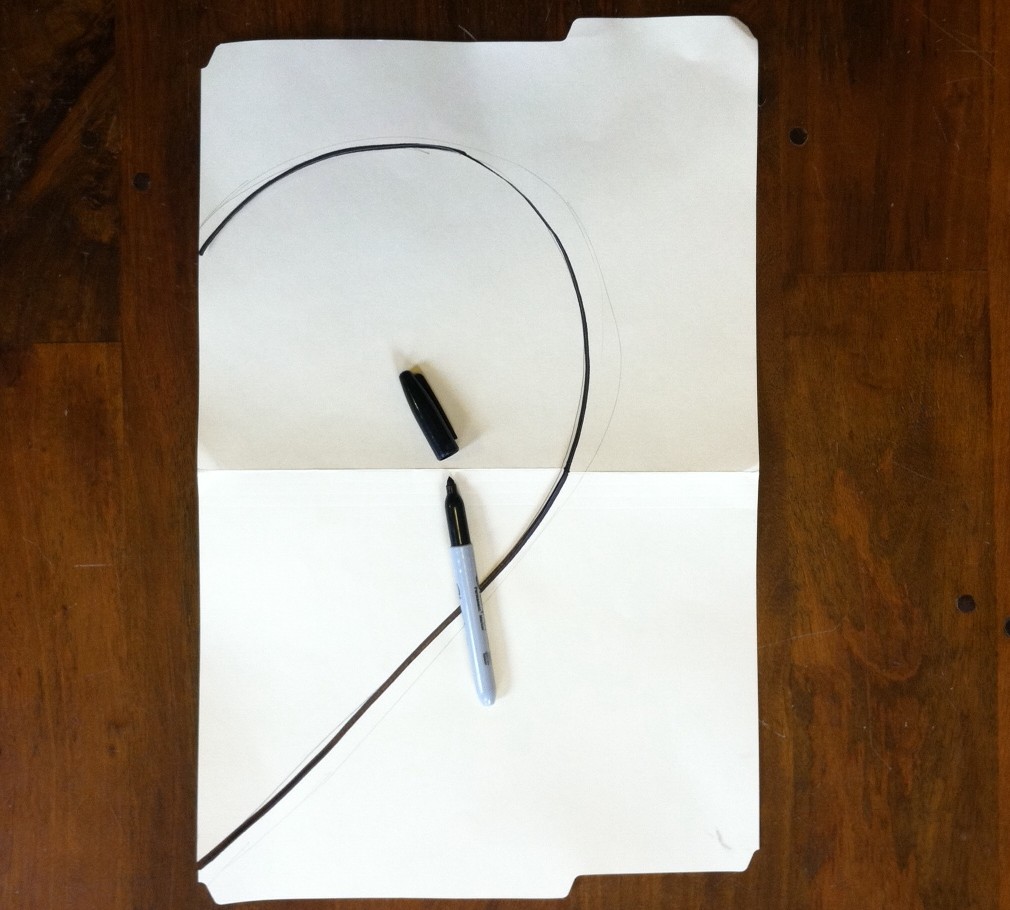
1. Lay the folder flat and use the marker to draw half of a heart along one of the long edges. (Note: I had to make an adjustment later on to accomodate the dimensionality of the human body–so don’t be afraid to make a particularly bulbous heart in order for it to “read” when the shirts are side by side.)

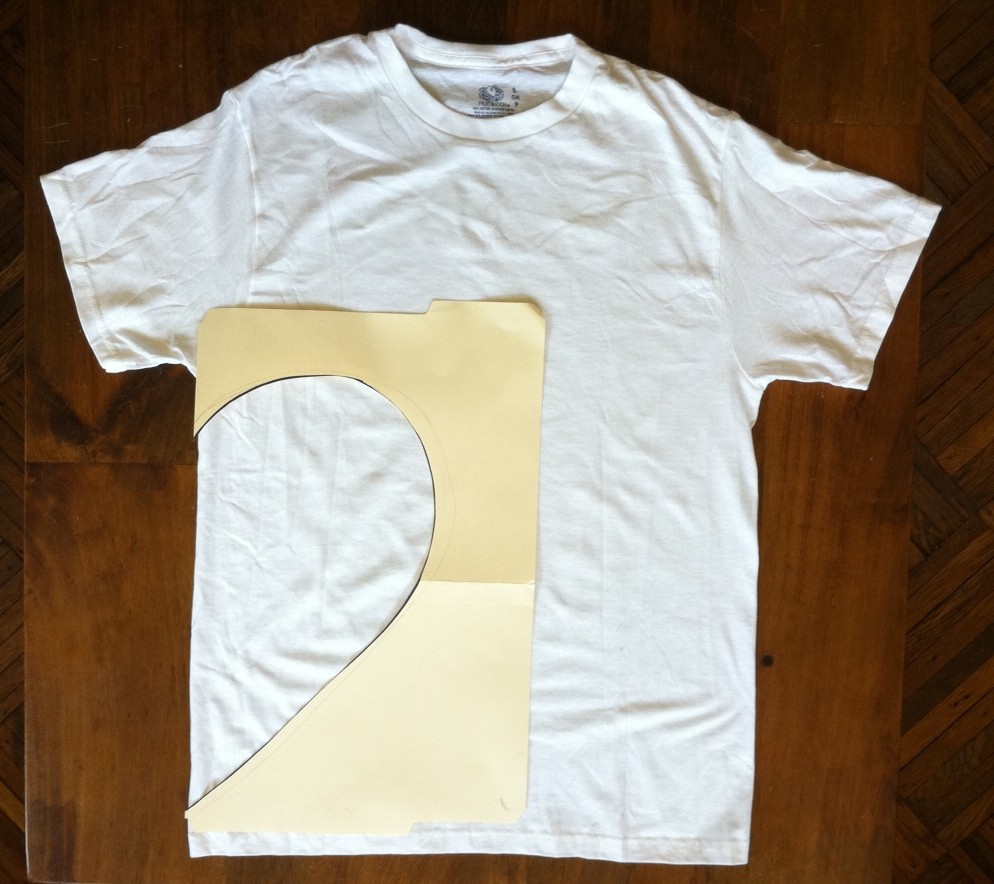
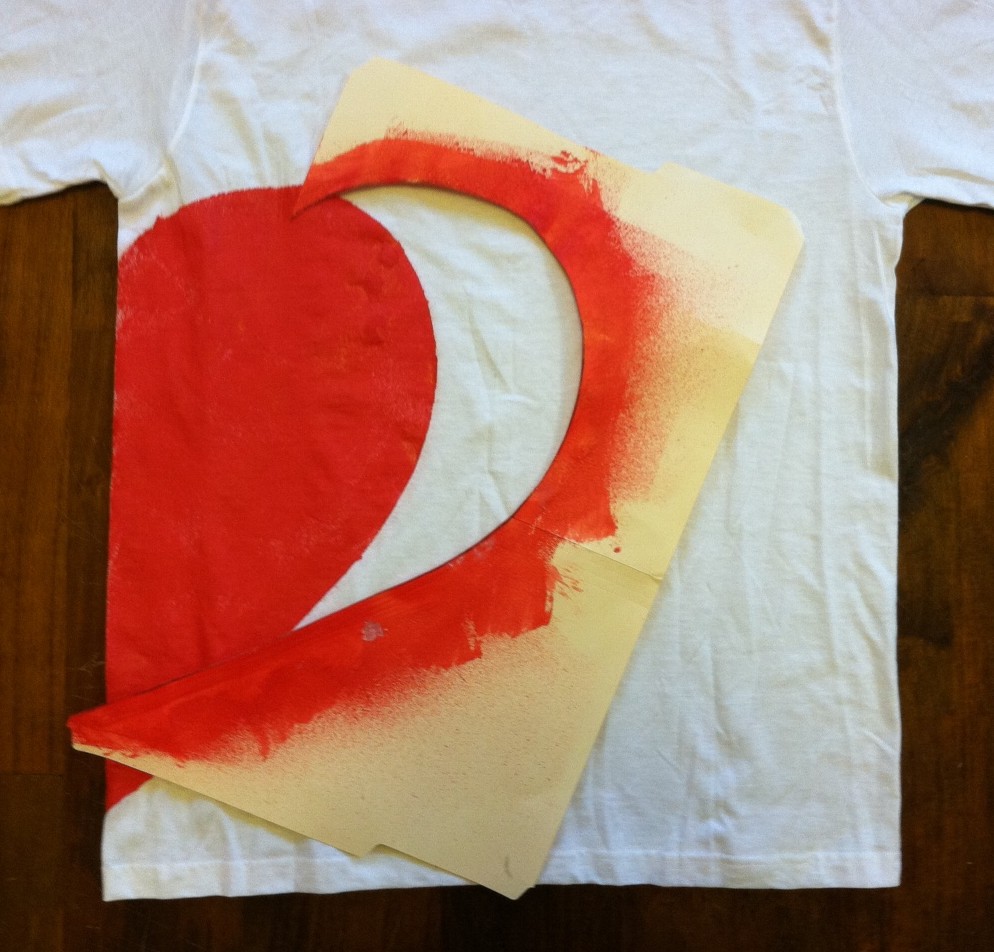
2. Cut out the half-heart template and line it up along the side of the torso of one of the shirts (under the sleeve). Mask the rest of the T-shirt (and use newsprint to protect your work surface), and spray paint the half-heart.

3. Carefully remove the stencil from the T-shirt, let it dry, and then flip the template to paint the other side of the heart on the other T-shirt. Then, when both the T-shirts and the stencil have dried, repeat the process to complete each heart on the back of the shirt. (And don’t worry if the paint seeps under the stencil a bit — like relationships, it might get a bit messy at times!)

4. Let it dry completely, wear it, and go find your best bud. (And don’t forget to make sure you stand on the correct side–and bend your knees or stand on your tiptoes, if necessary!)

Thanks to my friends Michael and Helen (who thematically appropriately identify as members of Camp Friendship Basketball League!) for modeling.


[ 2 Comments | Posted on January 22nd, 2013 ]

T-shirt Jam Session with BoingBoing!

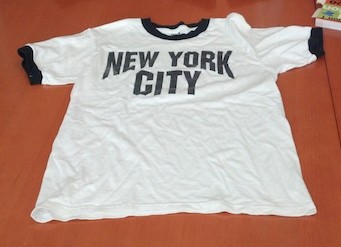
On a warmer day a few weeks ago, Jamie Frevele of BoingBoing and I sat down with my sewing machine, a couple pairs of sharp scissors, and Jamie’s stash of T-shirts (she has some amazingly iconic ones in there — Rosie the Riveter, Captain America, the New York City tee that John Lennon was famously photographed wearing — sleeves cut off — in New York in 1974 by Bob Gruen) to have a little Tee Party. And a party it was…

Without further ado, here’s how to cut the perfect neckline, and how to transform that old boxy tee into a fresh ‘n’ foxy tank top in T-minus 60 seconds (yes, we’re rife with T-shirt puns up in here). Here’s how it all went down, no-sew style:

For an additional tutorial (bonus!) on how to easily re-size a T-shirt with two easy seams — click through to see Jamie’s (@jamielikesthis) step-by-step photos of how we transformed her iconic New York City tee from this:

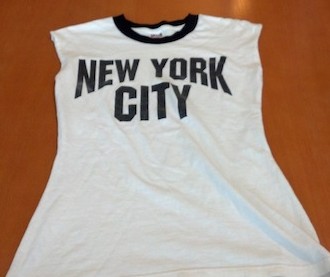
Into this:

The T-shirt (à la John Lennon) is boxy no longer!

Happy new T-shirt to Jamie, happy birthday to John Lennon (today would have been number 72), and happy T-shirt refashioning to you all!

[ 2 Comments | Posted on October 9th, 2012 ]

From Our Readers: Maria & Franz!

Earlier this summer, I got an email from my brother and sister-in-law with the subject line “T-shirt Guru, Help!” Maria and Franz are two musicians on an adventure along the Trans-Siberian Railway. Like any good musicians, they travel with merch, and like any good merch-peddlers, they run out of stuff fast. So they were down to two XXL T-shirts and quickly discovered that their fans were tending to come in smaller sizes. Maria writes…

“Franz and I have two XXL T-shirts left of one design and people much smaller than XXL keep expressing interest, but then balk at the size. We have a long train ride coming up, so I started thinking about trying to convert the shirts into cute, cut-up T-shirts. My sewing abilities and supplies are limited, but we’ve got decent scissors, safety pins, and a travel sewing kit. Can you recommend an easy-ish pattern that we could sell to a punky Russian girl?”

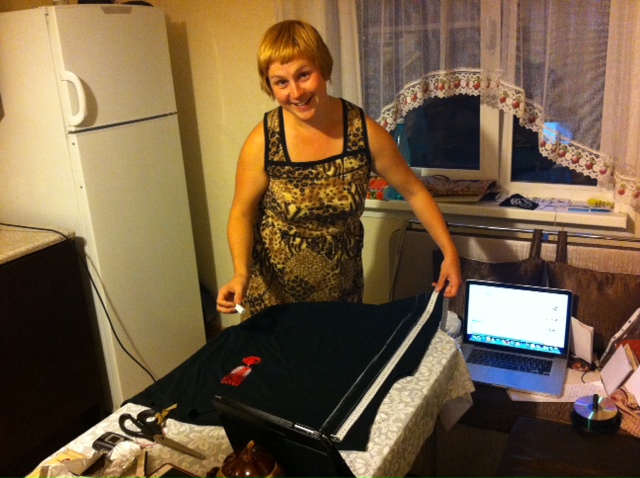
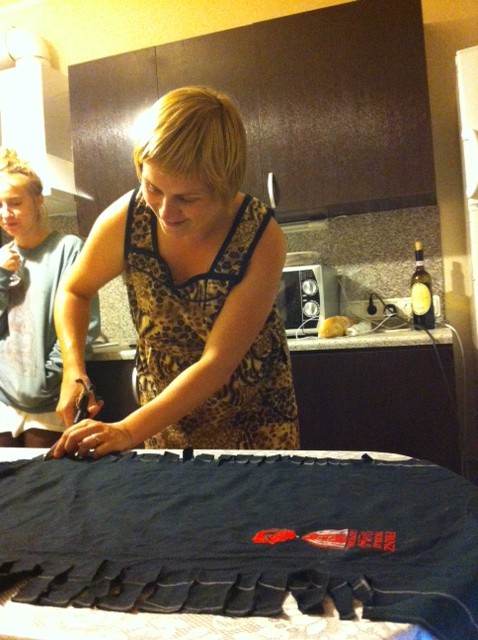
How could I ignore such a request? A few cross-continent consultation emails later, Maria and Franz had set up shop: They’d been crashing with some cute punk gals in the outer boroughs of St. Petersburg, and set up a workspace on their kitchen table. Armed with a pair of scissors, and that travel sewing kit, they set to work transforming their merch. Measuring and marking…

Cutting…

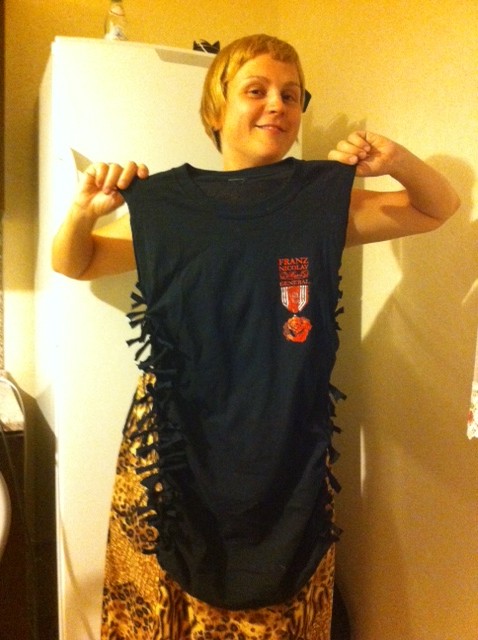
And knotting. Ta-da! It’s the “Knot So Fast” (project #104) tank top from Generation T: Beyond Fashion.

Sveta, one of the aforementioned cute punk girls who was looking on, was suspicious of all the scissor activity, but once she tried on the completed result, she asked if she could keep it, so, it seemed to be working. Nothing like converting a skeptic!

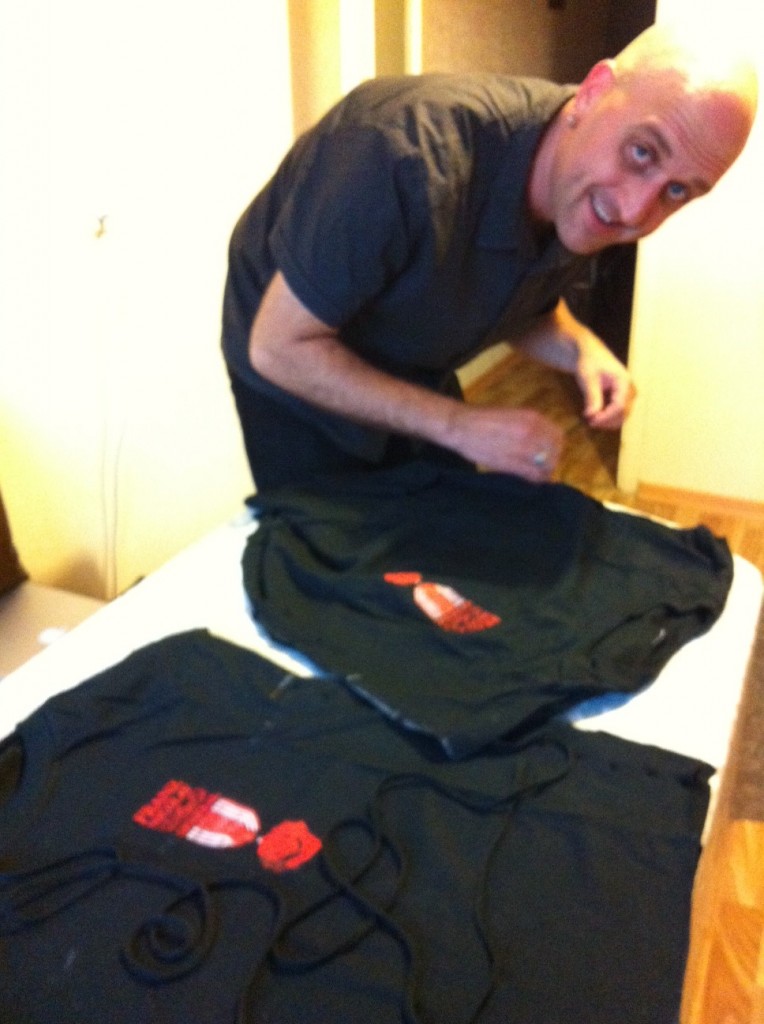
Then it was time to tackle “Outer Lace” (project #16) from Generation T.

And then they set off in search of one of the Russian editions of the two books, should any additional emerchencies arise.

UPDATE from the road: “We just sold the last of our Generation T-styled Franz Nicolay shirts to the fashionable women of Orenburg Russia. Thanks for the designs!”

[ Comments Off on From Our Readers: Maria & Franz! | Posted on September 14th, 2012 ]

From Our Readers: A Crafty Vegan Librarian!

Back in April 2009, craftyveganlibrarian hosted a Tee Party for a magnificent seven DIY teens at the library where she works. The group used scissors and safety pins to customize their wardrobes using a handful of no-sew techniques. Below is the “Brokenhearted” tee design (project #3) by the crafty librarian herself, found on page 30 in Generation T.


[ 1 Comment | Posted on July 20th, 2012 ]

I Love To Create: T-shirt Confetti Necklace!

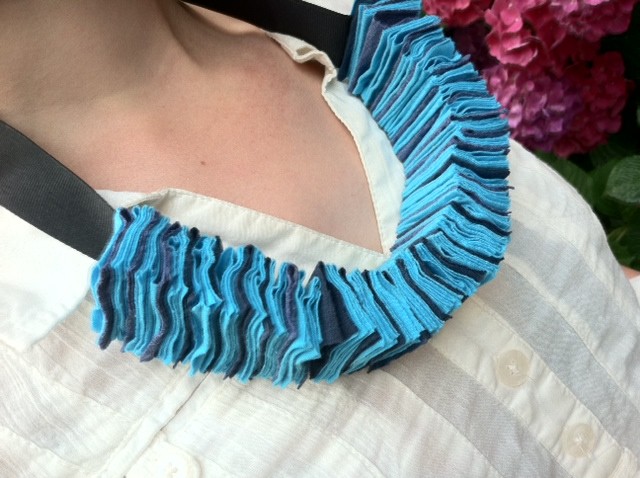
Interestingly, the inspiration for this festive, soft Fourth of July necklace came from south of the border — while I was on vacation in Oaxaca, Mexico, we happened upon a small gallery where I spotted an orange folded paper bracelet made by women in a local artist collective. The paper was so soft and fibrous, it reminded me of fabric. So when I set to re-imagining that bracelet stateside in my Generation T workshop (as a necklace of fabric and glue!), I was pleased that the results are even cozier — a wonderfully celebratory accessory fit for a summer barbecue! (I was intentionally playing it subtle with the shades-of-blue color palette, but a bold red, white, and blue color scheme would really pop.) And it’s comfy, too, when the sun goes down and it’s time to snuggle up and watch the fireworks.

Materials:
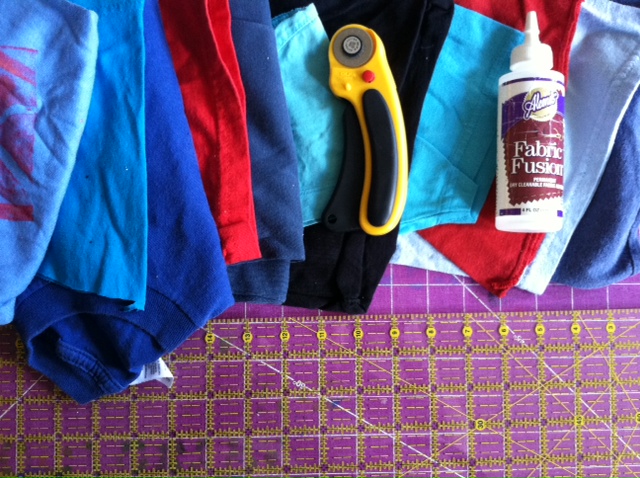
-T-shirt scraps (sleeves work well!), including one long one to use as the fastener
-Rotary cutter and cutting mat
-Quilting ruler
Aleene’s Fabric Fusion glue
-Ribbon (optional, in place of the long piece of T-shirt scrap to fasten the necklace)
Make it:
1.
Cut 1 1/2″-wide strips from the T-shirt scraps.
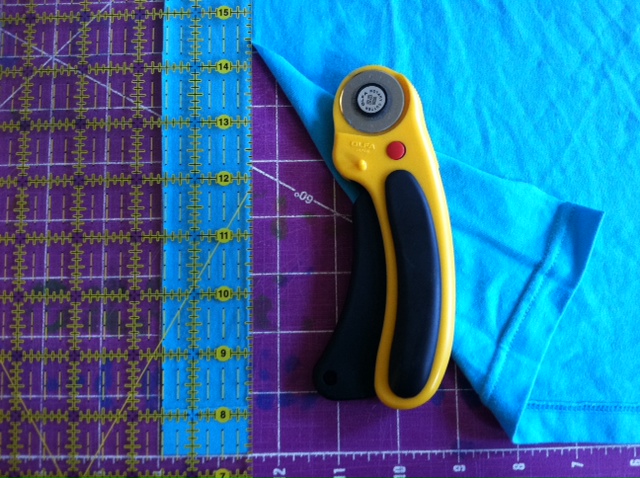
2. Cut the strips into 2″ pieces to make rectangles that are 1 1/2″ x 2″. (I cut about 124 rectangles in two different colors to make an approximately 9″-long necklace segment.)

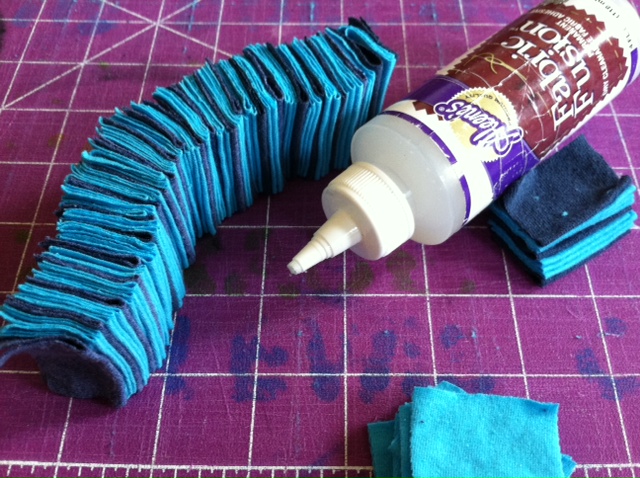
3. Lay one of the rectangles flat, wrong side up, and spread a thin line of glue slightly off-center and parallel to the short ends. Fold it in half so that the glue line retains the crease. Let the glue dry and repeat for the remaining rectangles.
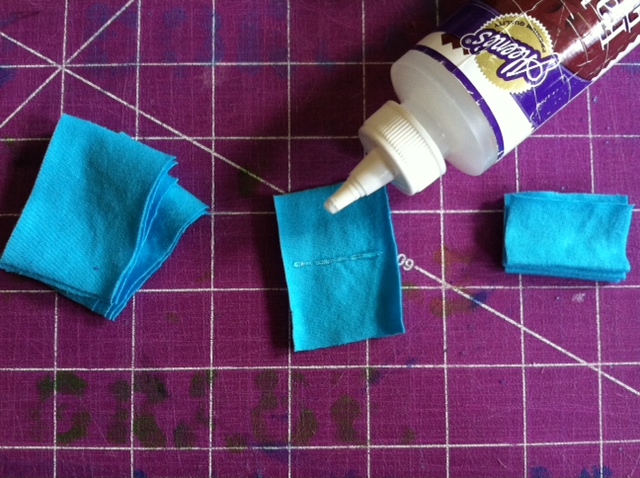
4. Squeeze a thin line of glue close to the folded edge of one of the rectangles and press another folded rectangle over it.
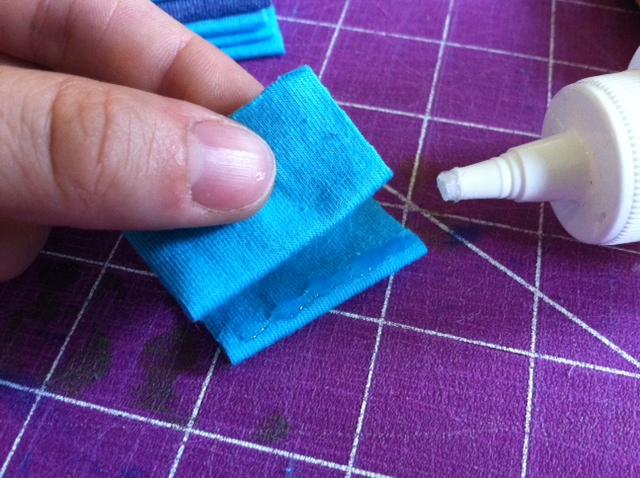
5. Repeat step 4 as many times as needed, to attach more rectangles together and create the necklace piece. (Arrange different colors to create a pattern!) Reserve two folded rectangles to use in step 7.
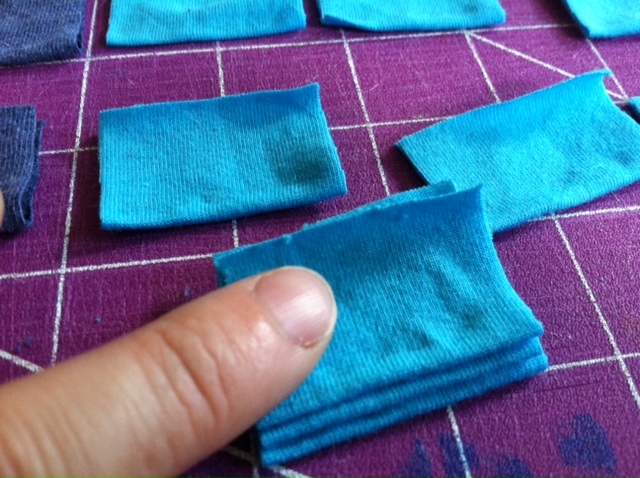
6. Let the necklace piece dry, then touch up any gaps as desired.
7. Spread glue along the end of a long T-shirt strip or ribbon (shown here), and center and press it along one of the spare rectangles from step 5.
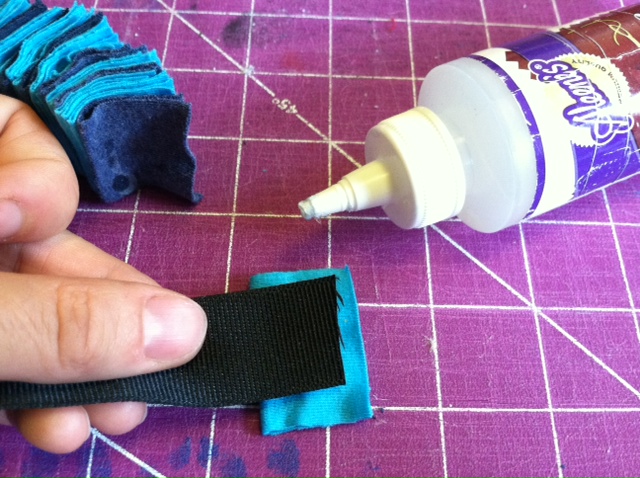
8. Then add more glue to the ribbon and press it against one end of the necklace piece, aligning the T-shirt rectangles (the ribbon end should be sandwiched in between T-shirt material). Repeat on the opposite end of the necklace piece. Let dry completely. Then snip the T-shirt strip or ribbon in the middle so you have two ends for tying.

9. Tie the ends in a bow at the back of your neck.
Variations:
Experiment by making smaller rectangles for a more delicate piece (you can make a necklace this way, or, I made an accompanying bracelet using 1″ x 1 1/2″ rectangles).
Use chain in place of the fabric fastener. (I like the idea of an all-white necklace piece with a gold tone chain.)
Try wearing it as a headpiece! (My sister’s boyfriend tied the necklace around his head
as a joke, bonnet-style, but with the right messy up-do, it could be quite the statement piece.)
Play with color: Make the red-white-blue version mentioned above, use the color scheme from your favorite sports team to wear to the next game, or craft a rainbow to brighten your day!

Tune in later this week to see the second necklace I made using the scraps left over from this one–super easy, super fast, and also no-sew (no-glue, even!).


[ 6 Comments | Posted on June 26th, 2012 ]

T-shirt Spiral Statement Earrings

Ages ago, I promised variations on my Softie Spiral Headband made from T-shirt coils. Well, at long last, here’s one take — a pair of colorful, bold, statement earrings. As a DIY project, they’re a nice alternative to the headband (if you’re too impatient or too short on time to make all the coils required for the bigger project!).

Materials:
-T-shirt scraps in different colors (T-shirt hems with the stitching cut off are perfect!)
-Fabric scissors
Aleene’s Fabric Fusion or similar fabric adhesive
-Ruler
-1 pair earring posts and backs
Aleene’s Jewel-It Embellishing Glue or similar jewelry adhesive

Make It:
Simply follow the instructions for making a T-shirt coil in the spiral headband tutorial. Make three pairs of same-sized and like-colored coils. (In this example, that means: two matching blue coils, two matching gold coils, and two matching pail yellow coils.)

To make sure that the two blue coils end up the same size, start by cutting the T-shirt strips to the same length. The top coil in the earring should be the smallest, with each coil getting gradually larger as you move down the length of the earring (the yellow one is about 1 3/8″ in diameter, the gold one is about 1 1/2″, and the blue one is about 1 3/4″).

Use the Fabric Fusion to glue the coils in a row, rotating the coils so that the ends of the T-shirt strips get “buried” in the seam. Then glue an earring post to each of the small coils (close to the edge, at the top of the earring, as shown) using the jewelry glue.

Allow the glue to set completely, then attach the earring backings, and you’re ready to wear or gift them!

Note: If these earrings are too big for your style (they do measure about 4.5″ long), you can make them smaller — just keep the same basic ratio between the sizes. Alternatively, you can make single coil earring studs for an even faster result!

[ 1 Comment | Posted on June 4th, 2012 ]

Rookie Turns a T-shirt into a Mod Dress!

How cute is this? Learn how to stitch up this black and white mod dress by Marlena Pope over at RookieMag! I love the styling, too — red-red lips really pop with the black and white geometry of it all.

I’m thinking color wheel opposites could be fun couplings instead of the black and white — orange and blue, maybe? or yellow and violet!

Photo via RookieMag.

[ 1 Comment | Posted on May 24th, 2012 ]