Other Projects

I Love to Create: Sparkle Kitty Ears!

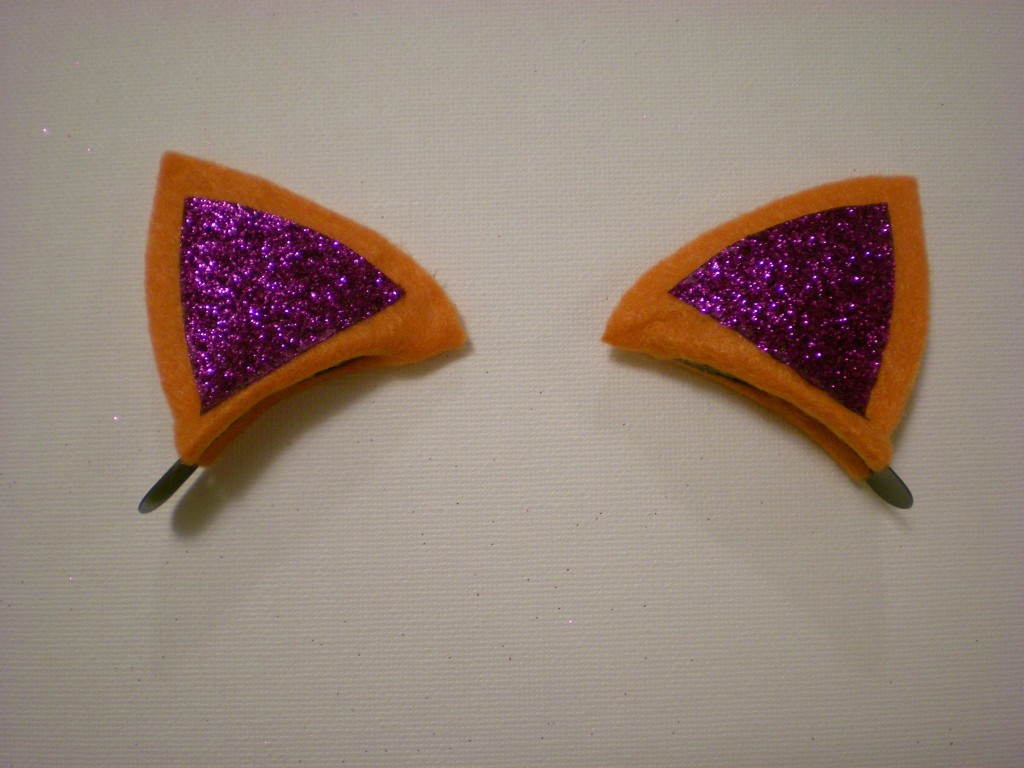
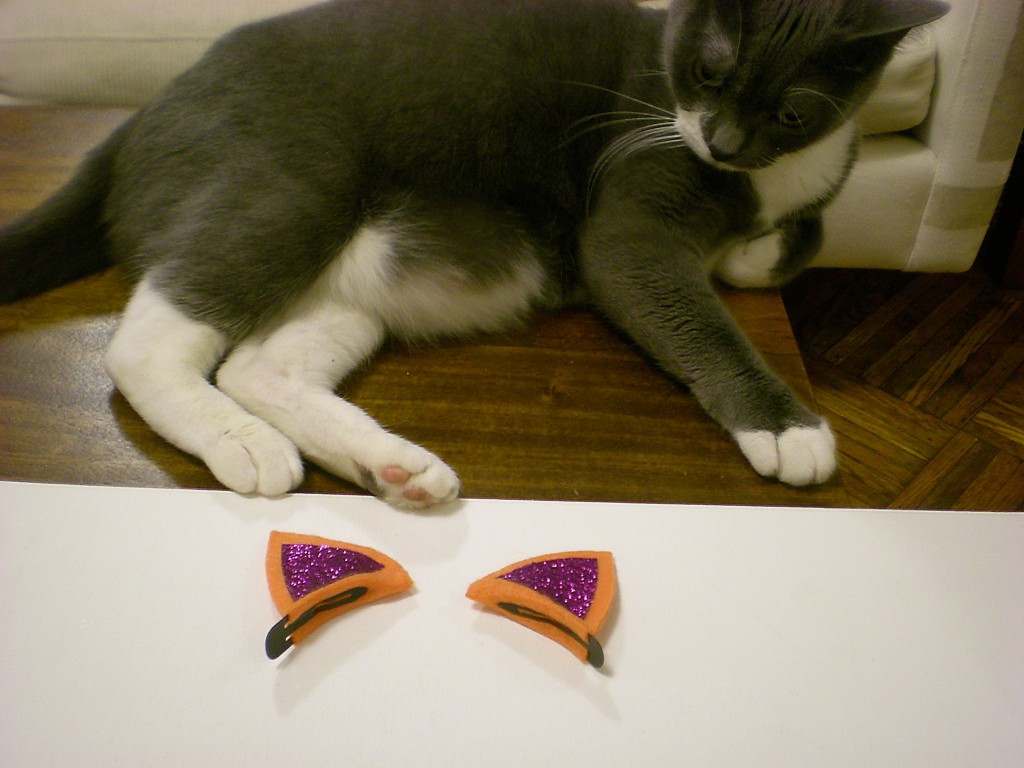
Clip-on cat ears for when you’re feeling a little bit feline! The occasion? Well, to be perfectly honest, I set out making these for my niece’s 5th birthday (she happens to love cats–her cat, Mo, in particular), but I didn’t finish them in time (despite the fact that they only take about 10-15 minutes to complete!). It turns out, though, that there was a higher power (called glitter) at work and the delay was well worth it: I recently got a delivery of Tulip’s new iron-on glitter sheets and I realized that the delay was meant to be (because what would these ears be without the sparkle?).

Save these for Halloween if you want, but why wait? I believe in wearing fun accessories whenever the mood strikes–because, hey, some days you just feel like a cat and here’s the perfect accessory to let you indulge that feeling. And talk about fun in the sun–these ears sure do sparkle!

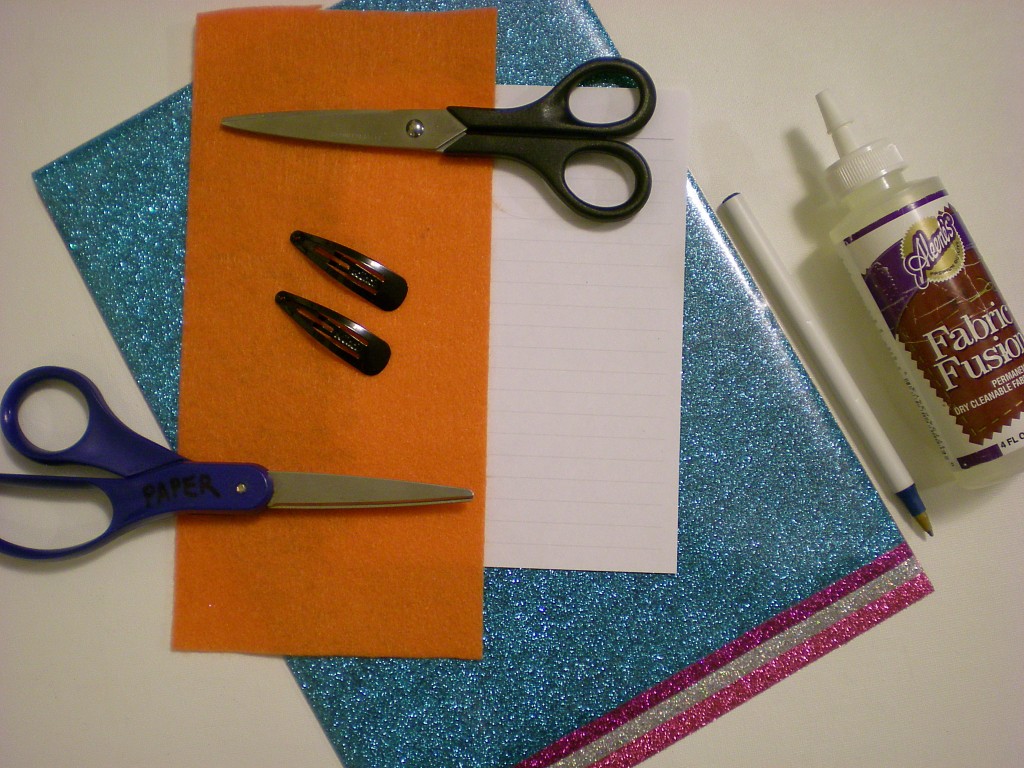
Materials:
-Pen or pencil
-Scrap of paper
-Colorful felt
-All-purpose scissors
-Fabric scissors
-Metal snap barrettes
Aleene’s Fabric Fusion fabric glue
Tulip Fashion Glitter Shimmer Transfer Sheets
-Pressing cloth
-Iron

Make it:
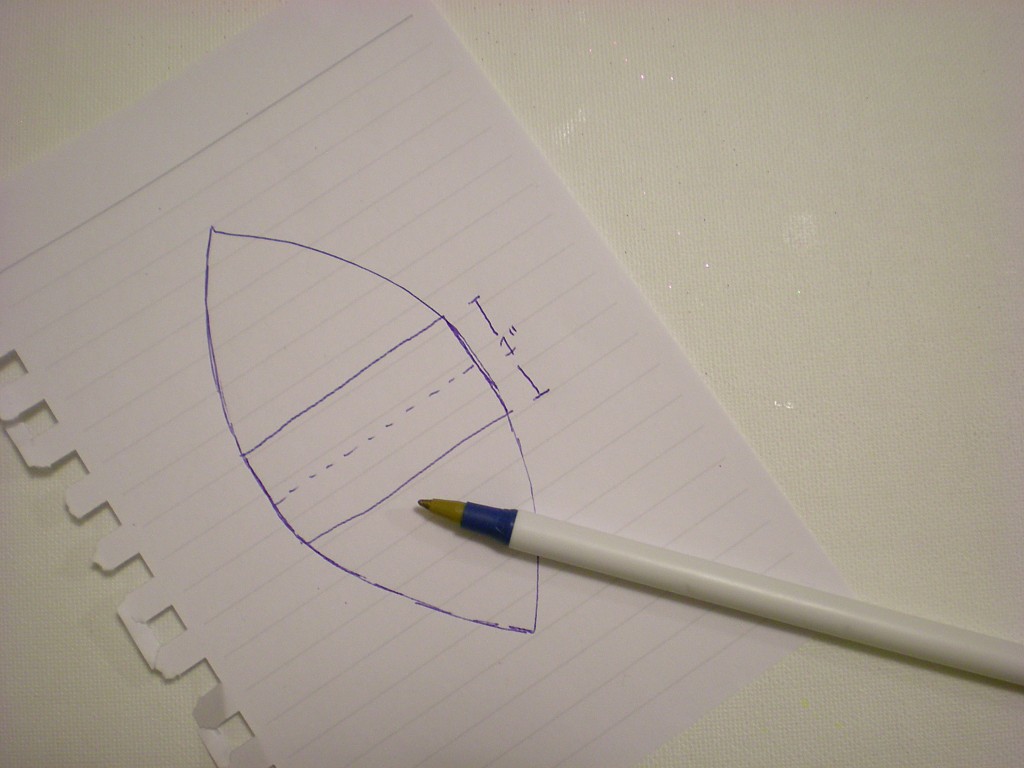
1. Use the pen and paper to sketch out a slightly rounded triangle, about 2″ high. Add 1/2″ at the base of the triangle and then mirror the shape below it to create the template. Cut it out with the all-purpose scissors. (You can also fold the paper at the base after you’ve drawn the top triangle and the extended base, and cut around the shape through both layers.)

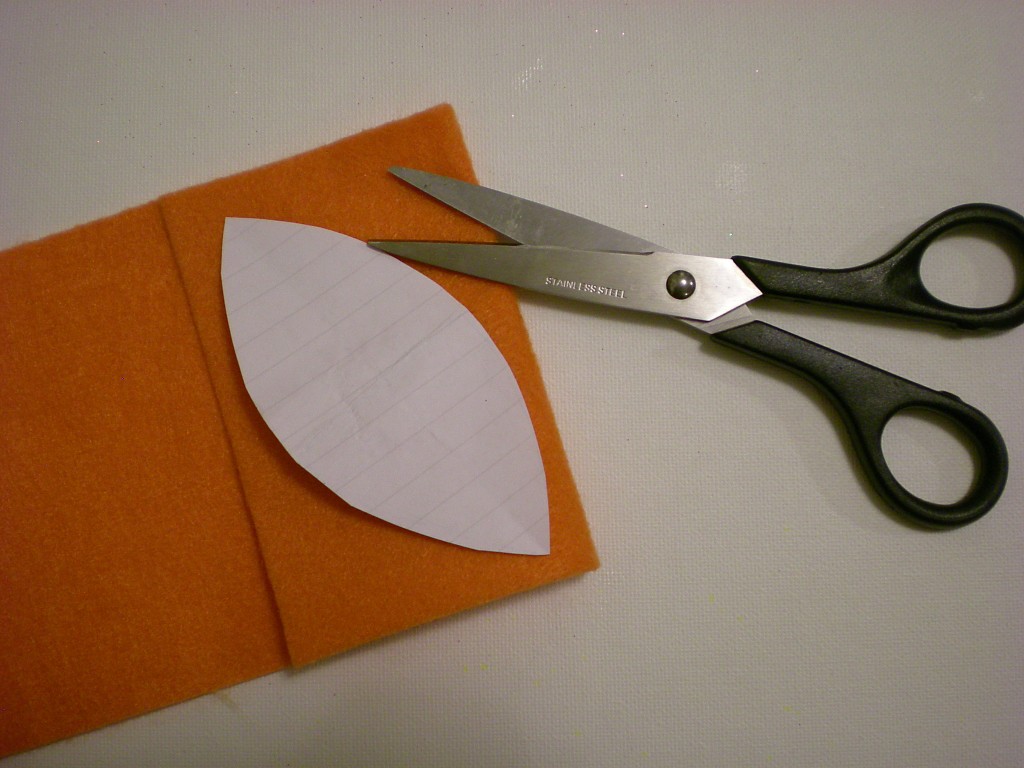
2. Fold over the felt and lay the template on top of the folded section. Use the fabric scissors to cut around the template, through both layers.

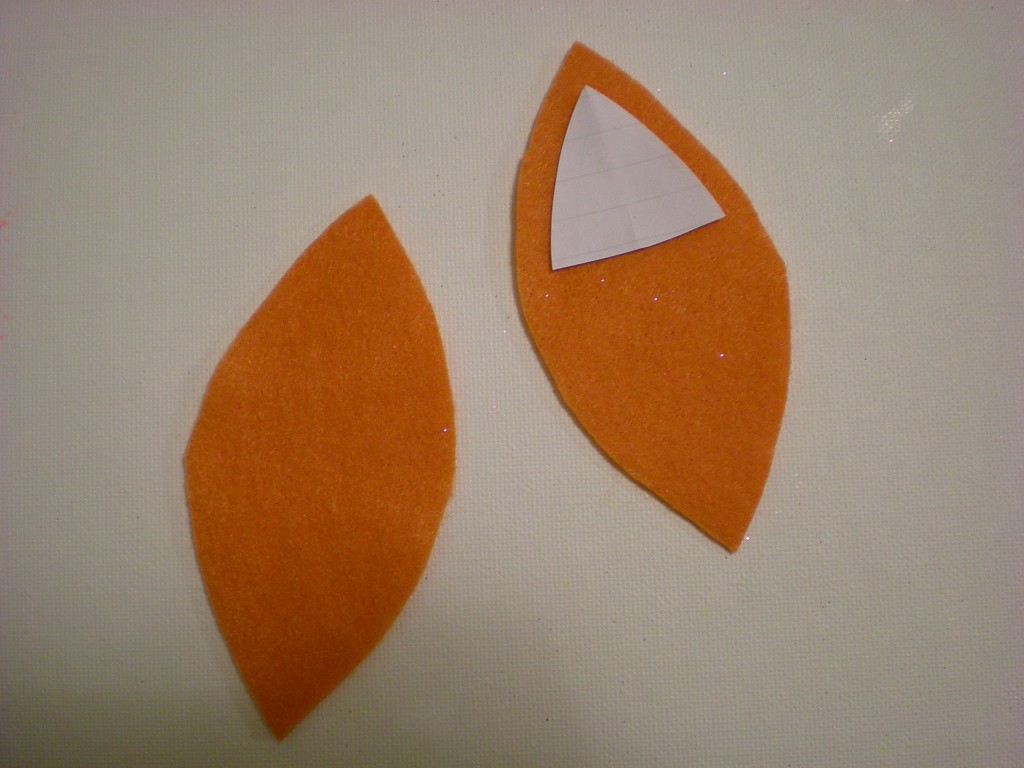
3. Mark and cut a second template, in the shape of a rounded triangle, about 1/4″ smaller on all sides than the original triangle in Step 1.

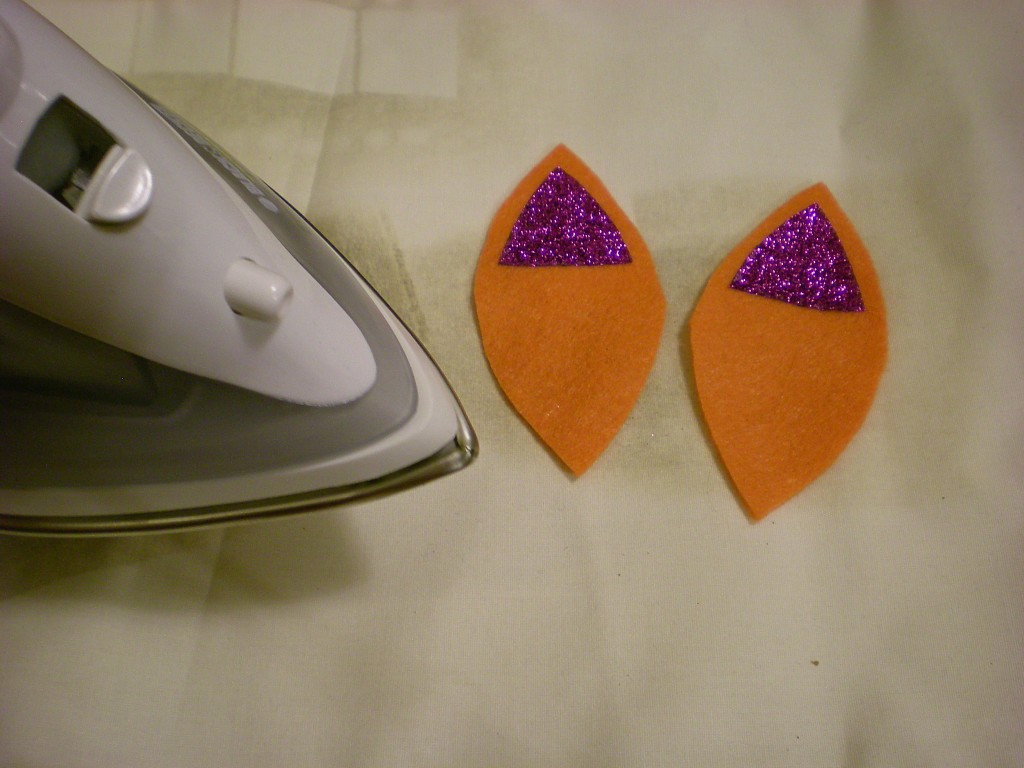
4. Select a color from the iron-on glitter sheets and trace the second template twice onto the shiny surface. Use the all-purpose scissors to cut them out. Peel away the shiny surface layer and arrange them on the felt ear pieces. Lay a pressing cloth over the ears, and press firmly with the iron for about 40 seconds. (Repeat if necessary to set the glitter transfer.)

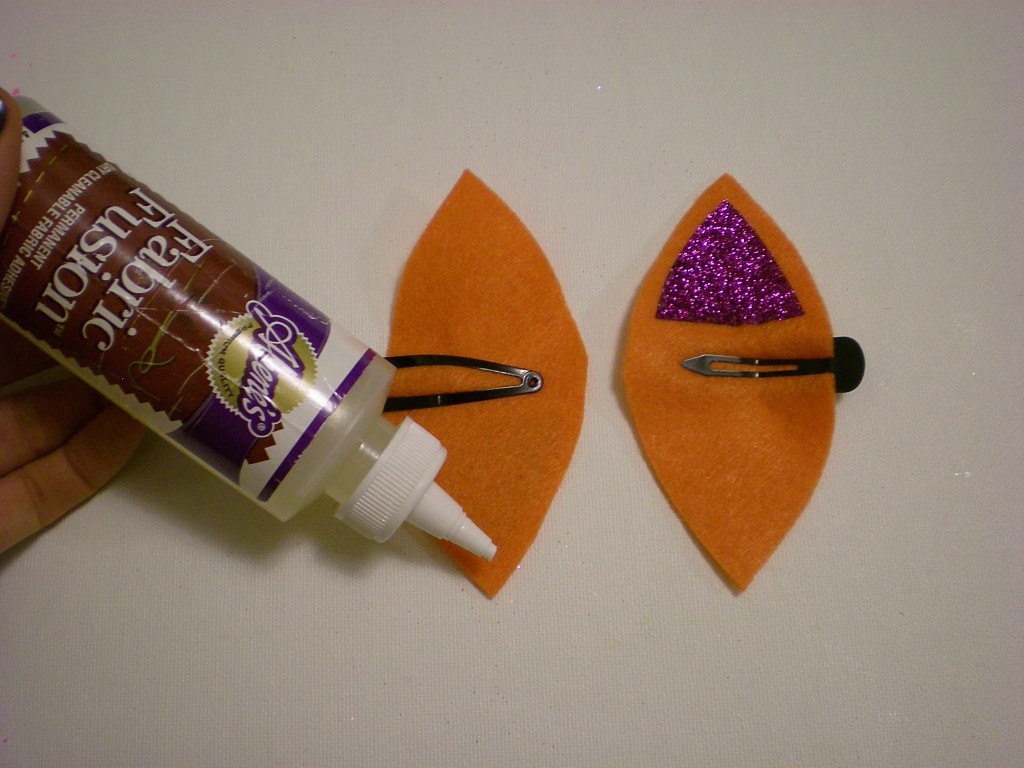
5. Clip the metal barrettes in the center, on each side of each felt ear piece, so that the top of the barrette corresponds to the wrong side of the ear piece and vice versa. Generously apply fabric glue around the edge of the wrong side of the ear piece. (The felt absorbs a lot of the glue, so don’t be stingy!)

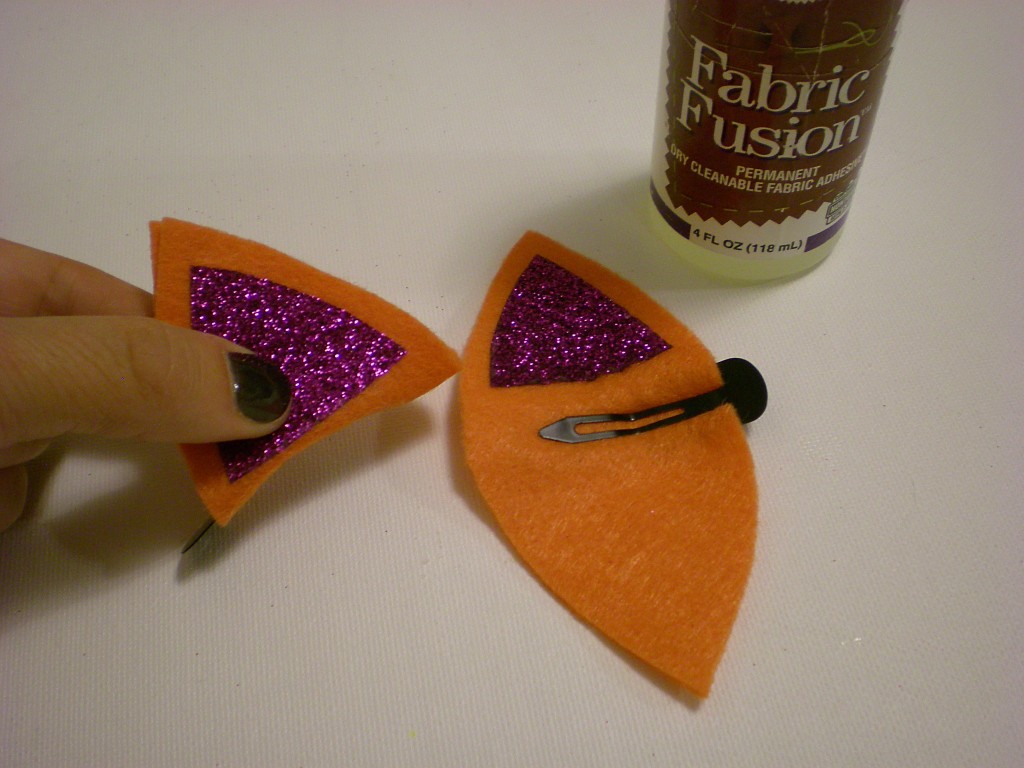
6. Fold the ear piece around the top of the barrette to seal the glue, and repeat on the second barrette.

7. Let dry. Optional: Clip the layers together with extra barrette clips while the glue dries!

8. Quick! Try them on before the actual cat who’s been helping you craft gets a little too interested and starts batting them off your workspace!

(Special thanks to Tulu the cat for “helping.”)


[ 10 Comments | Posted on June 28th, 2011 ]

Adventures

The Best of New York!

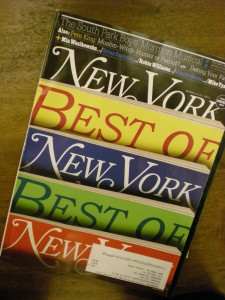
A few months ago (March, to be precise) I read New York magazine’s “Best of New York” issue and was surprised at how many pages and entries I flagged with post-its to explore!

The issue happened to coincide with Mr. Generation T’s birthday, and quite simply, he makes the top of my best of New York list! Mr. T is always behind the scenes, supporting all the work that goes into the publications, posts, products, and patterns that keep Generation T whirring, clinking, and humming along. And since his birthday fell on a Monday, and Monday is a hard day to celebrate anything, I treated him to a surprise adventure throughout the city on the preceding Saturday. Whether you live in the city or planning a visit, I hope our escapades may inspire you!

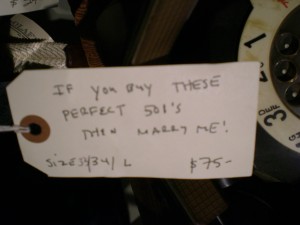
Following an “itinerary” I mapped out, based on many of the items I flagged in NY mag, we wound our way through different neighborhoods in Brooklyn, then hopped the subway for Manhattan. First up: Olaf’s, a men’s vintage boutique and the brother store to one of my fave vintage shopping spots (Olive’s Very Vintage) in Carroll Gardens. We found this charming tag hanging among the Levi 501s. And despite our distress over the conclusion of the HBO series Big Love, I decided I am not ready for sister wives–so Mr. T did not try them on.
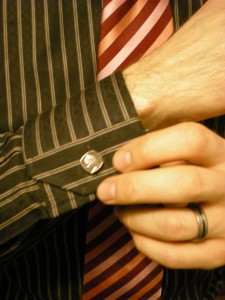
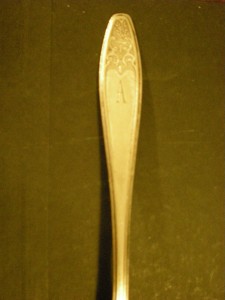
I did, however, under the guise of buying my sister a birthday gift (Ariana, close your eyes!!), manage to secretly buy a pair of vintage cuff links he had his eye on. And now that the cuff links have been gifted (and worn!), I can share them here, along with the engraved spoon I snagged for my sis:
Since we had a late start, we stopped for a snack at the local health food store before walking to Gowanus to check out the Film Biz Prop Shop, newly minted in December. The concept is this: Movies and TV and Broadway shows come and go–but where are all the props and set dressings laid to rest? With a frequently rotating stock, you’ll find all sorts of oddities, some categorized and sorted alphabetically in boxes along one wall with others carefully arranged into “rooms” on the sales floor. To start the alphabet, an impressive feat: Asia in a Box.
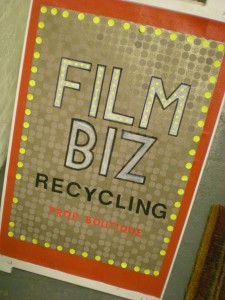
Granted, it was a rather large bin as opposed to a small box. When we got to the “C”s there were Creepy Clowns in a Box, Chopsticks in a Box, Cosmetics in a Box, out-of-alphabetical-order Drugs in a Box (filled with Romeo-and-Juliet-style tincture bottles), and Chalk and Erasers in a Box…not a bad spread.
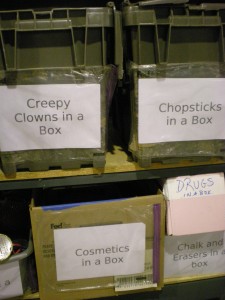
That shelf was topped only by the box of Fake iPod Speaker Docks filed under “F” — for all of your music-free needs! And yes, we checked. The box was fully stocked. With fake iPod speaker docks.

I was quite taken with the child-size model forms and the hand-blown glass sculptural pieces from Julie Taymor’s production of The Tempest. And more than a few vintage game boards that I thought would look fabulous on our walls (would-be purchases overruled by the birthday boy).
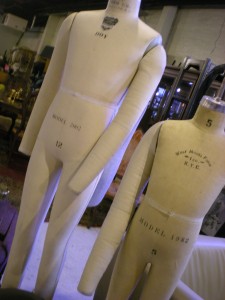
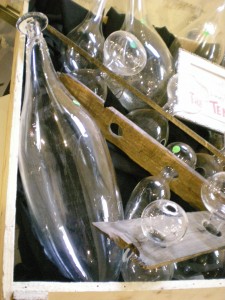
There were piles of throw pillows, layers of carpets, a pair of genie chairs, shelves of glassware, faux-glass paneling…

…racks of fabric, curtains, furniture. And shelves of dead electronics, under a sign that read “All Office Supplies FREE: Take as Much as Your Can.” Film Biz founder Eva Radke is definitely living in a crafter’s paradise!

Mr. T picked out “Porgy and Bess” record for $1.00…

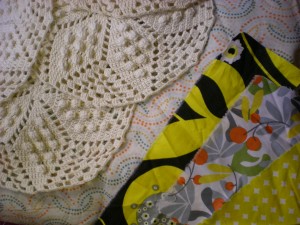
And I went for a swath of fabric (enough yardage for a new summer dress!), a handful of crocheted cotton doilies for some new T-shirt inspired masterpieces, and a few colorful scraps thrown in for free!
We could have stayed at the prop shop all day, but we had miles to go yet! Next up, we hiked back to the Brooklyn Heights neighborhood to another new outpost, whimsically called Goose Barnacle (which, btw, is a filter-feeding crustacean, not to be confused with a Barnacle Goose). We traipsed down Atlantic Avenue, taking notes for future expeditions, until we found the well-curated little man cave. I spied some verrry beautiful necklaces there and we liked the vintage glasses frames, but the clothing was a little too prepster for Mr. T’s taste. Levitra is used to treat erectile dysfunction. The research company revealed that its individual effectiveness is higher than that of the first representatives of PDE-5 blockers. Side effects are less pronounced. If the correct diagnosis of the causes of erectile dysfunction was carried out, Levitra will be effective in establishing indications for its purpose (in the complex of drugs).
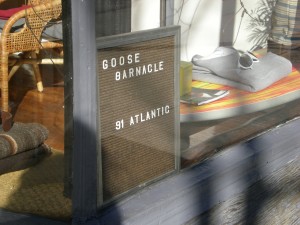
The time was ticking as we hiked all the way from Brooklyn Heights to Dumbo to feast our senses on the next destination, a gifty shop also catering to the gentlemen, Modern Anthology. (But not without a stop at the Brooklyn Ice Cream Factory to pool our pocket change and share a single scoop of chocolate chocolate chip in a sugar cone while people-watching on a bench on the pier. Three wedding parties went by in the duration of that single cone!) At Modern Anthology, we navigated our way through screenprinted monogram pillows, giant letters from old signage (including an oversize letter “T” that I thought would look fabulous in the Generation T workshop were it not for the price tag attached to it!), lamps constructed from rewired Tonka trucks, handmade belts, carpenter’s workbench, framed insects, art prints, and a coffee table propped up on gun stocks. Mr. T and I tried on beautiful handmade hats that we couldn’t afford and took totally creepy/cool pictures of ourselves in the mirror (with hot vintage pinup girls in the background!).

Then we excused ourselves once again, bound for our next destination…but not before stopping to admire this colorful yarn-bombed bicycle on our way to the subway! Meanwhile, the sun was getting lower in the sky and our tummies were grumbling.

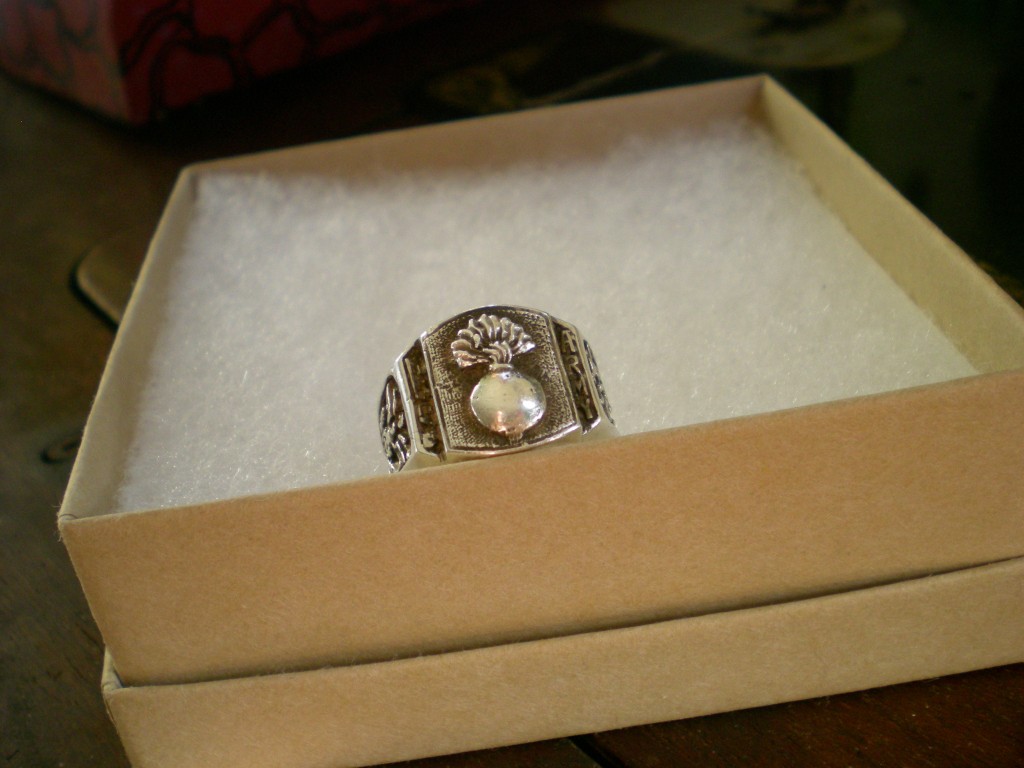
We hopped a Manhattan-bound subway to Palmer Trading Company where we found ourselves both shocked and rather in awe of a handmade leather wallet complete with the cow’s branding number burned into the front flap. The selection of vintage rings was the most fascinating to us–and Mr. T picked out one for his birthday treat: an old army ring with a design that arguably looked simultaneously like a bomb exploding, a sacred heart, and a radish. Considering the provenance of the ring, we’ll go with the first interpretation, but I like rooting for the underdogs. What can I say, where Mr. T sees destruction, I see growth (yes, I’m the author the radish interpretation).
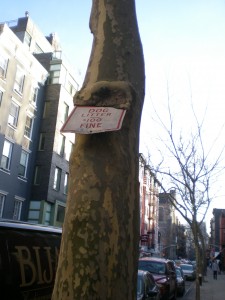
And finally, time to head to our dinner destination. (We skipped one other stop, Korin, because unbeknownst to me, Mr. T, who loves to cook, had already visited and has all our fancy chef knives sharpened there.) As we walked to dinner, we came across a curiously hungry tree — it was so hungry, it appeared to be devouring a street sign. Nom-nom-nom!
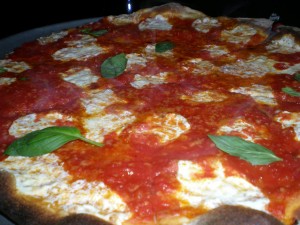
We enjoyed an absolutely delicious dinner at Rubirosa on Mulberry Street, feasting on pizza and handmade ravioli.
We stumbled just a bit farther south on Mulberry to have some custom cocktails stirred up by one of the mixologists at the well-hidden “speakeasy,” The Mulberry Project. There is no standard menu, but the chalkboard at the end of the bar announces the fresh fruits, vegetables, and herbs that are available as ingredients in your bespoke cocktail (check out some of the options, below!). I gave the bartender an open-ended order: Something that includes fresh ginger, please.

My cocktail was delivered with the promise that, “This drink will give you a night you’ll never forget, but won’t call you back ever again.” The dim lighting doesn’t quite do them justice, but suffice it to say that they were gorgeous and delicious.

Mine was a fresh-ginger infused watermelon sour with the “sour” flavor compliments of fresh pomelo and white rum acting as the alcoholic agent. I never would have ordinarily ordered a watermelon drink, so it was a refreshing treat! Mr. T’s challenge was for something herbaceous (he’s been cooking with a lot with rosemary lately) blended with bourbon rather than vodka. Our mixologist went with a savory sipper powered with Maker’s Mark. We couldn’t resist putting our mixologist on the spot once more with a chocolate challenge. First, a chocolate cocktail that wasn’t too sweet–he answered with a shaved bitter chocolate mandarin whisky drink that he “churched up” with a splash of Grand Marnier. Then, another chocolate infusion this time flavored with anise and more whisky!

Pleasantly buzzed and exhausted after our adventure, Mr. T and I caught the train back to the neighborhood.

[ 2 Comments | Posted on June 27th, 2011 ]

Events

Chicago, IL @ Pumping Station: One

It is officially summer (read: T-shirt season!), so nothing could make us happier than to hear about all the summertime T-shirt snipping events in the pipeline all over the country. Here’s one that’s happening in Chicago this Sunday June 26, 2011 from noon to 5 pm–it’s Pumping Station: One’s “Summer T-shirt Hackathon”! Participants are invited to bring old T-shirts (or new ones–as long as they’re not getting used in their current form, they’re fair game!) and learn how to transform them into a stuffed animal, a throw pillow, or a new piece for the wardrobe. No need to fear sewing, since there are plenty of no-sew projects to tackle, too. The event is being hosted at Pumping Station: One, a nonprofit hacker space populated by a community of folks dedicated to exploring the intersection of technology, art, science, and culture, and in cooperation with Learnapalooza.

Though not an official Generation T-sponsored event, we get so giddy when folks start throwing public parties to cut up their T-shirts that we wanted to share it with the larger T-shirt community — and hey, it appears that copies of Generation T: Beyond Fashion will be on hand for reference. Let us know if you go!

Summer T-shirt Hackathon
Pumping Station: One
3354 N. Elston
*
Chicago, IL 60618

*Enter the Big Black Door on the south side of the street. If that door is locked, ring the doorbell. Once inside, walk into the lobby area, turn right and head for the hallway. PS:One is located at the first red door on the right, look for the PS:One sticker!

[ 1 Comment ]

Events

Raleigh, NC @ Maker Faire NC

You know how much we love Maker Faires, so though Megan Nicolay is only able to be there in spirit for this one, Generation T will be there in the flesh…err, paper pulp…err, the crafty minds and nimble fingers of crafty readers Janet Kennedy and Kelly Farrow. This Saturday (June 18, 2011) Janet and Kelly and their team of intrepid recyclers will be using inspiration from Megan’s books, Generation T and Generation T: Beyond Fashion as they demonstrate how to take an ordinary T-shirt and re-purpose it into a T-shirt (or tank top, or pillow, or…) with style and flair! They’ll bring a box of tossed out T-shirts so that visitors may do their own “re-make & take” on the spot for $5. Proceeds of the creativity sale will benefit nonprofit organizations supported by 5 Bucks is Change. Most projects will be no-sew, but Kelly’s bringing her machine, so some light sewing will take place–brace yourselves!

If you’re in the area, please stop by the Tee Party to say hello to to Janet and Kelly and do some tee-cycling!–and pick up a free Generation T project card while you’re at it.

Maker Faire NC 2011
NC State Fairgrounds
Gov. Kerr Scott building
1025 Blue Ridge Blvd.
Raleigh, NC 27607

The event happens this Saturday June 18, 2011 from 10 am to 5 pm. Entry: Adults $4, Kids $2, Under 6 Free!
[ Comments Off on Raleigh, NC @ Maker Faire NC ]

Other Projects

I Love to Create: A DIY Necktie for Dad!

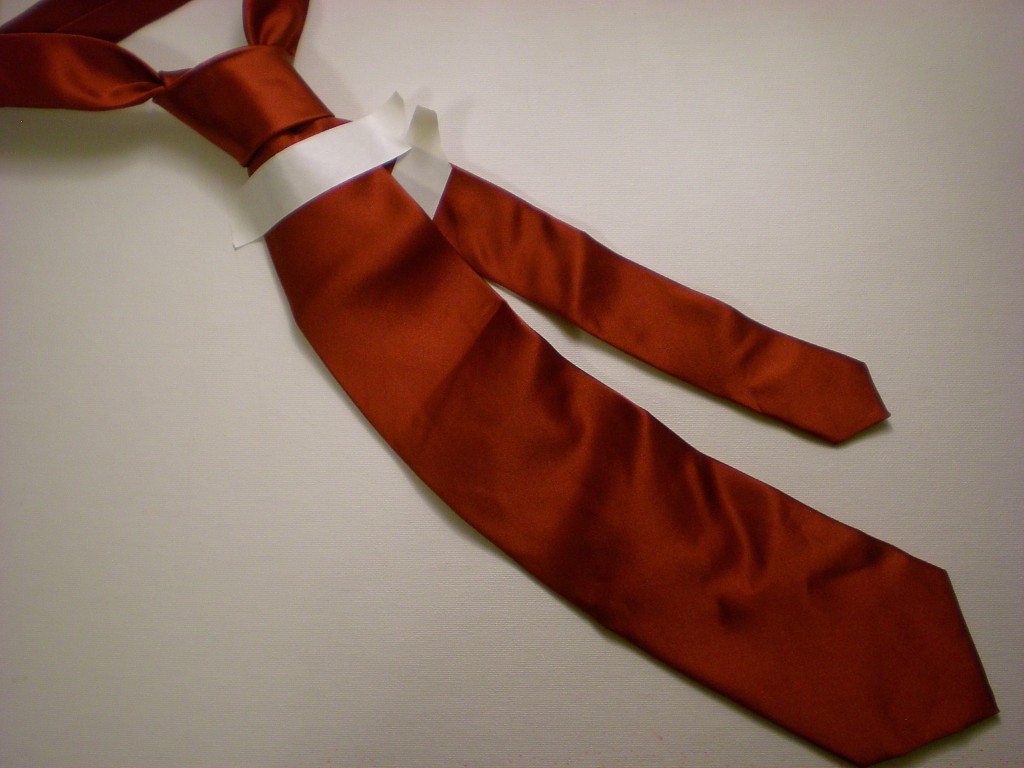
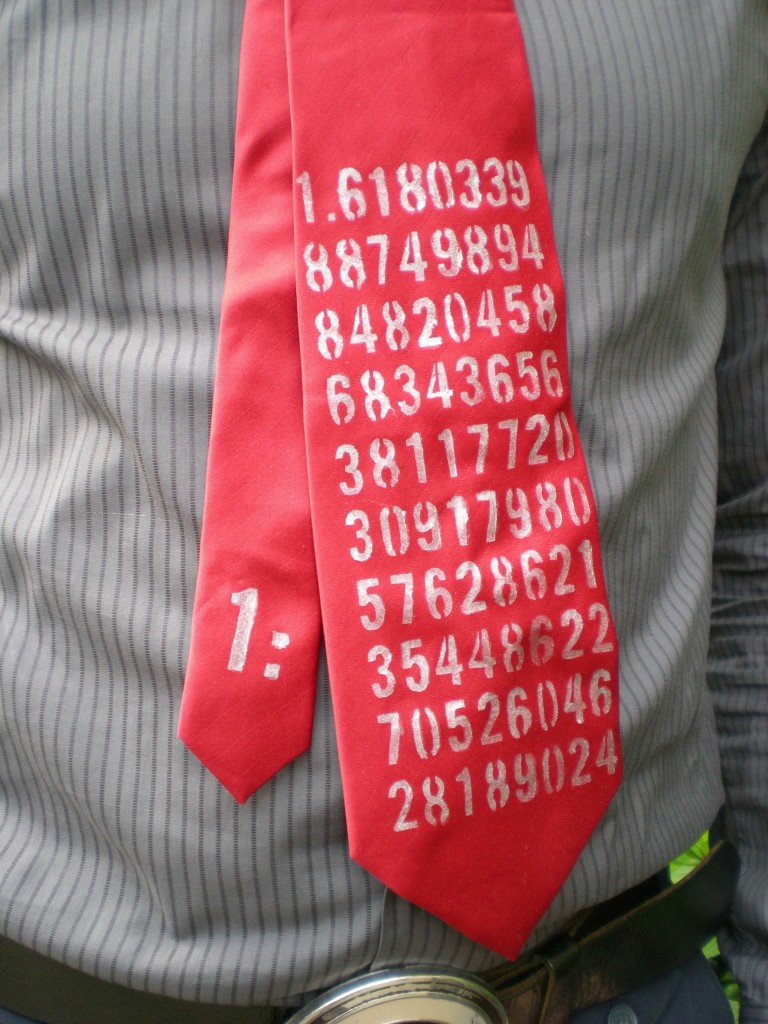
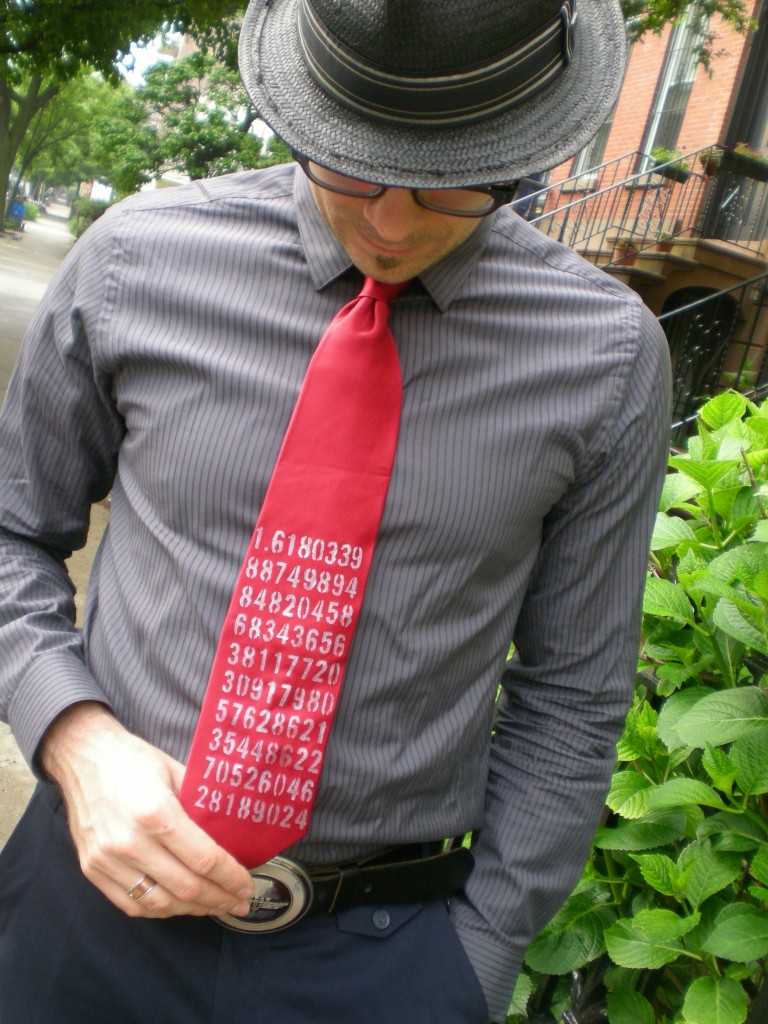
I know, I know — a tie can be the ultimate in clichéd gifts for dad. But hear me out: The problem isn’t with ties themselves, it’s boring ties.  Below is a technique for making a one-of-a-kind tie for that one-of-a-kind guy. Note: Lest there be any confusion, the photo below is not my dear ol’ dad, but my charming husband (“Mr. T”), who’s always a good sport when it comes to modeling my projects!

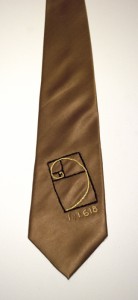
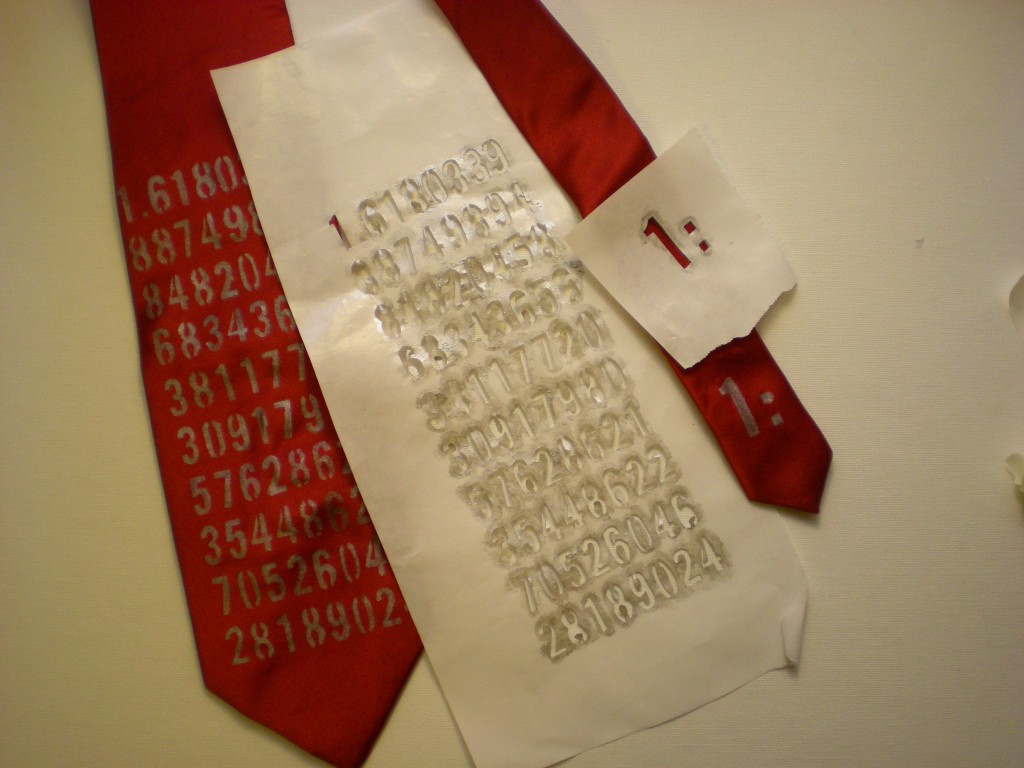
I have a history of making ties for my dad — not because he’s necessarily a tie-wearing kind of guy, but the school where he teaches has a dress code that states that all the guys have to wear a tie. It seems a little silly, given that he’s an art teacher and a tie dangling into a tray of photo developer or getting splattered with clay in the ceramics room is far from ideal, but he’s always embraced the tie with a great bit of humor and creativity. Though we couldn’t dredge up the handmade tie I gifted him when I was 7 (suffice it to say, I must have cut out the tie myself, too, because it was about 6″ wide and at least 6″ too short), I decorated it with felt pieces arranged into the shape of a smiley face. In high school, I was obsessed with going to the bead store, so I stitched some metal charms onto a black silk tie (above left). More recently, I embroidered the golden spiral inside a golden rectangle on the end of a tie (above right). But for my dad’s next tie, I’m using fabric paint. Here’s a project that a kid of any age can get into, and any dad will appreciate.

Materials:

-Plain necktie

-Image or pattern to turn into a stencil

-Freezer paper

-Pen or pencil

-Craft knife and cutting mat

-Artist’s tape

Tulip Fashion Graffiti Paint Taggers fabric paint

Round paintbrush (for stenciling)

Paint tray

Make it:

1. If you have the option, first tie the tie properly and mark the areas of fabric that will be most visible (it would be a shame to spend time on some delicate design only to have it hidden in the middle of the knot or under the collar). Otherwise, it’s wise to keep the design down on the widest part of the tie. (I marked my tie, but then decided to keep the design near the ends.)

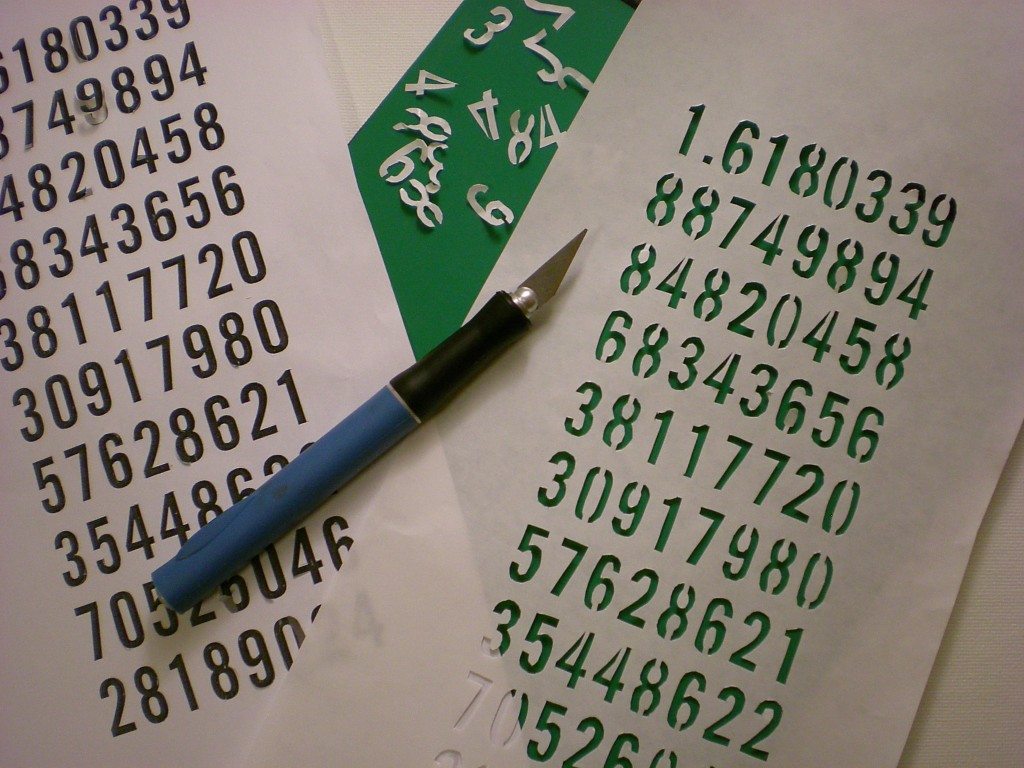
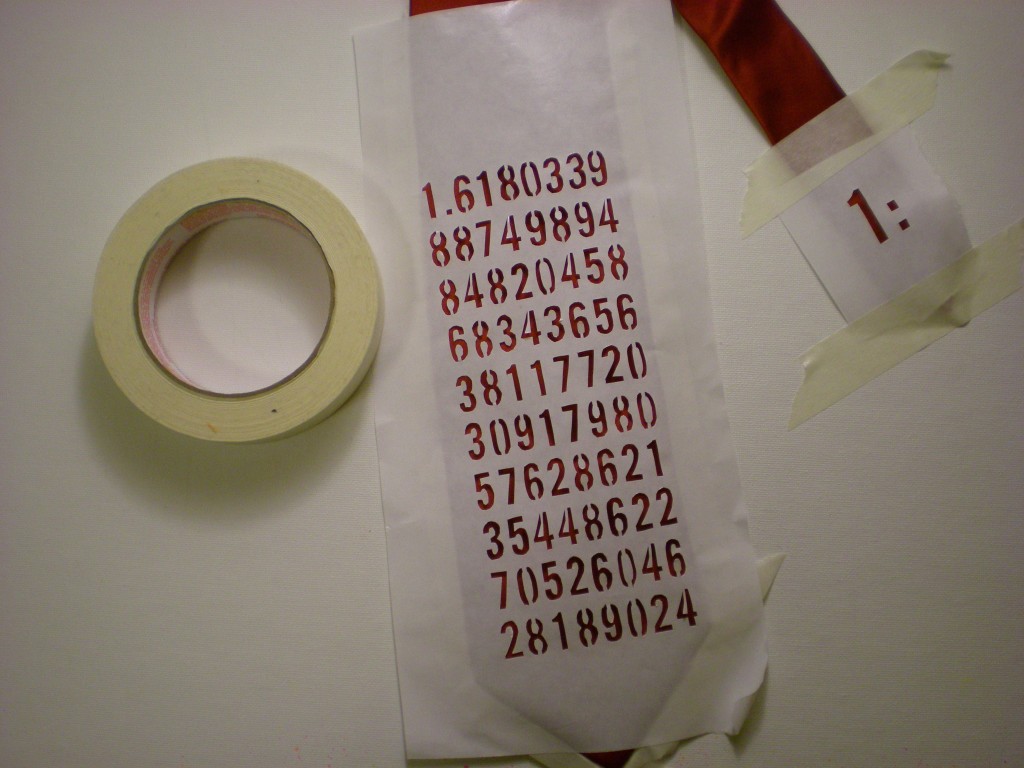
2. Choose your design and print it out. My dad has always been fascinated by the golden mean, a naturally existing ratio of approximately 1 to 1. 618 (see the embroidered tie above) that is used to describe the relationship of many living things found on earth (it’s in the  pattern of the seeds in a sunflower, the architecture  of the spiral chambers in a shell, the growth of leaves on a plant stem, the ratio of hand to elbow and head to torso, and so on…). My dad even designed the house I grew up in using this ratio as the model. Then layer a piece of freezer paper over the printout and trace it. If you use letters or numbers (like I did), make sure you add the appropriate vertical lines to the type treatment so that when it comes to cutting and painting, you don’t end up with an “O” or a zero that’s missing its center. Use the craft knife to carefully cut out the stencil. Note: At this point, yes, I fully recognize that “#1 Dad” would have been far easier, but hey, it’s all about personalization, and he happens to be my “#1 to 1.618033988749894848204586343656 Dad.”

4. Arrange the stencil over the tie and tape it in place to prevent shifting. (I taped the front and back to make sure it was secure.) Note: Artist’s tape should peel off well, but test a piece on the back of the tie to make sure it won’t damage the fabric.

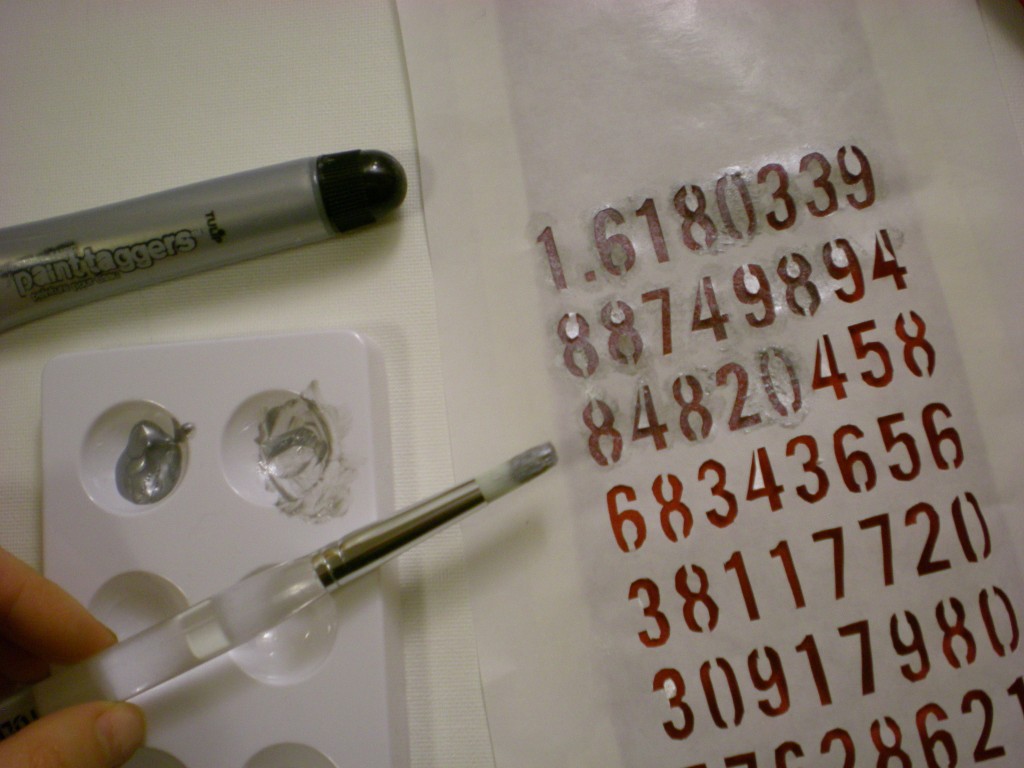
5. Adding very little paint at a time, dab the brush over the stencil. I picked a metallic silver paint, because I like the sheen and my dad can handle a little flair. To keep the paint from spreading underneath the edges of the stencil, hold the brush vertically so the bristles are perpendicular to the paint surface, and use a blotting motion.

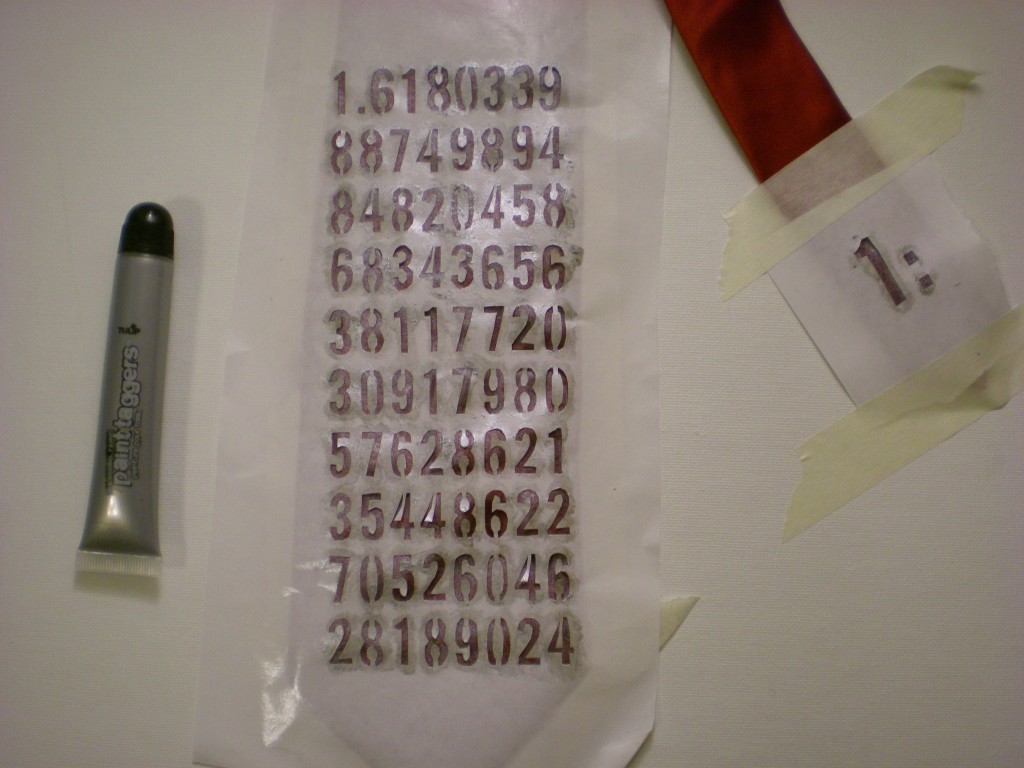
6. When you finish painting (don’t forget the short end of the tie — I decided to incorporate the first part of the golden ratio there, but you could also hide any semi-secret message there), let it dry.

7. When the paint has dried completely, carefully remove the tape and peel the stencil off the tie.

7. Now it’s time to gift it. (Or convince your husband that he has to try it on this morning before he goes to work so you can photograph it before you pack it up and ship it off in time for Father’s Day on June 19!)

Variations:

-For different pattern ideas, try any of the paint or sticker techniques in my 4 Ways to Spray post.

-Forget the stencils altogether and freehand a design with fabric paint.

-Forget the paints altogether and glue on felt appliqués!

-Bonus points if you make the tie out of T-shirts!


[ 14 Comments | Posted on May 24th, 2011 ]

More Fun

From Our Readers: Juno!

A tale of three sisters… Juno, Rosy, and Jasmine are three magnificent and creative sisters who I’ve known since my youthful days in New Hampshire. They recently played pivotal roles in a very special DIY project for Rosy, who got married last month in Paris. Here is a brief time line of the crafty wonderland, executed over an incredible number of modern social media platforms!

December 30, 2010 from Jasmine, via Twitter, via Skype: Megan, I just Skyped with Rosy and she showed me the T-shirts her friend Kit printed on that Juno will turn into a wedding dress for her.

My interest was piqued as I immediately tweeted back for more information! Eventually, I connected with Juno after she heard that I’d be in town to teach T-shirt workshops, when I can potentially catch a glimpse of the work in progress…

March 7, 2011 from Juno, via Facebook: How long will you be up here for this weekend? I’ve made Rosy a crazy art wedding dress with block prints by a friend of hers from your pattern—would love to cross paths with you and take a picture of you in it if the timing worked.

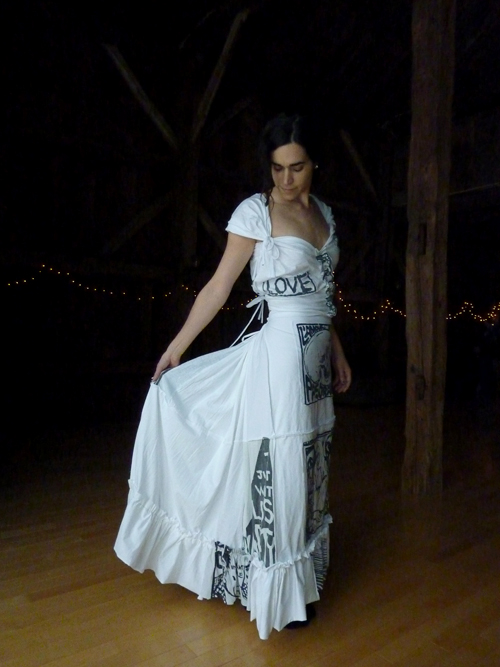
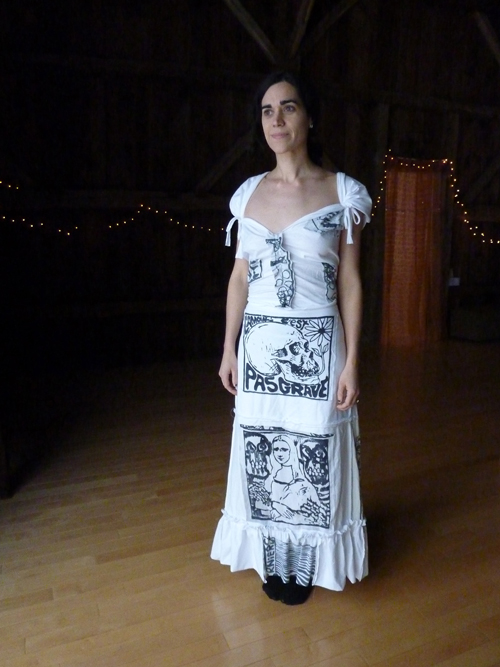
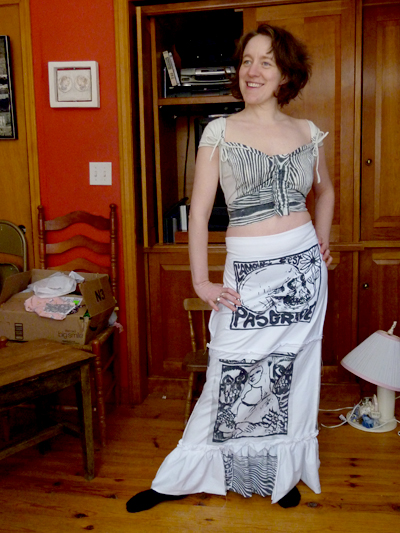
And Juno finished the gown (Tying the Knot, project #108 in Generation T; 108 Ways to Transform a T-shirt), and the timing worked, and I tried on the dress at the yoga barn before our yoga class, and we took some pictures! Then, we fast forward to after the wedding…

May 12, 2011 from Juno, via email: Sorry it’s taken me so long to get the wedding dress post up. The dress was fabulous—Rosy loved it and felt it was entirely her. The whole process made me excited to sew more and learn to make some easy clothes.

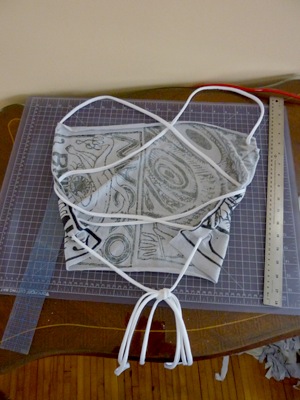
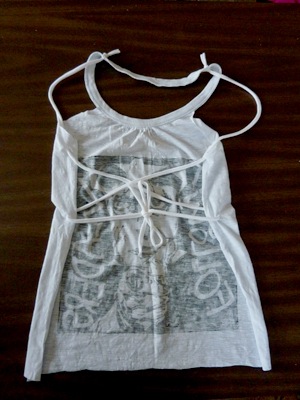
Oh, happy day! Now let’s take  look at that process. Here are some of Juno’s alternate versions for the bodice: the All Strung Out tank top, project #88 plus a combination of All Strung Out and the Shoulder Chic tank top, project #15. For more pictures of the whole process of acquiring the hand-printed shirts, cutting and sewing up the skirt, and the whole grand affair, visit Juno’s blog, Try This at Home

Here are some pictures of Jasmine trying on the dress and the different dress tops! The top she’s wearing below right is the top that is paired with the wedding skirt in the book, but in a different print than the one I tried on — Juno really had all her bases covered!

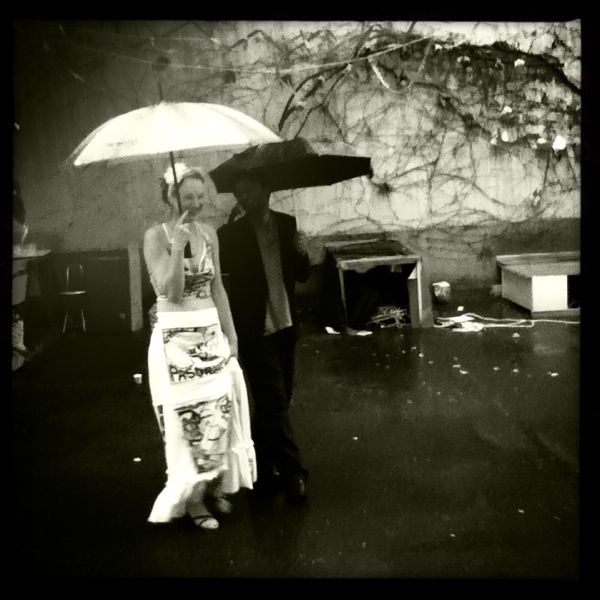
And here, at last, are some totally dreamy photos of the beautiful bride, Rosy! She chose, in the end, to wear the All Strung Out tank top as the top of her gown. Doesn’t she look stunning?

Congratulations to all involved in the beautiful project! (And thanks to Juno, for letting me play a minor role in it all!)

All photos courtesy of Juno Lamb at Try This at Home.

[ 3 Comments | Posted on May 13th, 2011 ]

More Fun

Generation T: The Next Generation

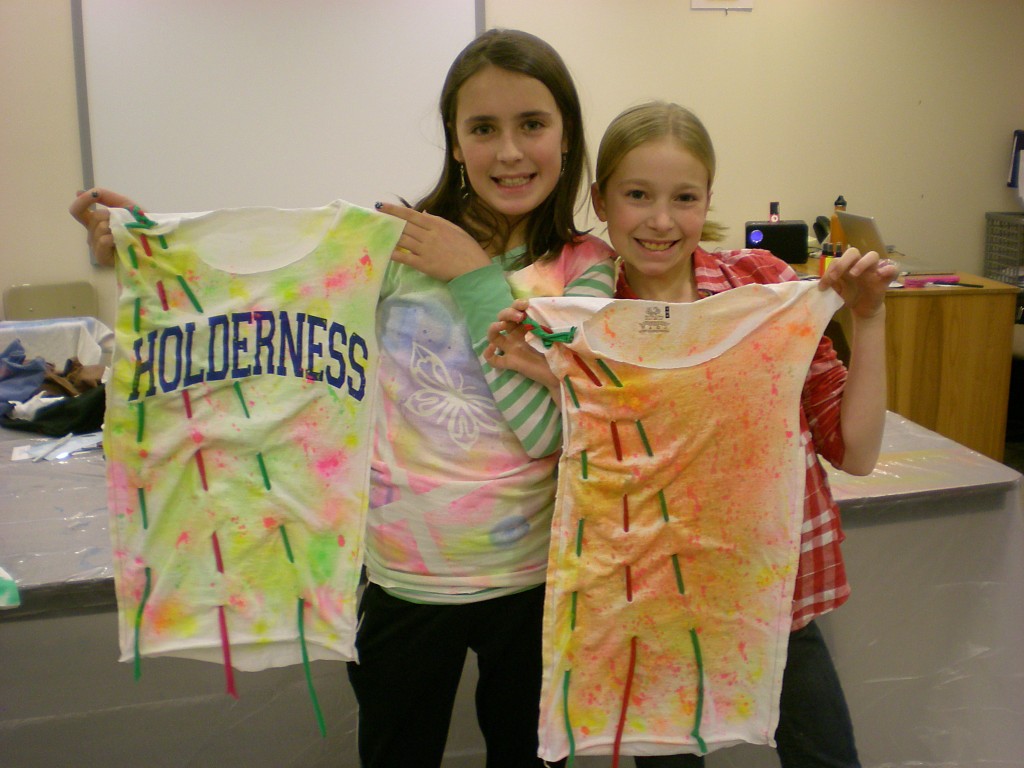
With Mother’s Day yesterday, and Father’s Day just around the corner, today’s post is inspired by those who inspire the next generation of DIYers. Here are some photos from my recent workshops at Holderness School–with my late afternoon crew. Even though Holderness is a high school, the school serves a much wider community in the faculty families that live on and near campus. After the Artward Bound Workshops were done for the afternoon, my late afternoon kids started to arrive (after they got out of middle, elementary, or preschool!).

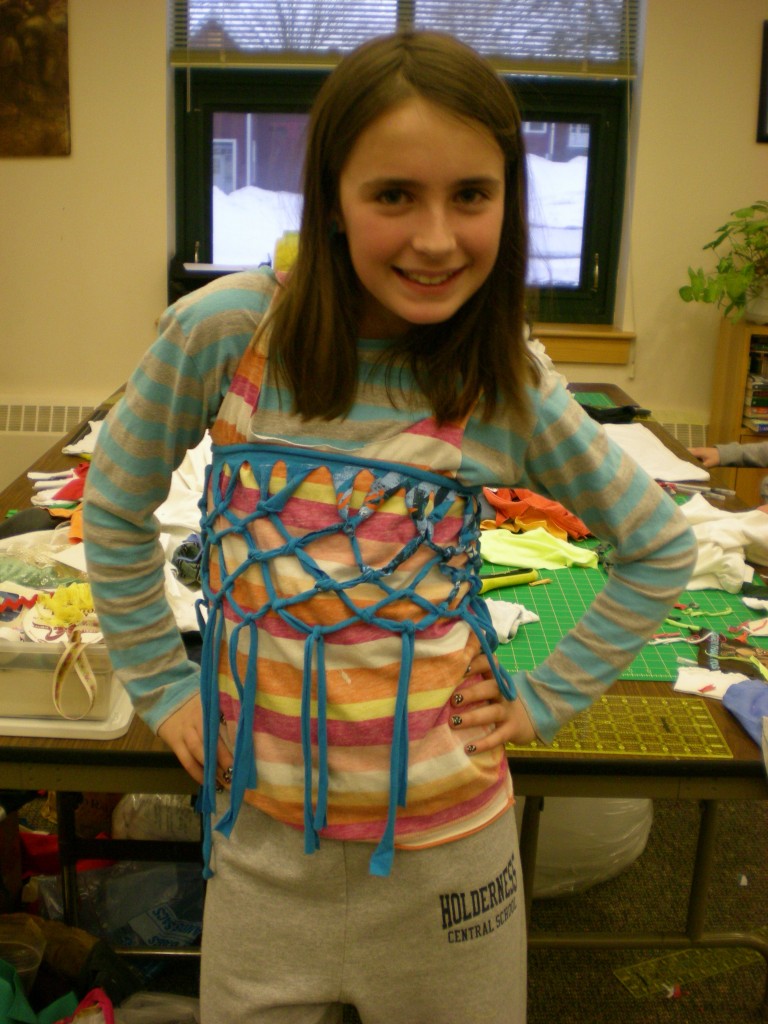
With dad’s encouragement, superstar DIYer Ella showed up almost every afternoon. This particular project is Knotty by Nature, project #44 from Generation T. And, rather than the traditional tube top underneath, she opted to snip a tank top from a colorful striped shirt she found in the donations. She also notes, “You can wear the knotted top around your waist over jeans or leggings!”

Mama Nikki decked out Molly and Mason in their superhero capes and boas (Mighty My Tee, project #55 and Tic Tac Boa, project #115, both from Generation T: Beyond Fashion) which they wore in the student fashion show (and, I’m told, all around the house!). Note: Molly’s skirt is also a T-shirt refashion — an outgrown dress whose top was cut off to make way for a T-shirt waistband!

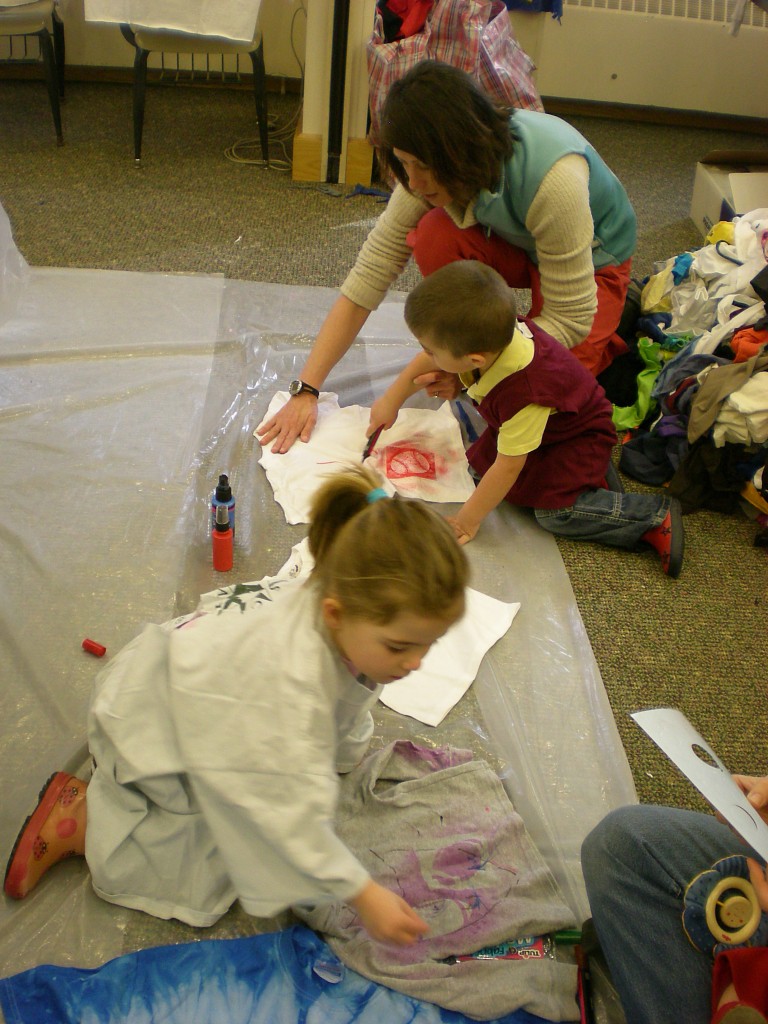
Claire and Michael (who are a little young yet to be handling the sharp scissors) donned T-shirt smocks and, with mom’s help, used fabric markers and fabric spray paints to personalize T-shirts that welcomed their dad back from his 10-day camping trip.

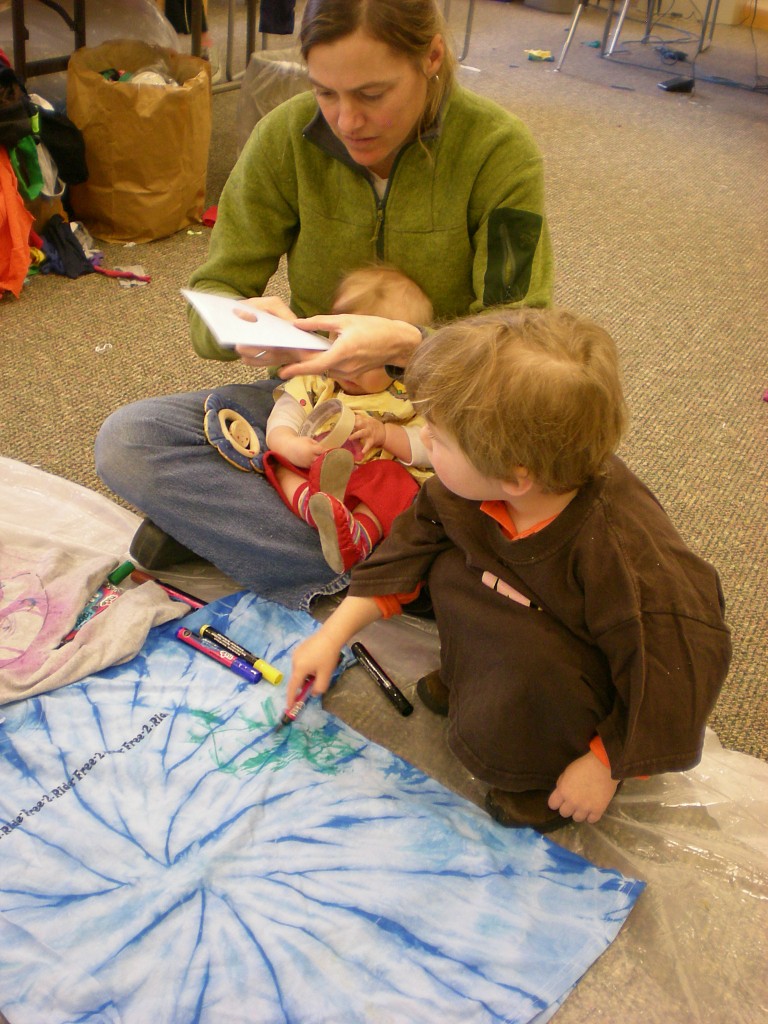
Mama Lindley helped Lindon apply stencils for fabric painting while baby Stella looked on and murmured noises of encouragement.

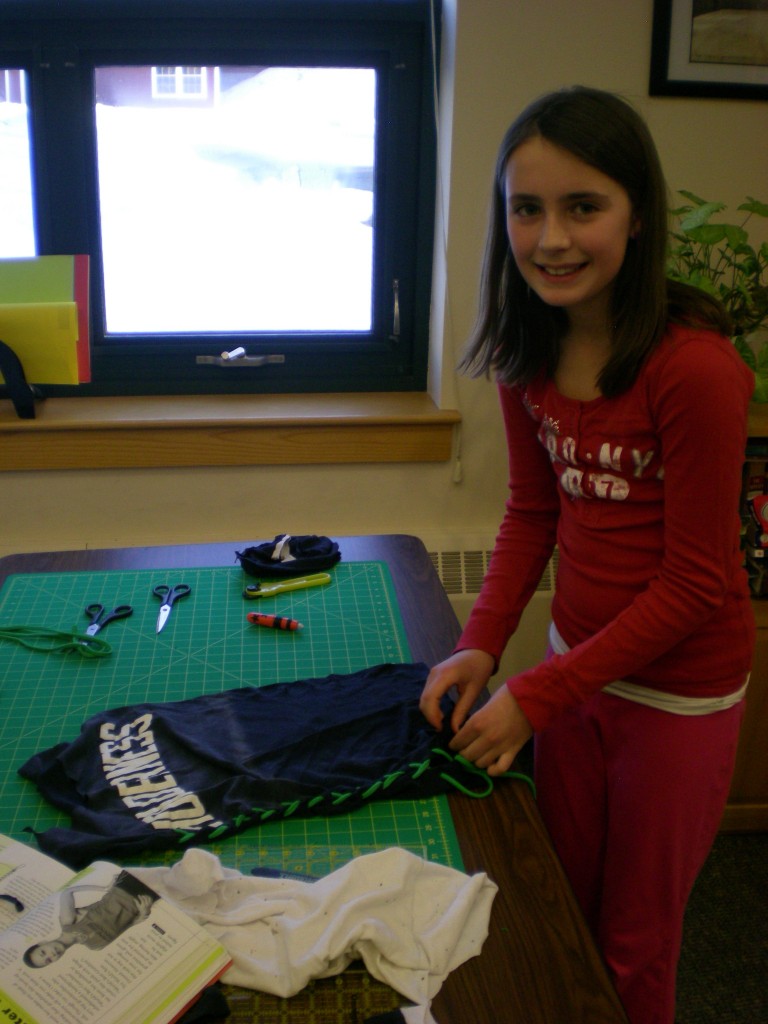
Ella was back for more, following the instructions to make Outer Lace, project #16 in Generation T.

The next day, she brought her pal Chase so they could make matching spray painted tank tops (Sew Easy, project #26, in Generation T).

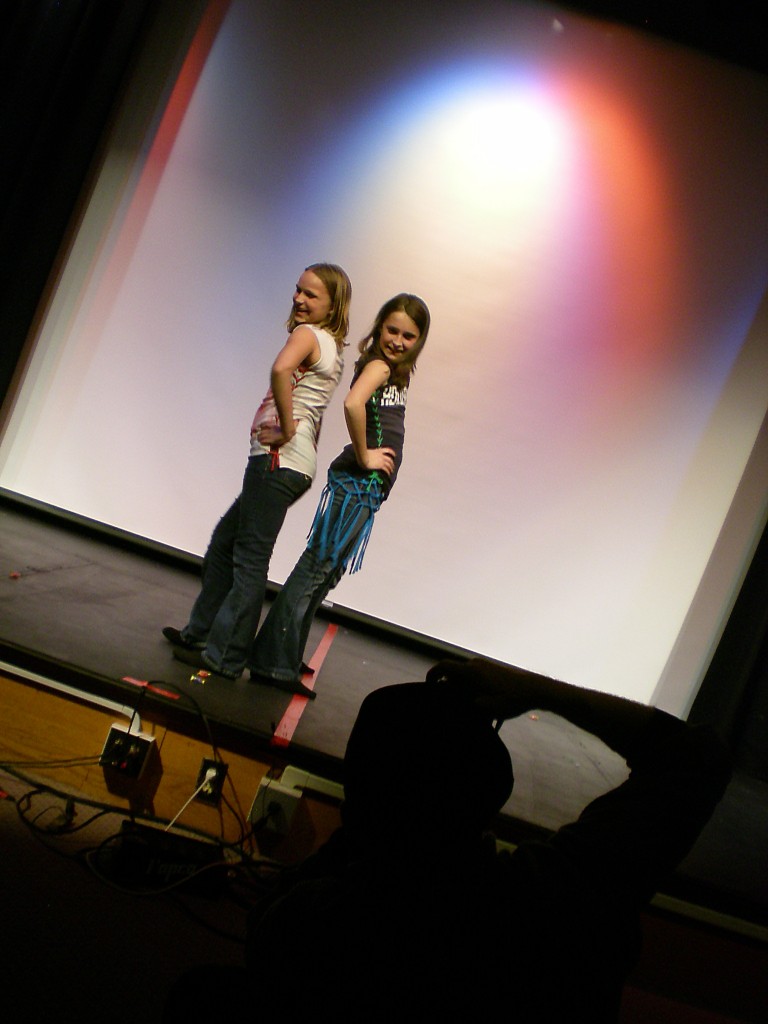
And Phoebe and Ella appeared together in the fashion show with in their Outer Lace tank tops (and, note the Knotty by Nature top worn as a sassy skirt!).

So here’s to all the parents out there who inspire and encourage kids to pick up scissors or markers or pencils — or any other creative instrument — and DIY. My own parents are two of the craftiest, handiest, creative people I know, and I wouldn’t be here writing this post today if it weren’t for them!

[ Comments Off on Generation T: The Next Generation | Posted on May 9th, 2011 ]

T-shirt Projects

I Love to Create: Spray 4 Ways!

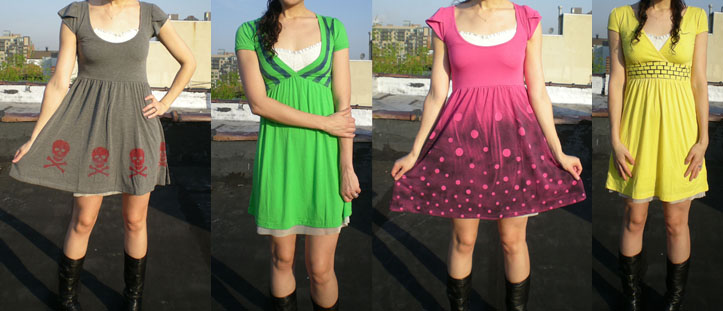
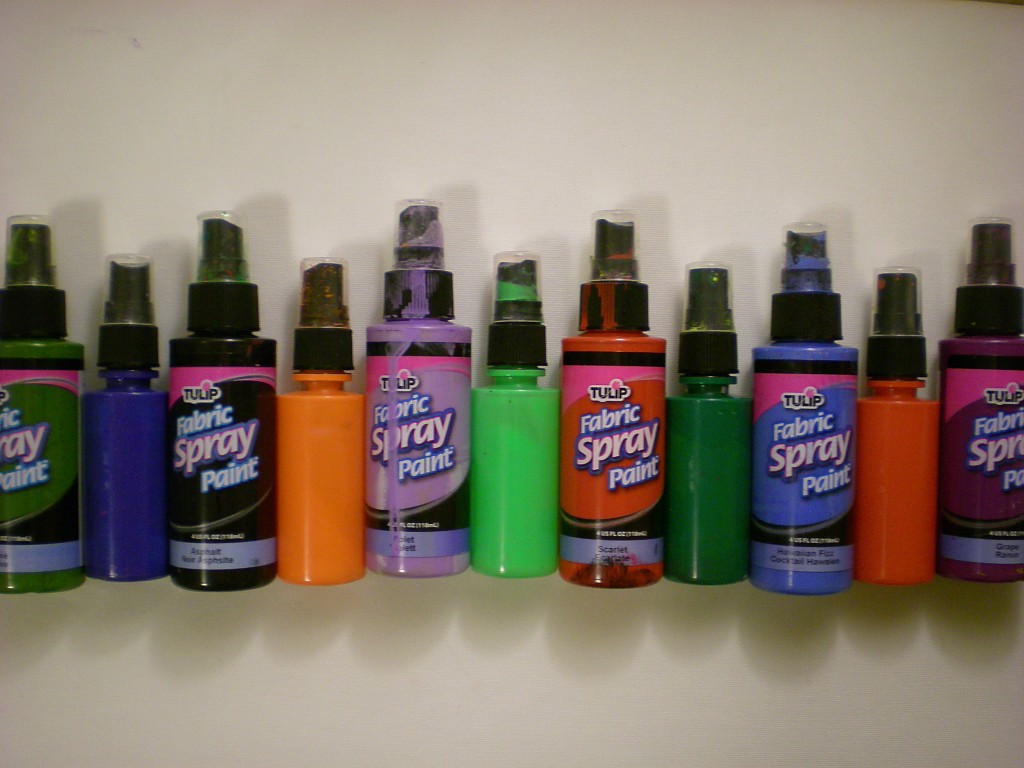
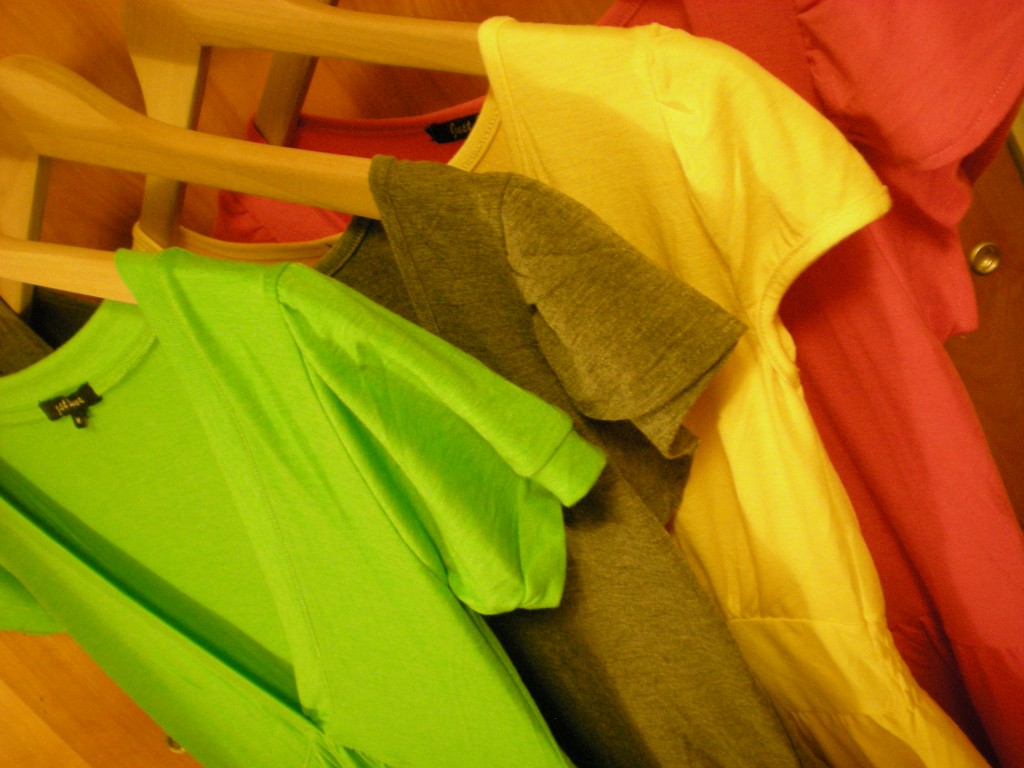
As some of you know, I’ve been just a little bit obsessed with my spray paints lately. And it’s because they’re the perfect quickie spiff-up and surface embellish for T-shirts, pillows, dresses–or any other fabric item you want to spray! Since it’s spring, though, I grabbed up some plain cotton dresses to spray. Here are four different ways to pair those fabric spray paints with templates made from materials around the house including masking tape, stationery stickers, and freezer paper. Pull your spray paints from your holsters!

Once your paints are assembled, select your surfaces (in all different colors–though light colors will take the paint best).

Then introduce any number of “secret weapons from around the house” (items that can be used as templates or stencils to mask parts of the fabric, e.g. freezer paper, permanent marker, a craft knife; map dot stickers; rectangle sticker labels; masking tape) in each of the individual projects below!

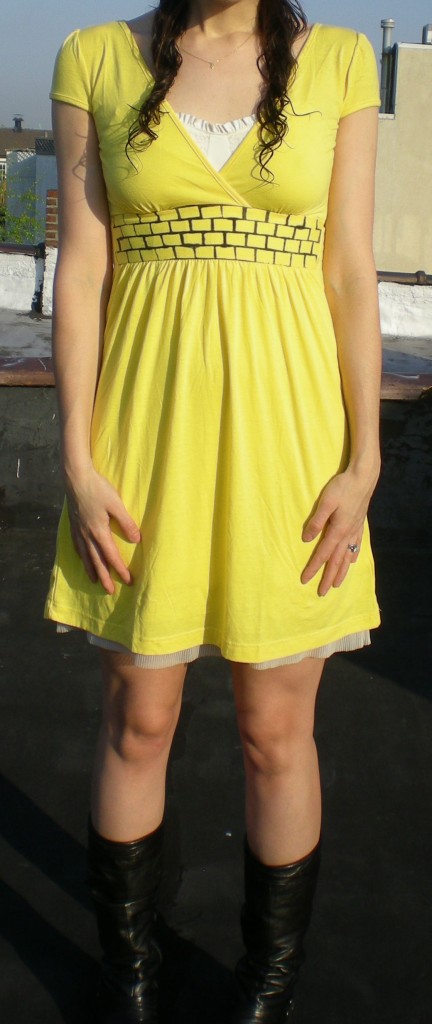
1. Yellow Brick Road

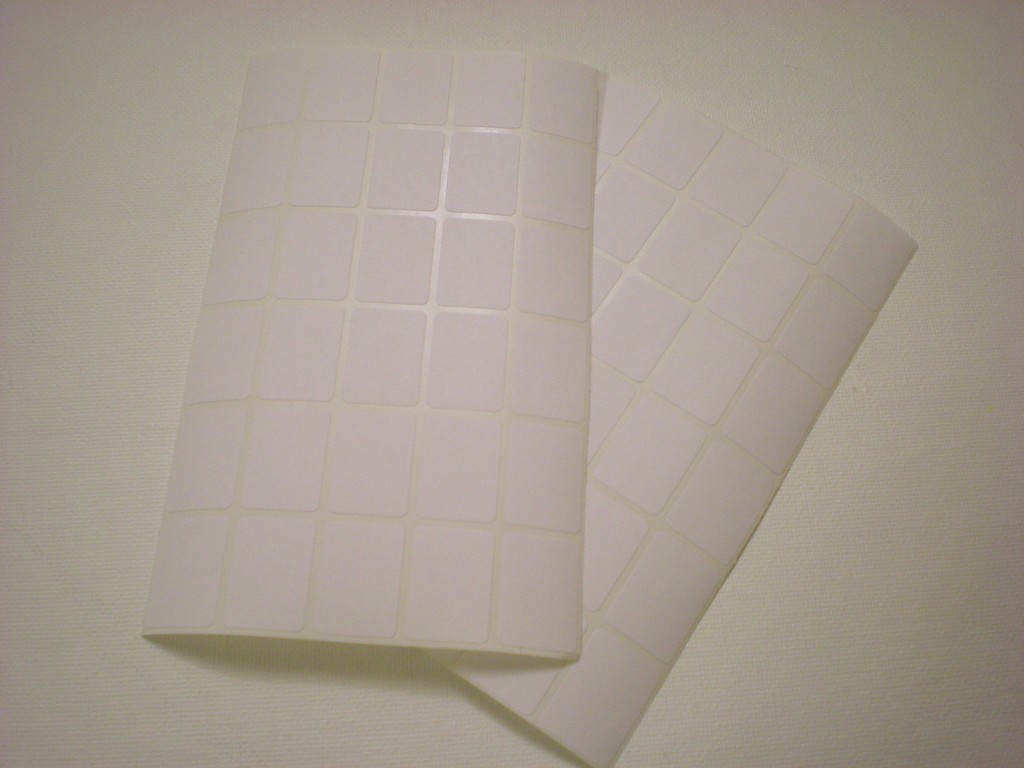
Secret weapon from around the house: Rectangle sticker labels

Originally, my plan was to stick on these labels in a checkerboard pattern to give the dress the feel of a racing flag. But the stickers so easily lent themselves to being bricks, that I immediately thought of the yellow brick road in the Land of Oz.

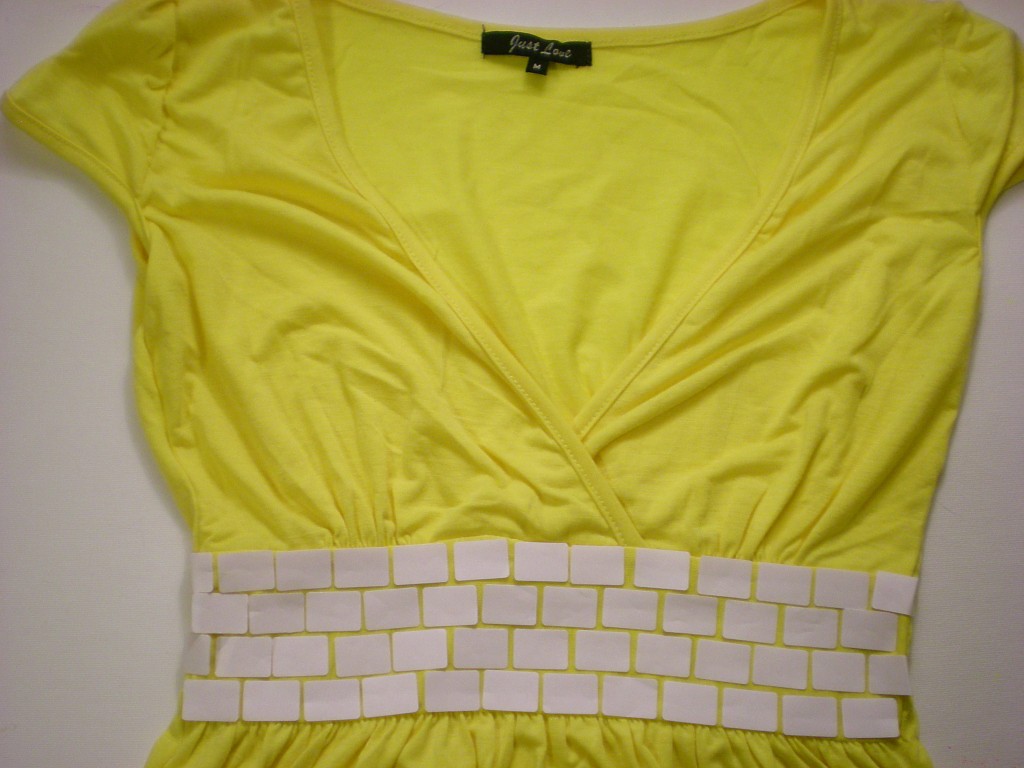
I chose to follow the yellow brick road along the waistband, but you could lay your bricks around the hem of the dress, up and over the shoulder, or a circle them all over the dress. I laid one row of bricks and then stuck down a second row, offsetting the first brick in the second row so that the rest of the stickers in that row would be slightly staggered to create the brick pattern.

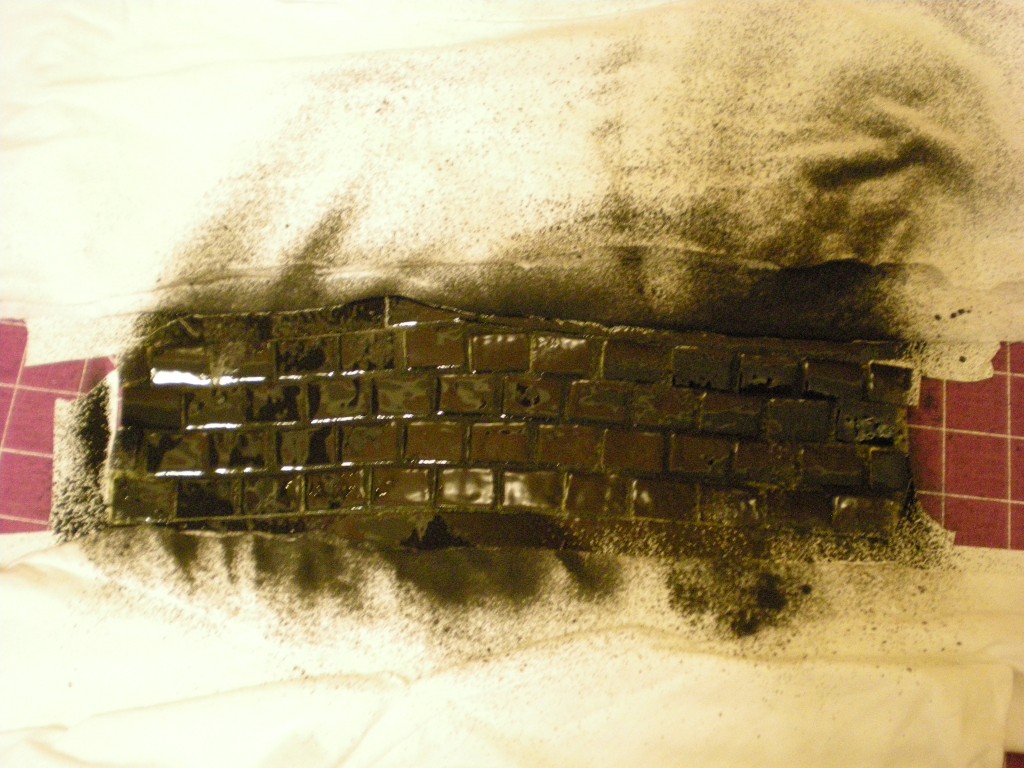
Mask the rest of the garment before spraying (I used T-shirt scraps and paper from my recycling bin) so that you can contain the paint to only the area you want to color. I used black spray paint to make the yellow bricks really pop!

Let the paint dry completely before you peel off the brick stickers and try it on!

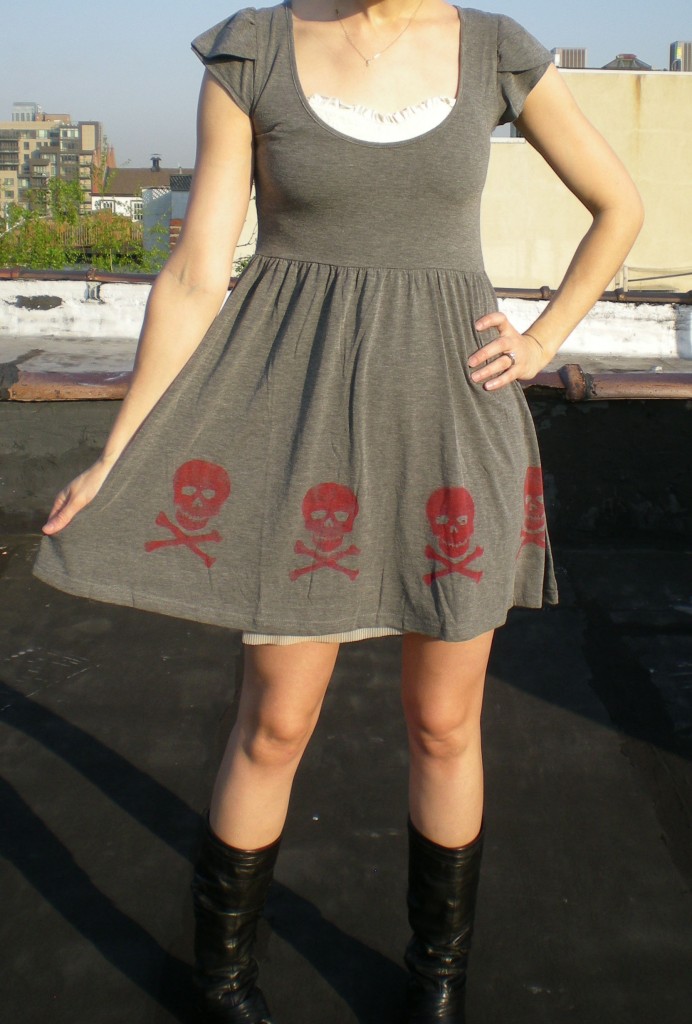
2. Skull & Bones

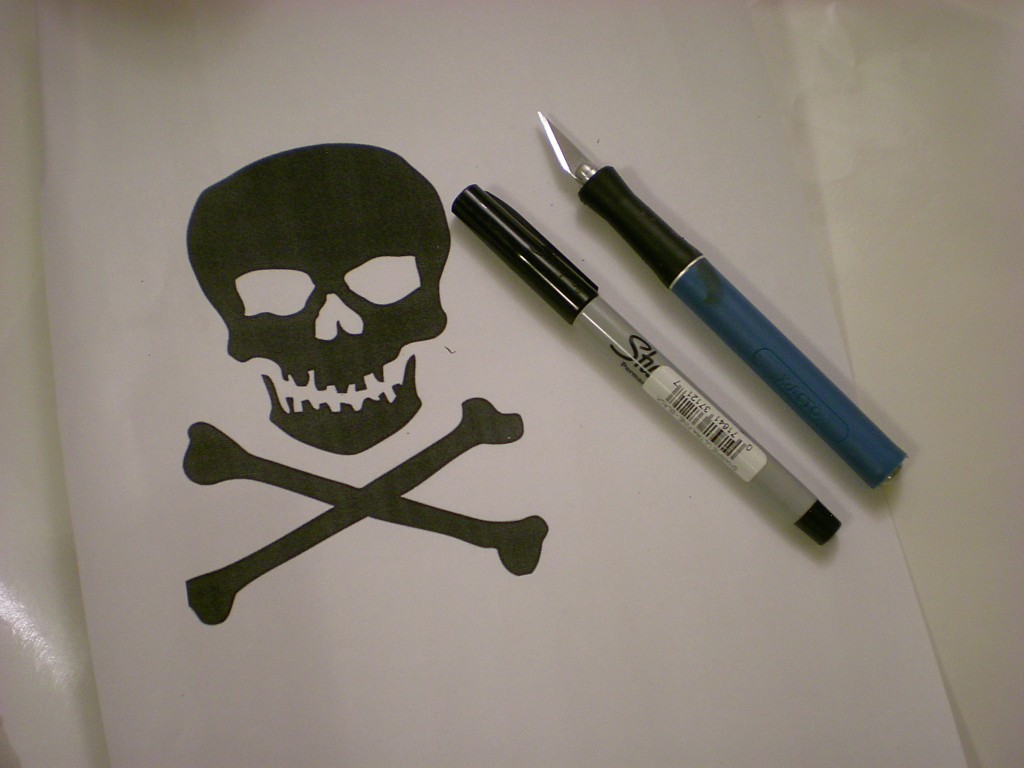
Secret weapons from around the house: Freezer paper, high-contrast image printout, marker, craft knife, and cutting mat

I chose the classic skull and crossbones as my image to download and print for creating the stencil, but any image is fair game!

Trace the design onto a sheet of freezer paper.

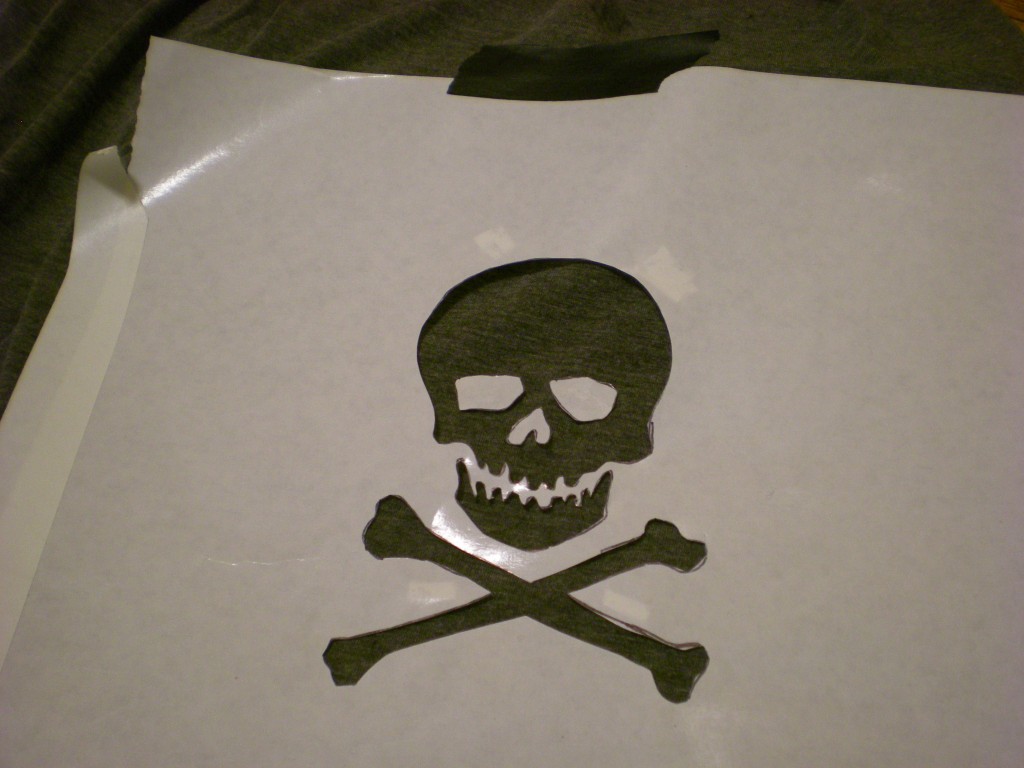
Then use the craft knife to carefully cut out the shapes.

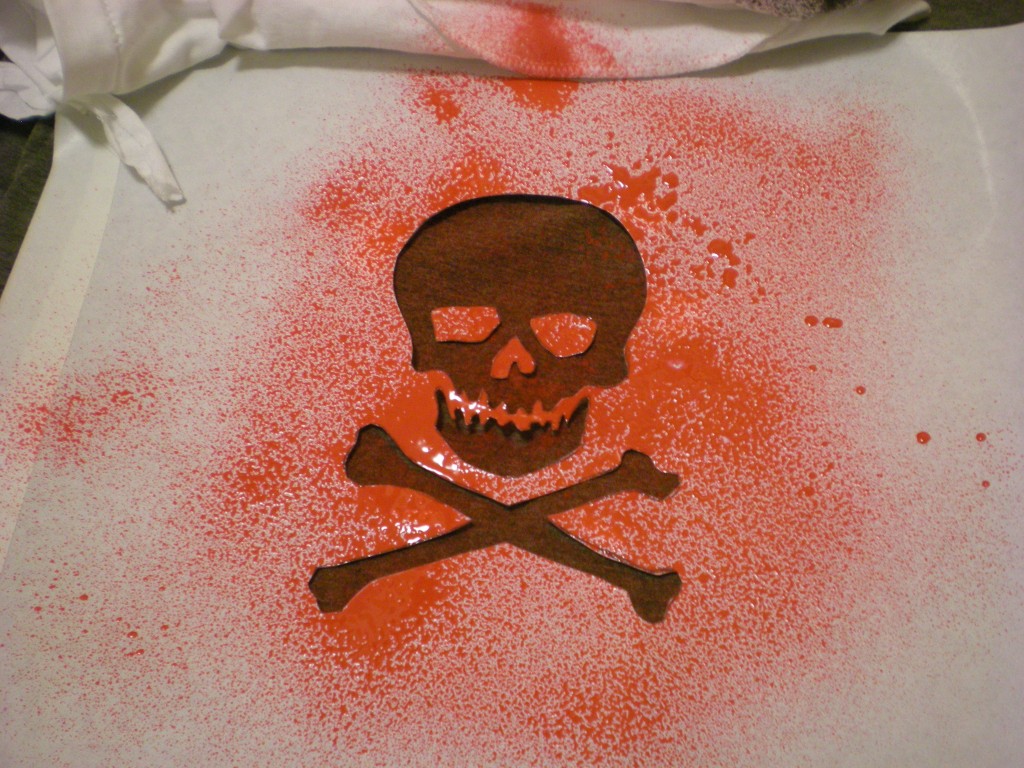
Tape the stencil onto the fabric surface (I placed it along the hem). Don’t forget to place any loose pieces (in this case, the eye sockets and nose cavity!). I sprayed red spray paint on the charcoal gray surface and reused the stencil to create a pattern around the bottom of the skirt.

Let each image dry slightly before moving the stencil to another part of the fabric.

Then let the image dry completely before spraying it onto the back of the garment. Let all the paint dry completely before you try it on!

3. Bubble, Bubble, Toil, and Trouble

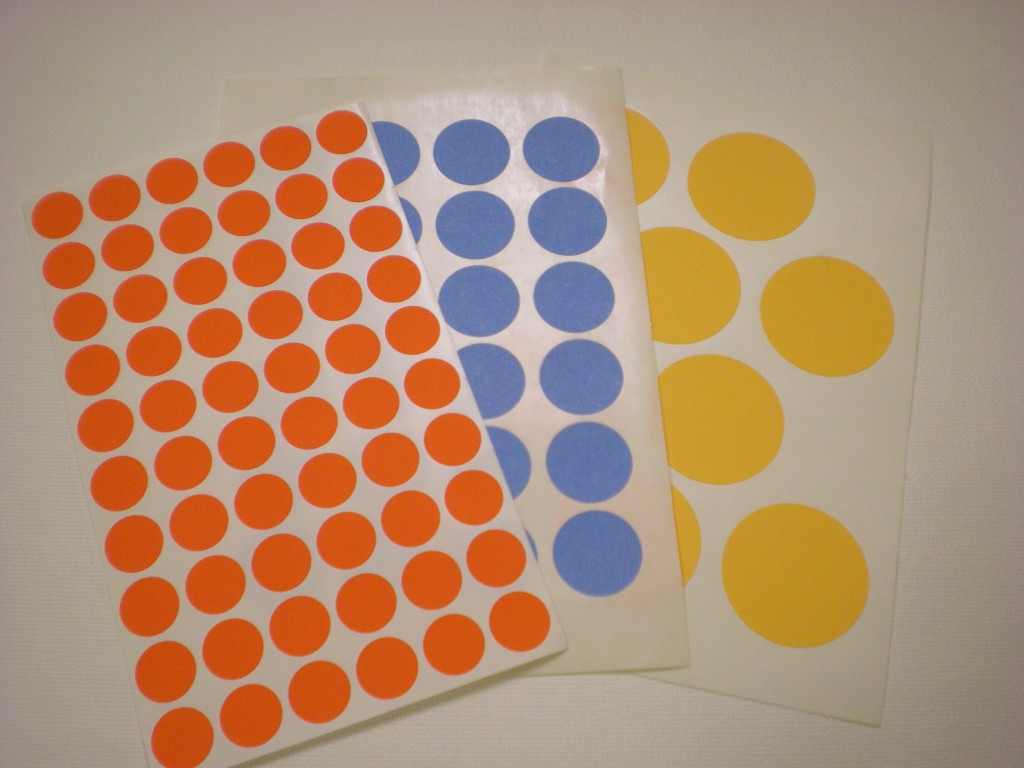
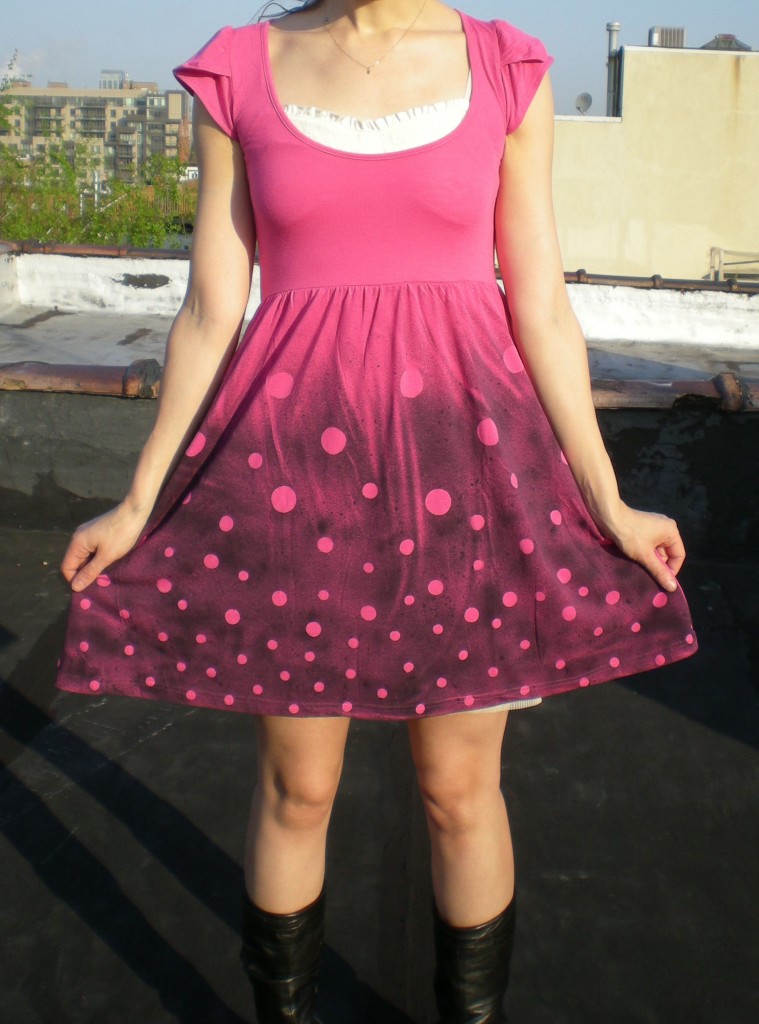
Secret weapon from around the house: Map or garage sale dot stickers in different sizes.

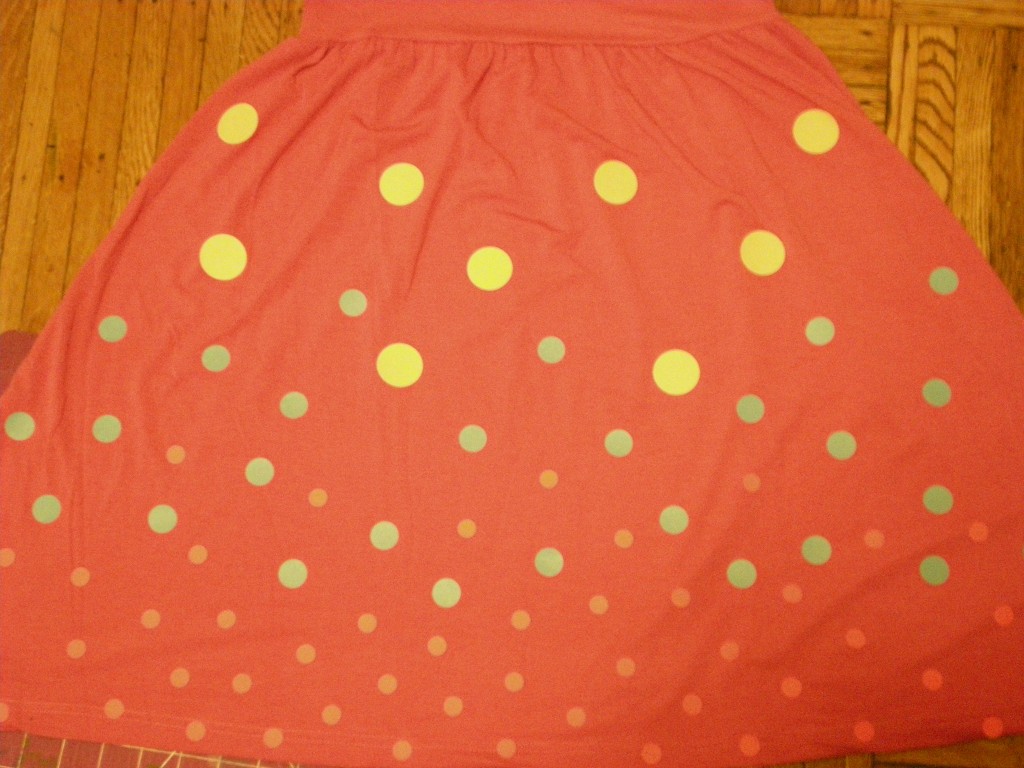
These stickers have so much potential. Beyond mixing up the sizes, you can arrange them into patterns, overlap them, use the surrounding sticker bits to create reverse dots, and so on. I used three sizes (3/4″, 1 1/4″, and 1 3/4″).

To create the appearance of bubbles rising up to the surface, I started with closely spaced small dots at the hem, then transitioned to more widely spaced medium dots, with the large dots finishing below the bodice.

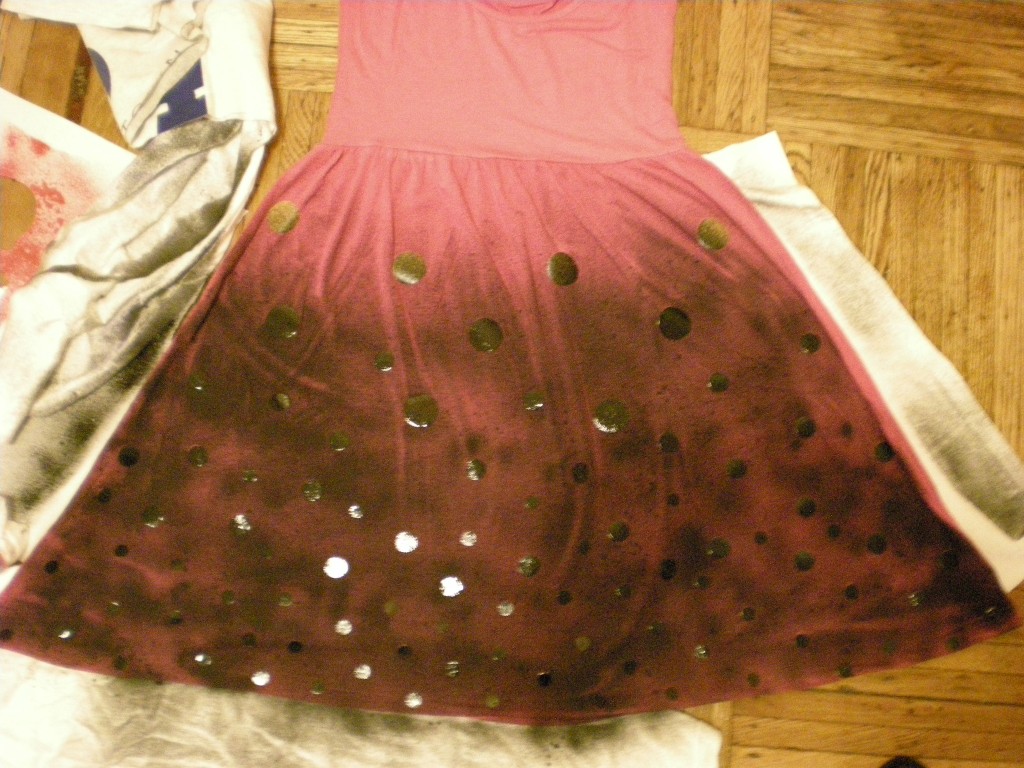
Mask all the parts of the garment you don’t want to color. I used black spray paint, fading out at the top, to make the pink really shine through! I also allowed the naturally occurring wrinkles caused by the gathered skirt to form “cracks” in the paint.

Let the paint dry completely before you put it on. Now that you’ve made your bubbles, go out and make some trouble!

4. Yipes Stripes!

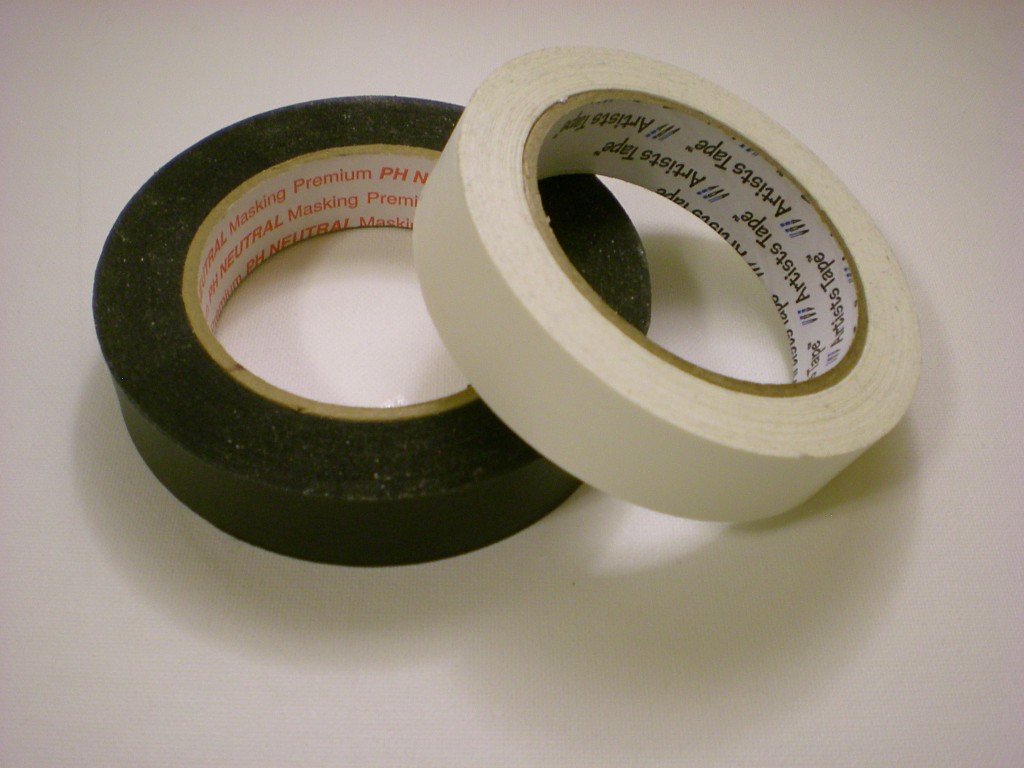
Secret weapon from around the house: Masking or Artists tape

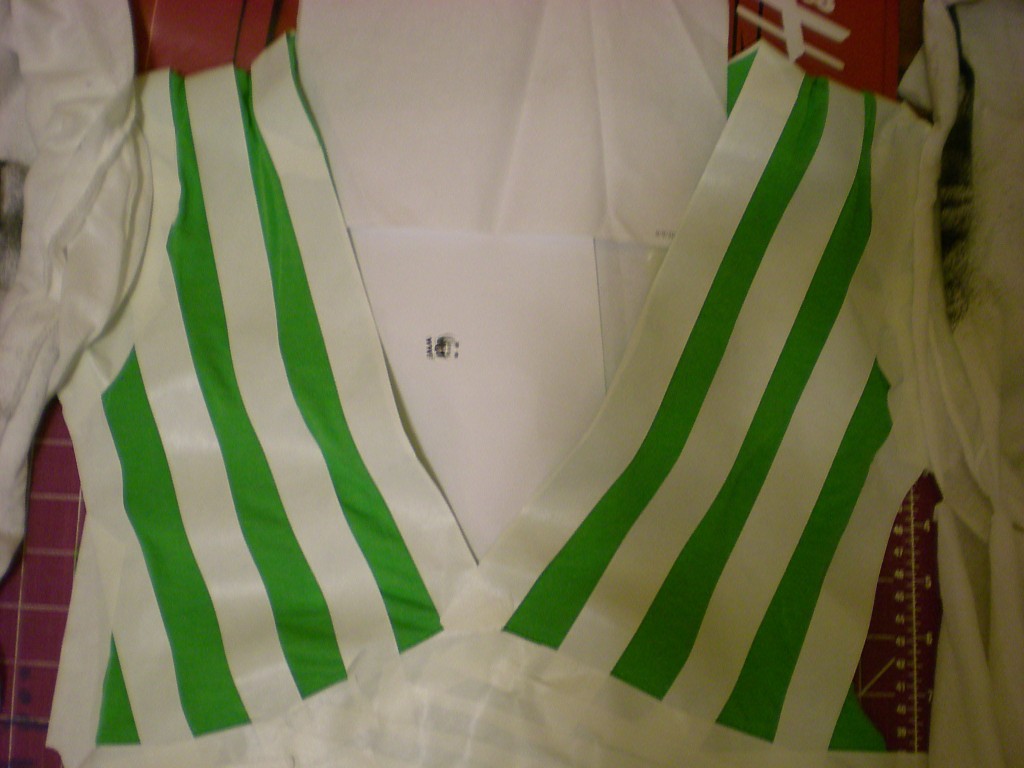
Stripes are just the beginning–you can create plaid, checkered, or gingham patterns with a roll of masking tape. Keep in mind that the width of the tape (and how closely you align them) determines the width of your stripes!

I followed the V-neck cut of the dress to create gently slanting diagonal stripes. Be careful to line up the tape strips carefully in order to keep your design symmetrical and even.

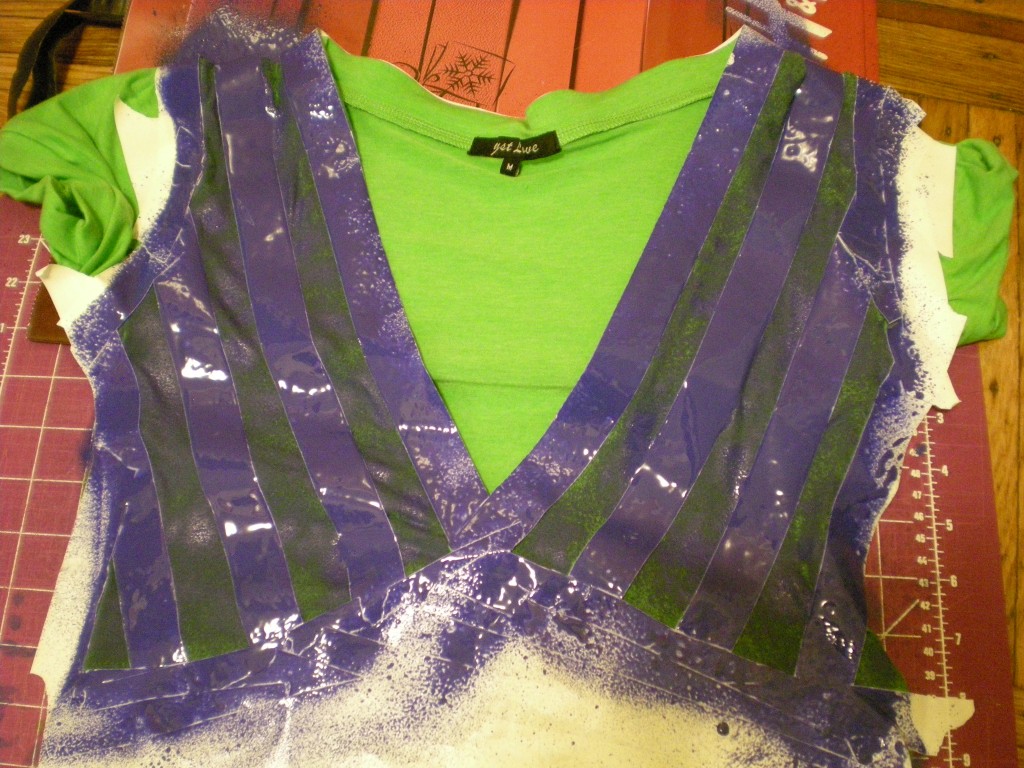
As always, mask the fabric you don’t want to paint! I chose blue spray paint to pair with my bright green frock–a springtime inspiration, for sure!

Let the paint dry before peeling off the tape to reveal your sassy stripes!

One, two, three, four — don’t stop now, let’s spray some more! How many more ways can you spray?


[ 20 Comments | Posted on April 26th, 2011 ]

T-shirt Projects

How to: Rollover Tank Top

The Rollover tank top (project #42 in Generation T: 108 Ways to Transform a T-shirt) is located on pages 110 and 111 and was cut and stitched from my well-worn lavender Keep Earth Alive: RECYCLE T-shirt. Congratulations to Kiki, who wins a signed copy of Generation T: Beyond Fashion for being the first of our finalists to email me all the correct info!

And congratulations to the rest of you, too! Your sweet runner-up prize is this T-shirt tutorial for that Rollover tank top.

Materials:

1 T-shirt

measuring tape

scissors

tailor’s chalk

straight pins

needle

thread

Make it:

1. Lay the T-shirt flat and cut a 8″-wide loop off the bottom of the shirt. Set it aside.

2. Measure and mark 12″ from the new bottom of the shirt. Cut horizontally across at that mark through both layers of fabric. Then snip through the side of the loop, creating a long rectangular strip.

3. Lay the strip flat and mark a length equal to your bust measurement (x) along the long edge of the rectangle. Cut vertically to remove the excess fabric.

4. Fold the rectangle in half lengthwise, right sides together. Pin along the short ends and sew the edge with a whipstitch.

5. Remove the pins. Turn the resulting 12″-high tube right side out and lay it flat. Turn the loop from step 1 inside out and center it above the 12″ tube so that its bottom (cut) edge meets the 12″ tube’s top edge.

6. From both sides of the 12″ tube, measure 2 1/2″ in and mark with the chalk. Pin the tubes together between the two marked points and sew along the pinned edge using a whipstitch. Remove the pins.

7. Flip the shirt over and repeat step 6 on the back.

8. Try on the shirt and roll the top tube over 4″ to 5″ so the right side of the fabric is facing out. Rollover is complete!

Variations:

This project is excerpted from Generation T: 108 Ways to Transform a T-shirt (Workman 2006).

[ 1 Comment | Posted on April 24th, 2011 ]

More Fun

Earth Day Giveaway Finalists!

And the five finalists chosen at random from the yesterday’s Earth Day Giveaway entries are Jessica W., Susan B., Kiki, Martha, and Anne N. St. Louis! Finalists, listen up:

My old Keep Earth Alive: RECYCLE T-shirt appears in the pages of Generation T: 108 Ways to Transform a T-shirt. The first of you five finalists to e-mail me (megan at generation-t.com) and correctly identify 1) the page number on which it appears, 2) the name of the project transformation, and 3) the color of the shirt (yes, that’s a hint), wins a signed copy of Generation T: Beyond Fashion: 120 New Ways to Transform a T-shirt. I’ll announce the winner tomorrow, Sunday April 24, 2011.

Good luck!

xo, Megan/ Generation T

[ 1 Comment | Posted on April 23rd, 2011 ]