T-shirt Projects

I Love To Create: T-shirt Confetti Necklace!

Interestingly, the inspiration for this festive, soft Fourth of July necklace came from south of the border — while I was on vacation in Oaxaca, Mexico, we happened upon a small gallery where I spotted an orange folded paper bracelet made by women in a local artist collective. The paper was so soft and fibrous, it reminded me of fabric. So when I set to re-imagining that bracelet stateside in my Generation T workshop (as a necklace of fabric and glue!), I was pleased that the results are even cozier — a wonderfully celebratory accessory fit for a summer barbecue! (I was intentionally playing it subtle with the shades-of-blue color palette, but a bold red, white, and blue color scheme would really pop.) And it’s comfy, too, when the sun goes down and it’s time to snuggle up and watch the fireworks.

Materials:
-T-shirt scraps (sleeves work well!), including one long one to use as the fastener
-Rotary cutter and cutting mat
-Quilting ruler
Aleene’s Fabric Fusion glue
-Ribbon (optional, in place of the long piece of T-shirt scrap to fasten the necklace)

Make it:
1.
Cut 1 1/2″-wide strips from the T-shirt scraps.

2. Cut the strips into 2″ pieces to make rectangles that are 1 1/2″ x 2″. (I cut about 124 rectangles in two different colors to make an approximately 9″-long necklace segment.)

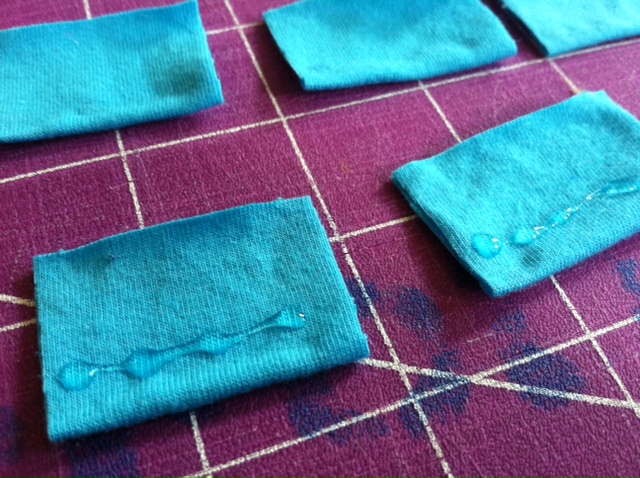
3. Lay one of the rectangles flat, wrong side up, and spread a thin line of glue slightly off-center and parallel to the short ends. Fold it in half so that the glue line retains the crease. Let the glue dry and repeat for the remaining rectangles.

4. Squeeze a thin line of glue close to the folded edge of one of the rectangles and press another folded rectangle over it.

5. Repeat step 4 as many times as needed, to attach more rectangles together and create the necklace piece. (Arrange different colors to create a pattern!) Reserve two folded rectangles to use in step 7.

6. Let the necklace piece dry, then touch up any gaps as desired.

7. Spread glue along the end of a long T-shirt strip or ribbon (shown here), and center and press it along one of the spare rectangles from step 5.

8. Then add more glue to the ribbon and press it against one end of the necklace piece, aligning the T-shirt rectangles (the ribbon end should be sandwiched in between T-shirt material). Repeat on the opposite end of the necklace piece. Let dry completely. Then snip the T-shirt strip or ribbon in the middle so you have two ends for tying.

9. Tie the ends in a bow at the back of your neck.

Variations:
Experiment by making smaller rectangles for a more delicate piece (you can make a necklace this way, or, I made an accompanying bracelet using 1″ x 1 1/2″ rectangles).
Use chain in place of the fabric fastener. (I like the idea of an all-white necklace piece with a gold tone chain.)
Try wearing it as a headpiece! (My sister’s boyfriend tied the necklace around his head
as a joke, bonnet-style, but with the right messy up-do, it could be quite the statement piece.)
Play with color: Make the red-white-blue version mentioned above, use the color scheme from your favorite sports team to wear to the next game, or craft a rainbow to brighten your day!

Tune in later this week to see the second necklace I made using the scraps left over from this one–super easy, super fast, and also no-sew (no-glue, even!).


[ 6 Comments | Posted on June 26th, 2012 ]

Luke, I Am Your Father.

Oh, that iconic (though misquoted) line uttered by Darth Vader to Luke Skywalker. Any kid growing up in the 1980s with the name Luke was oft subjected to various illuminations of this kind along with other ubiquitous Jedi advice such as, “Use the Force” and “May the Force be with you.” Today, on Father’s Day, we decided to flip Darth’s utterance on its head to honor a very special Jedi Knight named Luke (aka Mr. T) over here in the Generation T galaxy.

Though it’s a project particularly suited for a father named Luke (I’m sure you know one or two!), you can easily substitute any other Star Wars-loving dad’s name to make a personalized message from his little Ewok.

Materials:
-T-shirt for the little one (at least one, but I made two in different sizes)
-design printout (high contrast is best, and adjust your letters, like A and O, to make sure you’re not missing any center cutouts)
-freezer paper
-craft knife
-cutting mat
-ruler
-masking tape
-iron
-fabric spray paint (and/or fabric paint and a foam brush — I used both)

Make it:

1. Lay your printout on the cutting mat and place a sheet of freezer paper, shiny side down, over it. Trace the darkened pieces with the craft knife to create the stencil. (Again, be sure to attach the center of any letters with holes to their outside framework to prevent parts of the letter from going missing — I used masking tape to fix a couple letters I botched!)

2. Lay the freezer paper stencil over the T-shirt, using the ruler to center it below the T-shirt neckline. Gently press it (oh-so-quickly!) with a warm the iron to temporarily secure it to the front of the T-shirt. Insert a scrap piece of paper between the front and back of the T-shirt to keep the paint from bleeding through.

3. Spray and/or sponge the paint over the stencil. Cover the entire stencil but be careful not to over-saturate the fabric with paint or it may bleed under the edges.

4. Let the paint dry and gently peel off the stencil. (And even with the best intentions, the paint may bleed a bit!)

5. If the stencil is dry, reapply it to the next T-shirt and repeat! (We tried a version in gray, one size up, in long sleeves, for winter — because, hey, why not celebrate Father’s Day all year long?)

Happy Father’s Day from Generation T!

[ 2 Comments | Posted on June 17th, 2012 ]

T-shirt Spiral Statement Earrings

Ages ago, I promised variations on my Softie Spiral Headband made from T-shirt coils. Well, at long last, here’s one take — a pair of colorful, bold, statement earrings. As a DIY project, they’re a nice alternative to the headband (if you’re too impatient or too short on time to make all the coils required for the bigger project!).

Materials:
-T-shirt scraps in different colors (T-shirt hems with the stitching cut off are perfect!)
-Fabric scissors
Aleene’s Fabric Fusion or similar fabric adhesive
-Ruler
-1 pair earring posts and backs
Aleene’s Jewel-It Embellishing Glue or similar jewelry adhesive

Make It:
Simply follow the instructions for making a T-shirt coil in the spiral headband tutorial. Make three pairs of same-sized and like-colored coils. (In this example, that means: two matching blue coils, two matching gold coils, and two matching pail yellow coils.)

To make sure that the two blue coils end up the same size, start by cutting the T-shirt strips to the same length. The top coil in the earring should be the smallest, with each coil getting gradually larger as you move down the length of the earring (the yellow one is about 1 3/8″ in diameter, the gold one is about 1 1/2″, and the blue one is about 1 3/4″).

Use the Fabric Fusion to glue the coils in a row, rotating the coils so that the ends of the T-shirt strips get “buried” in the seam. Then glue an earring post to each of the small coils (close to the edge, at the top of the earring, as shown) using the jewelry glue.

Allow the glue to set completely, then attach the earring backings, and you’re ready to wear or gift them!

Note: If these earrings are too big for your style (they do measure about 4.5″ long), you can make them smaller — just keep the same basic ratio between the sizes. Alternatively, you can make single coil earring studs for an even faster result!

[ 1 Comment | Posted on June 4th, 2012 ]

Rookie Turns a T-shirt into a Mod Dress!

How cute is this? Learn how to stitch up this black and white mod dress by Marlena Pope over at RookieMag! I love the styling, too — red-red lips really pop with the black and white geometry of it all.

I’m thinking color wheel opposites could be fun couplings instead of the black and white — orange and blue, maybe? or yellow and violet!

Photo via RookieMag.

[ 1 Comment | Posted on May 24th, 2012 ]

I-Love-the-’80s Fringe Fabulous T-shirts

It’s springtime, which means one thing to me: T-shirt weather! It’s an exciting time here in the Land of Generation T, because as many of you know, it only gets better: After spring comes summer, which means we all get a little more scantily clad — T-shirts turn into tank tops and tube tops and ooh-la-la! So grab your scissors (to cut away some of that extra fabric, of course), crank up the color (bring on those fabric spray paints), and hop in your fabulous fashion time machine, because fringe is enjoying a bit of a renaissance this season. Last weekend, I dialed back the decades and dug into my craft stash to make some classic ’80s-inspired geometric tees.

Materials:

-light-colored T-shirt (I used a light blue one)
-ruler

-masking tape
fabric scissors
fabric spray paint (variety of colors)
-scrap newsprint paper

Make it:

1. Lay the T-shirt flat. Use masking tape to mark a horizontal line about 8″ up from the bottom of the shirt. Find the vertical center of the shirt and apply tape to the chest-region of the T-shirt to create a crisscrossing geometric pattern.

2. Insert the newsprint paper between the layers of the T-shirt to prevent the paint from bleeding through. Then apply fabric spray paint over the taped area. Apply another color or two, then let dry.

3. Peel back the tape, and then lay down more tape (I cut the tape strips in half, thirds, and quarters to make thinner lines) across your pattern to create a modified plaid pattern. Then spray paint more color!

4. Let dry completely before peeling off the tape to reveal your design.

5. Cut off the bottom hem of the T-shirt, just above the stitching. Then, using the tape marker you pressed down in step 1 as your guide, cut 1/3″- to 1/2″-wide fringe from the bottom edge of the shirt.

6. Cut off the sleeve hems, just above the stitching, and cut out the neckband, just below the neckband edge in the front and the back, and about 2″ wider on the sides.

7. Gently tug on the fringe to stretch it out (the fabric edges will curl in). Try it on!

8. Grab up additional T-shirts and experiment with your paint patterns and fringe — cut it on a diagonal, in a chevron-inspired V-shape, make it long or short!

Then pack a picnic, sling your boombox over your shoulder, and turn up any of the decade’s Billboard hits!


[ 5 Comments | Posted on May 22nd, 2012 ]

I Love to Create: Iron-on Sparkle Stencil T-shirts

I missed posting an iLoveToCreate project last month because I got a little distracted by that rather big DIY project of my own (more projects relating to my newest muse in the coming months, but in the meantime…). I recently attended a little boy named Caleb’s 2nd birthday party and was inspired to make something — something superhero-inspired for a super little guy! And since I’m obsessed with these iron-on glitter sheets, how about some fun, sparkly T-shirts?

Oh, and also, if you happen to be attending the Craft and Hobby Association (CHA) winter conference this year, don’t forget to stop in at the iLoveToCreate Bloggers Lounge next weekend to say hello to some of your favorite craft bloggers.

In the meantime, feast your eyes on two-year-old Super Caleb!

Materials:
-Stencils and other household objects to trace

-Ballpoint pen

Tulip Fashion Glitter Shimmer Transfer Sheets
-All-purpose scissors
-Toddler T-shirt(s)
-Pressing cloth
-Iron

Make it:

1. Select a stencil and trace the parts of it onto the desired color glitter transfer sheets. (Silver for the body of the rocket ship, purple for the star decal, blue for the stripe and the flame. Extra stars in blue!) Alternately, trace household items (like different size bowls, jars, tupperware lids, bottle caps, etc.) to create basic shapes like circles and rectangles.

2. Cut out all of the shapes and peel off the top layer of plastic before arranging the shapes on the front of the shirt.

3. Use the warm iron and pressing cloth to press on one piece of the design at a time (so that none of the pieces shift accidentally as you’re applying them). Iron on any sleeve decorations separately so you can lay that portion of the fabric flat when you’re working on it.

4. Then fold them, wrap them, and tie a ribbon in a bow…

5. …and gift them to a cute little toddler you know!

(Caleb’s mom reports that he loves wearing them, and points often to the sleeves, identifying the “stahs.”)


[ 3 Comments | Posted on January 24th, 2012 ]

How To: Advent Calendar T-shirt!

This project comes courtesy of my very talented and party-hopping younger sister, Ariana, who attended a very special holiday gathering this month in the Bay Area at which attendees don’t just wow with sparkly seasonal cocktail dresses — they costume it up. And not just sexy Santas and holiday carolers, but as, say, a dreidel, Nutcracker ballerinas, or the entire cast of Charlie Brown’s Christmas!

The event is called the Elf Party. It was originally started as a party among friends and has since grown into a huge fundraiser for children in need — not to mention a very popular event. Tickets sold out in just 30 minutes this year!

Needless to say, Ariana needed to dress to impress, and when we were having a crafty consult, I suggested that she be an advent calendar–a wearable variation on the “Final Countdown” pocketed calendar (project #35) from Generation T: Beyond Fashion — complete with pockets full of treats! And so she set to work…

Materials:

-Plain tunic dress or long T-shirt (in red or green for Christmas or blue or white for Hanukkah; sample is from American Apparel)
-2 to 3 sheets of craft felt (in red or dark green for Christmas or blue or white for Hanukkah)
-Fabric scissors
-Pen
Tulip Fashion Glitter Shimmer Transfer Sheets
-All-purpose scissors
-Pressing cloth
-Iron
-Straight pins
-Treats (individually wrapped mini candy canes and other hard candies work well–depending on how long you’ll be wearing the outfit, keep in mind that body heat can melt Hanukkah gelt or other chocolates!)

Make it:

1. Measure and cut about twenty-five 3″ by 3″ squares of felt (depending on the number of pockets you’d like).

2. Trace or draw the numbers 1 through 24 (or 25), on the glitter transfer sheets. Note: Trace numbers 1 through 12 for the twelve days of Christmas, or 1 through 8 for the eight nights of Hanukkah, and so on. (Optional: If you’re going Christmas-themed, trace and cut a star to place at the top of the arrangement.)

3. Cut out the numbers and/or shapes.

4. Following the instructions on the packaging, peel the clear layer off the top of the glitter numbers and arrange them glitter side up on each felt square. Then press the numbers on the squares with a pressing cloth and a warm iron.

5. Lay the tunic flat and arrange and pin the squares onto the front. Thread the needle with contrasting or matching thread and use a running stitch or backstitch to sew around the two sides and the bottom of each square to complete each pocket.

6. Remove the pins, try on the tunic, and fill up those pockets with treats!

[ 1 Comment | Posted on December 6th, 2011 ]

Caution: Speed Bump!

We here at Generation T hope everyone had a safe, boo-tiful, and bountiful Halloween last weekend! In addition to this bonus Halloween costume project below (okay, file it away for next year), you might notice that there’s some rather “big” news to share over here at Generation T headquarters: there’s a Baby T on the way! (And since we’ve taken to calling the inside-the-belly baby “Zombie,” it seemed only fitting that we get to make the announcement in costume.)

It can be tricky to come up with costume ideas when you’ve got a bun in the oven — besides the classic “Watermelon Smuggler” (make that a pumpkin smuggler), the obvious mummy (ha!), or a bathing beauty (get ready to dress in a bikini and paint the belly in the pattern of a beach ball). Go for the more literal, and get your partner in on the costume so you can have a chef and an oven (which I have to say held some appeal until I realized that I’m already feeling a tad large and awkward these days and dressing in a box would only serve to enhance my impressive girth).

So without further ado, here’s how I made my Speed Bump Halloween Costume (and yes, I do hear they’re called “speed humps” in Connecticut, but what can you do)…

Materials:
-Plain T-shirt
-Masking tape (to make stencil)
-Scissors
-Black fabric paint

-Foam brush

-Yellow card stock or paper
-Ruler, dowel, or chopsticks (to use as sign post)
-Pencil

-Black permanent marker

1. Cut and stick the masking tape across the front of the T-shirt in the pattern of two tire tread marks. Insert scrap paper in between the layers of the T-shirt to keep the paint from bleeding through. Then lightly paint over the masking tape.

2. Cover the taped area with paint and then let it dry completely.

3. While the paint’s drying, measure and cut an approximately 7 1/2″ x 10″ rectangle from the yellow card stock (round the corners for an authentic street-sign shape). Then use the pencil and marker to draw and color in the appropriate speed limit. Set it aside.

4. Peel off the tape from the T-shirt to reveal your painted tire treads!

5. Tape the ruler, centered, along the back of the street sign.

6. Now suit up!

P.S. Good luck to all of those folks running today in the ING New York City marathon — on this inspiring occasion, here’s to avoiding any speed bumps during the run!

[ 5 Comments | Posted on November 6th, 2011 ]

10 Quick & Easy T-shirt Halloween Costumes!

Just in time for you last-minute Halloween revelers! Make a beeline for your T-shirt stash and pull together one of these costumes in mere minutes…. Last week, my friend Elan asked me to help her out with a student project for her journalism class (see Elan in action, right, who was willing to climb on top of tables to get the right shot!). Here’s a little video tutorial we came up with to show you 10 super quick-and-easy ideas for a T-shirt-based Halloween costume. Forgive the low sound, since we were working without a mic, but we hope you enjoy!

Top-10 Last Second Halloween Costumes from Elan Bird on Vimeo.

And in case you missed the visuals, below are the 10 quick-and-easy T-shirt-based Halloween Costumes (all illustrations courtesy of Megan/Generation T):

1. Charlie Brown (a good man, indeed, from our pal Charles M. Schulz–add a black pair of shorts and a baseball cap for good measure)

2. Deviled Egg (love me some wordplay! just grab those devil horns and tail I know you have packed away somewhere)

3. Candy Corn (inspired by my friend Alexa (aka The Swell Designer)’s adorable tie-dyed onesie!)

4. Shooting Star (more nerding out with words, adapted from an idea in The Halloween Handbook PS: those are squirt guns, folks!)

5. Zombie (classic: blood, brains…nuff said; and here’s the perfect soundtrack to listen to while you craft)

6. True Blood Waitress (don’t forget to add some fang marks on the neck!)

7. Chick Magnet (ha. get it?… also adapted adapted from an idea in The Halloween Handbook)

8. Static Cling (you don’t even need paint for this one!)

9. Thing 1 and Thing 2 (These Dr. Suess characters are perfect for pairs costumes!)

10. Playing Card (Ace of Spades or Queen of Hearts–or recruit enough for a full 52-card deck! Then shuffle.)

And if you have a T-shirt left over, don’t forget to make check out the tutorial for a trick-or-treat tote!

[ 6 Comments | Posted on October 28th, 2011 ]

I Love to Create: Flower Power Picture Frame!

So often these days a photo album is an online click, and a frame may simply be the outer edges of a smart phone as you flick through those saved photos. Having just returned from vacation, I was inspired to make something a little less fleeting to display my memories of beach, sand, and snorkeling. And what better material to use to celebrate summer vacation than scraps from that all-time summer favorite: the T-shirt.

Materials:
-T-shirt scraps (in various colors)
-Circular object (about 2.5″ in diameter to use as a cutting template)
Aleene’s Fabric Fusion fabric glue
-Fabric scissors
-Blank picture frame
Aleene’s Tacky Line Runner (double-sided adhesive dispenser)
-Printed vacation photos to fit in the blank picture frame

1. Cut a series of circles from the T-shirt scraps. (I cut about 55 circles in order to cover a 4″ x 6″ frame.) Cut them all the same color or mix it up to add vibrant highlights to the frame — I was inspired by the colors of the corals (yellow, salmon, and raspberry hued) that we snorkeled near in Vieques.

2. Select one circle, fold it in half, then fold it in half again. Cut a scalloped edge into the open (arced) edge so the piece of folded fabric becomes heart-shaped.

3. Unfold the piece of fabric (it should slightly resemble a four-leaf clover) and squeeze a small amount of fabric glue into the center. Fold it in half, with the edges slightly askew (so the petals don’t line up exactly) and pinch.

4. Then apply a small dab of glue along the folded edge and fold it in half again to create a blossom.

5. Pinch the end and separate the petals and let dry. Repeat steps 2-4 for the remaining circles then set the blossoms aside.

6. Apply the double-stick adhesive liberally to the front of the frame. Be careful not to press your fingers into it since the oils will deplete the sticky qualities!

7. One by one, press the blossoms into the adhesive on the frame, angling and overlapping them to cover the frame and create a pleasing pattern.

8. Layer the flowers over the entire frame, and don’t hesitate to cut more if you find gaps in the coverage.

9. Now for the hard part! Select a photo to place in the frame.

Variations:
-Use strips of T-shirt scraps to make into coils to decorate the frame.
-Simply cover the photo frame with T-shirt fabric and then embellish with a small cluster of blossoms.
-Use a cluster of these flower power blossoms to embellish a headband, hair tie, or brooch!


[ 5 Comments | Posted on August 23rd, 2011 ]