More Fun

From Our Readers: Lauren!

Lauren was lovely enough to attend one of my book tour events in the Seattle area in summer 2009. Last spring she hit up Chapter 4: Kid Rock, in Generation T: Beyond Fashion, for all her baby showering needs that season. Here are the pretty sweet gifts that she stitched up:

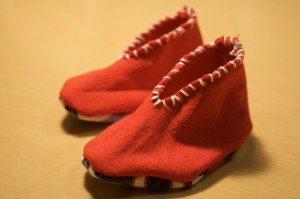
Playing Footsie baby booties (project #48).

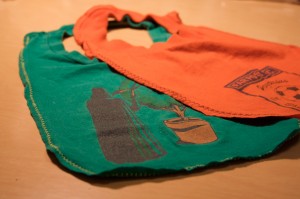
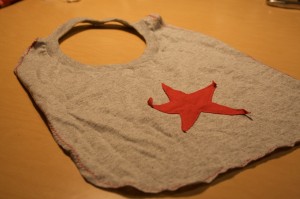
Baby Back Bib (project #53).

Baby Back Bib (project #53) with appliqué.

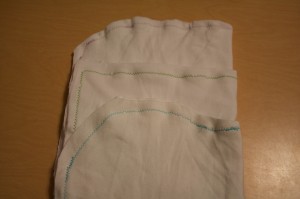
Too Cool for Drool burp cloths (project # 50) with colorful zigzag stitching.


[ 3 Comments | Posted on January 18th, 2011 ]

Adventures

For Spring 2011: McCall’s Patterns!

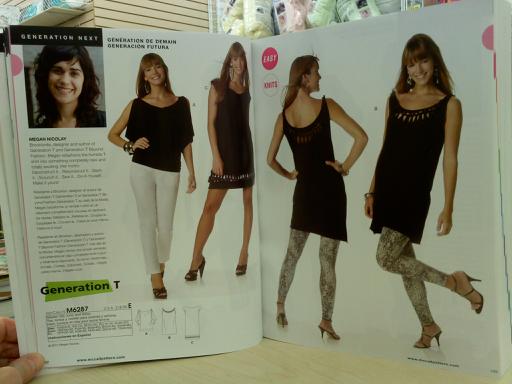
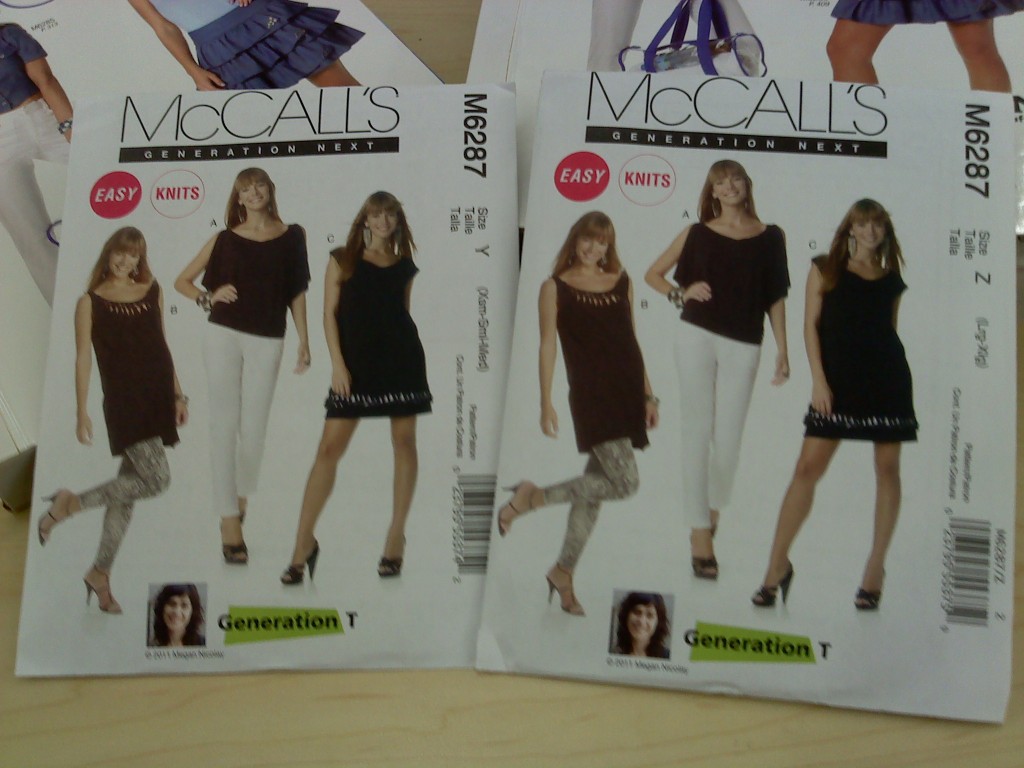
I’m so excited to announce a very cool project I worked on in 2010: designing my first paper patterns for McCall’s Spring 2011 “Generation Next” campaign! I’m thrilled to be included in the newest pattern catalog alongside notable young designers Rebecca Turbow, the ladies at Flirt Brooklyn, and Melissa Watson. And here’s the proof (via my mom’s camera phone in the sewing section of a JoAnn Fabric & Craft Store in NH) — a spread in the catalog and the actual pattern envelopes, shown below!

My patterns are for use with jersey knit fabric, so while they’re not T-shirt designs per se — each style can be adapted for use on an actual T-shirt! And though I created all of the designs in black (what can I say, after 10 years living here, I’m a true New Yorker when it comes to fashion), I think they’d be fabulous in a dark plum, burgundy red, or teal. The envelope includes patterns for three related looks: a top, a tunic, and a dress and are available in two sizes, shown below: XS, S, M and L, XL.

So please check out the online look book or check out the real thing at your local fabric and pattern shop (and then go ahead and try them out at home on your sewing machine) and let me know what you think!

[ 5 Comments | Posted on January 10th, 2011 ]

Other Projects

DIY Skirts and Pillowcases and Cakes, Oh My!

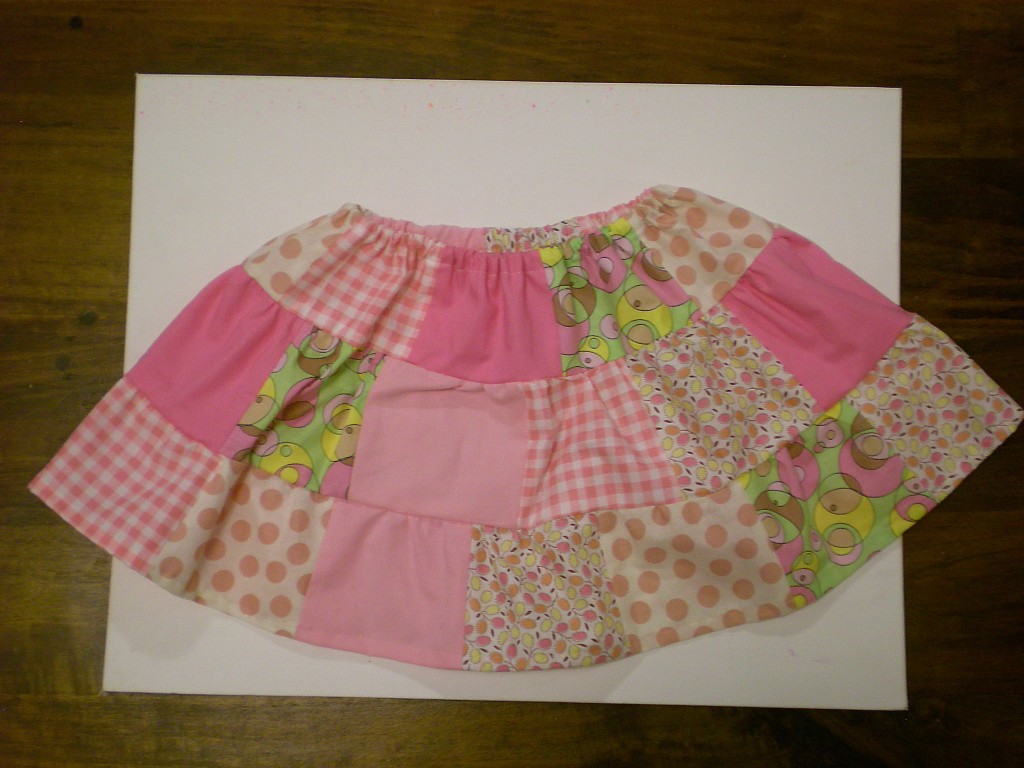
In the spirit of the DIY Christmas, I thought I’d share a sampling of the ways in which I incorporated the handmade into my holiday season.  You all read about the headbands and hair ties I made for my niece — I also whipped up two skirts for her (she happens to loooove the color pink–can you tell?). I made this one using a tutorial from TheMerryChurchMouse, who calls this design “The Charming Little Skirt.”

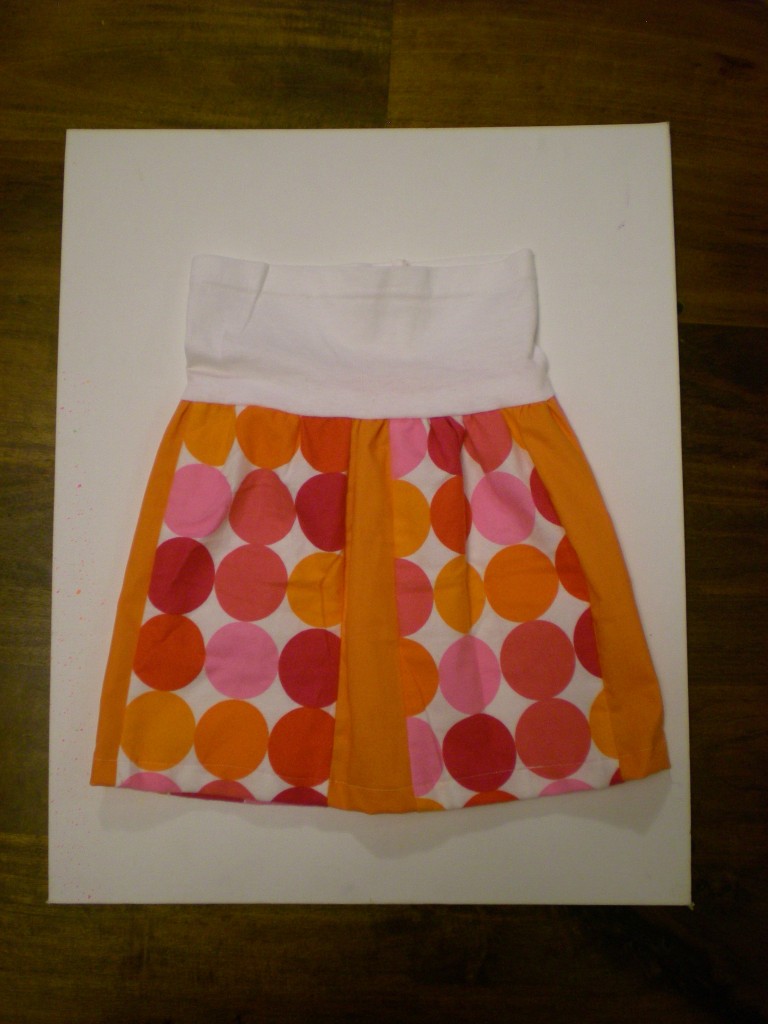
Skirt number two is adapted from the “Easy Elastic Waistband for a Little Girls Skirt” by TheMotherHuddle — the waistband is made from a scrap T-shirt hem!

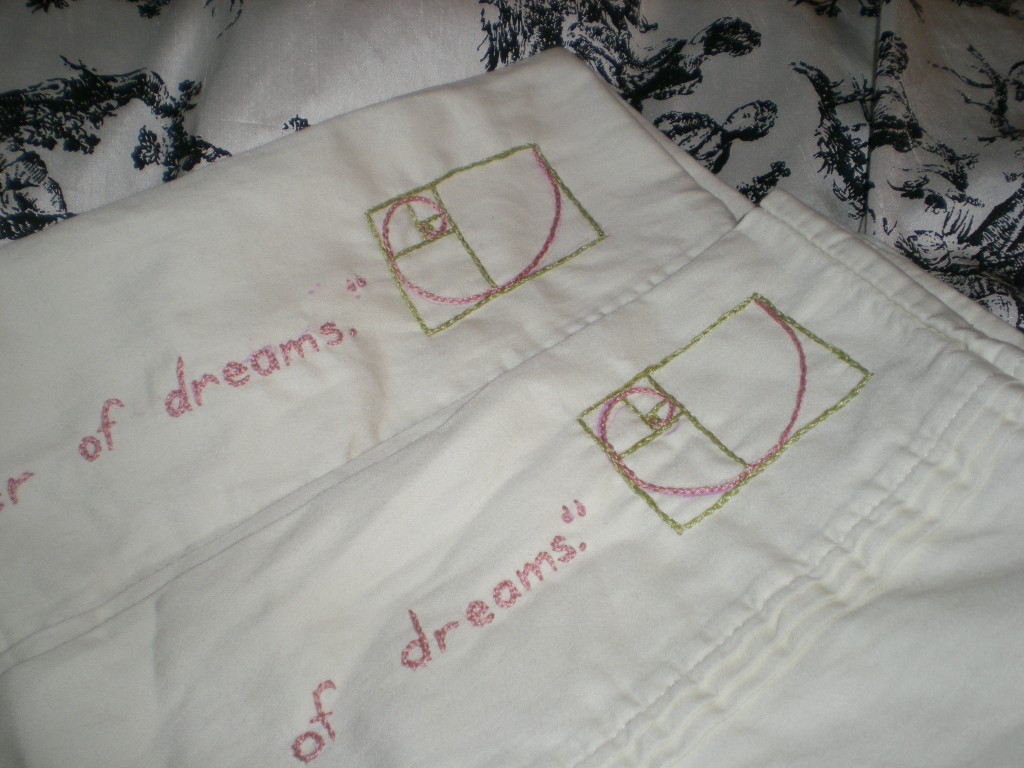
I also embroidered pillowcases for my sister-in-law. Mr. T found the perfect quotation that combines dreams (appropriate for pillowcases) and architecture (her profession): “An architect is the drawer of dreams.” –Grace McGarvie I added the golden spiral and rectangle since it is the only architectural influence I know! (My dad designed the house that I grew up in and based the entire design around the golden section.)

And to finish with something tasty, this is the Lemon Olive Oil Cake I made for Christmas eve dinner at my in-laws. (Adapted from this recipe.)

If only I had photos of the chocolate truffles Mr. T and I made for dessert the following night…alas, they, like the cookies a week earlier, did not last long enough for a photo shoot. But we scored a stand mixer from his mom for Christmas, so more baking is definitely in our future!

What about you? Will any of your holiday gifts kick-start the DIY project aspirations you have for 2011?

[ 4 Comments | Posted on January 9th, 2011 ]

Other Projects

How to: Softie Robots

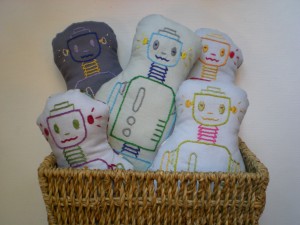
I came to make these little soft-bots quite by accident. I was testing some patterns for a project at my day job, and suddenly found myself in the company of five robot outlines that had been ironed onto several fat quarters of fabric I had picked up from a local quilt shop. What was I going to do–not stitch them? Never. So I set to embroidering each robot in my spare time (on the subway to and from work, at jury duty despite having my scissors confiscated, during my lunch break in the park). And then they sat. (One reason why the step-by-step photos are less than stellar is that the process for making them was so very stretched out!) It wasn’t until a not-so-recent craft night that I took the next step: cutting them out and pairing each bot with its backing. Now that I’ve finally completed the mini-army of ‘bots, it’s time that they found homes…. Thankfully, in the amount of time that it took me to complete them, several of my friends have had babies. And every new baby deserves a new ‘bot!

Materials:

-Scrap fabric for embroidering (light colors work best with iron-ons)

-Scrap fabric for backing (use patterns!)

Aunt Martha’s Heat Transfer Pattern “SR1 Robots Invade”

-Scissors

-Embroidery needle and thread

-Embroidery hoop

-Chalk marker or air-soluble marking pen

-Straight pins

-Sewing needle and thread (or sewing machine)

-Fiberfill

-Cotton twill tape (optional)

Make it:

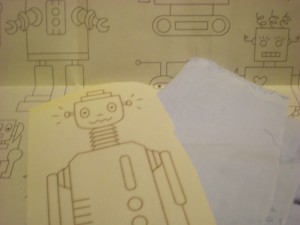
1. Select your light scrap fabric. Cut out the pattern and transfer it to the fabric with a warm iron.

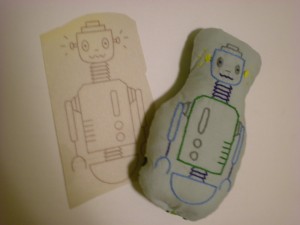
2. Select the embroidery floss colors. (I used 3 to 4 colors for each robot.) Separate 4 strands from the selected floss and thread the embroidery needle. Secure the fabric template into the embroidery hoop and start stitching!

3. Mark and cut about 1″ to 1 1/2″ around the stitched robots. Select appropriate backing material and place the cut piece against the backing. Cut around the piece to create a matched backing piece. Pin around the edges.

4. Sew around the pinned edges about 1/4″ from the edge, leaving a 1″ to 1 1/2″ opening at one end. Turn the fabric right side out and stuff it with fiberfill.

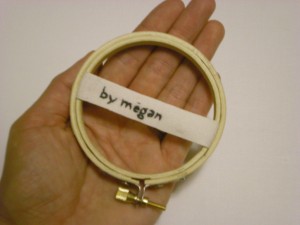
5. Stitch closed the opening and you’re done! Optional: If you’re feeling adventurous, stitch a personalized tag with 2 strands of embroidery floss on cotton twill tape.

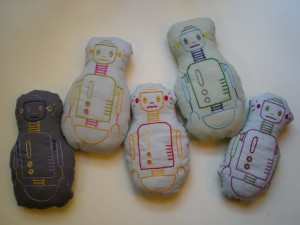
And voila: Here they are, five robots in a basket. In a creative stroke of inspiration, I named each ‘bot for its destined owner: Clockwise from lower left, that’s Levi-bot, Elliot-bot, Luke-bot, William-bot,  and Lillian-bot. Hope to update soon with photos of the ‘bots in their new homes!

For other great fresh, alternative embroidery patterns, check out Jenny Hart’s Sublime Stitching designs.

[ 7 Comments | Posted on January 4th, 2011 ]

T-shirt Projects

8 Ways to Transform a T-shirt (via HuffPo)

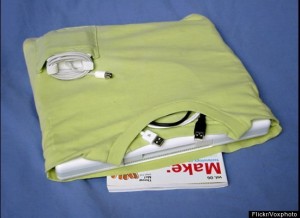
Add another 8 T-shirt projects to the hundreds of Generation T projects you’ve already got in your arsenal! This slide show collection includes projects from DollarStoreCrafts, Makezine, SuperNaturale, and more–courtesy of Care2’s Becky Striepe. Make’s T-shirt laptop cozy is shown here–plus a pillow, a quilt, a skirt, a necklace, a grocery tote, an appliqué, and…a pair of T-shirt undies!

And, 8 must be the hot little number because here are another “8 Ways to Recycle that Old T-shirt” posted by Valley News Live (list by Raquel Fagan; provided by Earth911).

[ 5 Comments | Posted on December 29th, 2010 ]

Other Projects

I Love to Create: No-tug Headbands!

Last month, in preparation for the holiday party circuit, I shared the tutorial for the Softie Spiral Headband. This month, I’m making headgear for the younger generation. These headbands, inspired by a project from one of my favorite books, Crafty Mama, are for my four-year-old niece (though I’m not a Crafty Mama, the Crafty Auntie title is one I take very seriously).
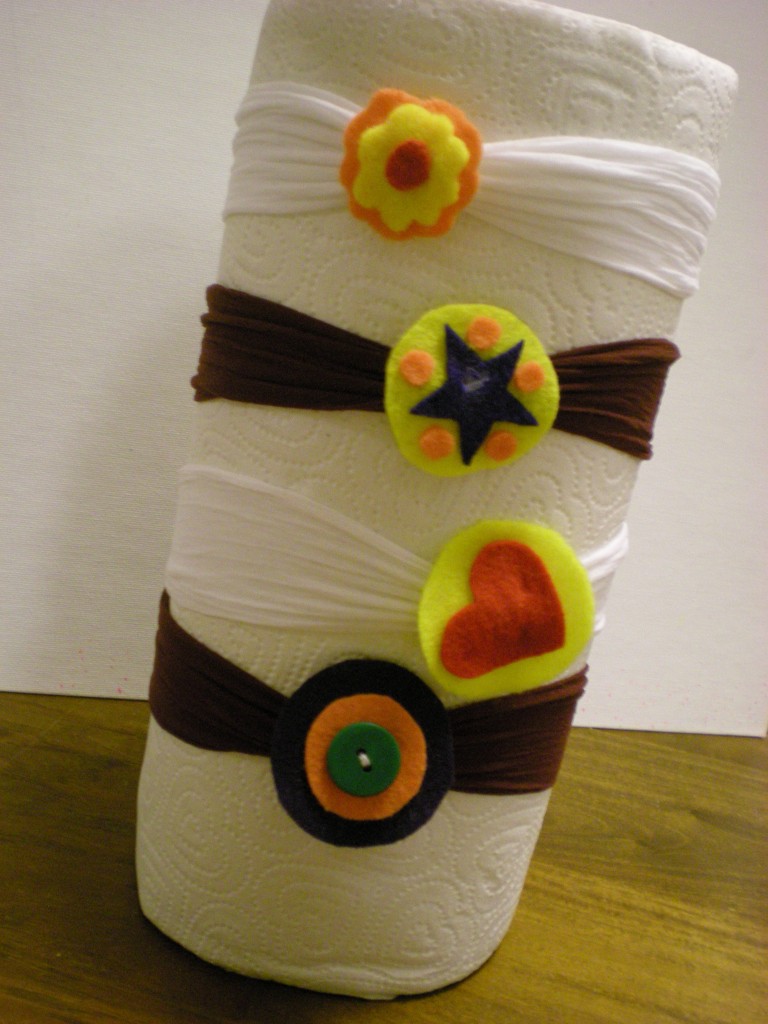
The back story is that my niece is attempting to out her bangs (I tried it, too, at her age — until I had that perfectly disastrous alignment of mom-on-the-phone, scissors-in-hand, and an oh-so-brilliant scheme to rid myself of my bangs far more quickly: I cut them off completely). My niece is more patient than I, but the available solutions to bangs-in-the-face either poke (plastic or metal-based headbands), prod, or pull (barrettes), or are too tight or too loose. In other words, the classic Goldilocks situation. But these stretchy soft headbands are just right. (A Christmas morning photo offers up the results — scroll down to the bottom, since the paper towel roll just doesn’t do the headbands justice!)
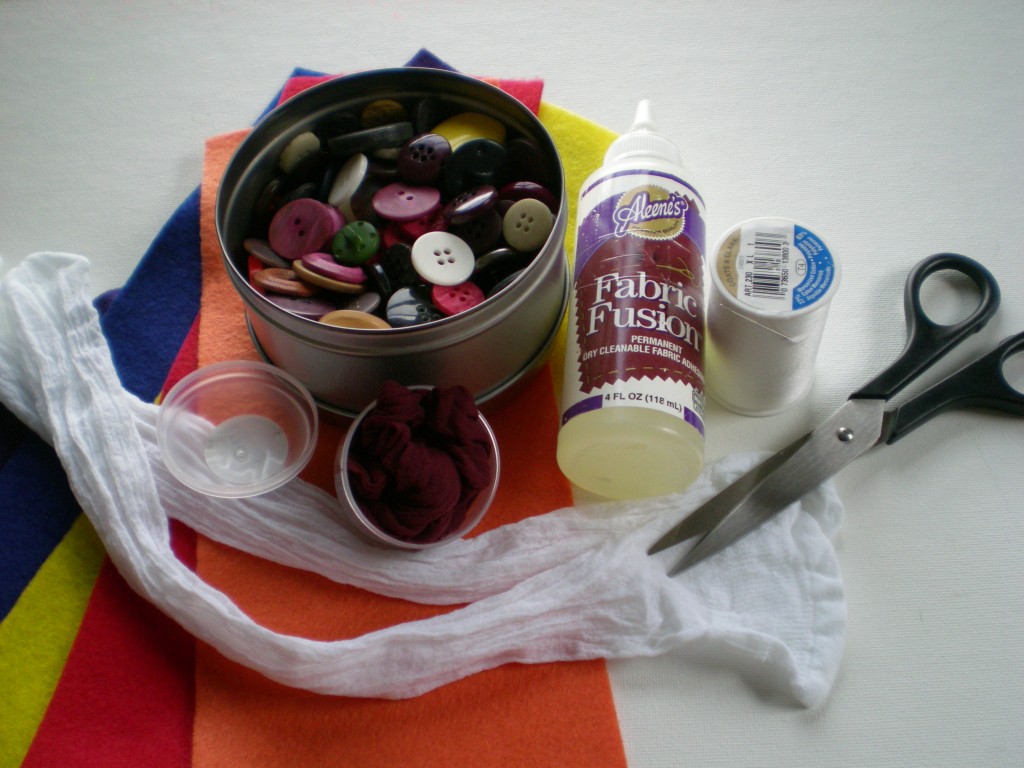
Materials:

-package knee-high stockings (1 stocking makes 1 headband)

-scissors

-needle and thread (color to match the stockings)

Aleene’s Fabric Fusion Permanent Dry Cleanable Fabric Adhesive

-colorful felt pieces

-buttons (optional, for embellishment)

-clothespins (optional, for clipping in place while gluing/drying)

Make it:

1. Remove the stockings from the packaging and stretch them out. Cut about 1″ off the top of one stocking and set it aside. Thread the needle, knot the end, and make a running stitch about 1/4″ from the cut end of the stocking.
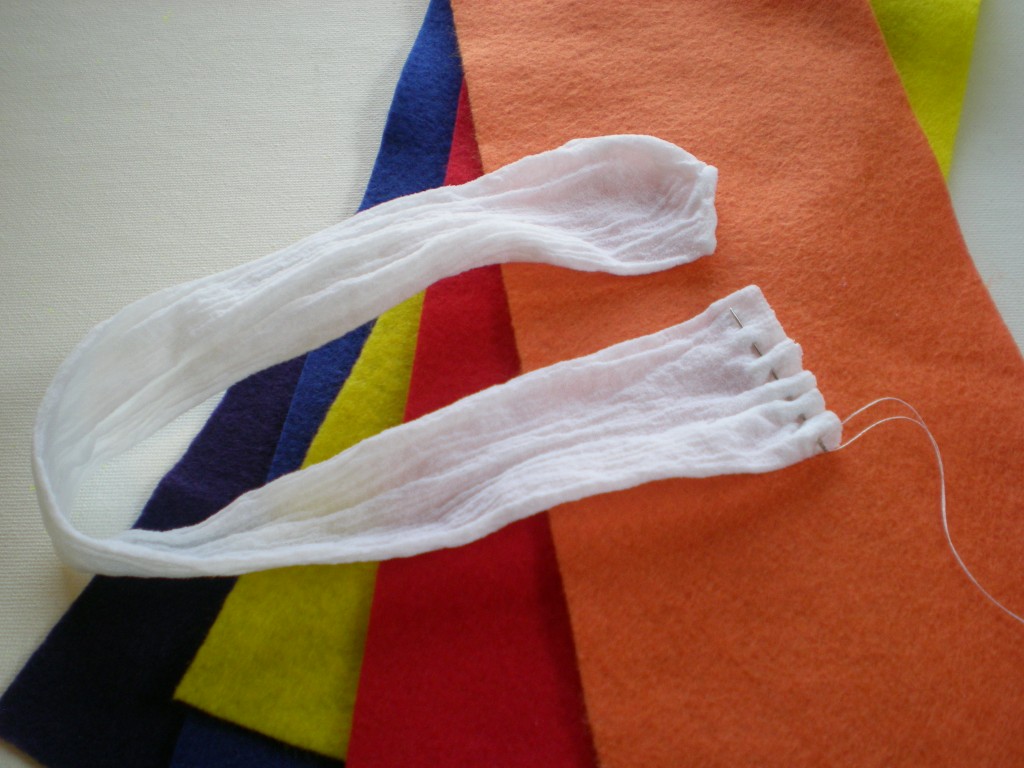
2. Sew a running stitch along the toe end of the stocking and gently pull the thread to gather the two ends of the stocking together, forming a loop. Make a few more stitches to secure the ends, and knot.
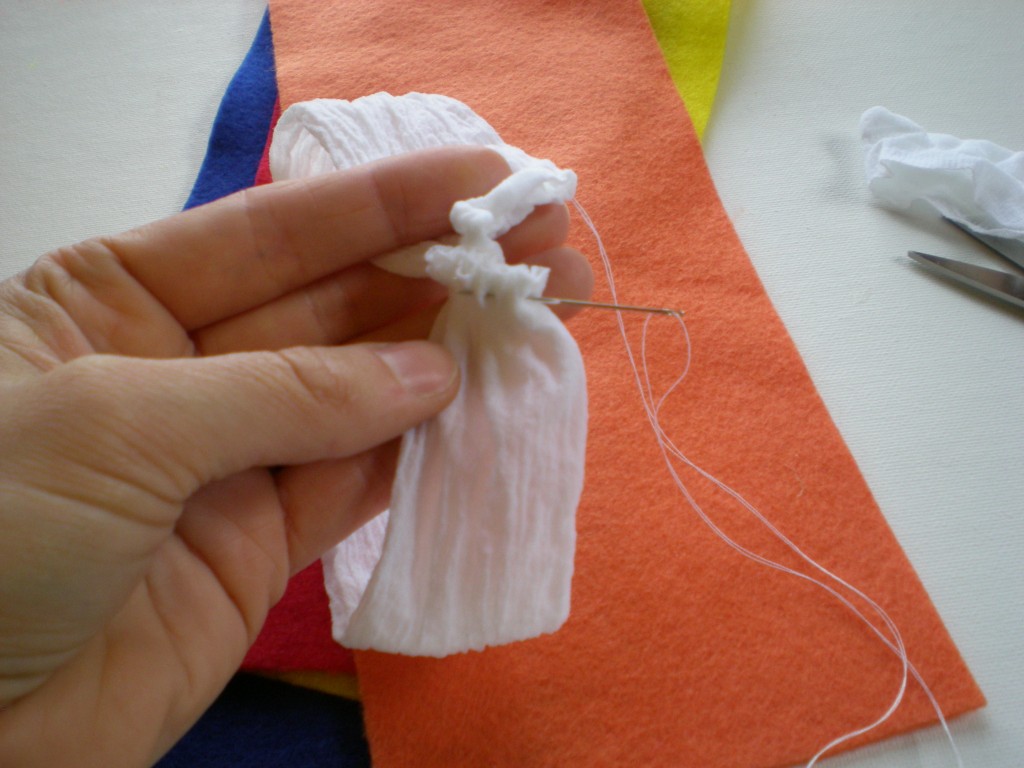
3. Set the loop (the headband) aside, and cut decorative shapes from the felt pieces. Cut several felt strips about 1/2″ by 3″.
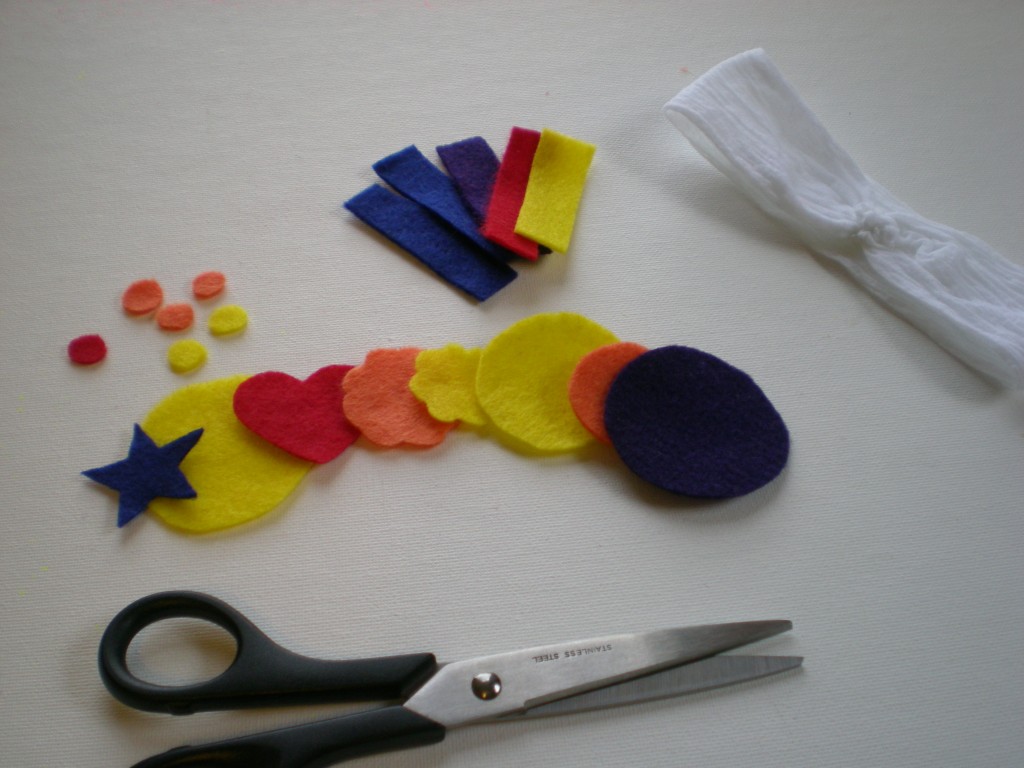
4. Wrap one felt strip around the gather on the headband (to hid the stitching and provide a base for the embellishment). Apply glue liberally to the ends of the strip and fold them over each other. Let dry, and reapply glue as needed. (Felt is a very porous fabric, so the glue gets absorbed easily.) While the glue dries on the headband, mix and match felt shapes to make embellishments. Optional: Add buttons, glitter, ribbon, even fabric scrapbook embellishments to personalize the headband.
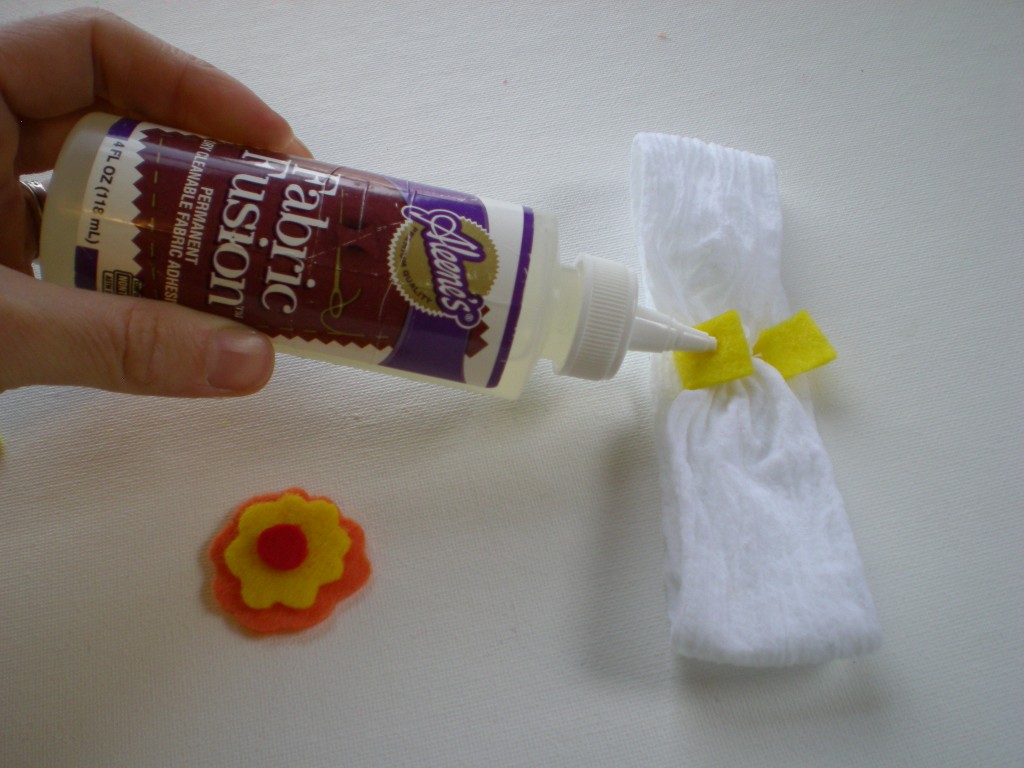
5. Glue the felt embellishment over the felt seam and let dry. (Again, apply that glue liberally!)
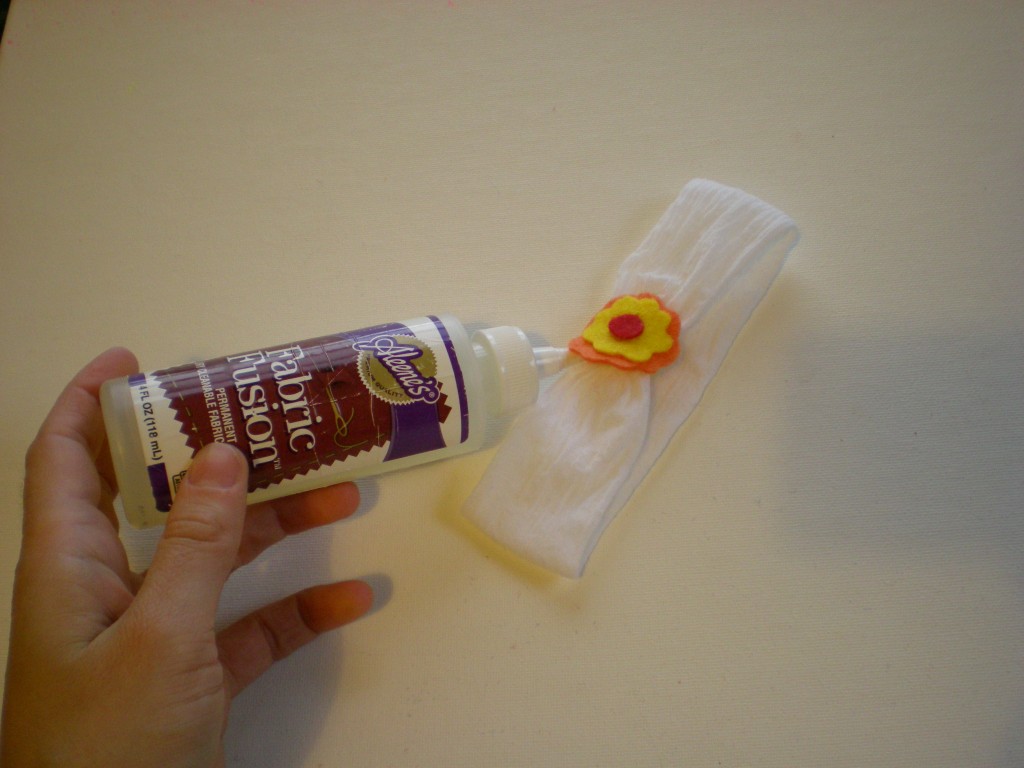
6. You’re done! The stocking headband now becomes the perfect stocking stuffer! Or skip straight to the wearing part — with no complaints of pulled hair, and no shaggy bangs covering up her sweet little face! Tea party, anyone?

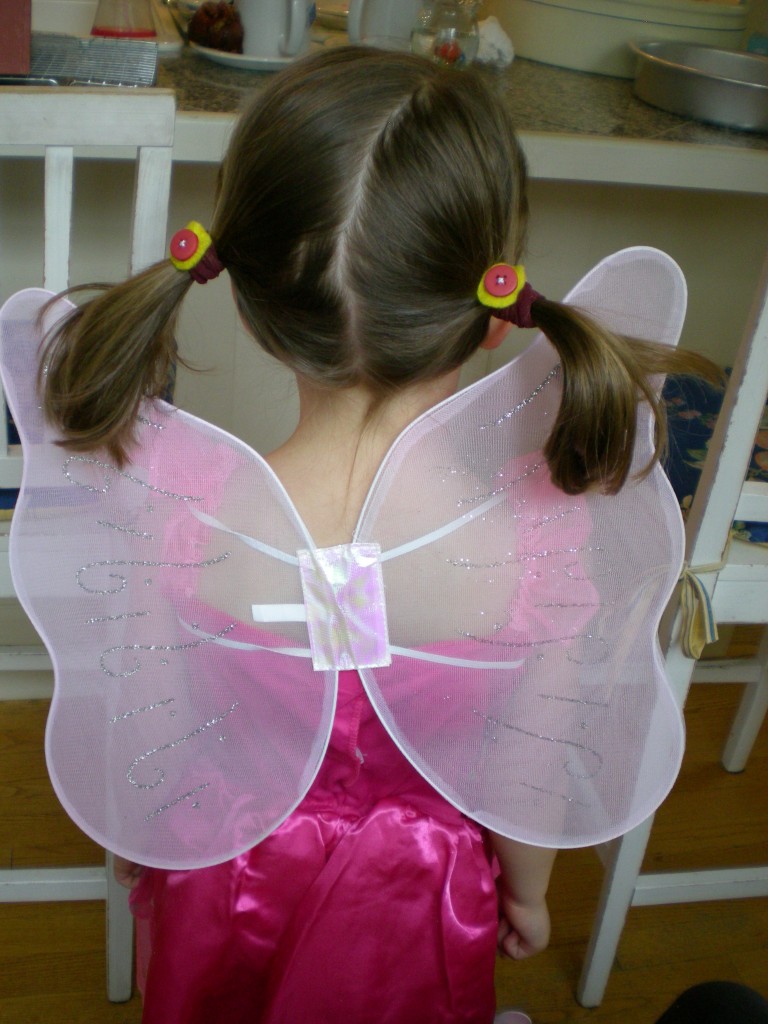
Bonus: Remember the 1″ bit of fabric you cut off the top of the stocking in step 1? Follow steps 4 and 5 to make No-tug Hair Ties! Perfect for taming pigtails, ponies, and braids. (Fairy wings come separately!)
Double bonus: If you buy your stockings at the pharmacy or the dollar store, they often come in little round plastic containers that can easily be converted into a simple cat toy — drop a button inside, snap it tightly closed, and roll it across the floor.


[ 5 Comments | Posted on December 28th, 2010 ]

More Fun

Merry Christmas Giftaway!

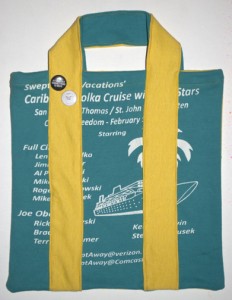
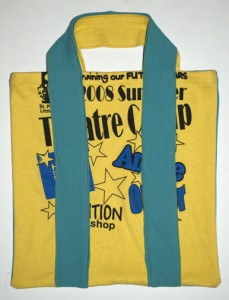
Warm wishes for a cozy Christmas and congratulations to Dia, who will be receiving the Rock the Tote tote bag (project #84 in Generation T: 108 Ways to Transform a T-shirt) pictured here as her Christmas surprise!

I made it using a turquoise blue “Caribbean Polka Cruise with the Stars” T-shirt and a bright yellow “2008 Theatre Camp” T-shirt that I found in a Florida thrift shop earlier this year! After stitching it up, I added two punk pins I made — because even bags need accessories.

How inspiring to hear all of you sound off on everything you’ve been busy making — I especially like to hear that so many of you have been using crafting or baking as a reason to spend more time with family and friends. Because as often as DIY can be a solitary activity, I love to craft with fam and friends, too (when I’m not crafting for them, of course!). I took a cookie baking class recently with my friend (no photos — everything was gobbled up too quickly!), I attended a chocolate truffle-making class with my husband last week — the results of which we’re sharing with his family today, and I’m sitting down with my niece to construct a batch of “Cheeseburger” cookies this afternoon. (I expect the sugar high to last through the New Year!)

So, I still have a few projects I’ll share after all the presents have been unwrapped on this end, but in the meantime, visions of your craftivities dance in my head: lots of T-shirt aprons, felted goodies, knitted dishcloths, ornaments, wreaths made from old Christmas trees, a pair of crime-fighting wrist cuffs with lightning bolts on them, scarves, gloves, cereal box wallets, fused plastic bag crafts, Kindle cozies, sculpted animal figurines, photo ornaments, baby hats, jam, hand lotion, pet toys, soap…and more! Oh, and let’s not forget all the baking, too: muffins, pumpkin gingerbread, macaroons, banana bread, rum cake, chocolate truffles, loads and loads of cookies, oh my!

Happy, happy Christmas, and to all a good year ahead!

[ 5 Comments | Posted on December 25th, 2010 ]

More Fun

From Our Readers: Rachel!

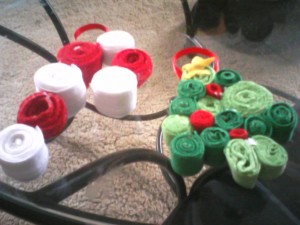
Inspired by the Softie Spiral Headband project I posted in November, reader Rachel made these beautiful ornaments from coiled scrap strips of T-shirts.  A colorful Christmas tree and a candy cane to trim the tree or tie onto a gift! Rachel reports that they were super quick and easy to make and that she’s really loving her discovery of green crafting. We’re loving it, too!

Happy holidays — and don’t forget, you have until midnight tonight (EST) to enter the Generation T Holiday Giftaway!

[ Comments Off on From Our Readers: Rachel! | Posted on December 24th, 2010 ]

More Fun

A Gift for You.

Whew! It’s been busy over here in the Generation T workshop. We’ve been cutting and pinning and sewing and gluing up a storm in preparation for Christmas morning (projects which we hope to share with you post-Christmas — alas, there are too many gift recipients following the blog that it’d give away the surprise!). We’ve also made a little something for you! But, the thing is, it’s a surprise until Christmas day (you know, like Christmas!). So, your gift will be revealed (unwrapped, if you will) on Christmas and we’ll mail it the following week.

To enter the gift-away, leave a comment (on the blog or on Facebook) sharing a DIY element you incorporated into your celebration of the holiday season. Did you bake cookies? (I did — lots!) Did you make a salt dough menorah? Stitch up some stockings? Make a wine cozy to deliver that bottle of New Year’s Eve champagne in? Did you make tomato sauce from scratch? Inspire us! Limit 5 total entries per person. Entries will be accepted until midnight on Christmas Eve, EST. We’ll announce the gift and and choose the recipient at random on December 25, 2010!

Happy holidays, Megan & Generation T

[ 48 Comments | Posted on December 21st, 2010 ]

T-shirt Projects

12 Holiday T-shirt Projects!

To celebrate and count down the 12 days until Christmas (yikes), here’s a roundup of 12 T-shirt crafts we love over here at Generation T (and yes, we might be biased on a few of them, but we can’t help it). So if your halls aren’t completely decked, here are some last-minute fixes that will make you sing fa-la-la-la-la, la-la-la-la. Or at least do re mi fa so la teeeee…. Wow, this holiday punch is tasty!

1. T-shirt wreath by Tara Gentile at ScoutieGirl. A colorful (no-sew!) decoration that won’t smell as sweet, but you also won’t have to sweep up dried pine needles in two weeks!

2. T-shirt stockings by Megan Nicolay at Generation T (or by Kathy Cano-Murillo at CraftyChica). Two takes on that old classic–the holiday stocking–made from a classic old T-shirt.

3. T-shirt garland by Ash and Kimmy at GreenEyedMonster. A festive pom-pom decoration that can be brought out year after year–for the tree, for the mantle, for a little window dressing!

4. T-shirt advent calendar by Megan Nicolay at Generation T. You might remember seeing this one during last year’s solstice giveaway–and you better get cracking in order to make and fill this one up in time for a countdown!

5. T-shirt hat by Kalleen from AtSecondStreet. A cute brimmed hat for the milder winter weather–bonus points if you add ear flaps! Or this one by Whitney Moss and Heather Flett at RookieMoms–forget ear flaps, this one’s got ears (and yes, we give you permission to make it in an adult size).

6. T-shirt snowflake by Megan Nicolay at Generation T (project #4 in Generation T: Beyond Fashion). Forget the overplayed sparkly Santa sweater, make a T-shirt snowflake as unique as you are! ::sigh::

7. T-shirt knotted scarf by Gwenstella at BecauseSheStartedKnitting for her. And for him: a Fringy T-shirt scarf by Paul Overton at DudeCraft. Or any of these three scarves, by Megan Nicolay at Generation T (on Threadbanger)!

8. T-shirt mittens by Ashley at LilBlueBoo. Okay, okay, so she makes them from sweatpants (which might be warmer than T-shirt), but the tutorial and techniques still apply since they’re both knit fabrics!

9. T-shirt Christmas tree skirt by Megan Nicolay at Generation T (project #43 in Generation T: Beyond Fashion). And, we’ll have a no-sew variation to post very soon–stay tuned!

10. T-shirt necklace by Melissa Esplin at ISLY. Sometimes it’s not enough to deck the halls or trim the tree–you need to deck yourself for all those holiday parties!

11. T-shirt headband by Megan Nicolay at Generation T for iLovetoCreate. See number 10. Now it’s time to add the tree topper! (Tee topper?)

12. T-shirt apron by Disney at RufflesAndStuff. Or this one by Kayla at KaylaKsThriftyWays if you’re short on time. This was tough: it was between the apron and the T-shirt oven mitt–for all the holiday cookie baking, of course!

Happy last-minute crafting to you! What are your favorite holiday T-shirt tutorials? What have we missed that you would like to see on this list?

[ 3 Comments | Posted on December 14th, 2010 ]